The Free Shipping Rules module is a highly effective tool for encouraging customers to increase their order value.
It displays a dynamic, site-wide bar that shows shoppers how close they are to qualifying for free shipping.
As customers add items to their cart, the bar updates in real-time, turning a potential shipping cost into a powerful incentive to add more products and boost your store’s average order value (AOV).
Activating the Free Shipping Rules Module
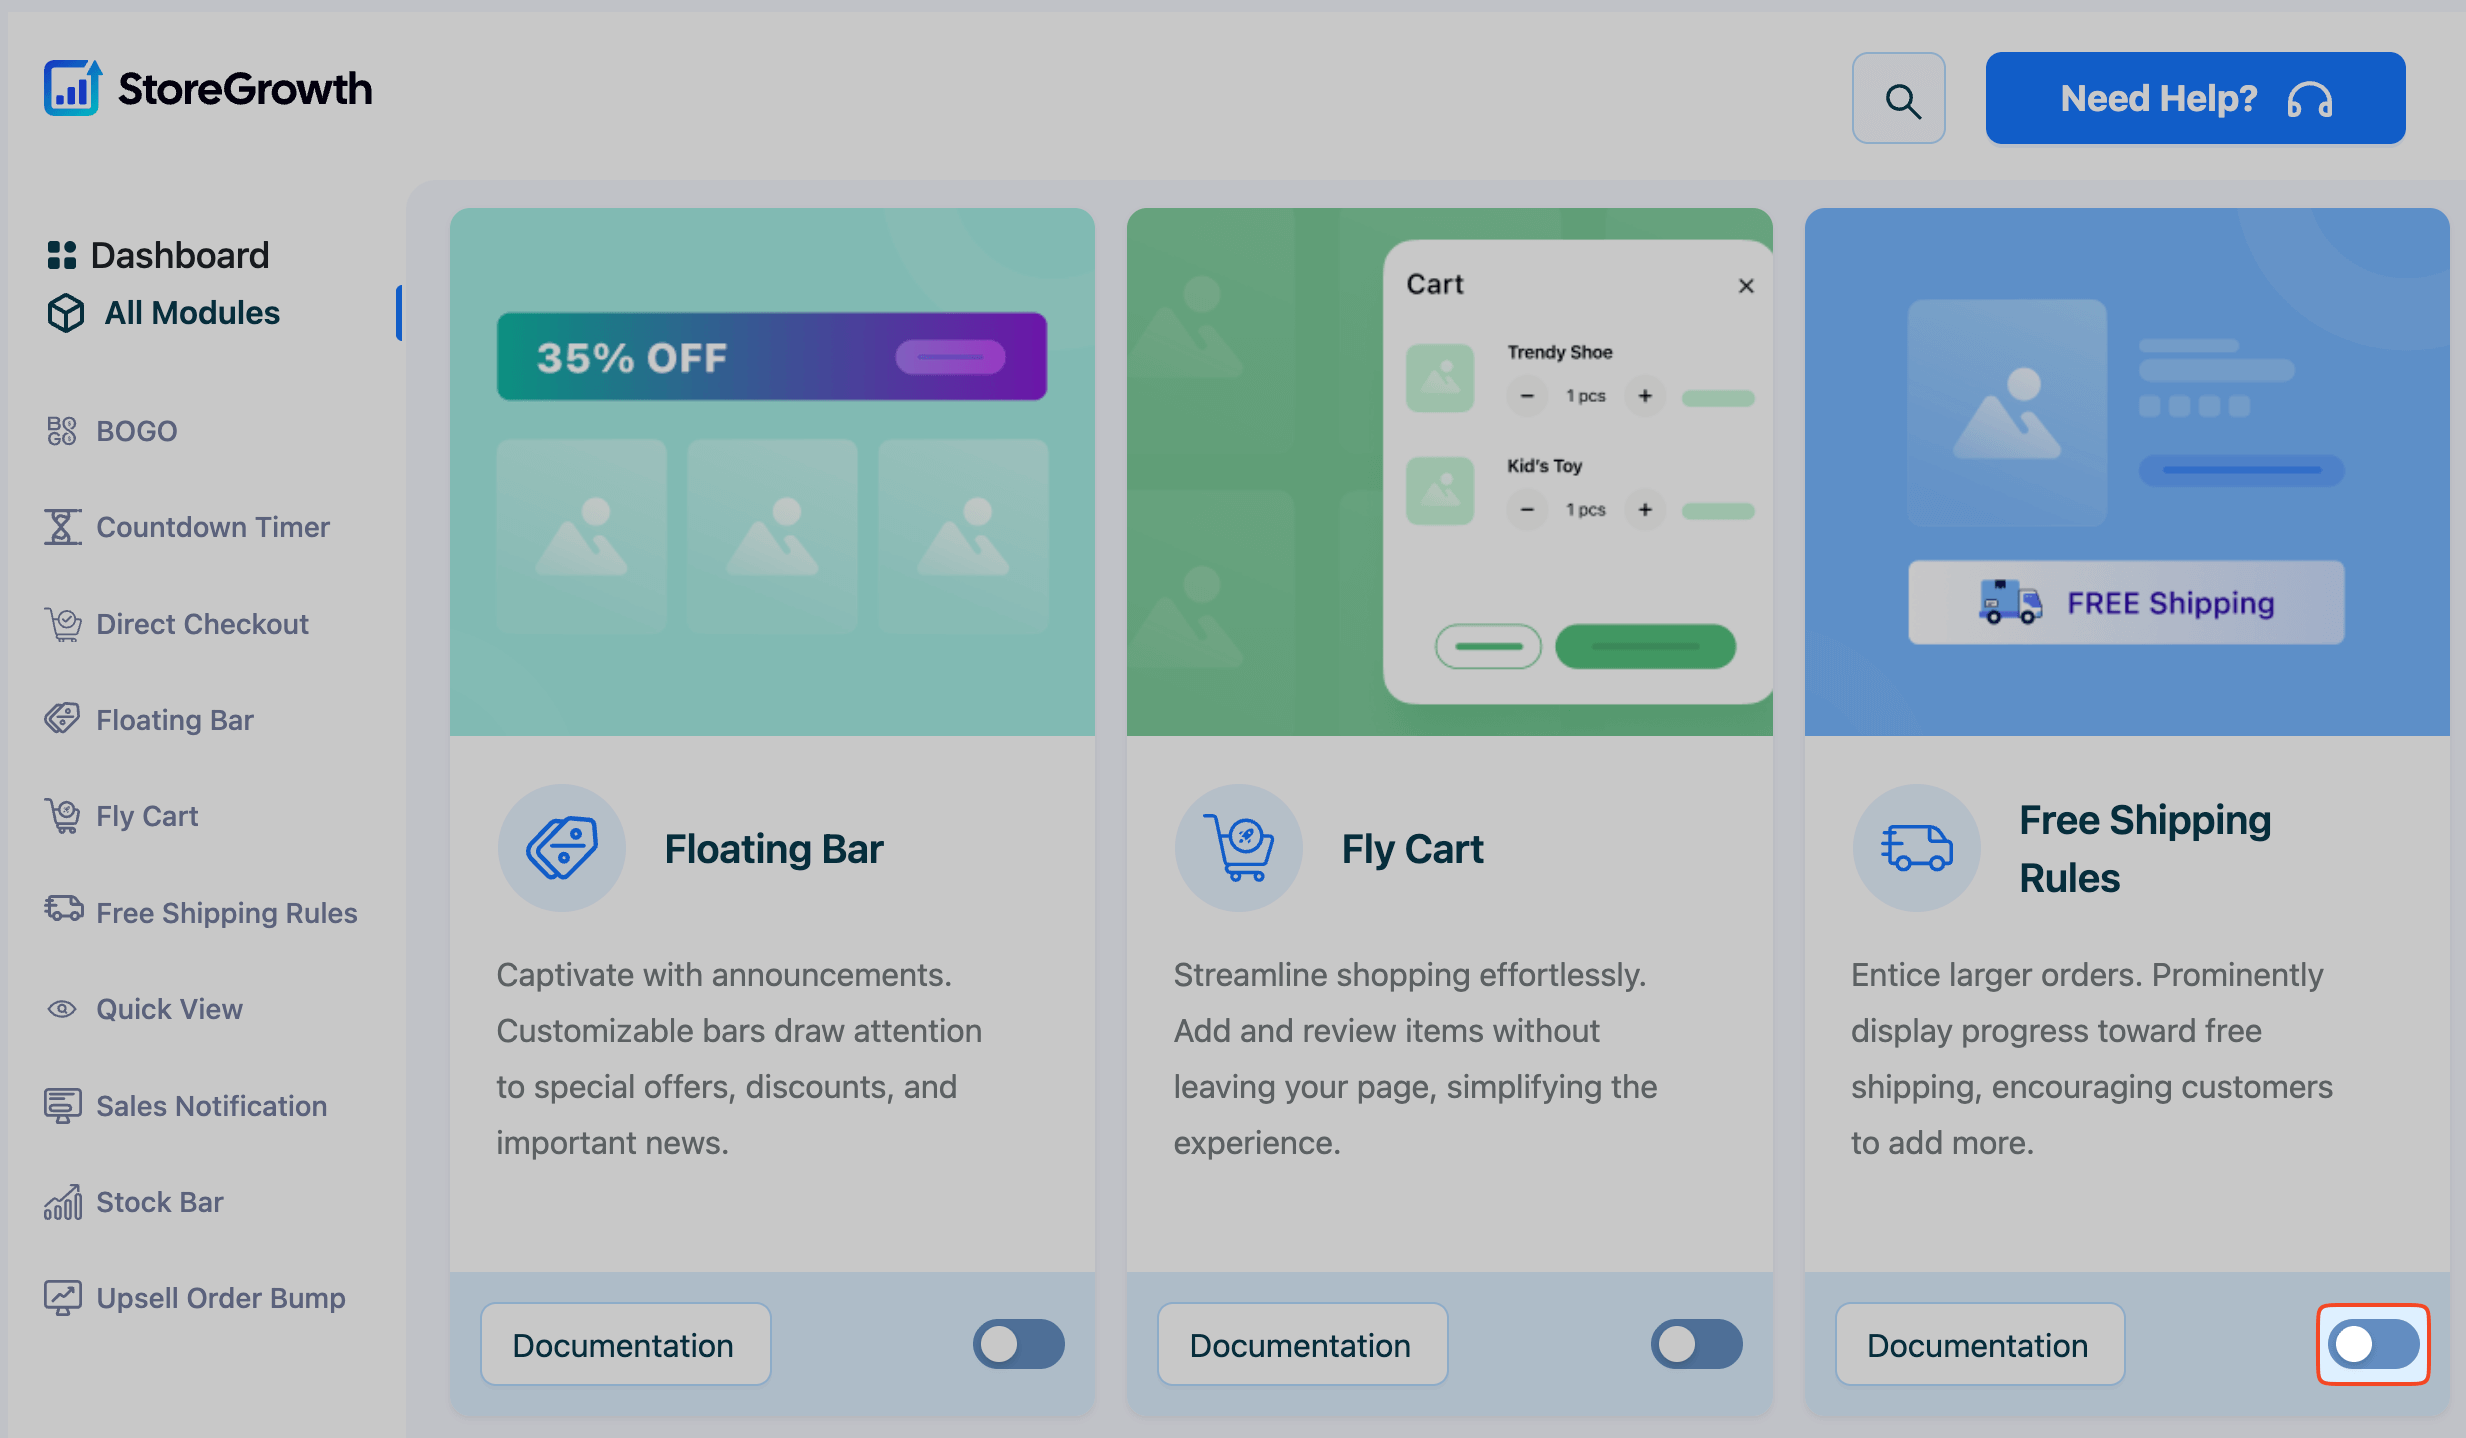
To begin, you must first activate the module from the StoreGrowth dashboard.
- Navigate to StoreGrowth » Modules from your WordPress dashboard.
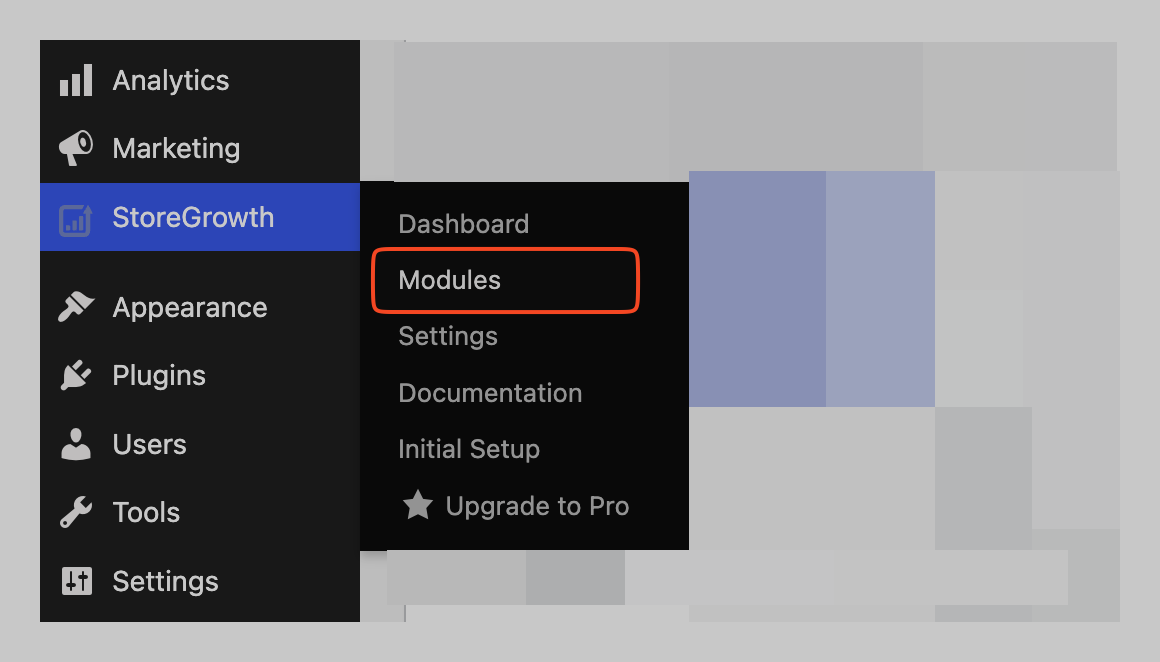
- Find the Free Shipping Rules module card in the list.
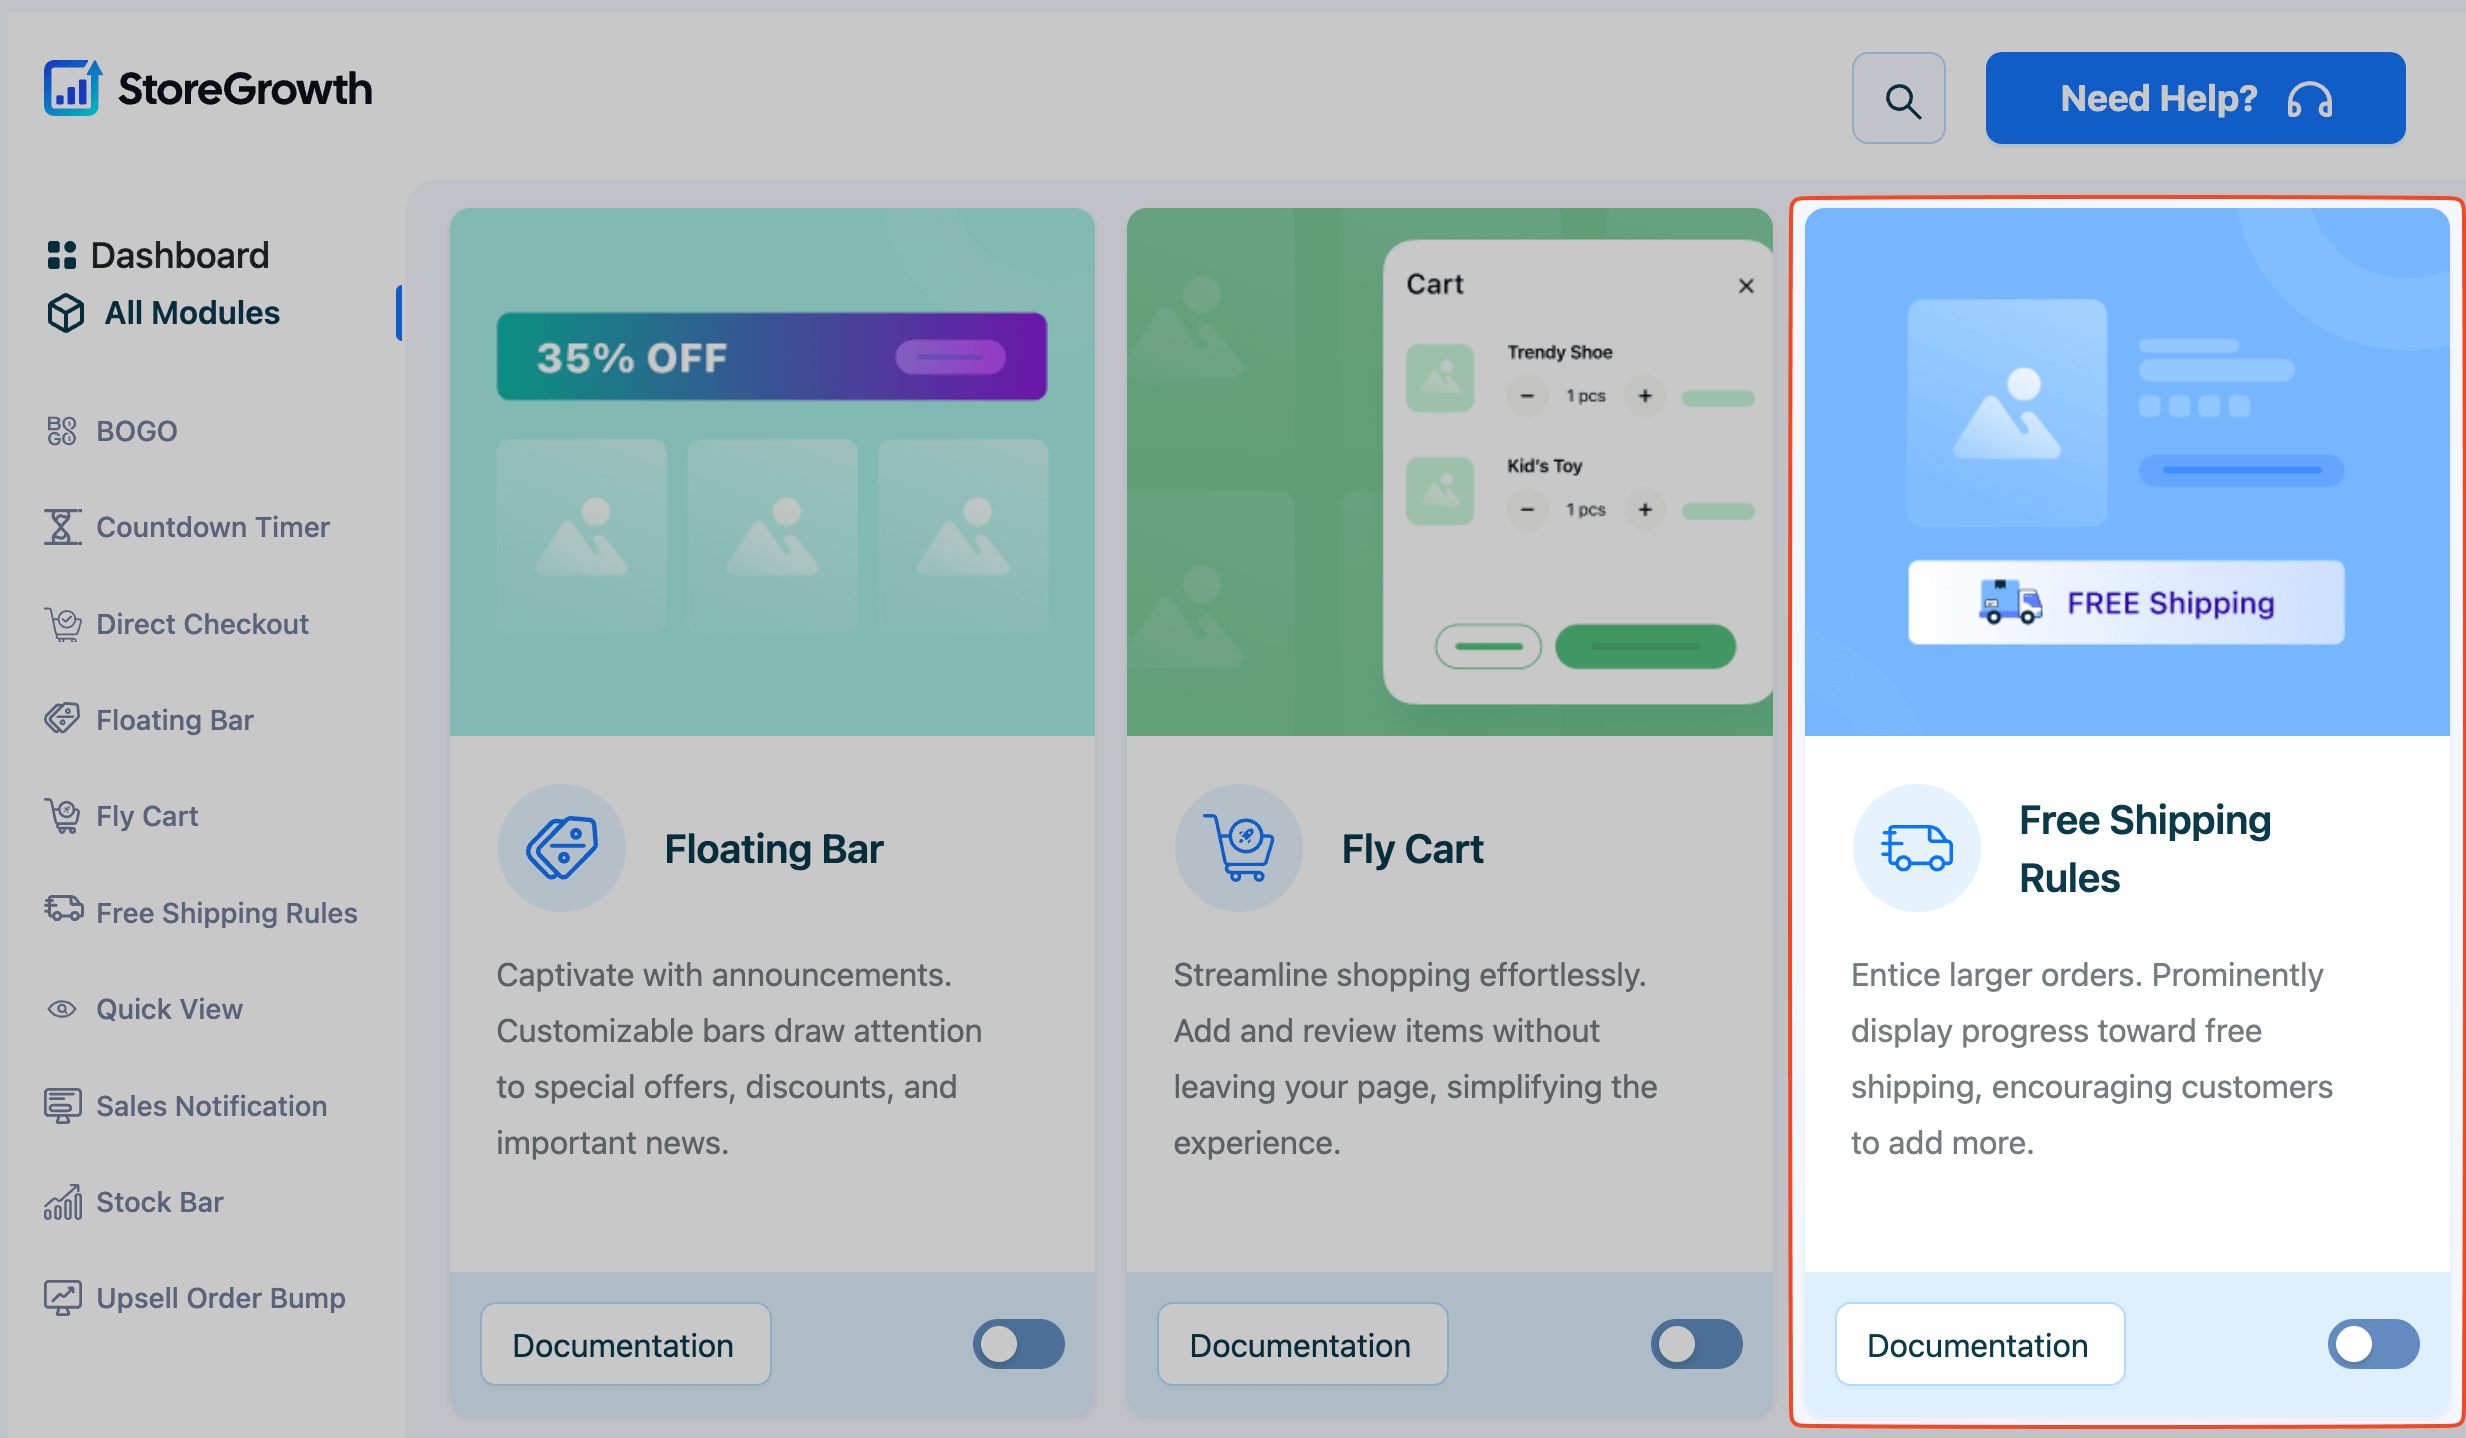
- Click the toggle switch to the “On” position to activate it.
Once enabled, a “Free Shipping Rules” menu item will appear in the main StoreGrowth sidebar, where you can access all its settings.
Prerequisite: Set Up Free Shipping in WooCommerce
Before configuring the bar, it’s crucial to understand that this module visualizes the progress towards a free shipping goal. The actual shipping rule that grants free shipping must be set up within WooCommerce itself.
To ensure the bar works correctly, follow these steps:
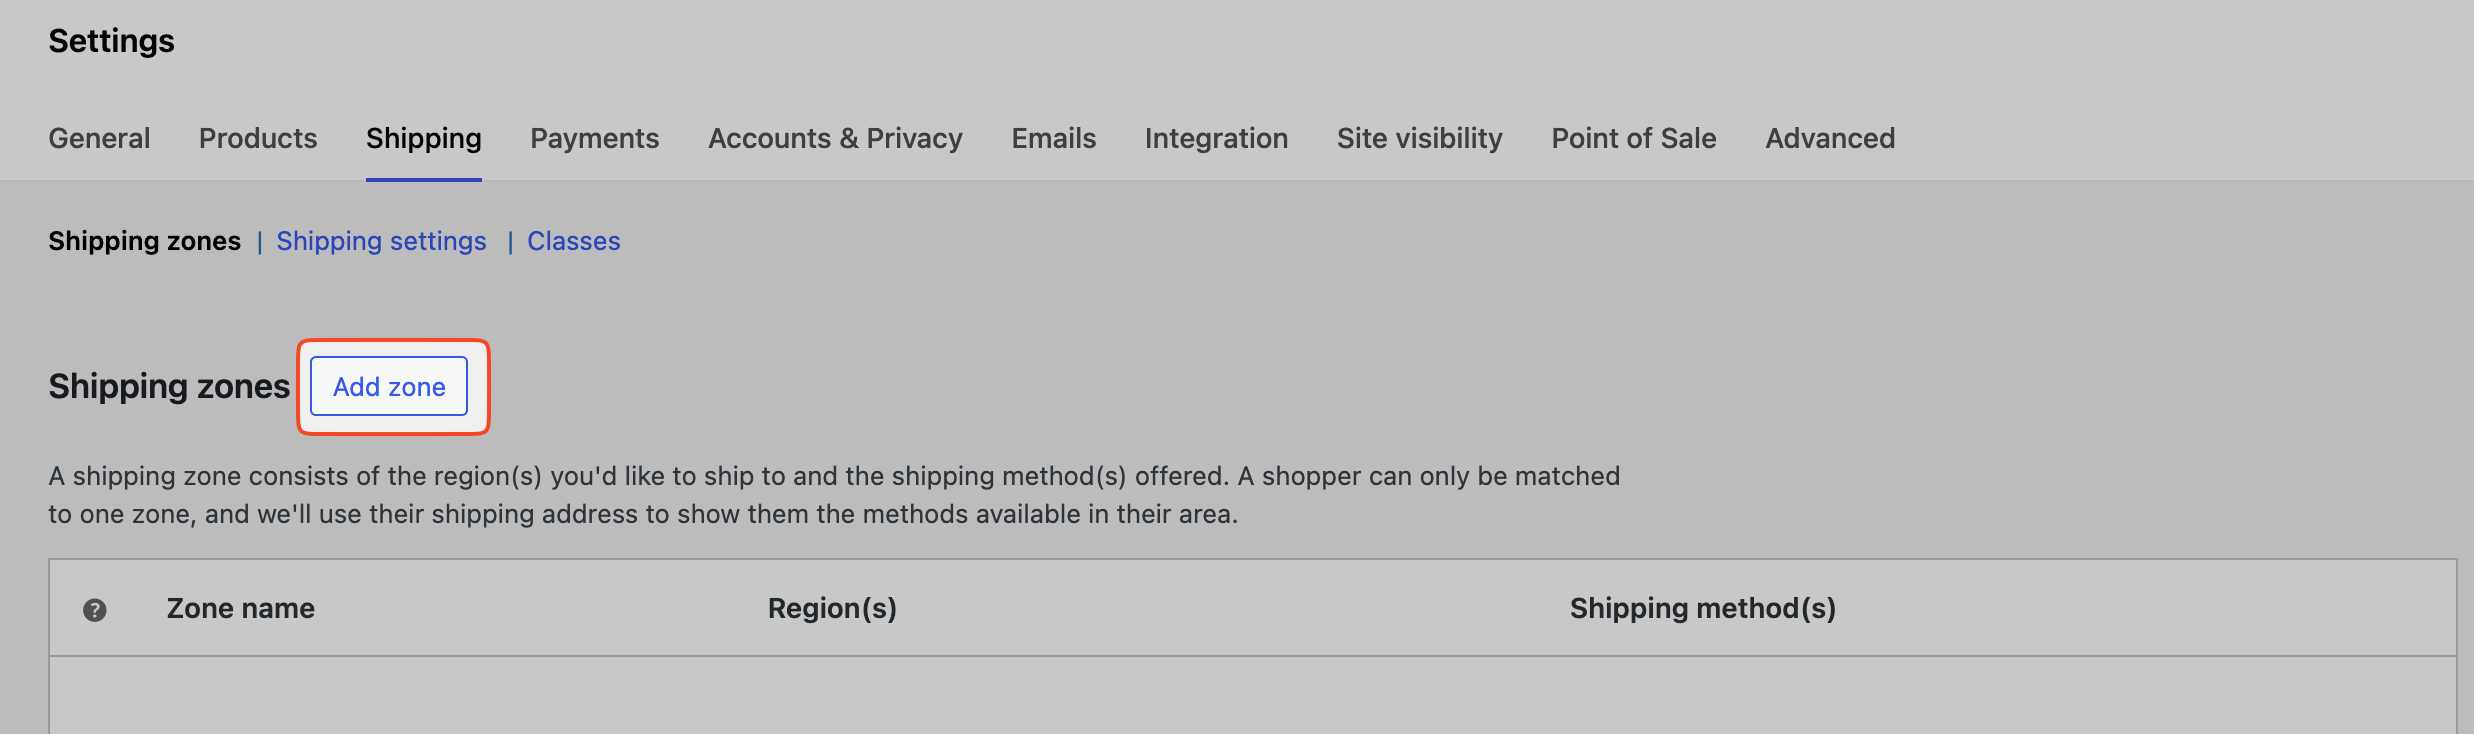
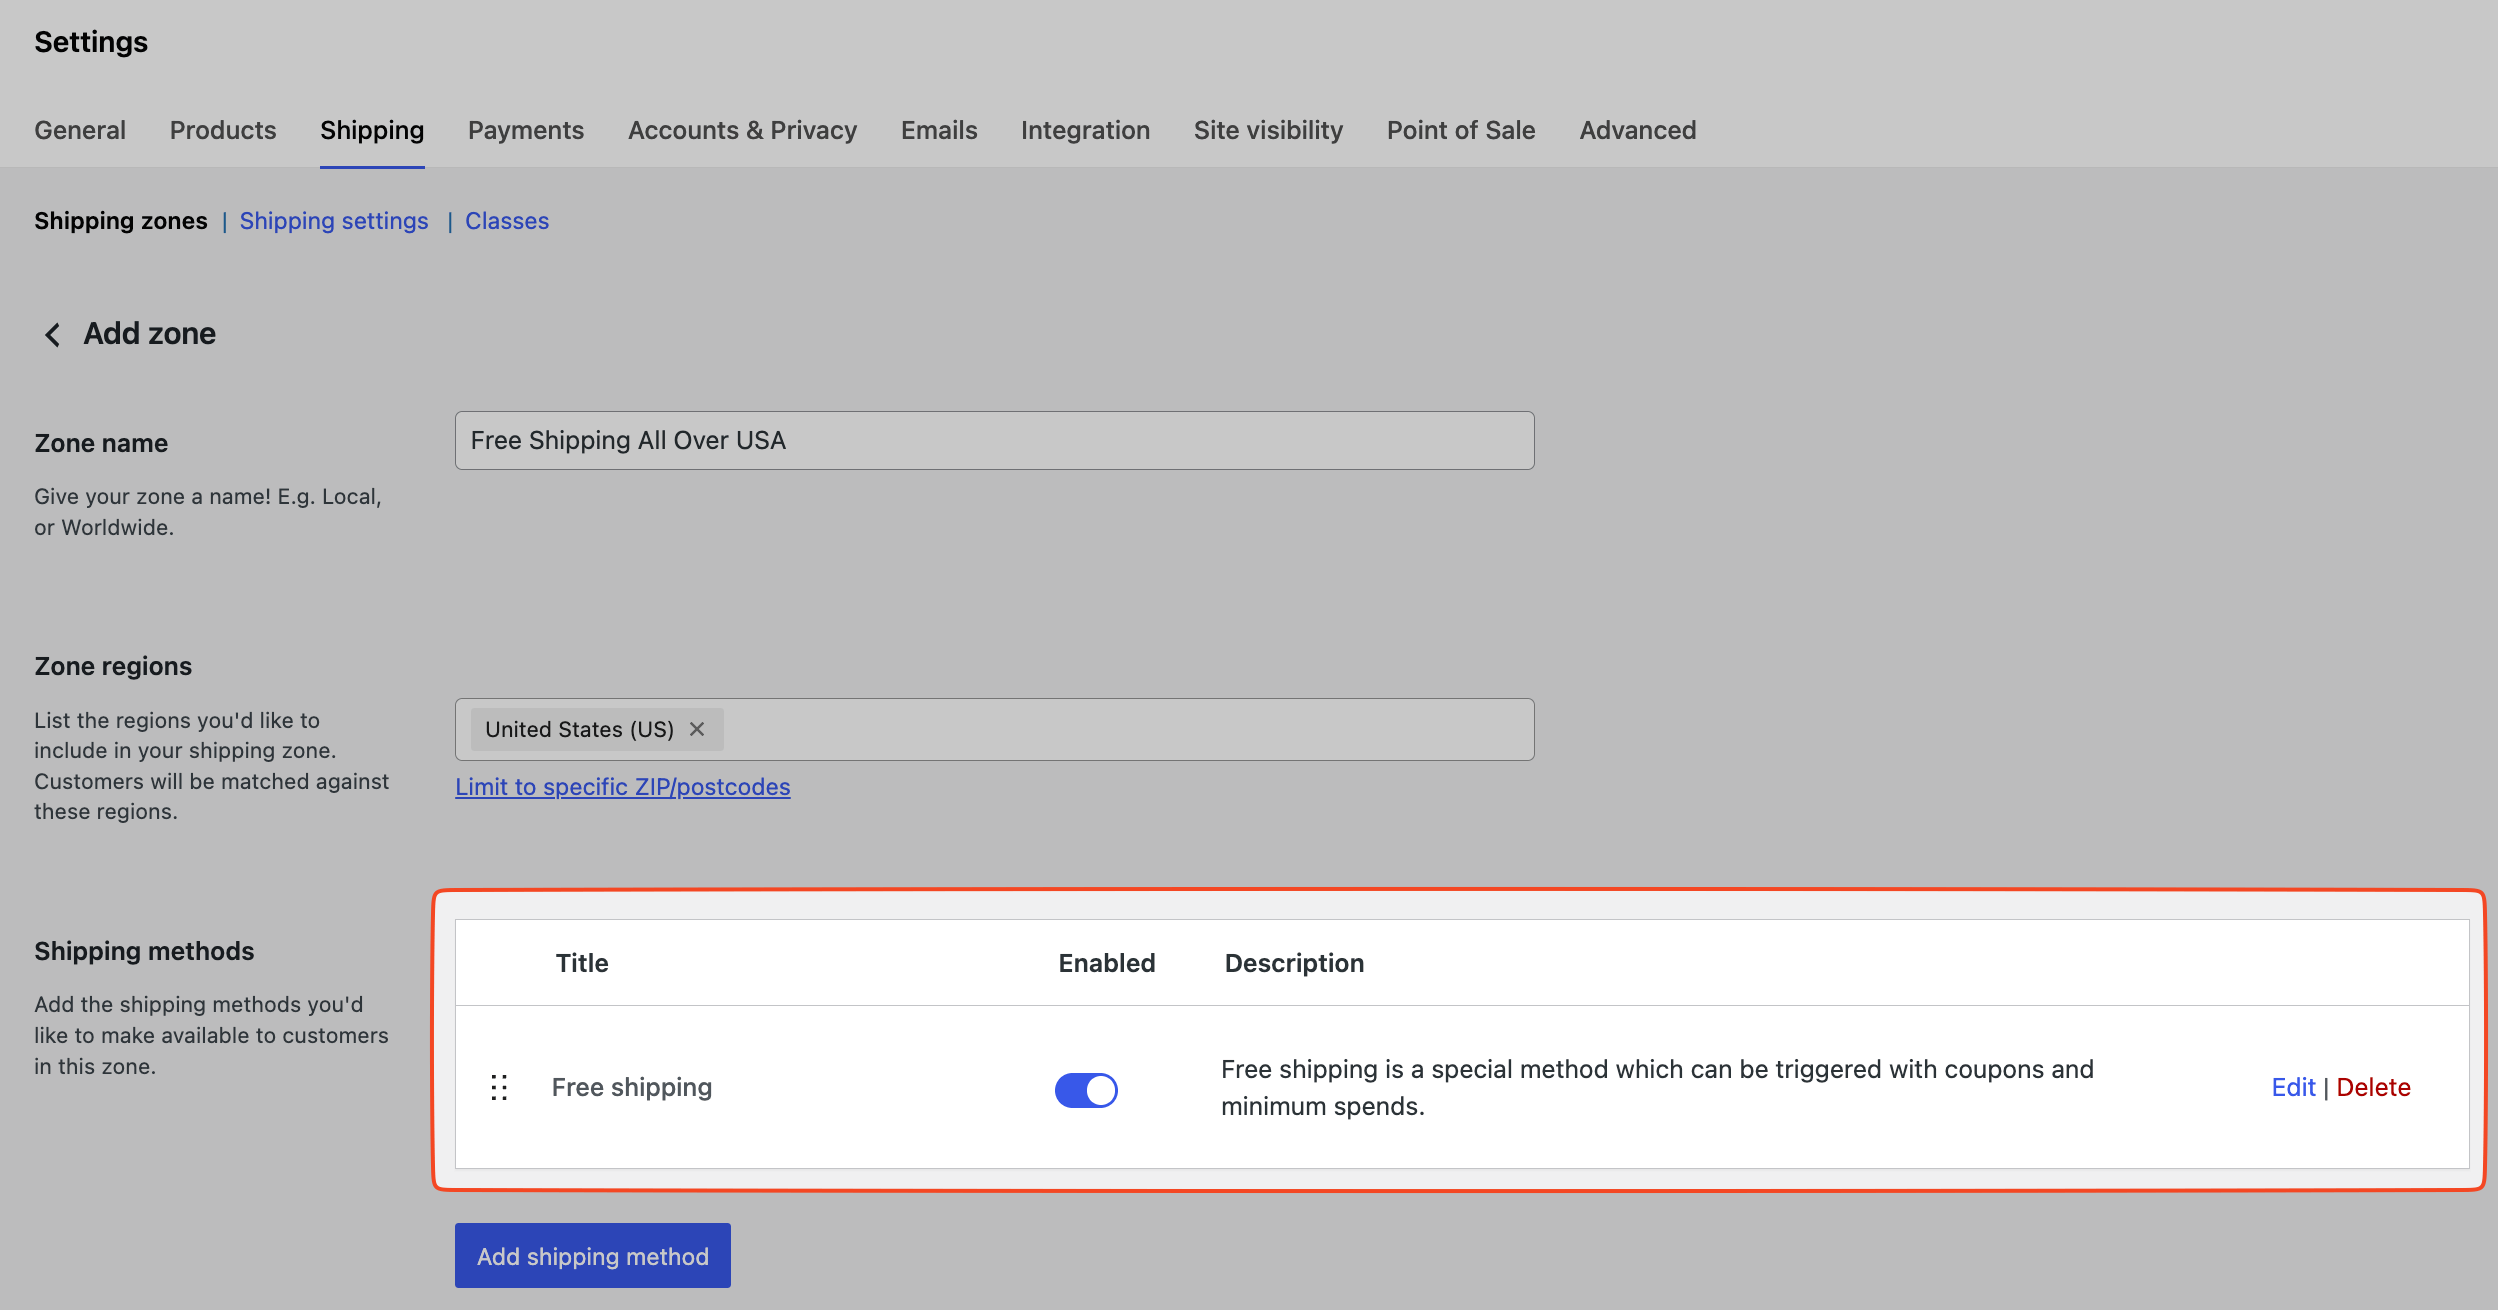
- Navigate to WooCommerce » Settings » Shipping.
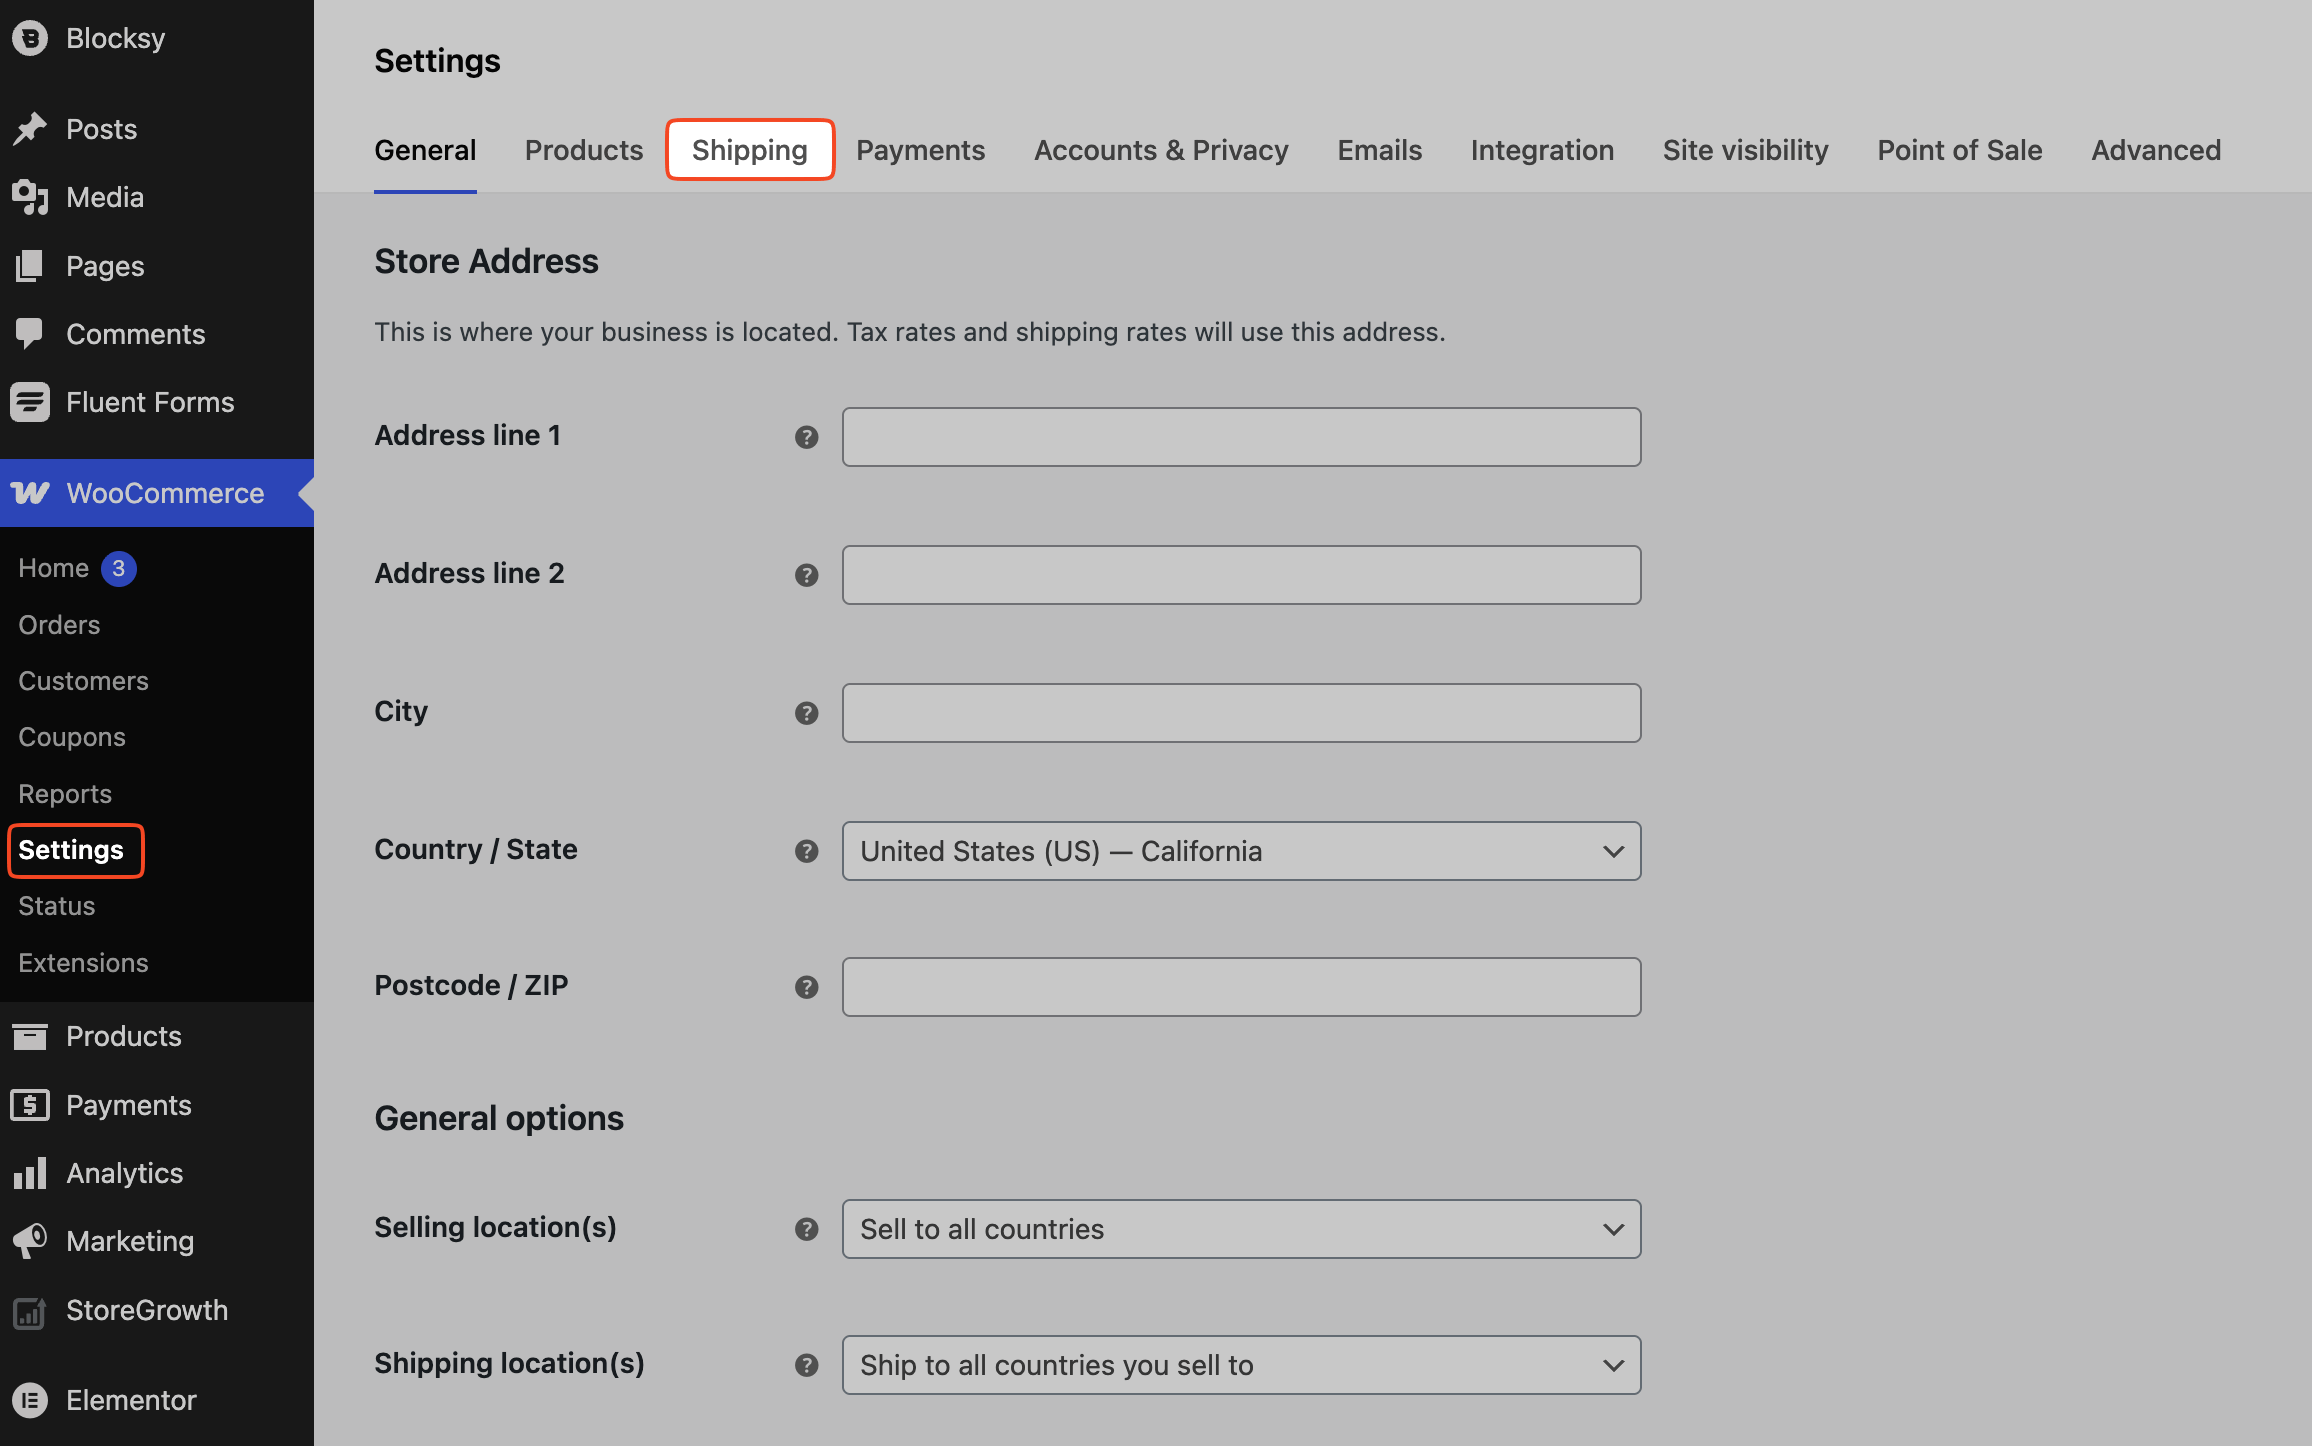
- Select a Shipping zone to edit, or create a new one.
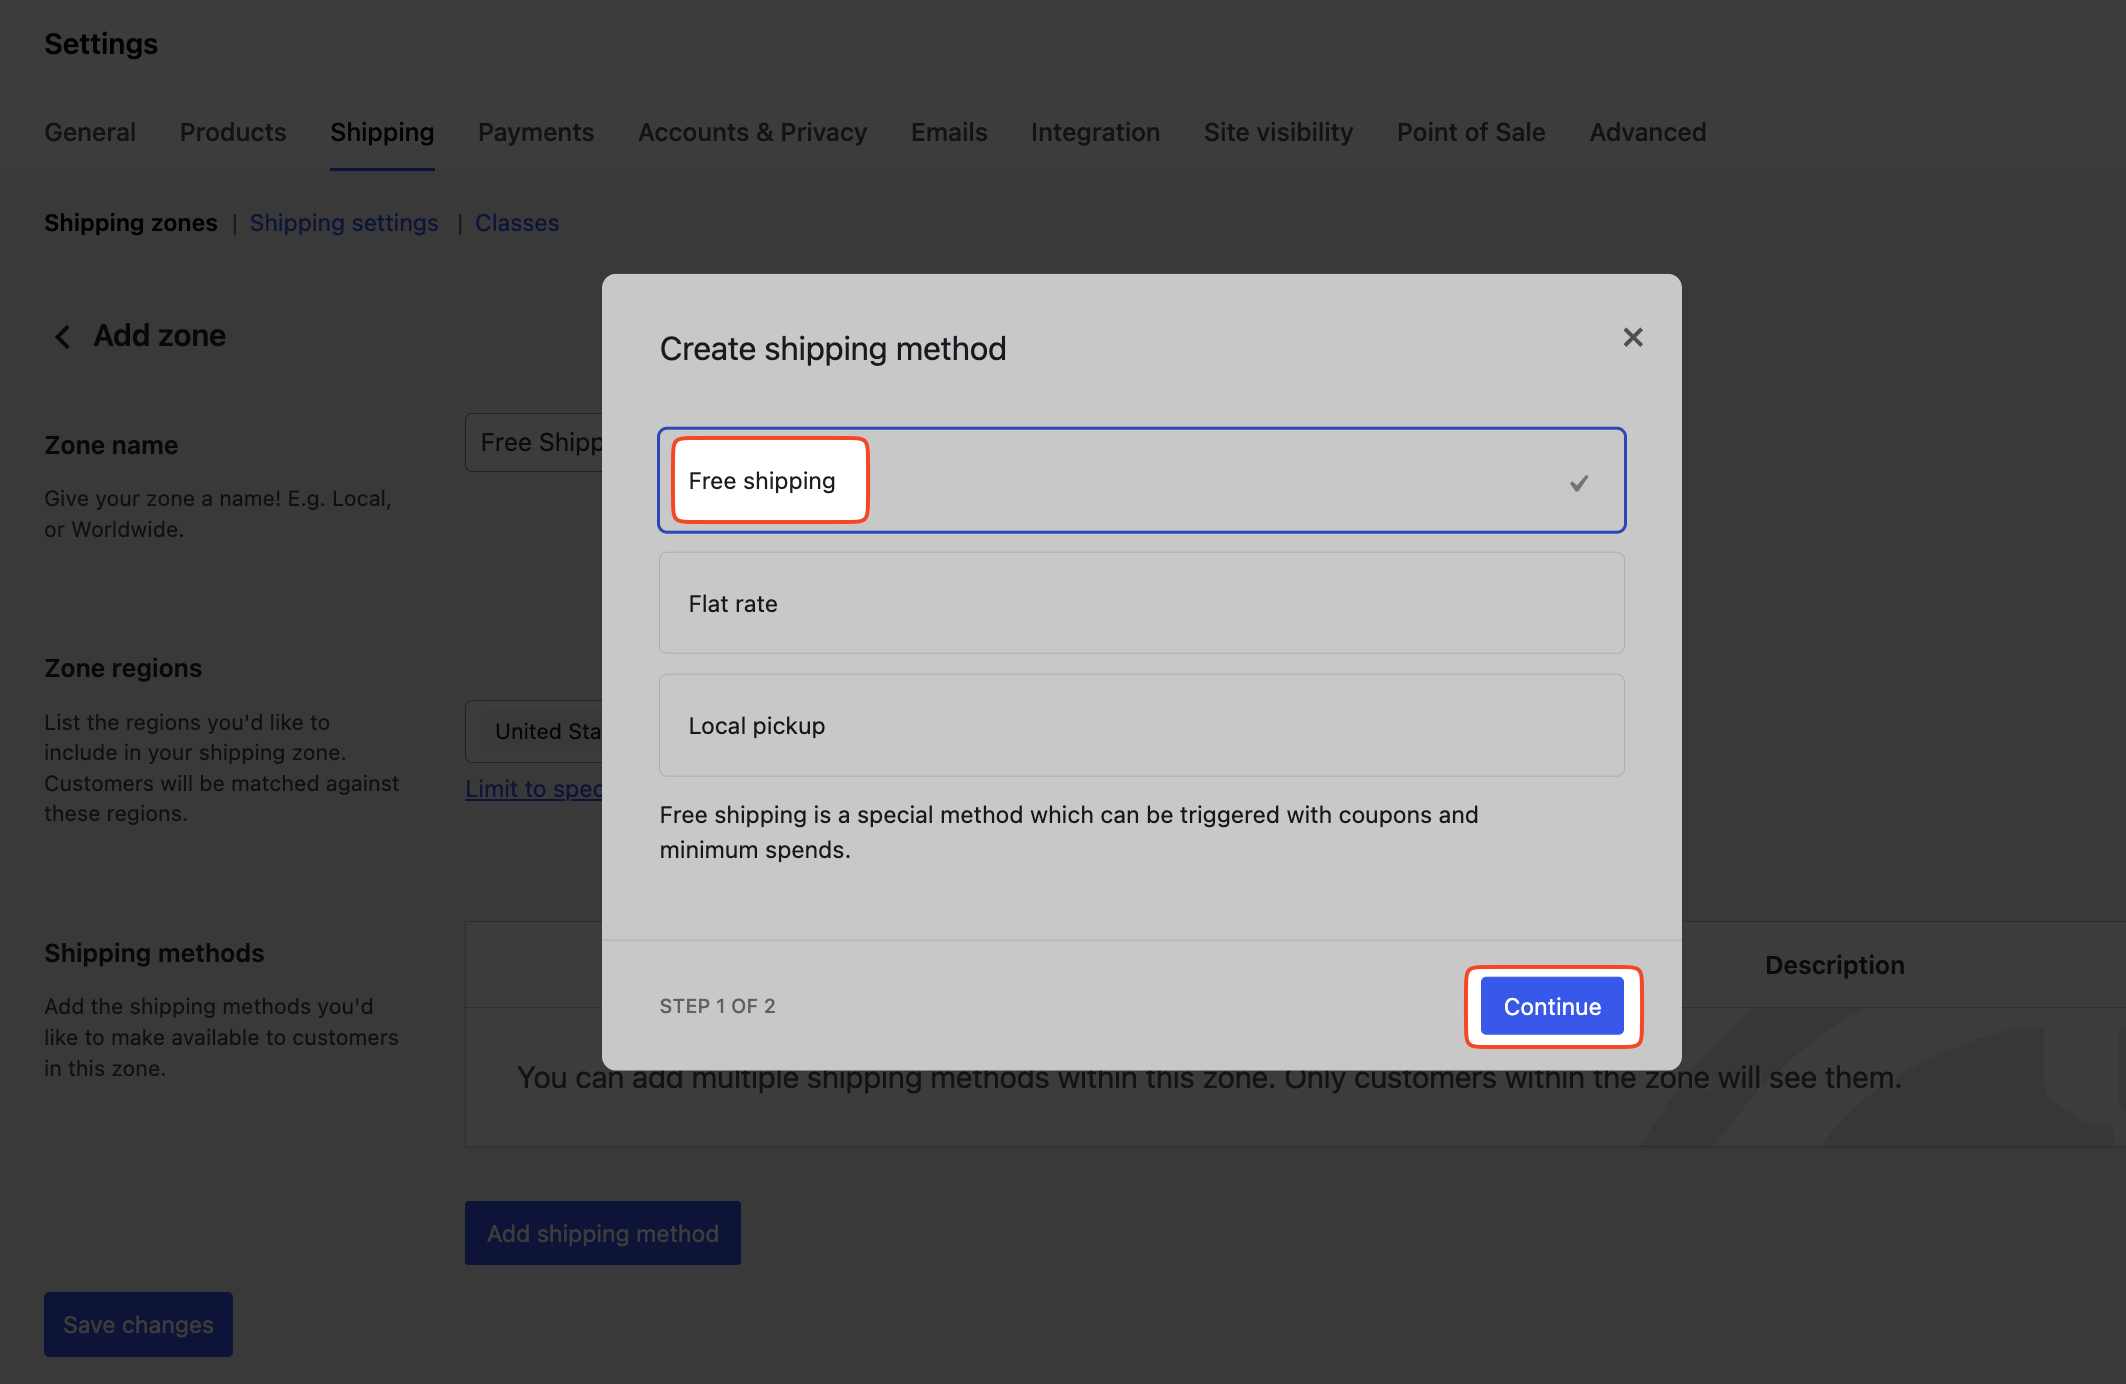
- Within the zone, click Add shipping method and select Free shipping.
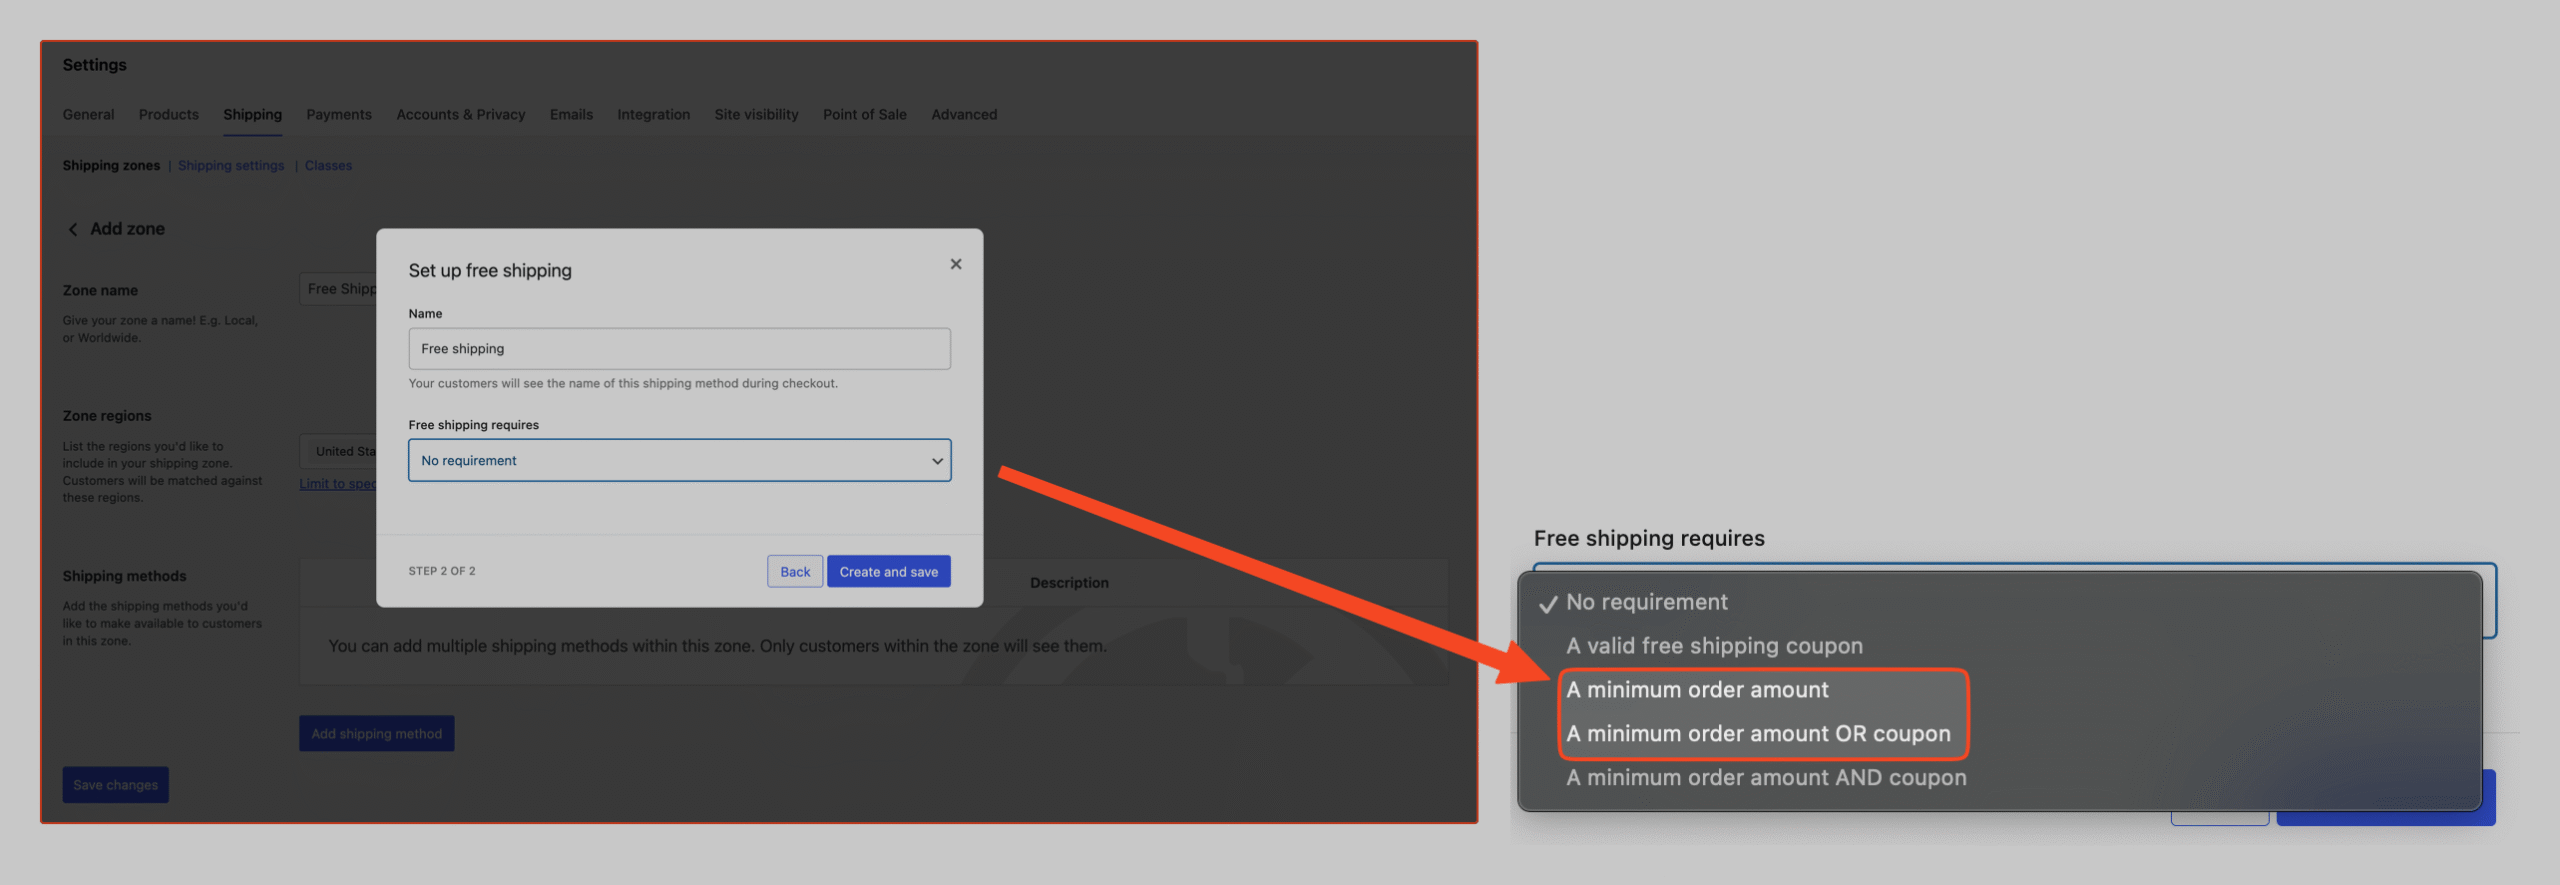
- In the “Free shipping requires…” dropdown, select A minimum order amount.
- Enter your desired threshold in the Minimum order amount field. This value should be the same as the one you will set in the StoreGrowth module.
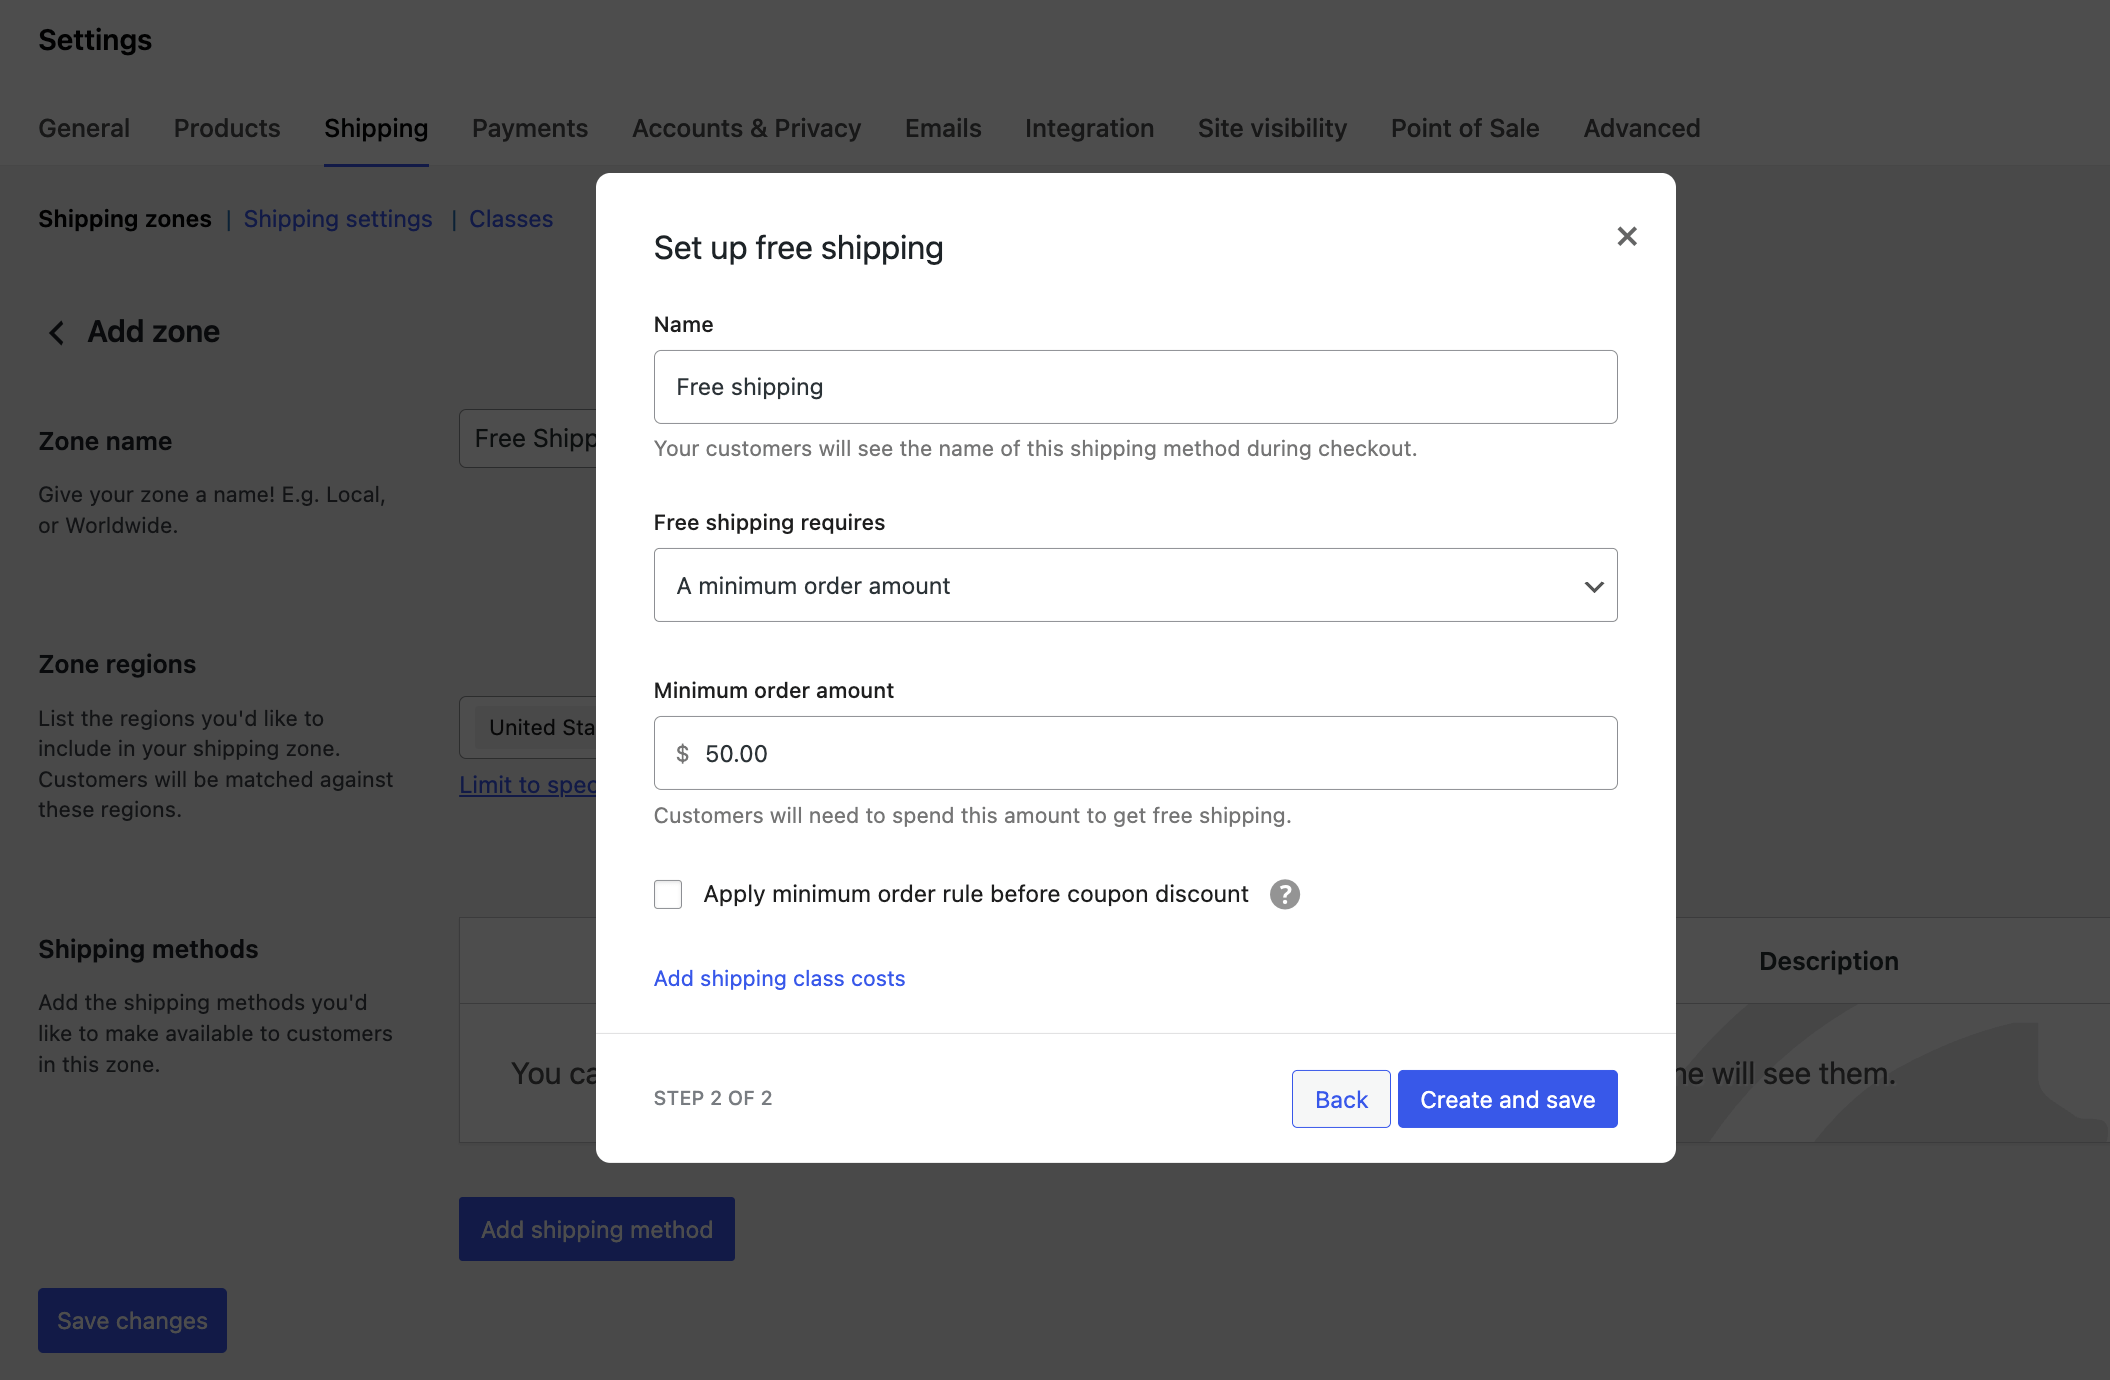
- Click Save changes.
Configuring the Free Shipping Bar
Navigate to StoreGrowth » Modules » Free Shipping Rules to access the main settings panel. This area is divided into two tabs: Banner Setting and Design.
Banner Setting Tab
This tab controls the content, behavior, and display rules for your free shipping bar. A live preview at the bottom of the page shows how your bar will look on the front end.
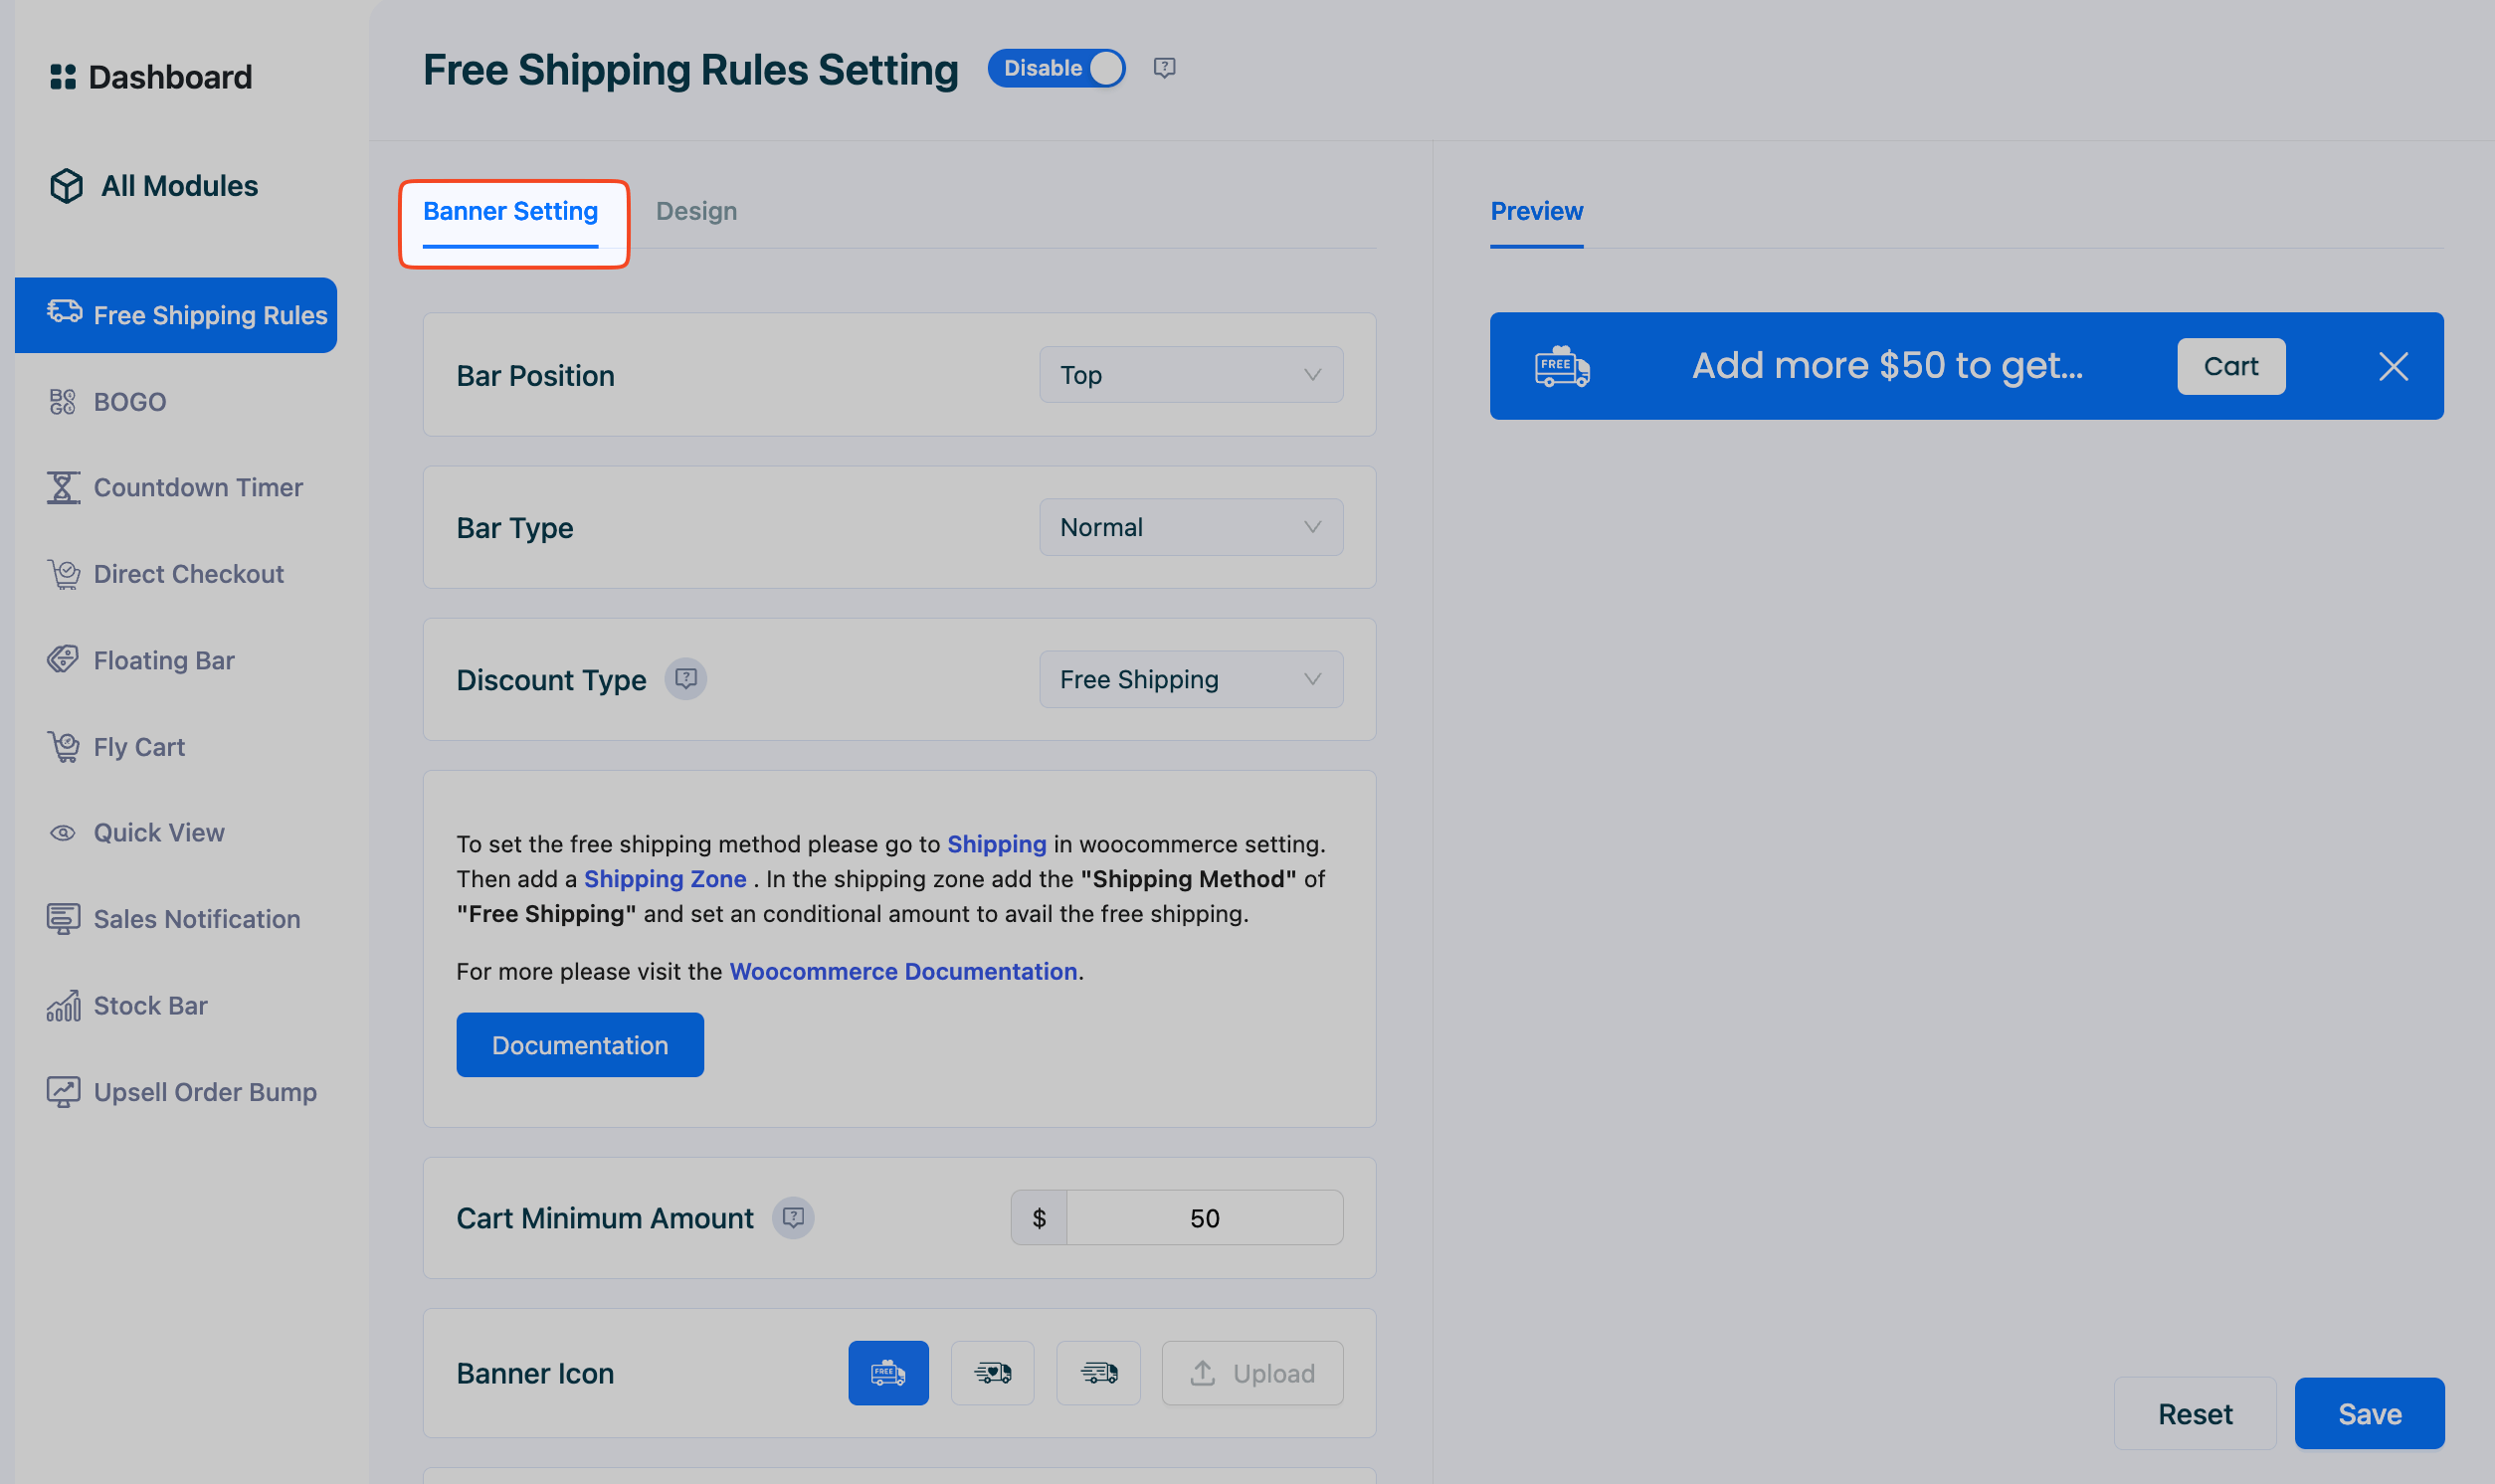
- Bar Position: Choose where the bar appears on the screen: Top or Bottom.
- Bar Type: Control how the bar behaves as users scroll.
- Normal: The bar stays in its position and will scroll out of view.
- Sticky: The bar remains fixed, staying visible as the user scrolls.
- Discount Type: Select the goal for the progress bar.
- Free Shipping: The bar will track progress toward a free shipping threshold.
- Discount Amount: The bar will track progress toward earning a specific discount amount.
- Cart Minimum Amount: Enter the cart total required to activate the offer. Important: This amount should match the threshold you configured in your WooCommerce shipping zone settings.
- Banner Icon: Select from a library of pre-designed icons or upload your own custom icon.
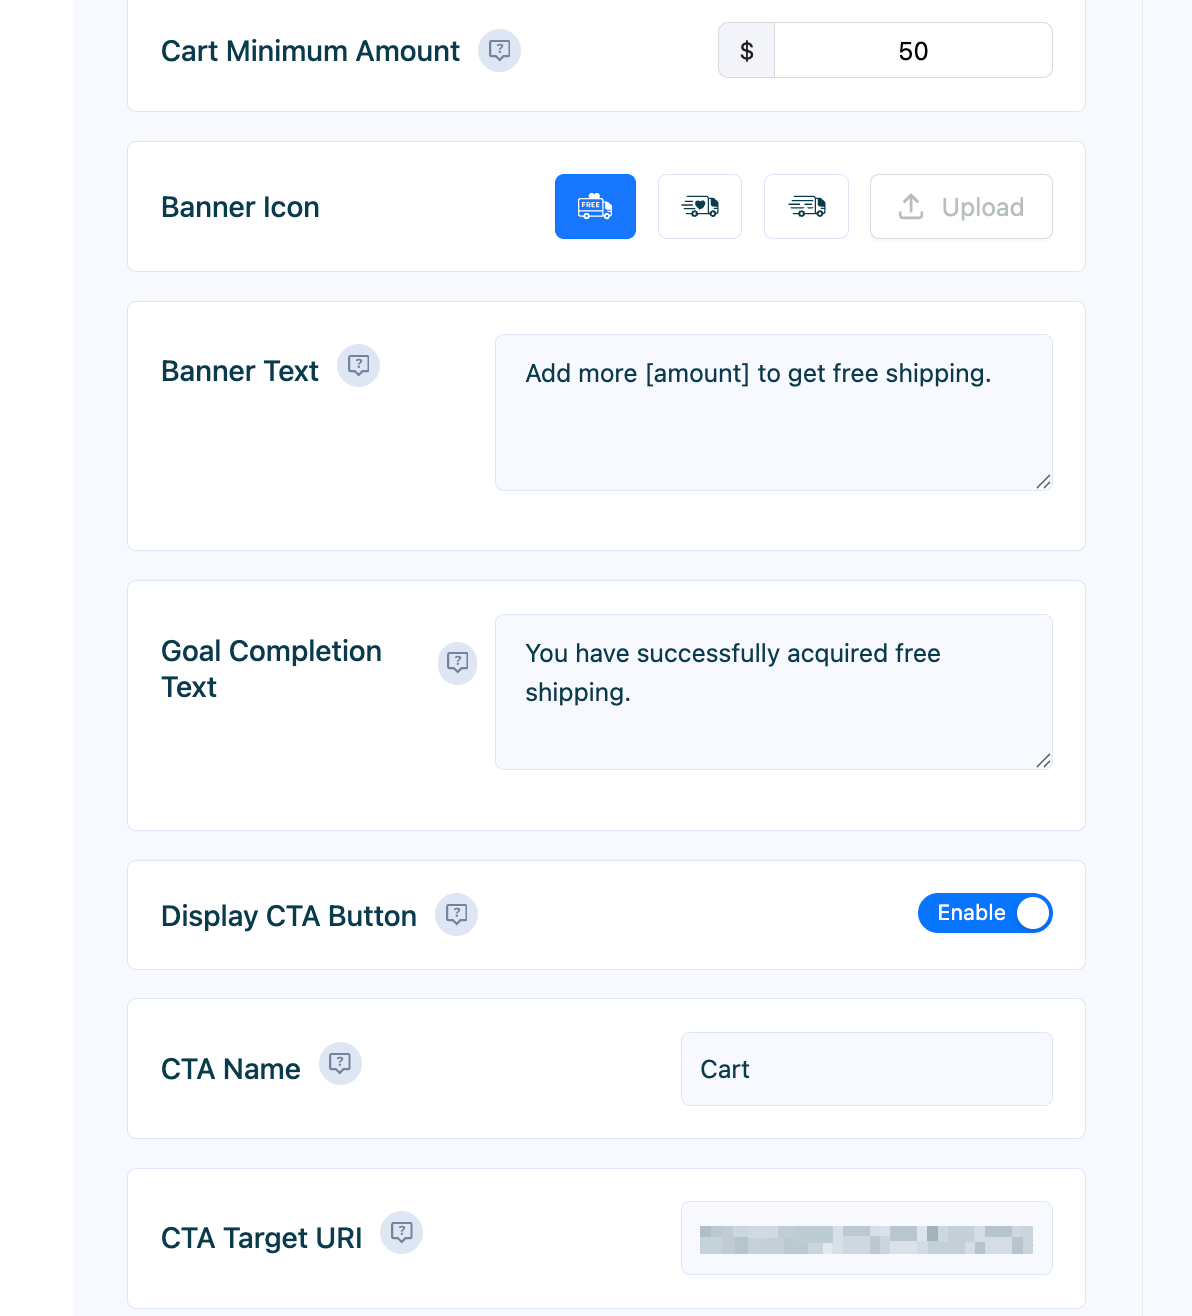
- Banner Text: Enter the message customers see before they reach the goal. Use the
[amount]shortcode to dynamically display the remaining amount needed (e.g., “Add [amount] more to get free shipping!”). - Goal Completion Text: Enter the success message that displays once the customer has reached the threshold (e.g., “Congratulations! You’ve unlocked free shipping!”).
- Display CTA Button: Toggle this on to show a call-to-action (CTA) button on the bar.
- CTA Name: Customize the text for the CTA button (e.g., “Cart,” “Shop More”).
- CTA Target URL: Set the link for the button, such as your cart or shop page.
- Display Rules: Define precisely when and where the bar appears.
- Show Banner: Choose to display the bar on Desktop, Mobile, or both.
- Trigger: Set how the bar is triggered. You can make it appear After a few Seconds or After Scroll (based on a percentage of the page scrolled).
- Page Targeting: Control which pages the bar appears on. You can set it to Show Everywhere or target specific pages.
Design Tab
This tab allows you to fully customize the visual appearance of your free shipping bar to ensure it matches your store’s branding.

- Banner Height: Adjust the height of the bar in pixels.
- Font Family: Select the font for the banner text.
- Font Size: Set the size of the text in pixels.
- Color Customization: Use the color pickers to style every element of the bar:
- Background Color
- Text Color
- Icon Color
- Close Button Color
- CTA Background
- CTA Text Color
- Template: Choose from pre-designed templates for a quick and professional look.
After configuring these settings, be sure to click the Save button.