In this module, we’ll talk about the stock bar, which shows total products sold to customers as well as product availability.
To open this module, just click on Dashboard→ StoreGrowth → Modules→ Stock Bar.
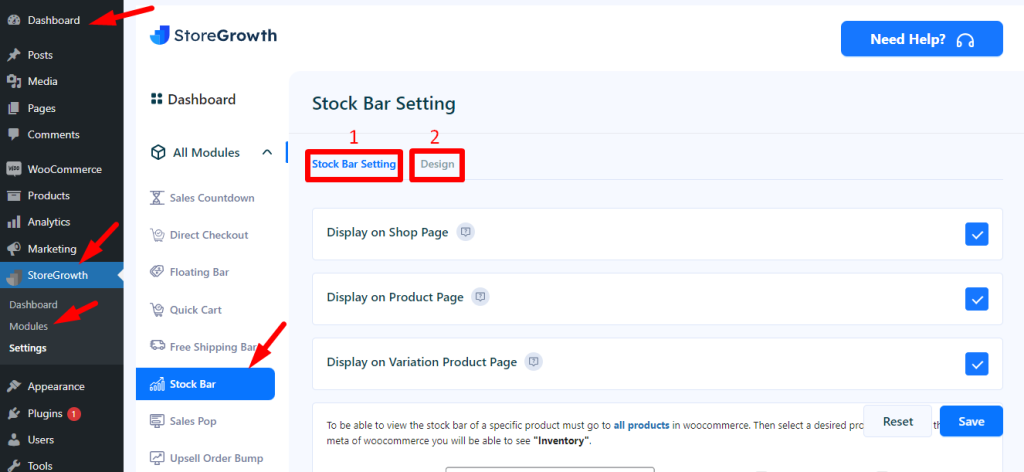
As you see, there are two settings in this module.
- Stock Bar setting &
- Design setting
1. Stock Bar Setting #
In this setting, there are the following fields:
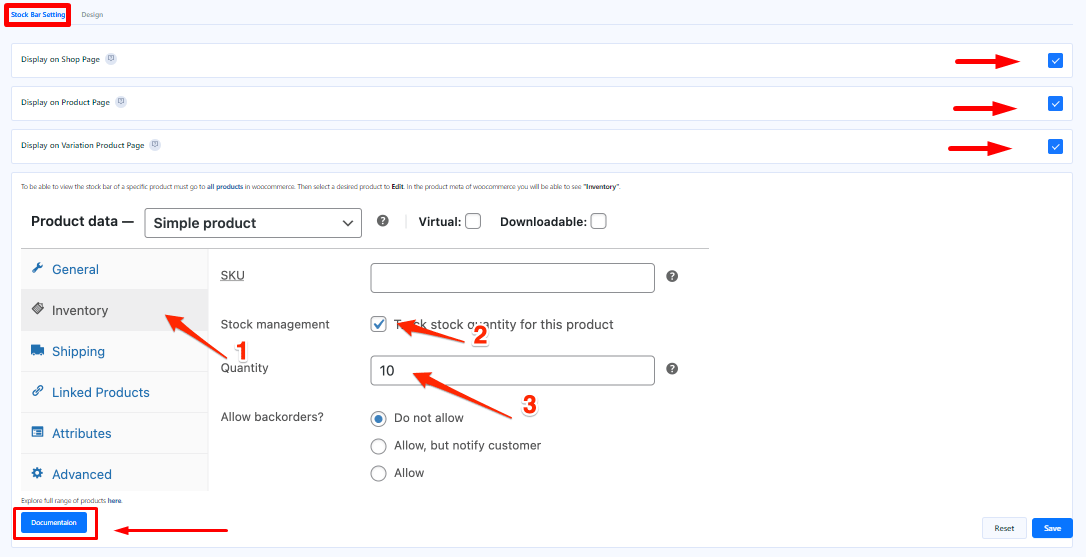
Display on Shop Page: By checking this box, you can display the stock bar on the shop page. To do this, just click on Dashboard → Products.
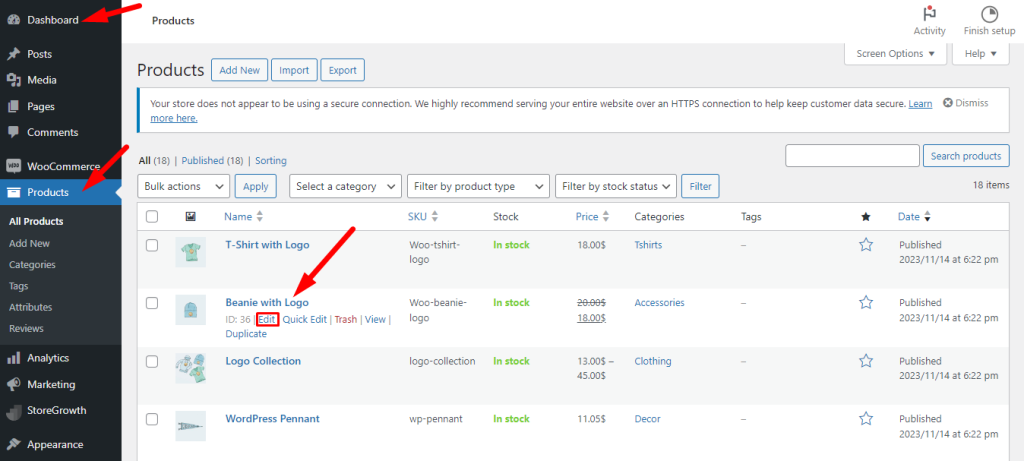
Now select any product you want. Here you select Beanie with logo, click on the Edit button, scroll down, and you will see the inventory option here; just click on it. Now check the track stock quality for this product and set the quantity.
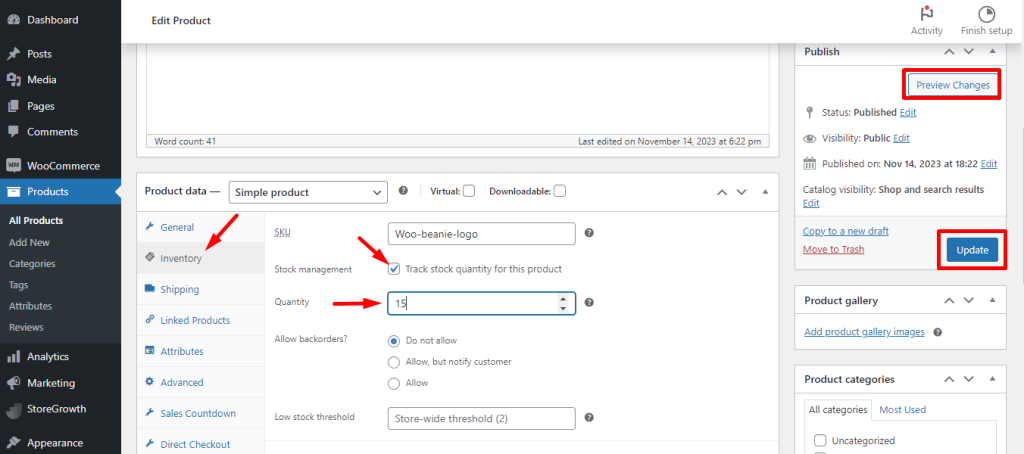
Now click on the update button and If you go to the shop page it would be like this:

Display on Product Page: Similarly, you can display the stock bar on the product page by checking this. And it would like this:

You can also see the availability of this product. Here, you see that there are 16 products in stock.
Display on Variation Product Page: Variable products are products with multiple options or SKUs, such as jackets in different sizes or colors. This product type is useful when you need to set different attributes, images, stock, or price in your set of variations.
You can add a variable product here, and customers can view it.
To add a variable product, just click on Dashboard → Products, and then select any product to which you want to add a variation. Here we select the V-Neck T-shirt image in the given picture.
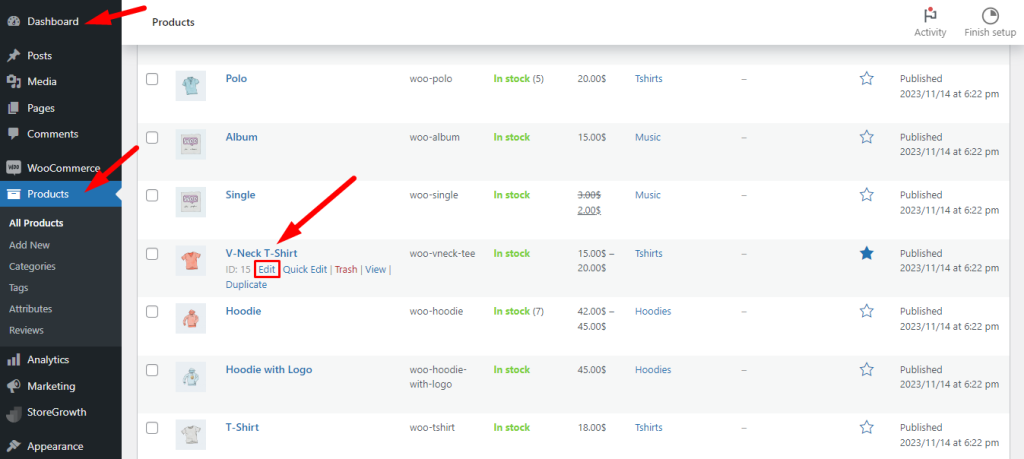
Then click on the edit button, and you will find the edit product page.
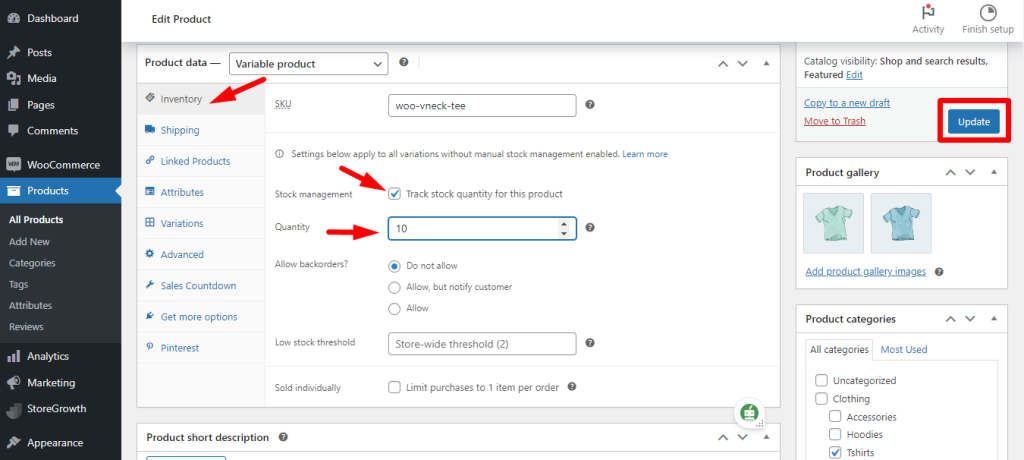
Now click on the inventory and check the track stock quantity . And set the quantity of the products and update this. It’s global stock management, not a specific product.
Now click on the variation, and you will find the variable product.
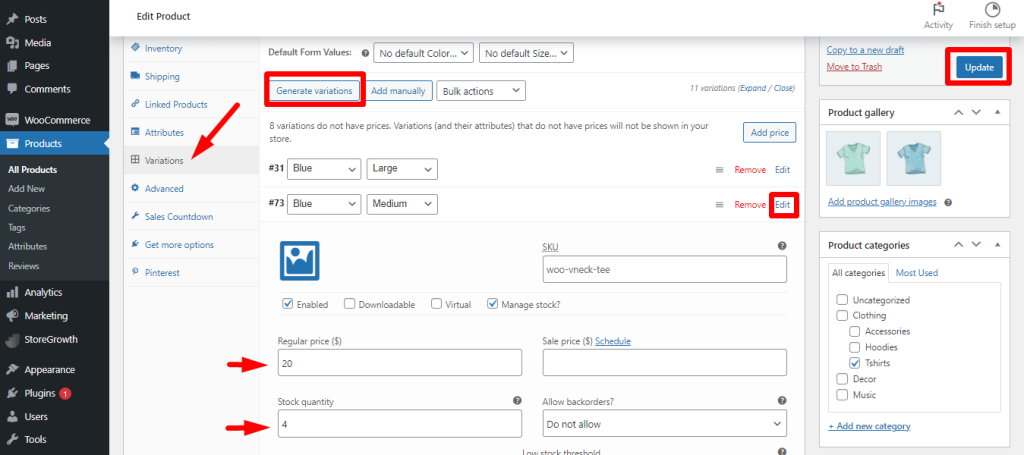
You can generate variations here by clicking on Generate Variations. By clicking on the edit button, you can check manage stock and set the quantity of the product here because it’s for a specific product.
After this, scroll down, and you will find a save changes button. Just click on this, and on the right side, you will also find an update button. Just click on this. Now you can see the change on the product page.
If you select the color blue and size medium, you will see the availability.

If you select green & large, you will see this.

Thus, you can see variations in different products.
2. Design setting #
In the design setting, you can customize the stock bar by changing the mentioned input fields.

Background color: When you click the input field, a pop-up color box appears from which you can choose any color.
Similarly, you can alter the color of the Border color and Foreground color.
Here, you can also set the stock bar height. You can increase or decrease the height by clicking the input field.
Stock Display Format: If you click on this input field, two options, such as Above Stock Bar and Below Stock Bar, will appear. If you select the Above Stock Bar, the bar will show above; otherwise, it will show below.
Total Sell Count Text: The text “Total Sold” will be displayed in this field, which will be located on the left side of the stock bar.
Available Item Count Text: The text “Available Item” will be displayed in this field, which will be located on the right side of the stock bar.
You can view a live preview of it after filling out all the fields.

At the end of the design settings, there is a template section where you can select any template and view a live preview of it.

Here, if we select the second template, it would look like this:


