To open this module, click on the following sequence Dashboard→ StoreGrowth→ Modules→ Sales Countdown.
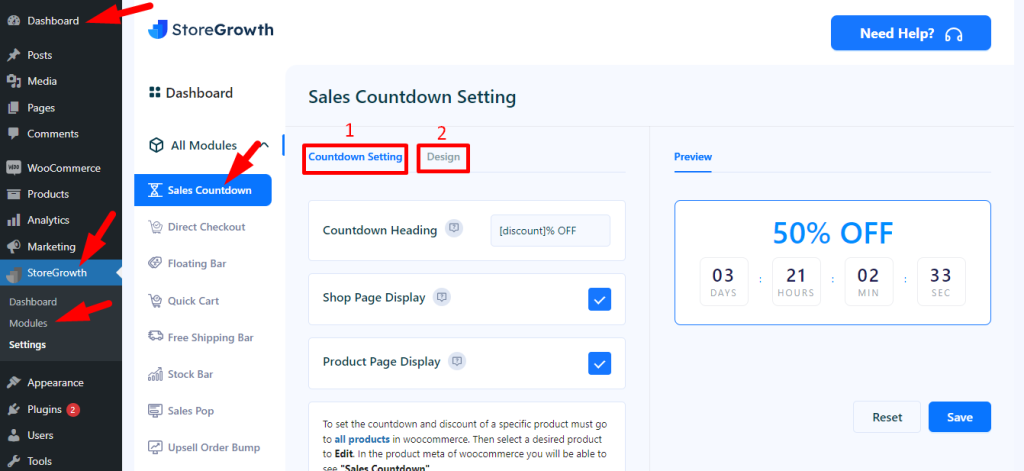
You will find that there are two settings, namely:
- Countdown Setting
- Design Setting
1. Countdown setting
In this setting, there are three fields shown in the attached picture.

1. Countdown Heading: The [discount] will be replaced with your actual discount percentage. It works only for a single product. Here, we can set the discount percentage.
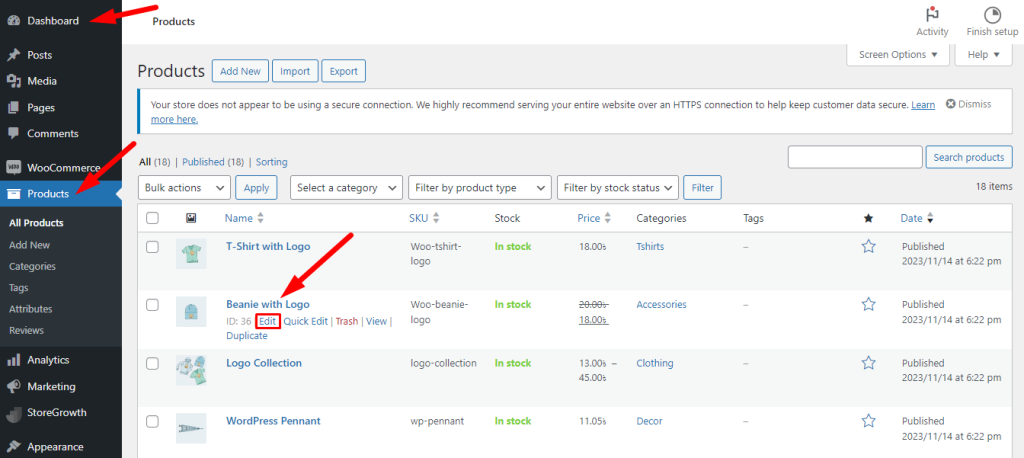
Besides, you can also select any product that you want.
To do this, just click on Products → select Beanie with Logo → Edit
Upon clicking ‘Edit’, the Edit Product page will appear, then scroll down, and you will find the Sales Countdown. Just click on that.
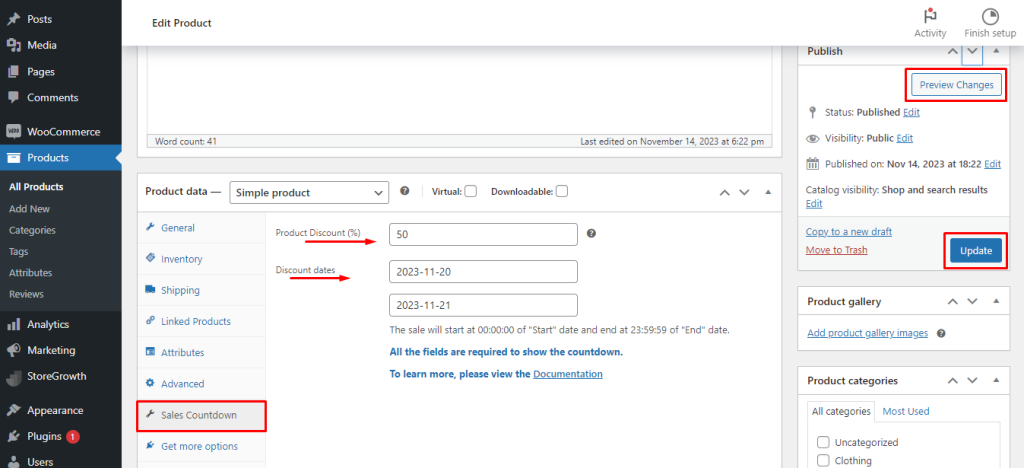
You will find that Input fields for the Product Discount and the Discount Dates will appear when you click on them. Fill them up. Then, on the right side of this page, there are buttons for Update and Preview Changes. Select them by clicking on them.
The changes will now be visible on the front end.

2. Shop Page Display: If you check this box, a countdown timer will appear on the shop page. Otherwise, it will not be displayed on the shop page. We will check this here, and it will look like this.

3. Product Page Display: Similarly, if you check this box, a countdown timer will appear on the product page. Otherwise, it will not be displayed on the product page.
We will check this here, and it will look like this on the product page.

2. Design
You can see that there are four input fields, and they are:
- Widget Background Color
- Border Color
- Heading Text Color
- Template

You can change the color of these input fields here to suit your preferences, and you can also select and preview any template from these two templates. If you choose the second template, it will look like this:
