To open this module, just click on Dashboard→ StoreGrowth→ Modules→ Floating Bar.
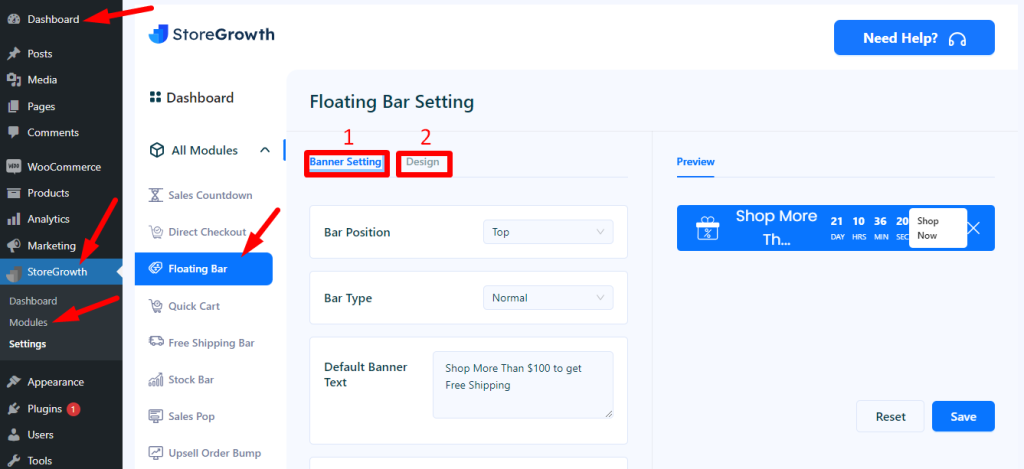
There are two settings in this module
- Banner setting and
- Design setting
1. Banner setting
This section includes the fields below in the attached image.

Bar Position: Here you can set the bar position to top or bottom, depending on what you want.
Bar Type: You can also set the bar type to normal or sticky.
Default Banner Text: In this input field, you can set the default banner text that is shown on the shopping page.
Banner Icon: By clicking the upload field, you can upload any icon from your local folder or choose one from the uploaded icons as your banner icon.

Show Button: This allows you to look for the button on a desktop or mobile device.

Button Action: When you click on this input field, two choices will appear, including Banner Close and Url Redirect. If you select Banner Close, the banner will not appear on the shop page. But if you select Url Redirect, it will appear with two options, as given below in the attached image.

After selecting the Url Redirect, you need to enter the shop or store URL in the first marked field. Then, if you want to see the shop in the Others tab, you need to check the box (Open in New Tab); otherwise, it will open to the same page.
Countdown: Here, you can set the countdown on this bar for shopping. And it will look like this.

Coupon Code: This section also lets you enter a coupon code. You have the option to enable or disable this.
Display Rules: In the bottom of the banner setting, there is a display rules section, which has three input fields:
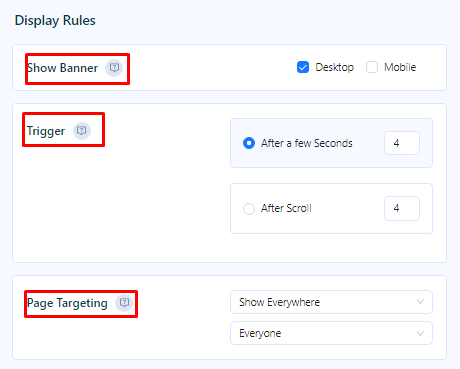
Show Banner: In this case, you can choose whether to display the banner on desktop or mobile devices.
Trigger: After a brief delay or after some scrolling, the banner will show up. In this case, 7 seconds is the default duration.
Page Targeting: The final input field in this section is for page targeting, where you can choose whether to show the page to everyone, just the selected page, selected users, or just logged-in users.
2. Design setting
In this section, you can change the whole design of the floating notification bar banner and view a live preview by changing input fields.

Here is the list of input fields.
Banner Height: You can increase or decrease the height of the bar.
Font family: By clicking this field, you can also change the font family. If you click on this field, various options will show up, and you can choose what you want.
Font Size: Similarly, you can change the font size.
Background Color: The floating bar’s background color can be modified. You can choose any color from the popup that will appear if you click on this field.
The color of the text, icons, buttons, button text, and close button can all be changed in a similar manner.
By customizing these input fields, you can live preview it like this:
