The BOGO feature lets customers create BOGO offers with options like offer type, quantities, discounts, scheduling and design customization.
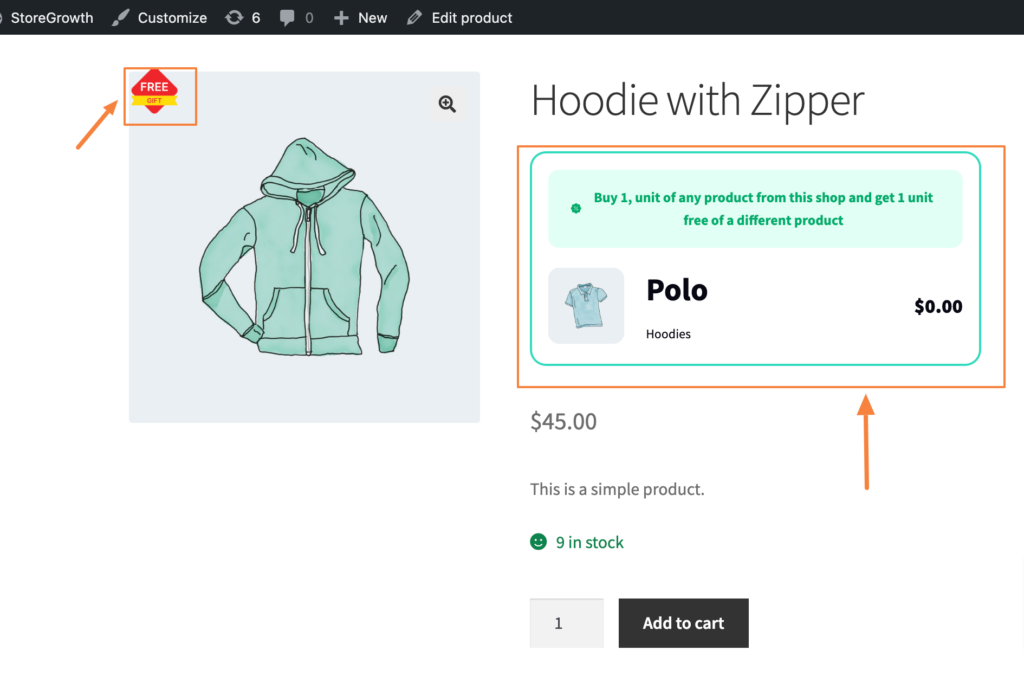
Users can easily notice the BOGO badge on the target products on the shop page. After adding the target product, the offer product gets added in the cart automatically.
Let’s see how you can use the BOGO feature easily.
How To Use The BOGO Module?
Step -1 Enable The BOGO Module
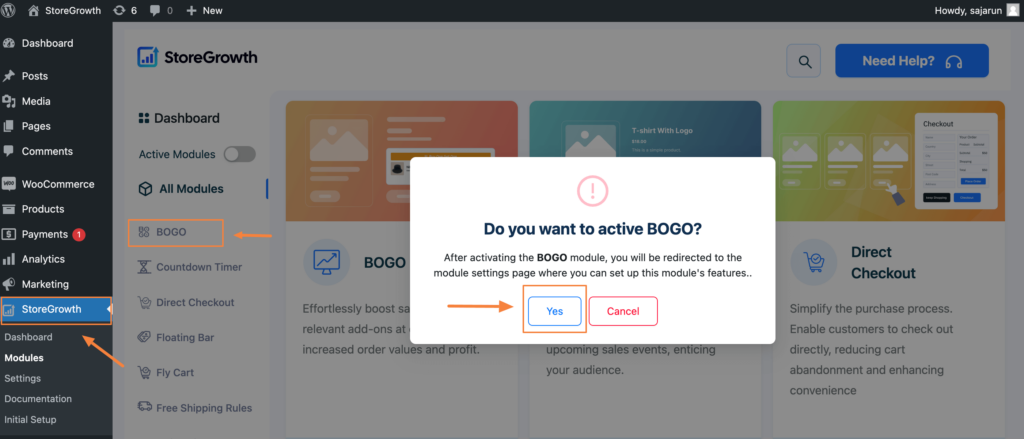
First, go to the StoreGrowth dashboard and click on the ‘BOGO’ option to activate it.
Once you click on the ‘Yes’ option, it will take you to the General setting of the BOGO module dashboard.
Step – 2 Configure The General Setting
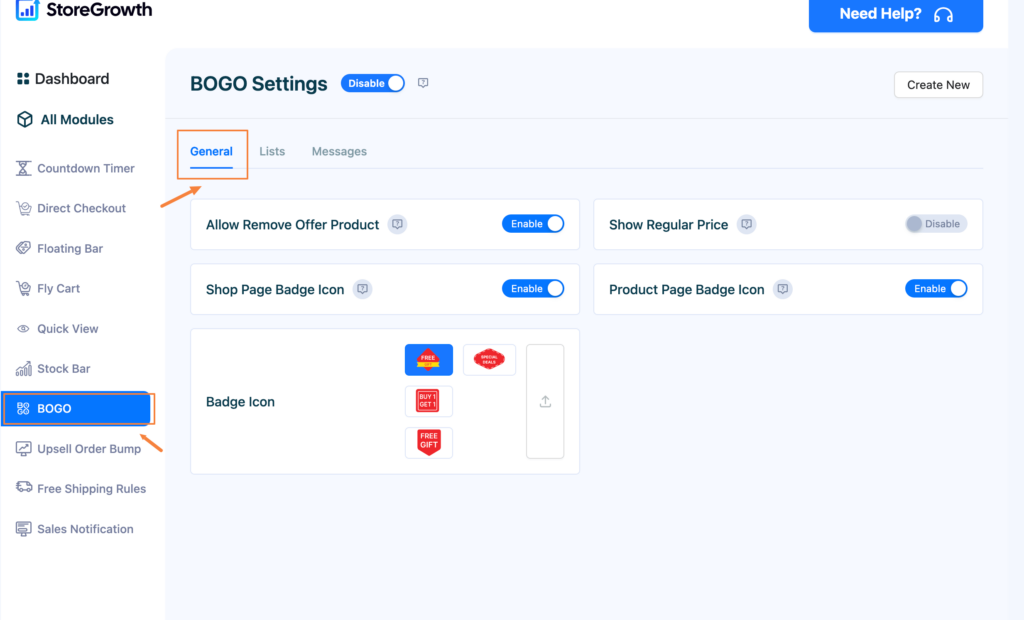
In the General Setting, you have set up some visibility settings for the BOGO deals.
1. Allow Remove Offer Product: Enable this option to allow the customers to remove the offer product from the cart.
2. Show Regular Price: Enable this option if you want to show the regular price with the offer price.
3. Shop Page Badge Icon: This option allows you to showcase the BOGO badge icon on the shop page.
4. Product Page Badge Icon: This option allows you to showcase the BOGO badge icon on the product page.
5. Badge icon: Choose your preferred BOGO badge icon to highlight the BOGO offer.
Once you have configured the General setting, move on to the next tab – Lists.
Step – 3 Create Your BOGO List
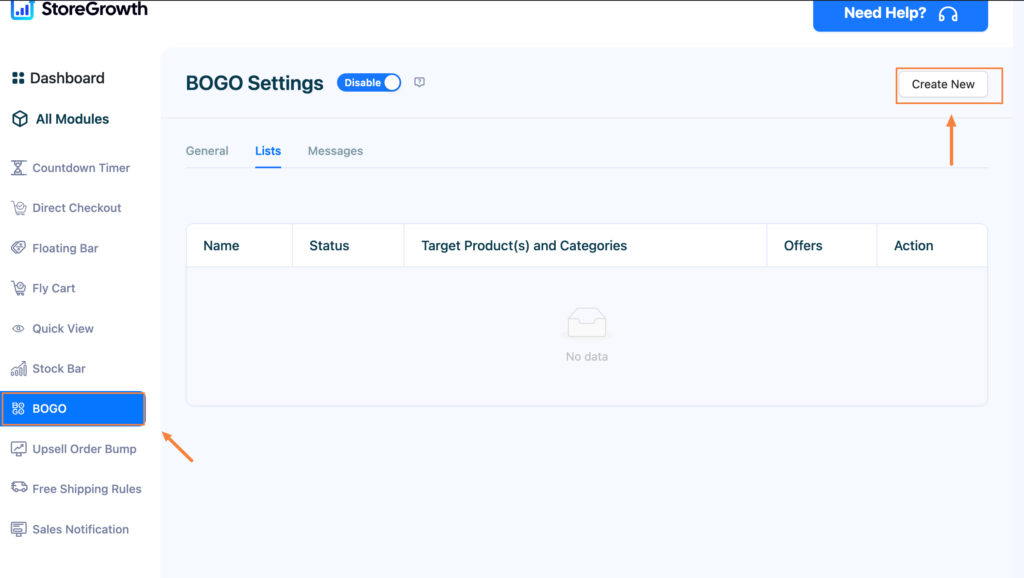
This is the page where your BOGO offers will be listed. To create your first BOGO offer, click on ‘Create New’ option.
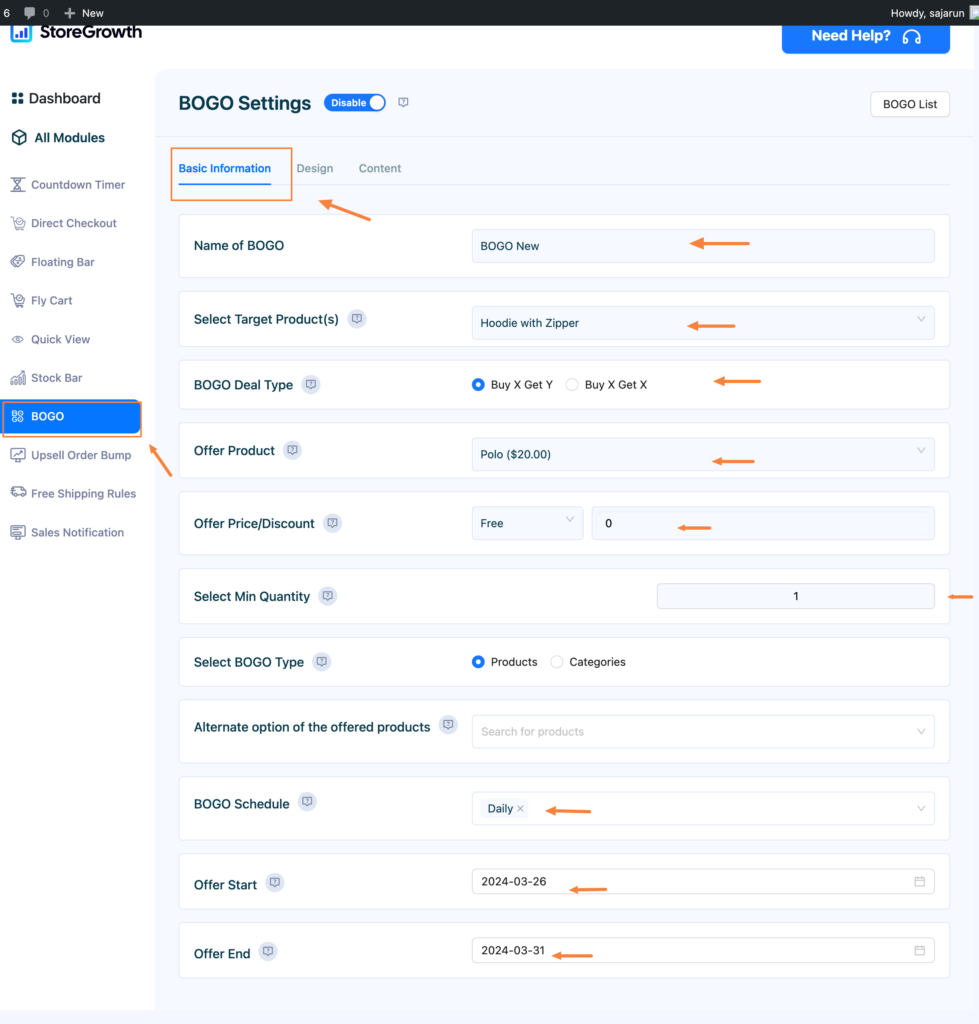
In the first tab you’ll get the basic information for the BOGO deal.
1. Name of BOGO: Write a name for the offer.
2. Select Target Product(s): Select which products you want to target for creating the deal.
3. BOGO Deal Type: Choose your deal type between Buy X Get Y & Buy X Get X.
4. Offer Product: Choose your offer product.
5. Offer Price/Discount: Select the offer price. You can offer it for free or select a discount percentage.
6. Select Min Quantity: Select the minimum quantity for adding to the cart.
7. BOGO Schedule: Choose the schedule to display BOGO offers.
8. Offer Start Date & End Date: Select the timeline for the created BOGO offer
Next, go to the design tab.
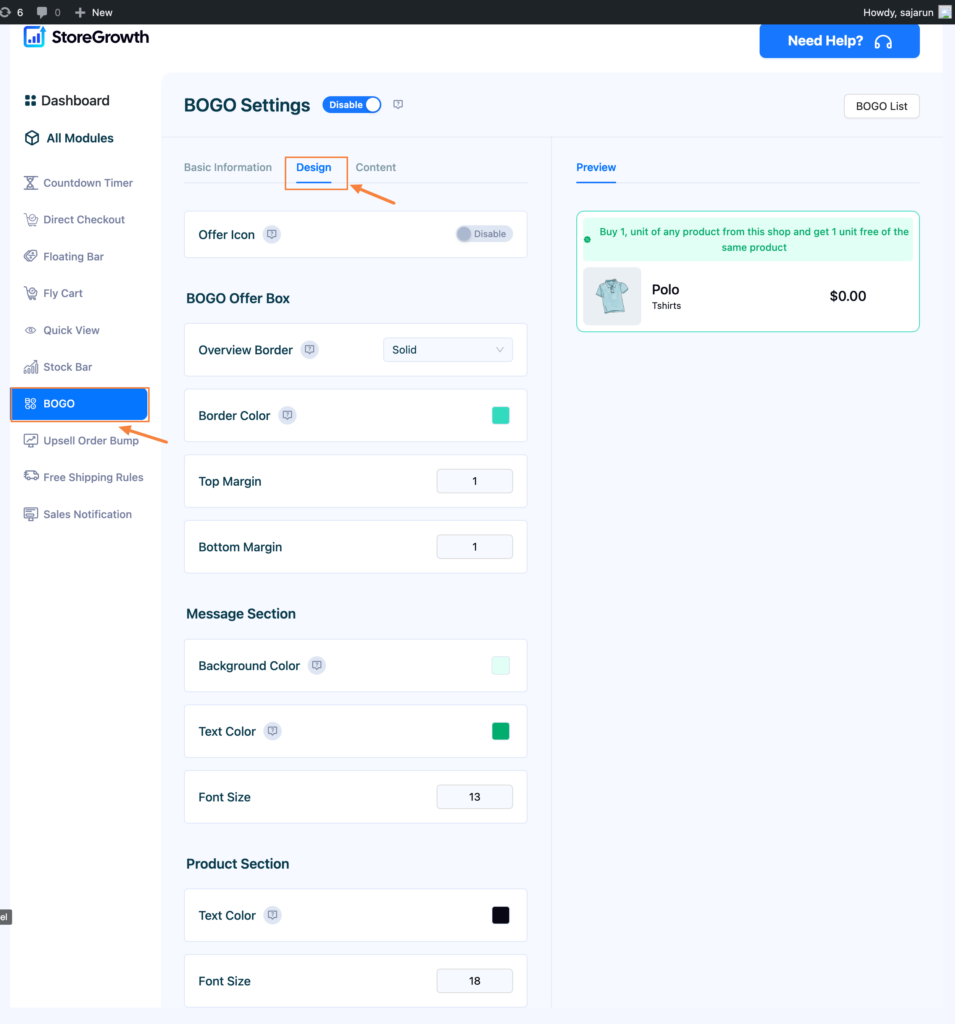
Step – 4 Customize the BOGO Offer Box Design & Content
In the design tab you get all the necessary options to customize the BOGO offer box.
Adjust the following design parameters for your shop:
1. Overview Border
2. Border Color
3. Top Margin
4. Bottom Margin
5. Background Color
6. Text Color
7. Font Size
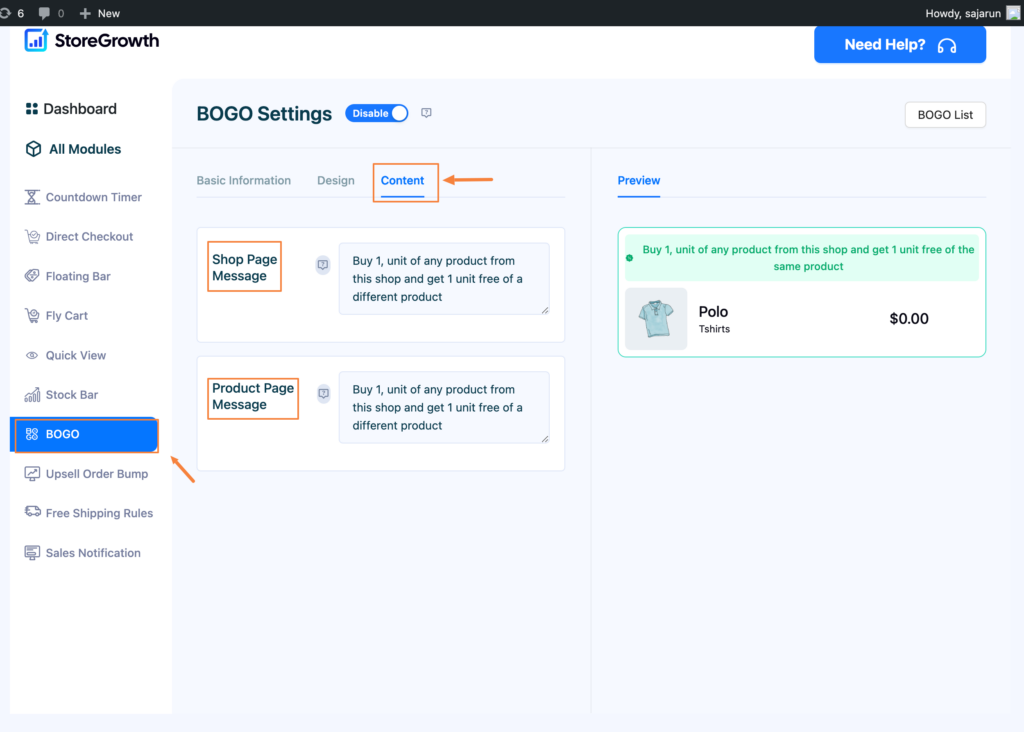
And, if you want to modify the message of the BOGO offer box, go the content tab. Here, you can modify the shop and product page message for your offer box.
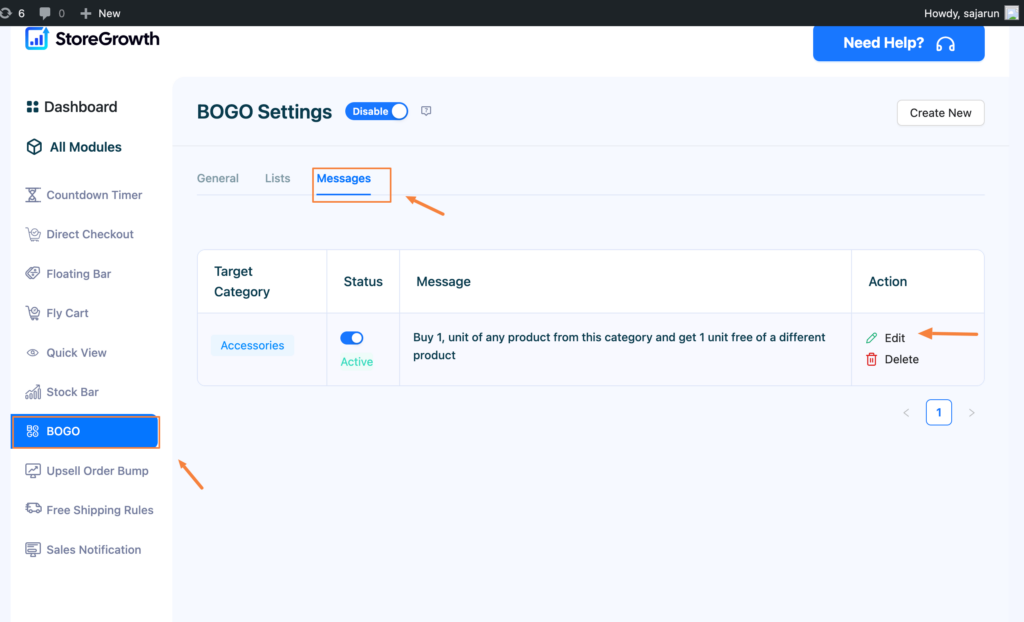
Also, if you are creating category-based BOGO offers, then you can go to the Message tab and modify your message there.
So, once you’re done setting up the BOGO offer, let’s go to the shop and see what the BOGO offer looks like.
That’s how you can easily create irresistible BOGO offers using StoreGrowth.