

Did you know that 7 out of 10 shoppers who add something to their cart on your site will leave without buying?
It’s not a flaw in your products or your online store. It’s not a problem with your offerings either. It’s a predictable, multi-trillion-dollar problem, and it’s happening right now in your store.
According to extensive research from the Baymard Institute, the average online shopping cart abandonment rate is a staggering 70%.
And the number one reason for this mass exodus?
Unexpected costs, with shipping fees being the primary culprit for 48% of all abandoned carts.
But what if you could turn that biggest problem into your most powerful sales tool?
That’s where the free shipping bar for WooCommerce comes in. This isn’t just another banner at the top of your site; it’s a strategic, psychological tool designed to guide your customers, increase their order value, and slash your cart abandonment rate.
In this definitive guide, you’ll learn:
- The secret psychology that makes a dynamic shipping bar so incredibly effective.
- A step-by-step walkthrough to set up your own powerful shipping bar in under 5 minutes using the StoreGrowth plugin.
- Advanced strategies to turn your shipping bar into a precision-targeted revenue machine.
So, why the wait? Let’s dive deeper into how having a dynamic shipping bar can do wonders to your business.

The Secret Weapon: Why a Dynamic Shipping Bar Actually Works
A passive “Free Shipping Over $50” banner is easily ignored. It forces customers to do the math. A dynamic free shipping bar for WooCommerce, however, is an active sales tool. It leverages a proven psychological principle: the Goal-Gradient Effect.
First documented by psychologist Clark Hull, this effect confirms that our motivation skyrockets the closer we get to a goal.
Think of a “Buy 10, Get 1 Free” coffee card. When you have 9 stamps, the urge to get that last one is irresistible. The goal feels tangible and within reach.
A dynamic bar creates this same powerful urgency in your store. When a customer’s cart updates to show, “You're only $12.45 away from free shipping!,” it instantly reframes their mindset:
- The Goal is Visualized: They see their progress, making the reward feel real.
- Motivation Spikes: They are no longer just Browse; they are driven to complete the goal.
- AOV Increases Naturally: Adding one more item becomes the logical next step to “win” the free shipping.
This isn’t just a feature; it’s a trusted, data-backed strategy. You are gamifying the purchase to be more engaging and, for you, more profitable.
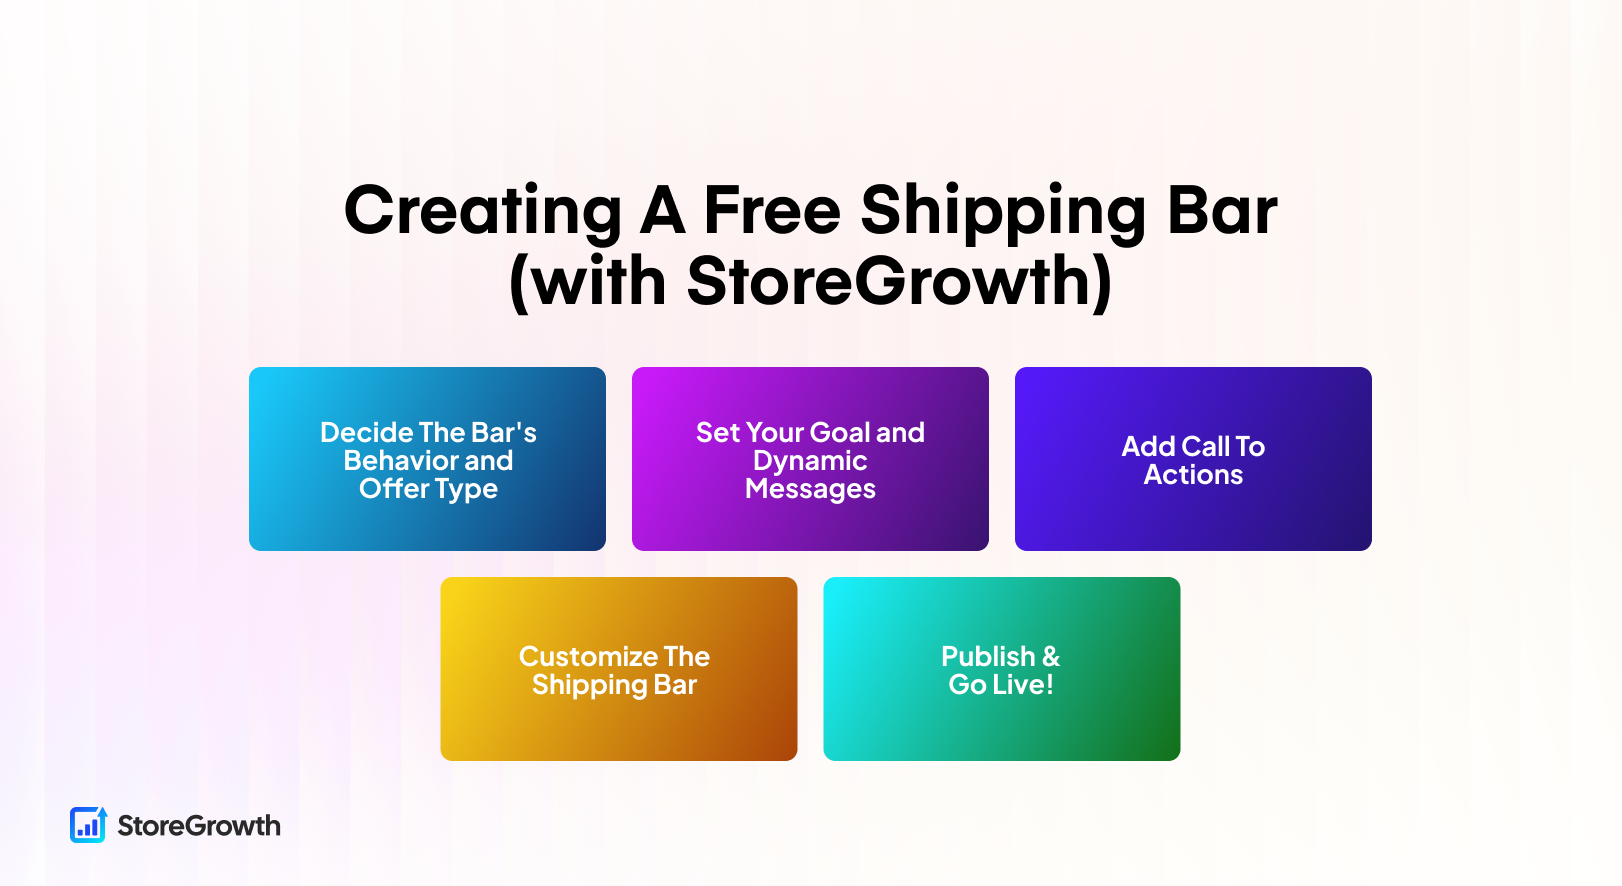
Your Step-by-Step Guide to Creating a Free Shipping Bar with StoreGrowth
Now, let’s put that powerful psychology into practice. We’ll walk you through setting up your own dynamic free shipping bar using the StoreGrowth plugin. You can have this live on your site in the next five minutes.
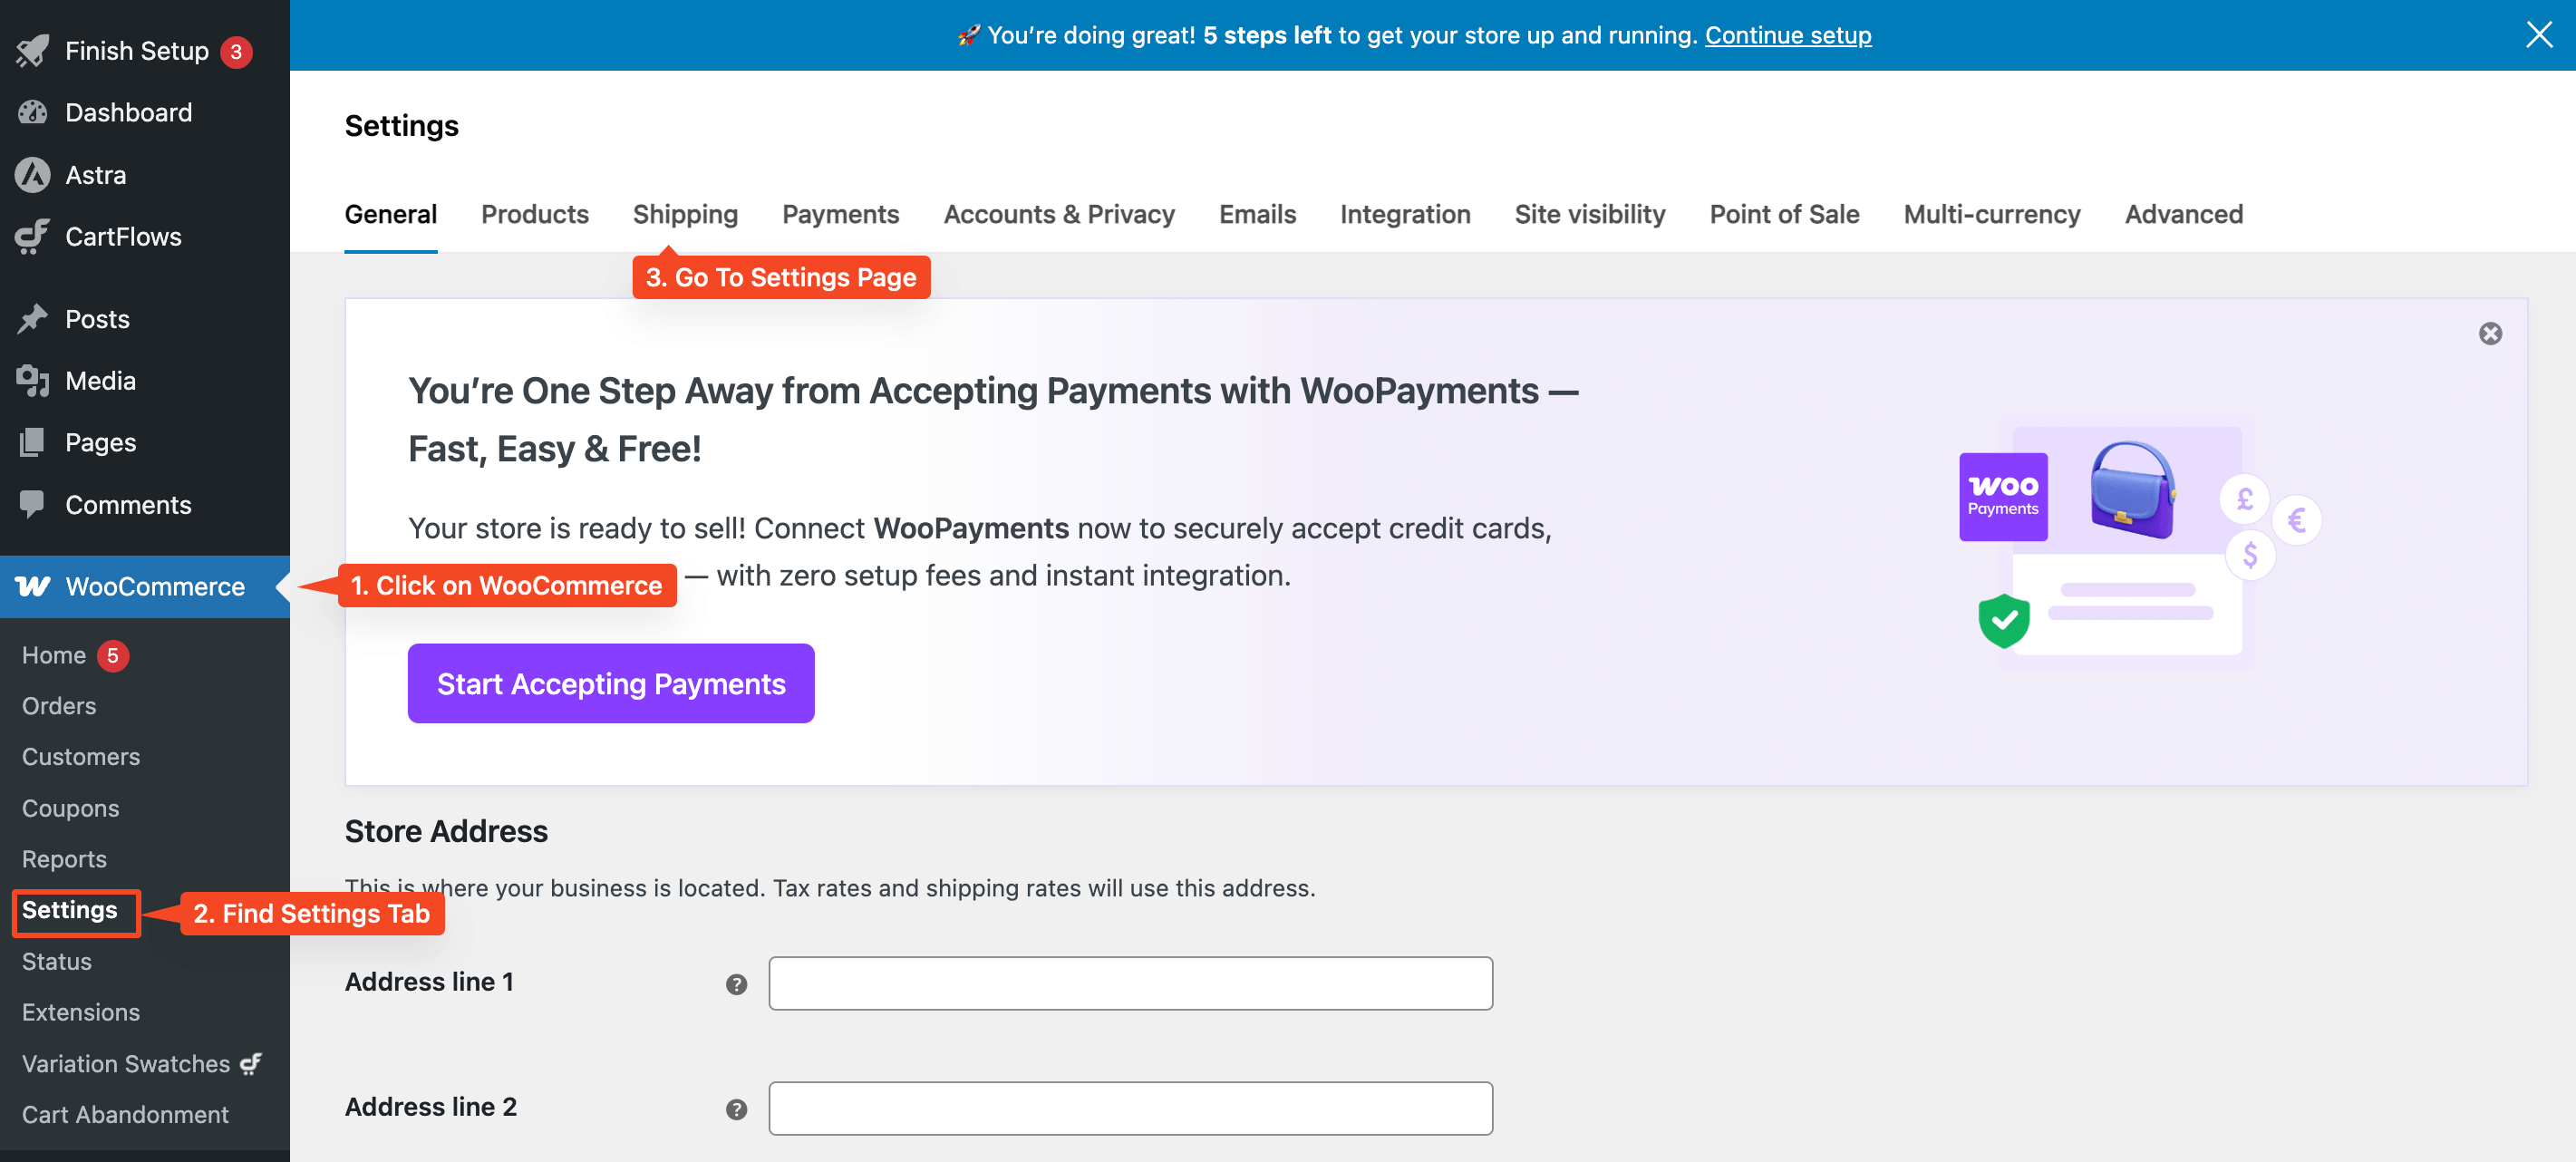
Step 1: Configuring WooCommerce Shipping Zones
Before we begin, make sure you have a “Free Shipping” method configured within your WooCommerce shipping zones. The bar needs an existing shipping rule to work with!
To do this, first navigate to your WordPress Dashboard, and go to WooCommerce Settings Page. Find the Shipping Settings from the top bar.
In the Shipping Settings, you’ll now see a list of shipping zones you’ve created. If you haven’t set up any zones yet, click Add Shipping Zone to create one.
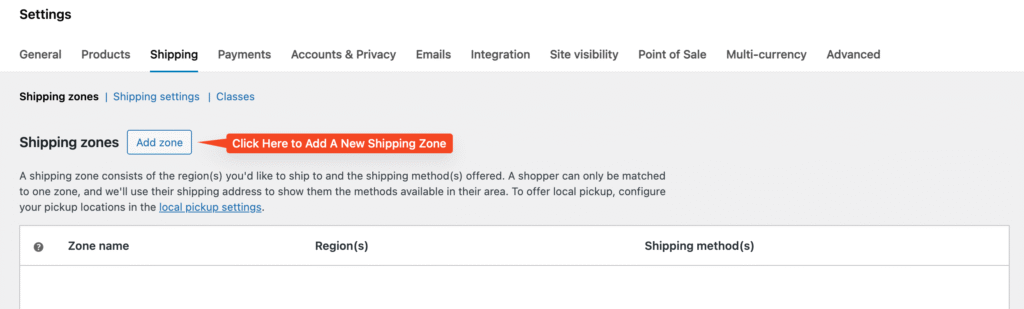
Now, in the Add Shipping Zones settings, you can give your Shipping Zone a name and select the regions (country/city/region) that you want the shipping rules to trigger in.
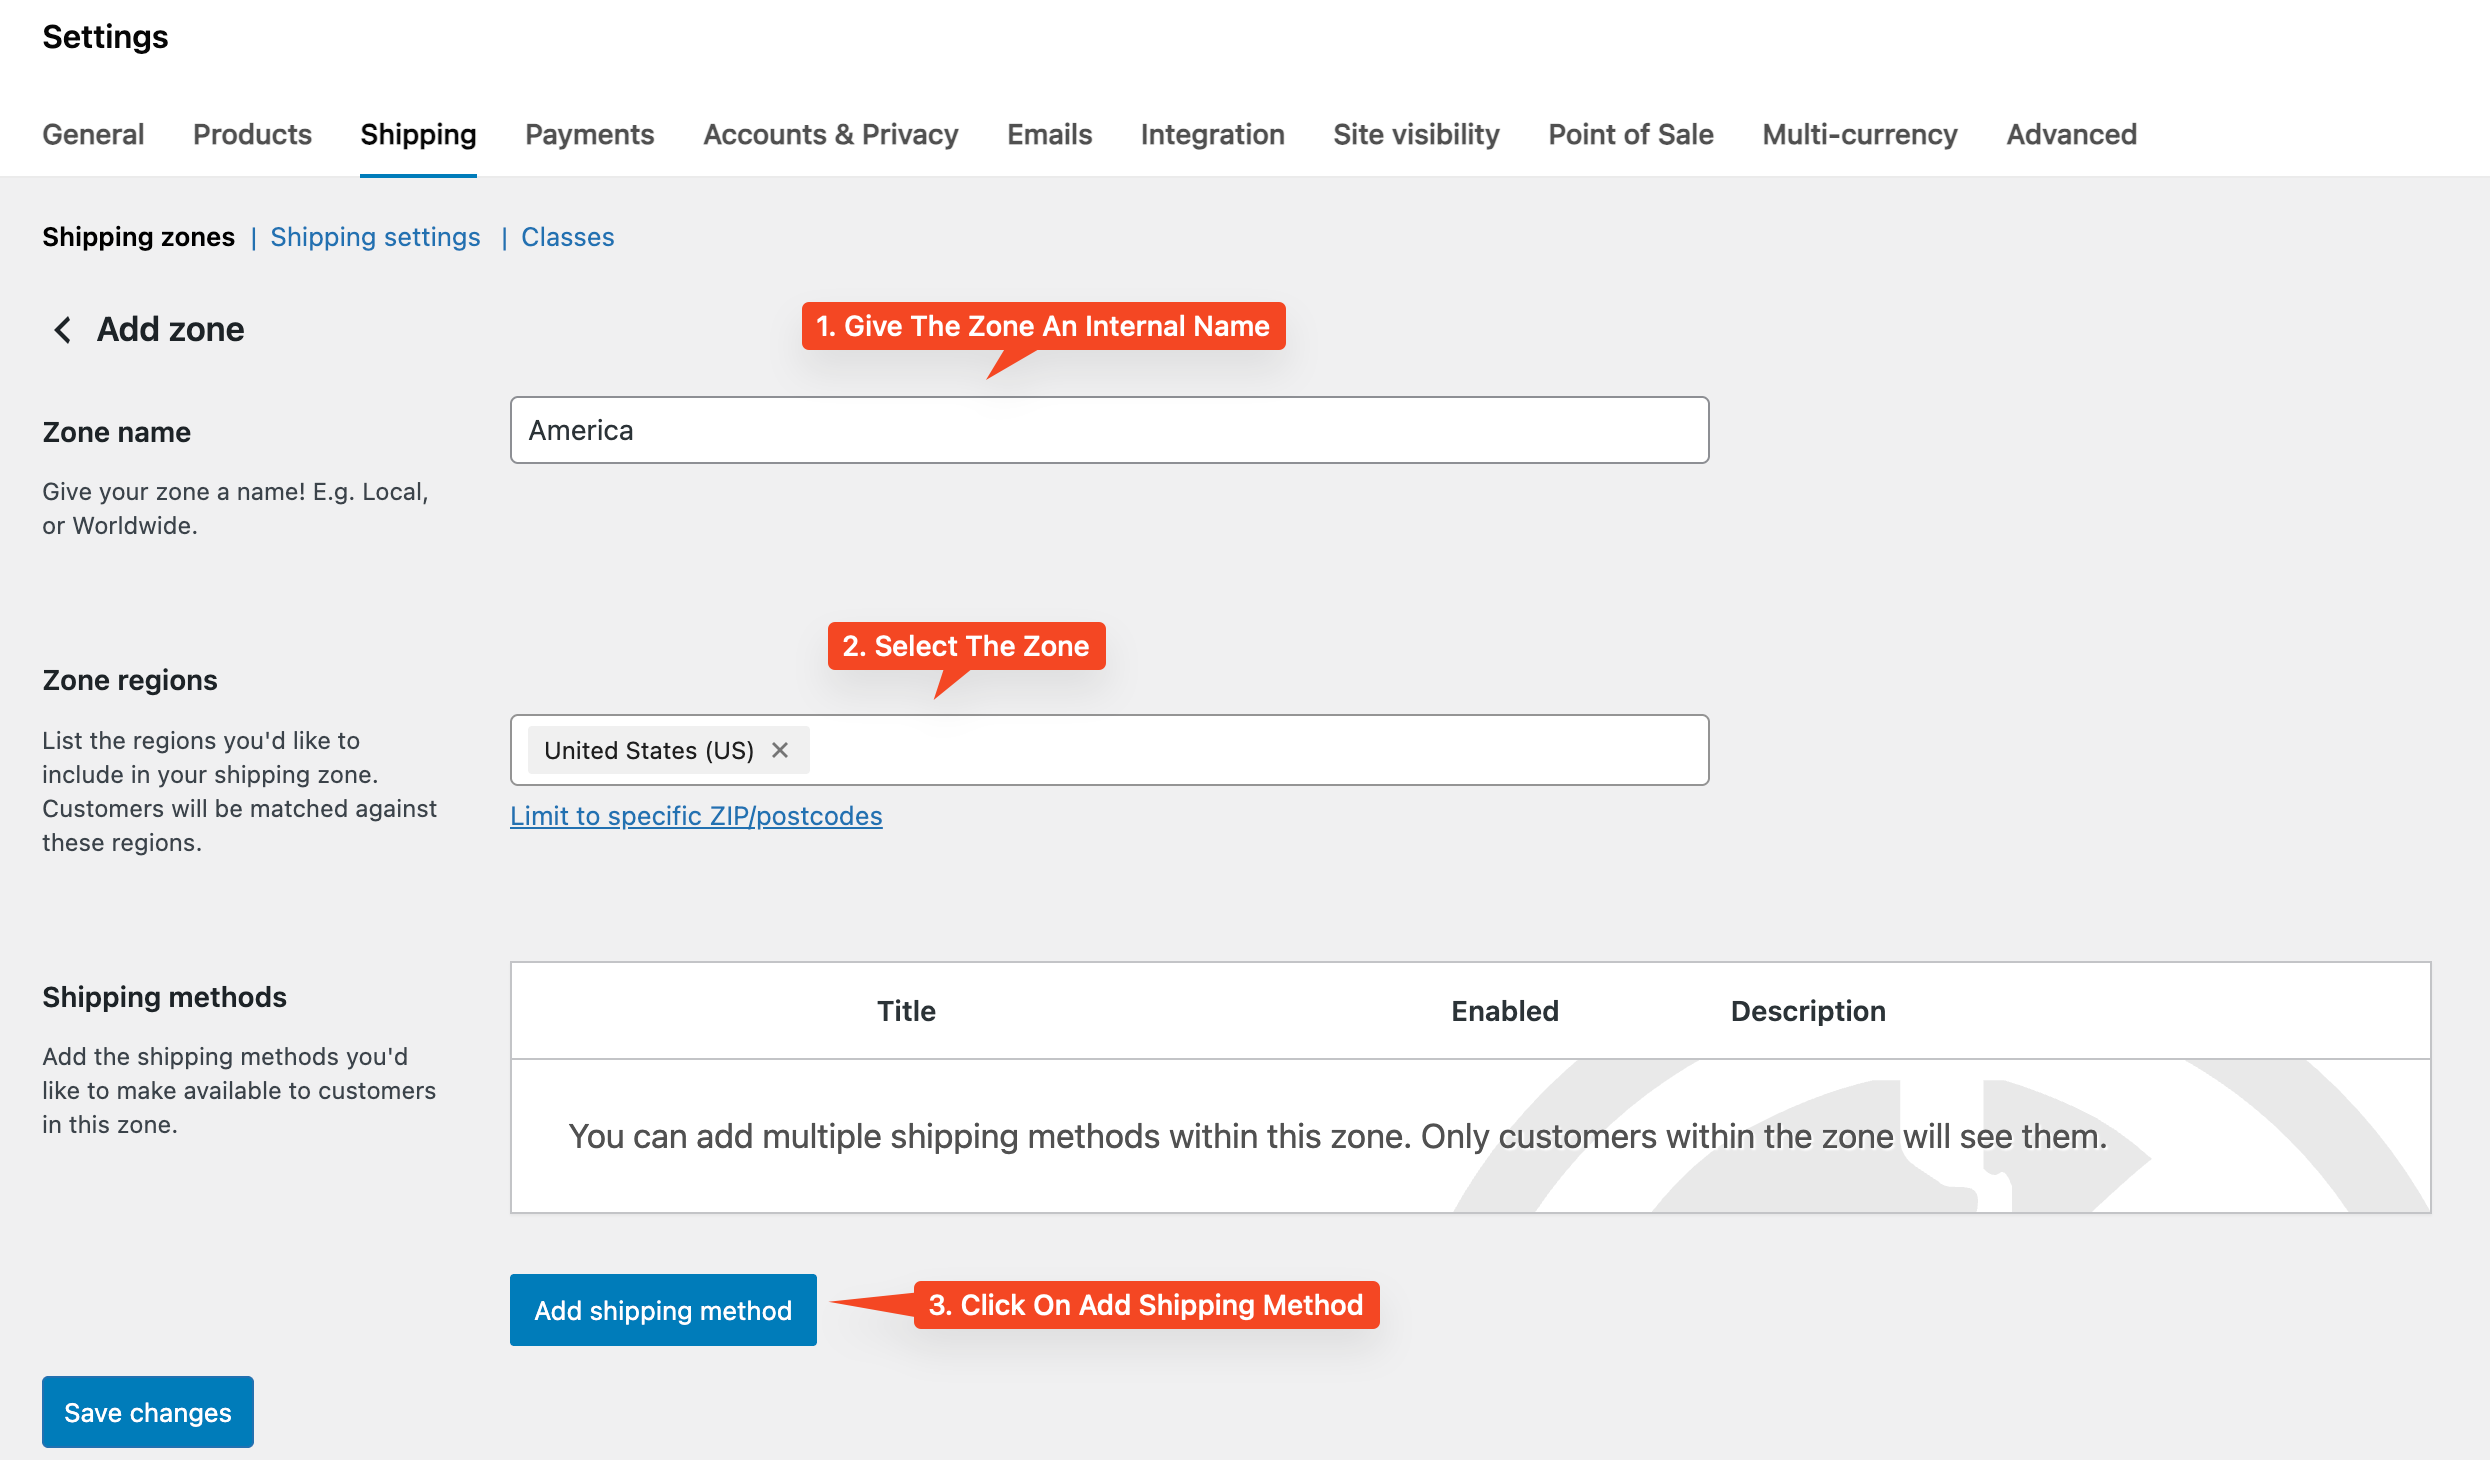
Now, you can add a shipping method. For our use case, we will be selecting FREE Shipping, and enabling Free Shipping on a minimum order amount of $50.
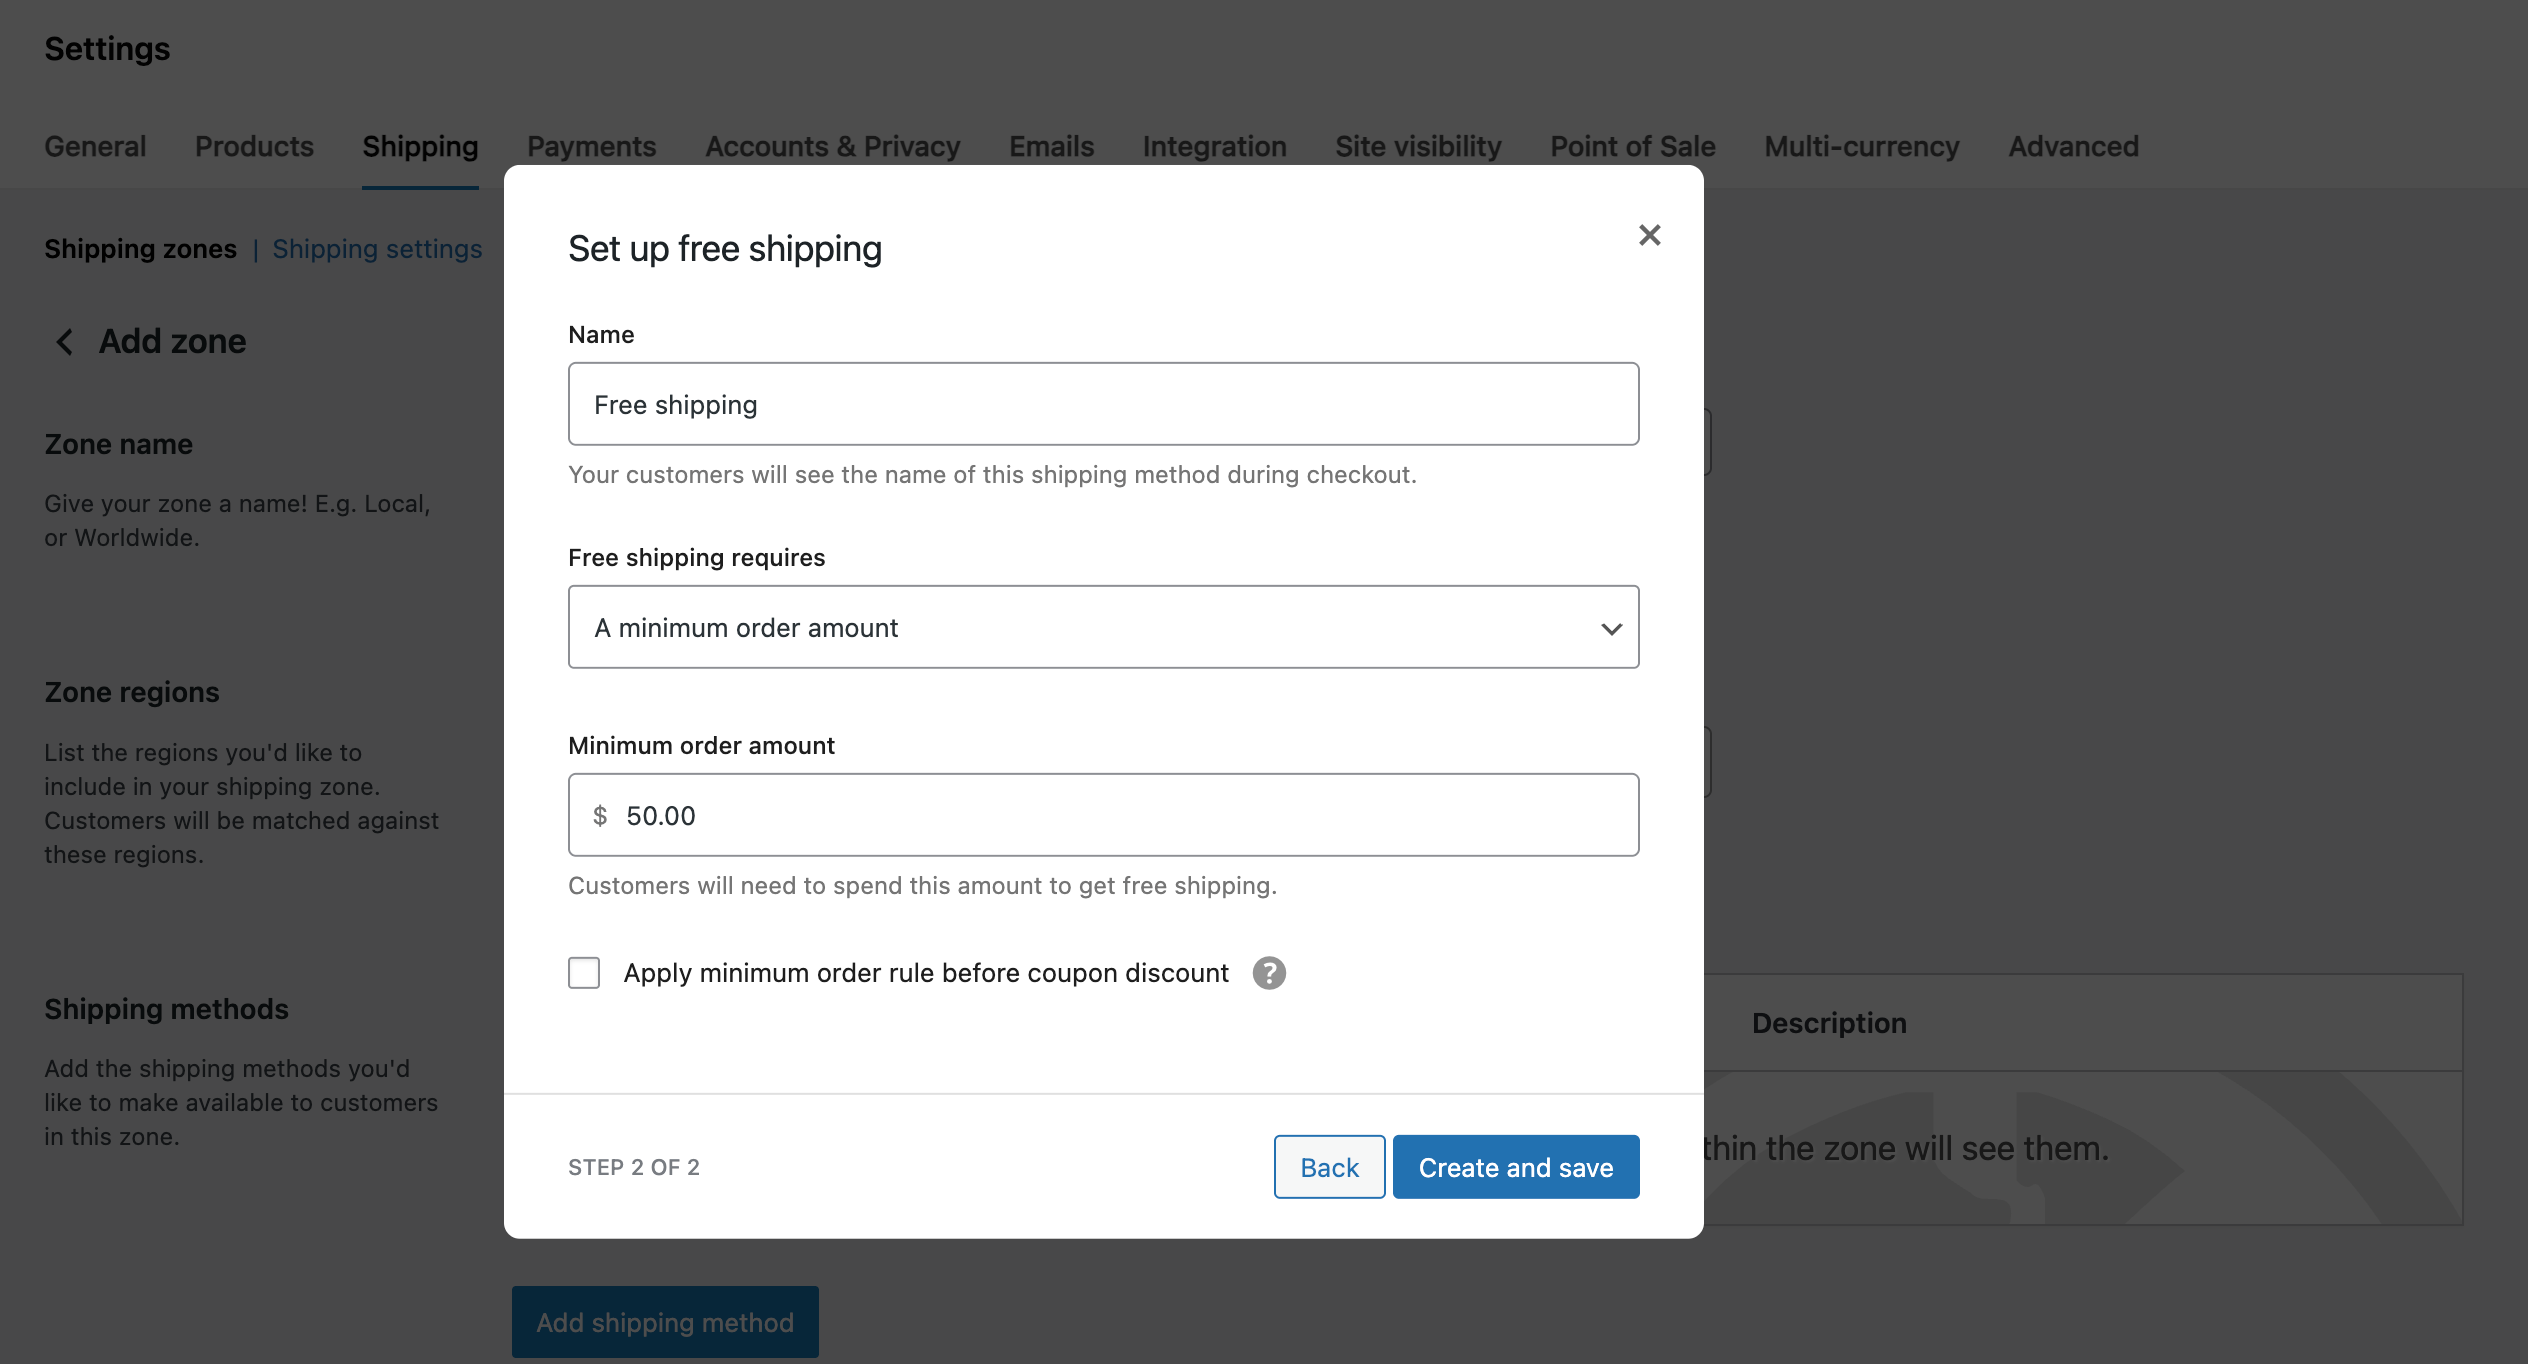
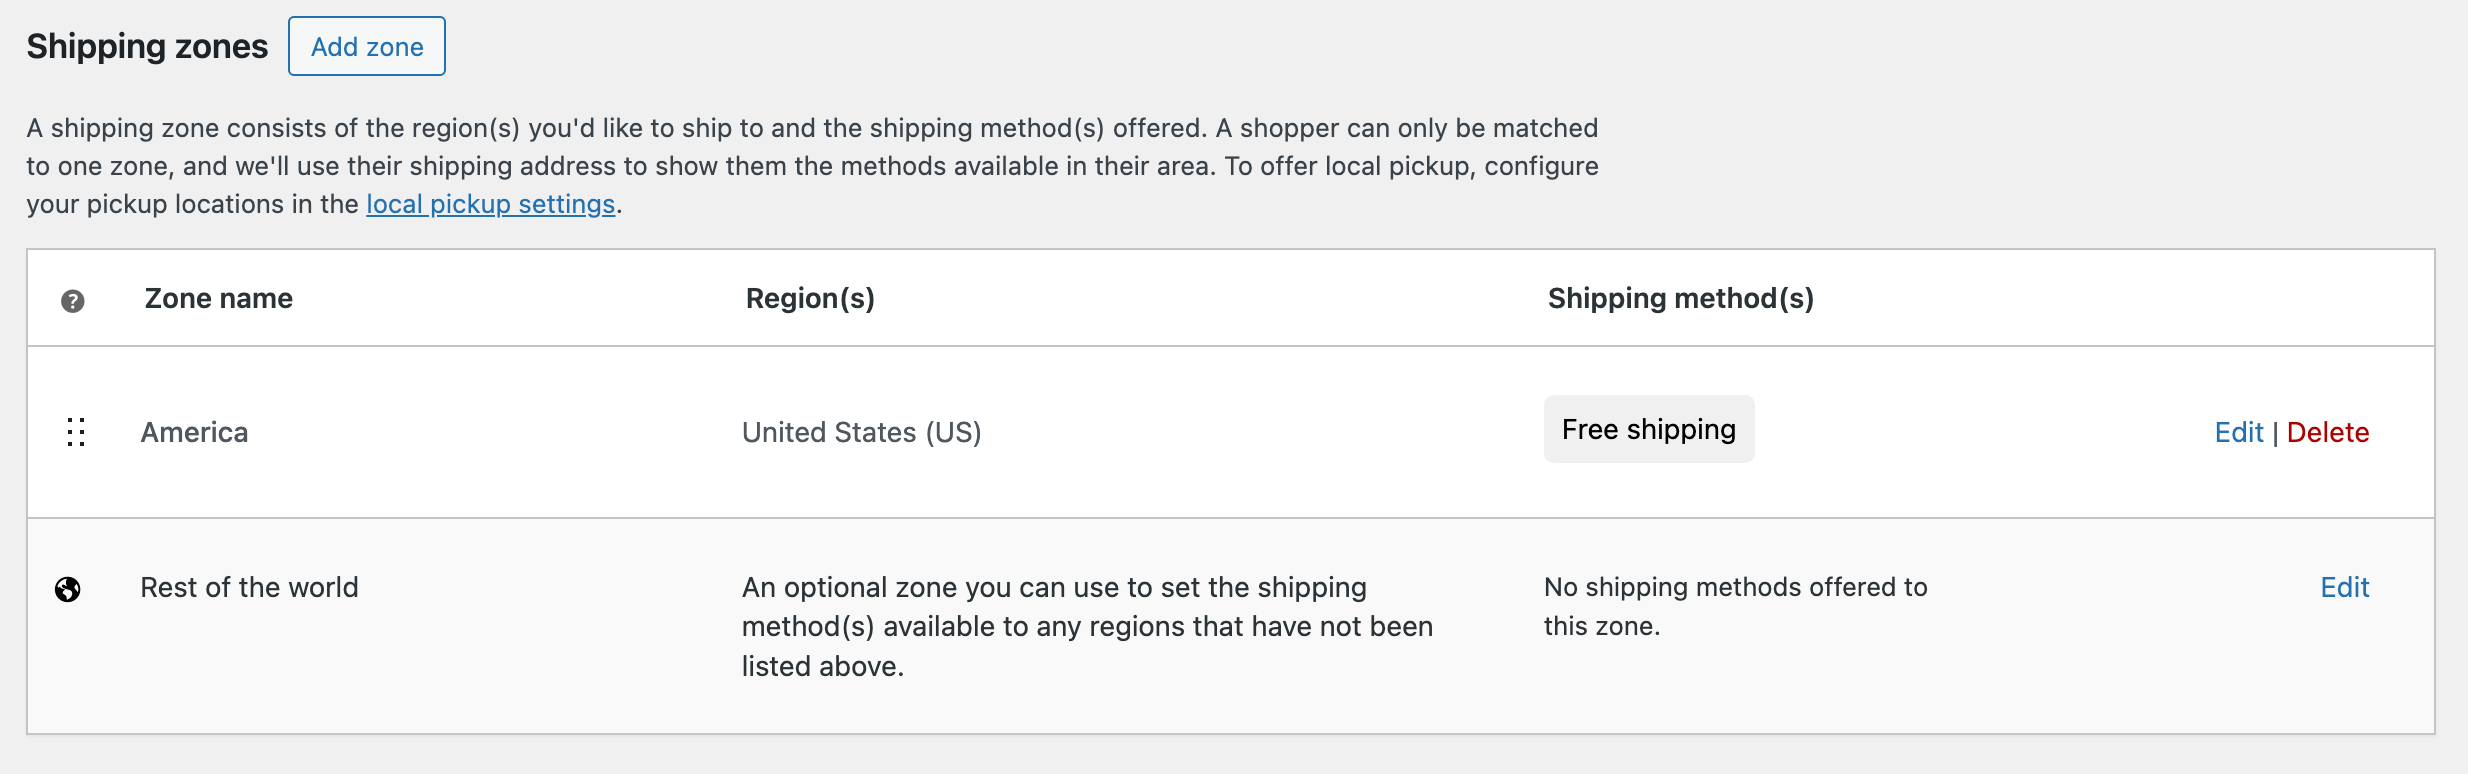
Now, once you are done, click on Create and save. We have successfully created the FREE Shipping logic in WooCommerce.
Step 2: Installing Free Shipping Bar for WooCommerce Plugin – StoreGrowth
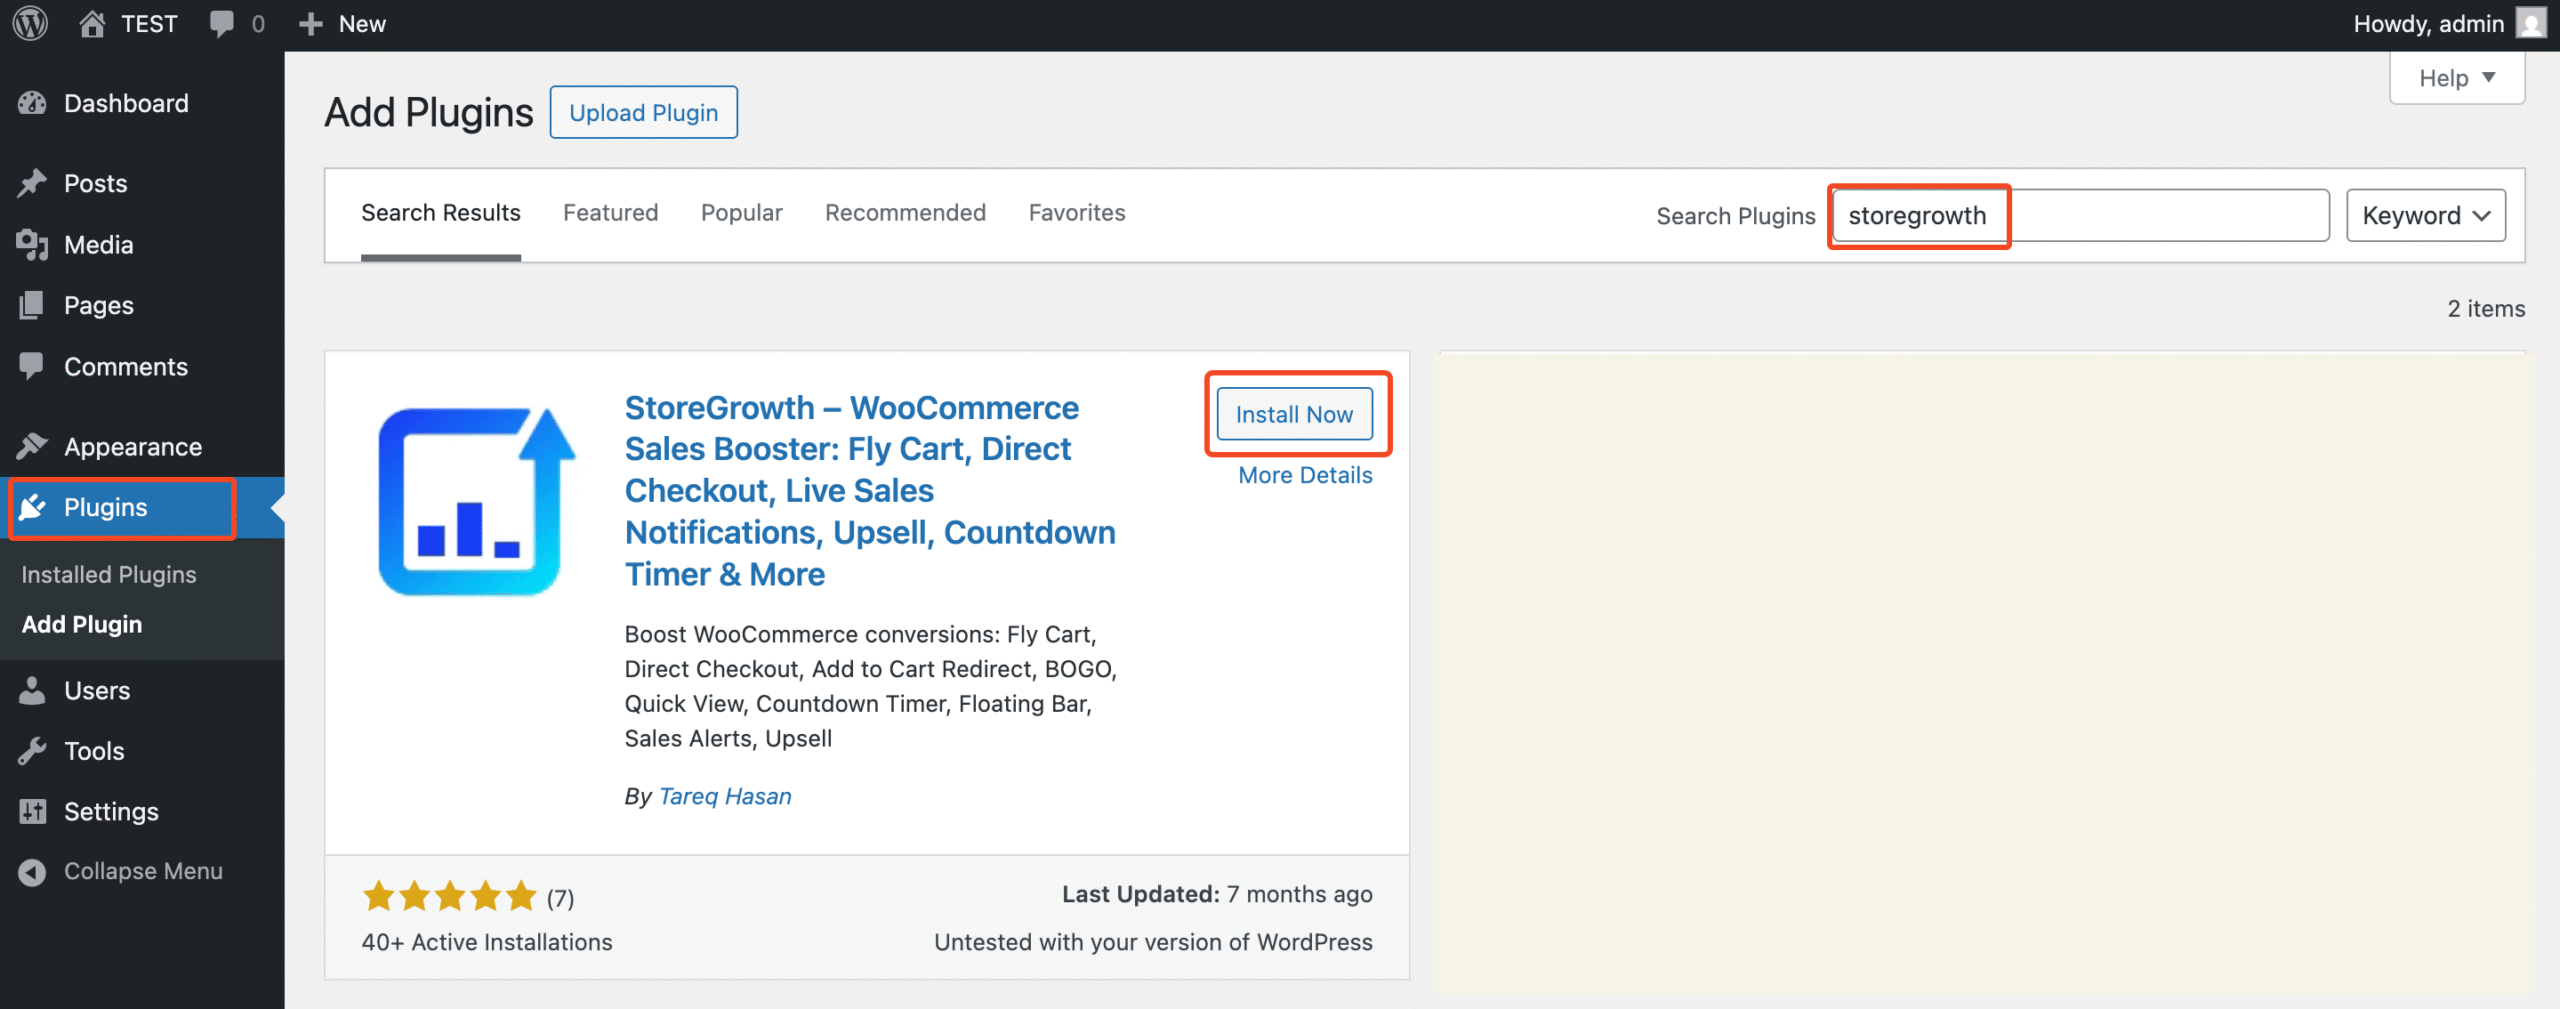
After setting your Free Shipping Rules and configuring the zones, you can install the StoreGrowth plugin from the WordPress repository. Search for the plugin, and click on Install.
Once you’ve installed and activated StoreGrowth, navigate to StoreGrowth > Modules. Here you can view all the features available to you.
This is where you’ll build the engine of your free shipping bar.
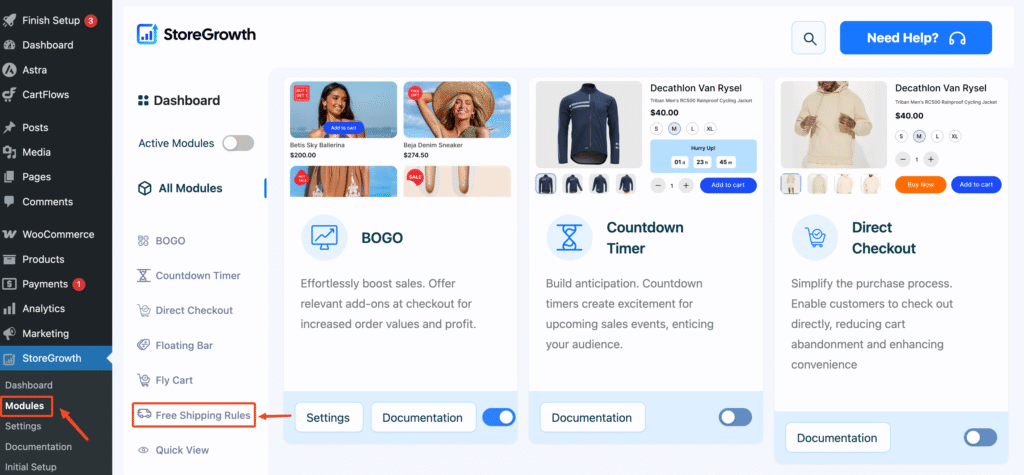
Next, click on the Free Shipping Rules from the left sidebar. It will prompt you to enable the module. Simply click on YES.
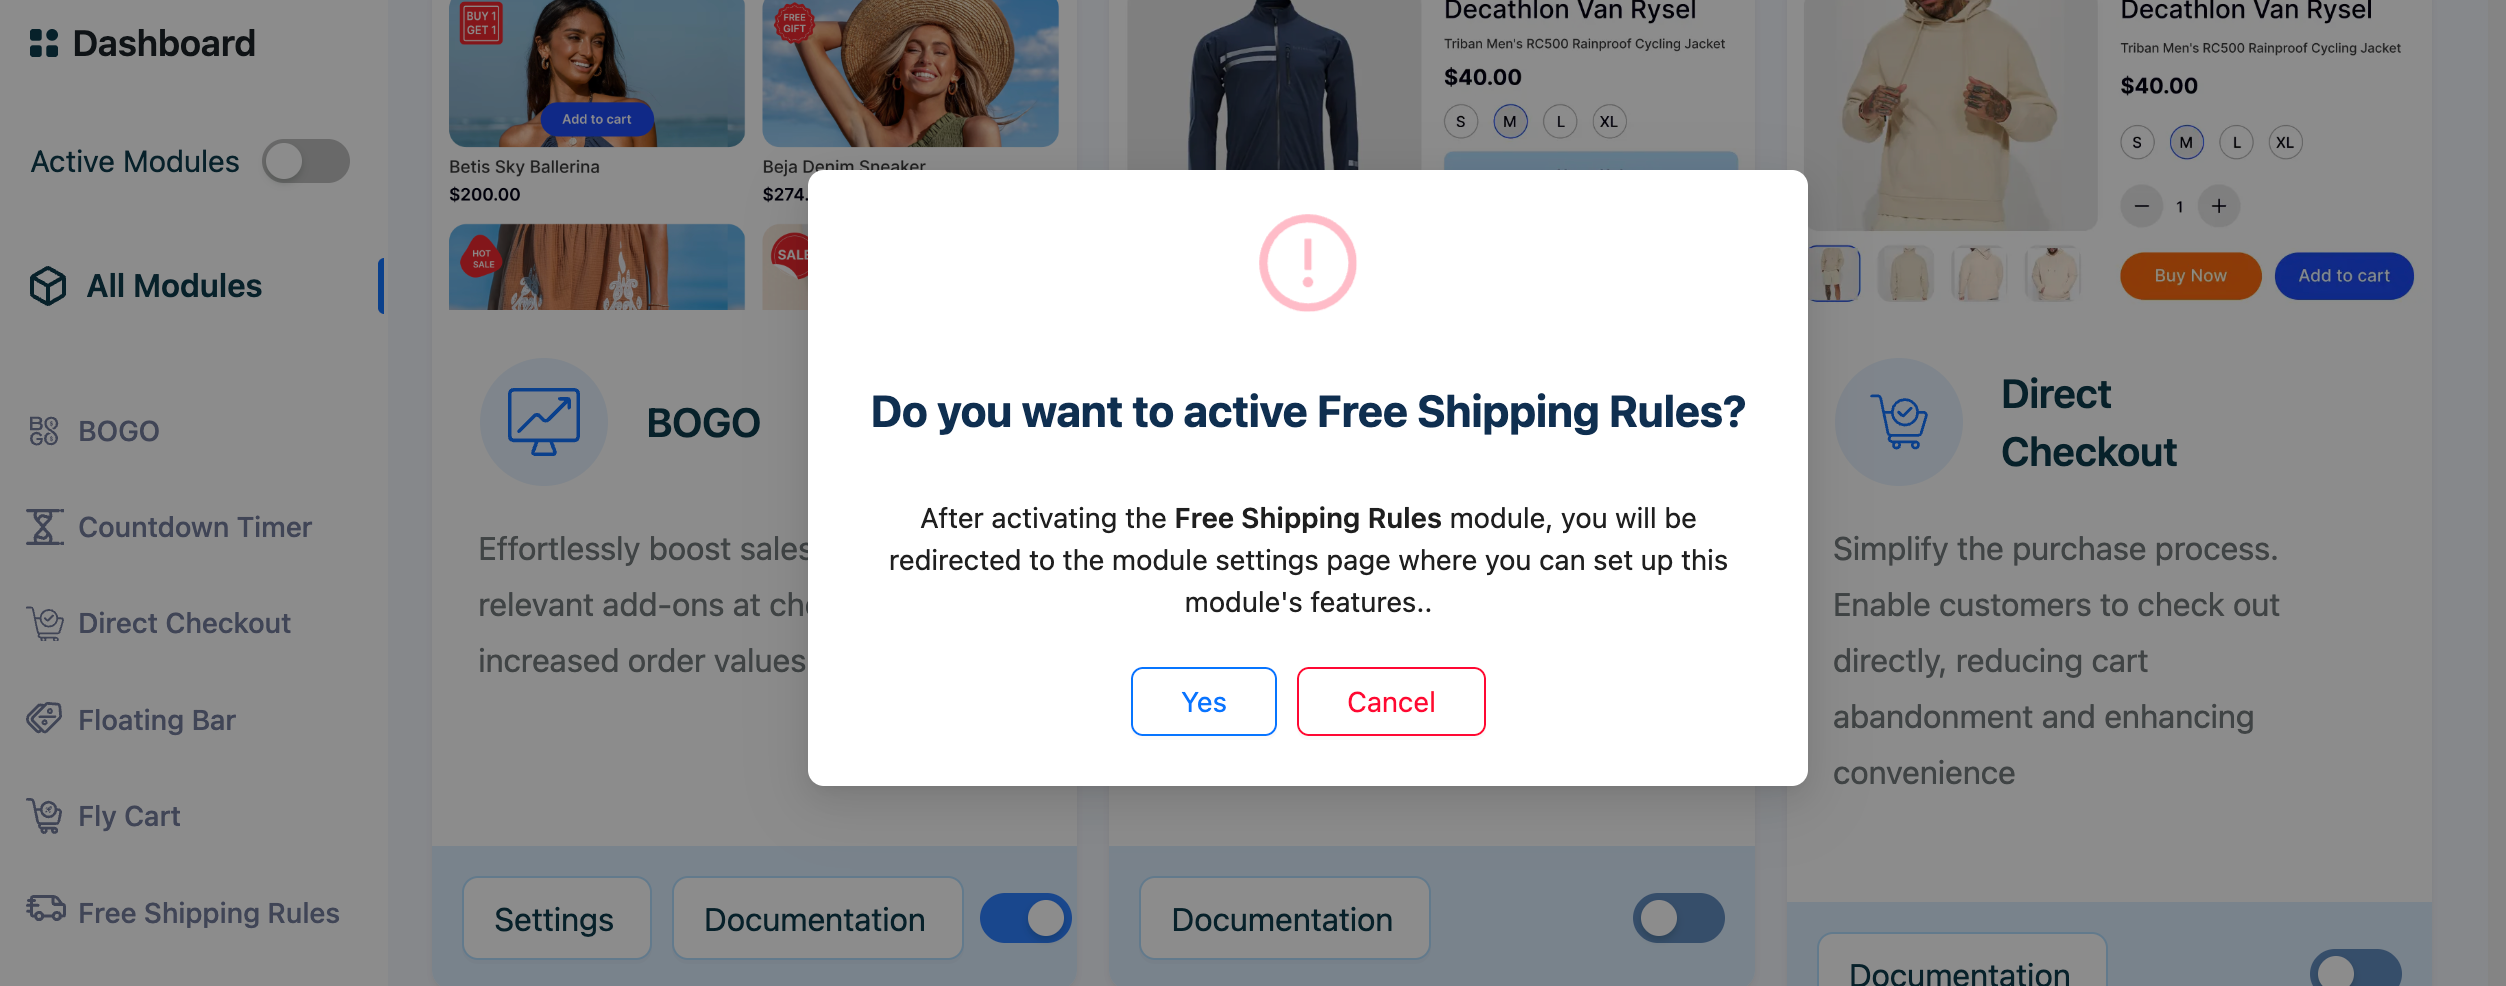
Now, you are ready to design your custom FREE Shipping Bar in your store!
Step 3: Choose Your Bar’s Behavior and Offer Type
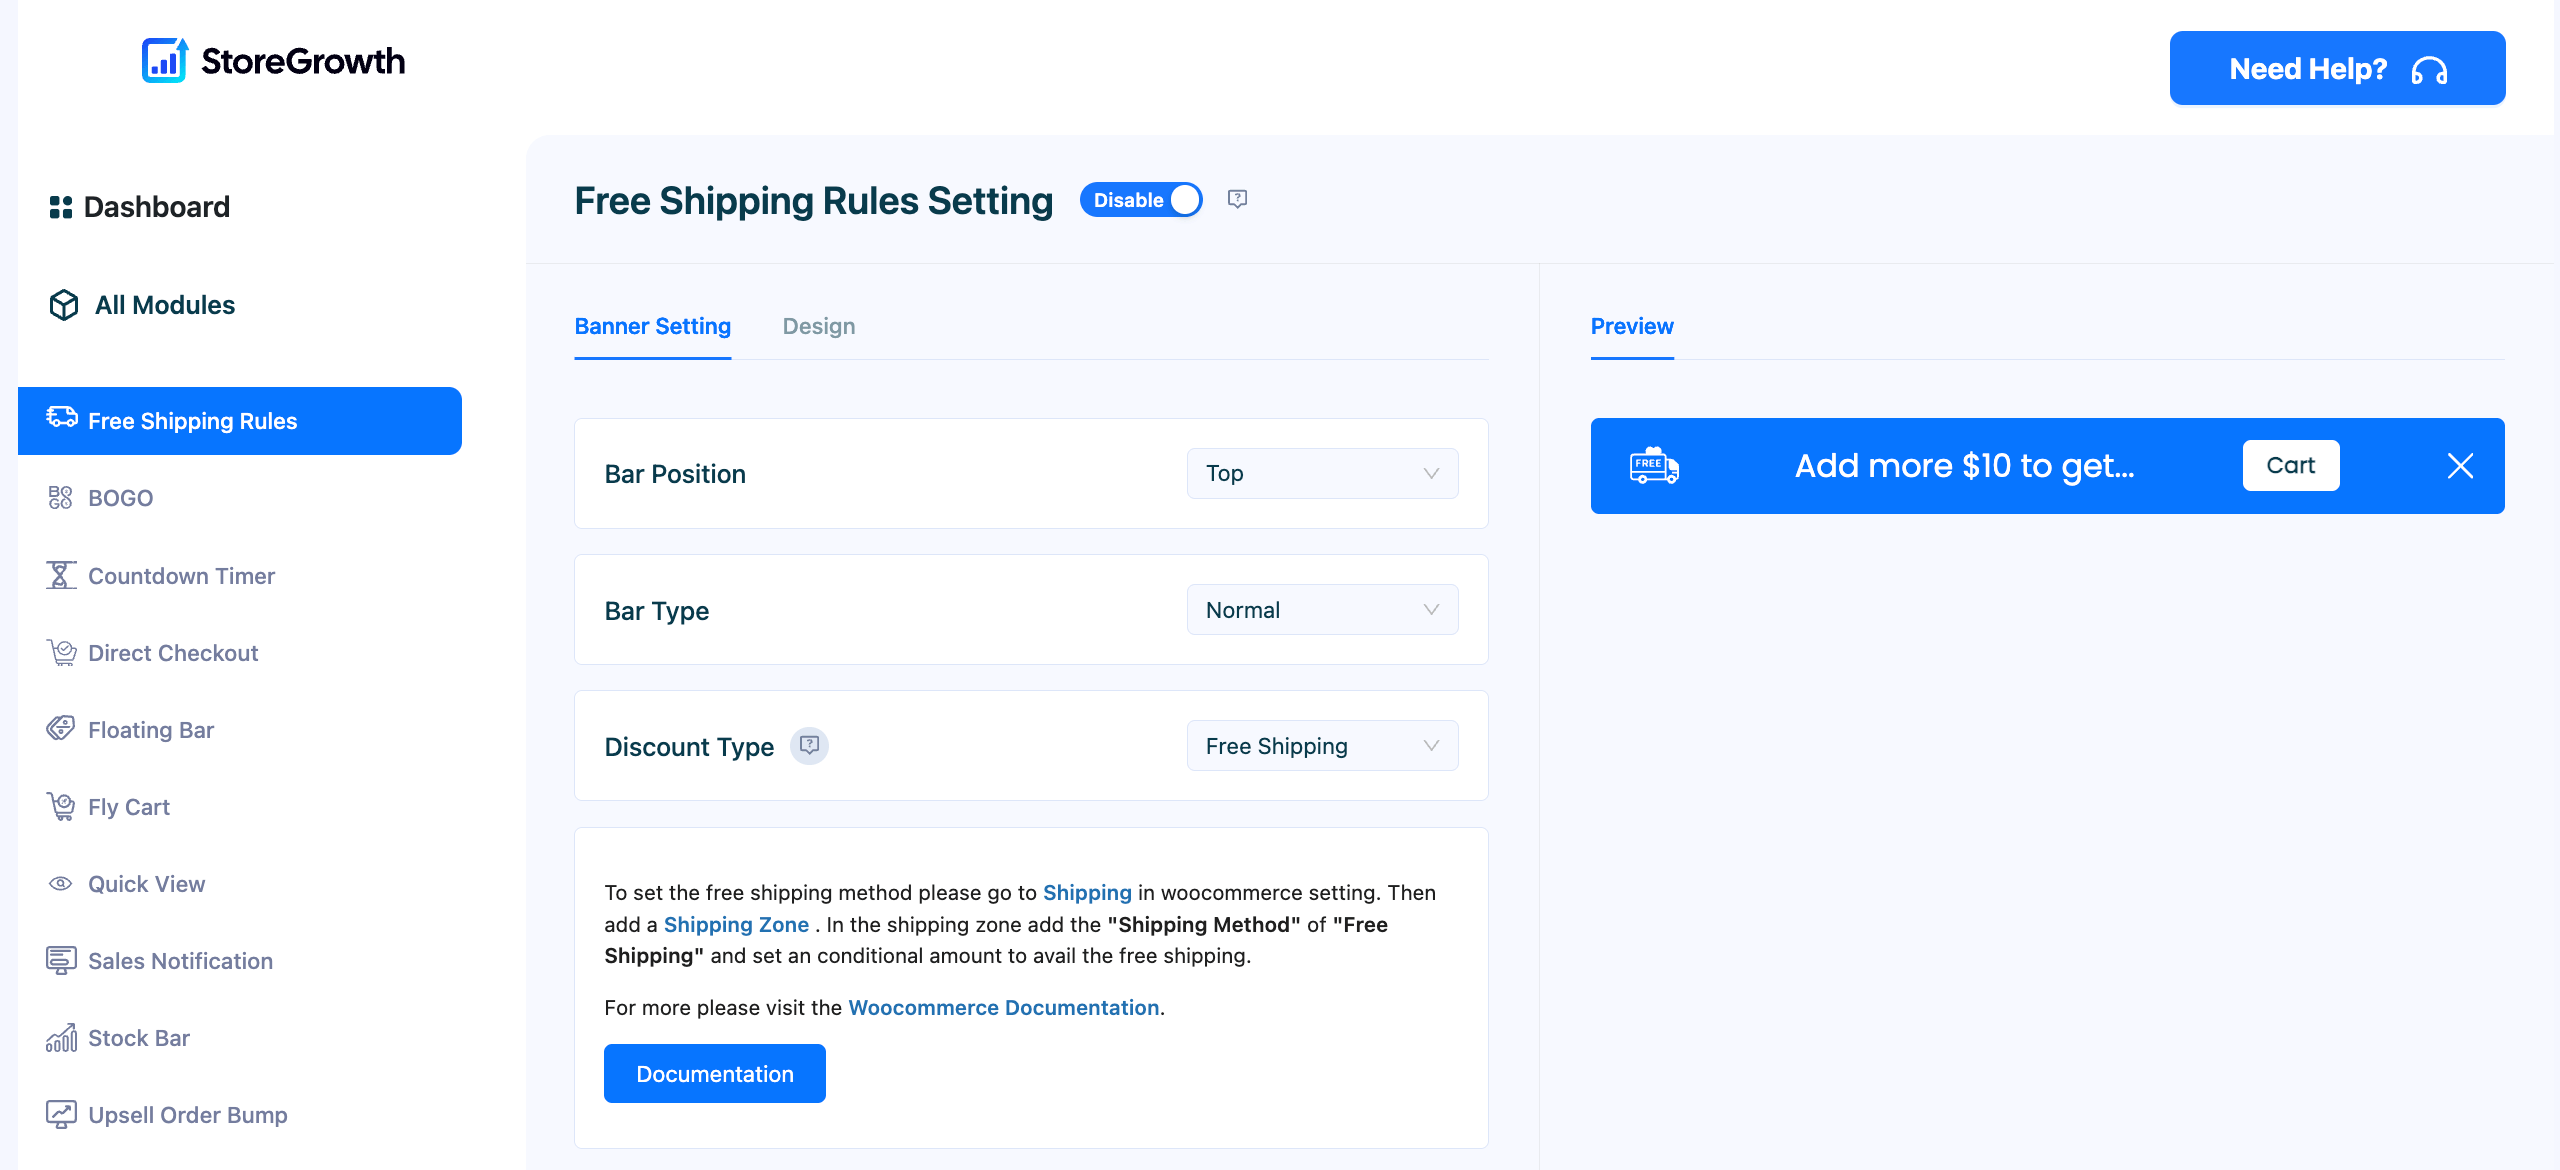
First, let’s define how the bar behaves and what kind of offer you want to make.
- Bar Position: Choose where you want to show the Free Shipping Bar. You can select either a top position or bottom of the screen.
- Bar Type: Choose between Normal (a standard bar at the top of the page) or Sticky (which stays visible as the user scrolls).
- Discount Type: This is a key strategic choice.
- Free Shipping: The classic choice. The bar will track progress toward a free shipping goal.
- Discount Amount: A powerful alternative. You can offer things like “
$10 off on orders over $100.” This is perfect for stores with complex or fixed shipping costs.
Step 4: Set Your Goal and Dynamic Messages
Next, define the goal for your customers and craft the messages that will guide them.
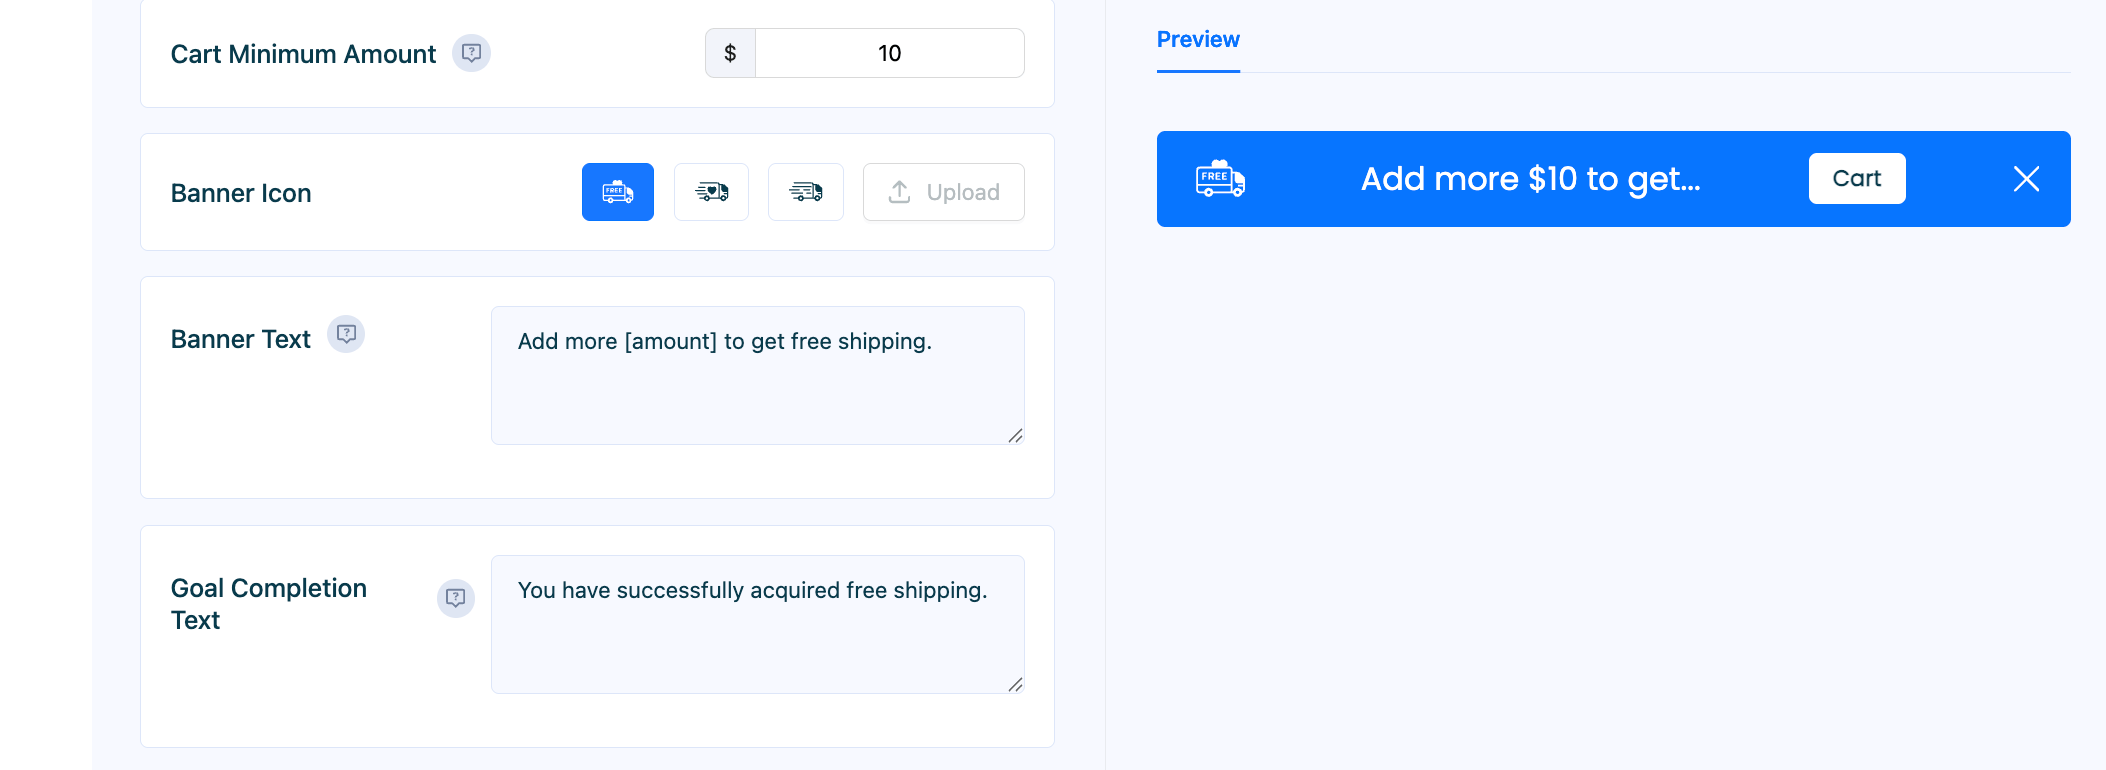
- Set the Cart Minimum Amount: In the Cart Minimum Amount field, enter the value customers need to reach. For example, 50.
- Choose an Icon: Select a Banner Icon that fits your message, like a truck or a gift. Pro users can upload their own custom branded icons for a truly unique look.
- Write the Dynamic Text: This is where the magic happens. In the Banner Text field, use the
[amount]shortcode. This variable will dynamically update to show customers exactly how much more they need to spend.- Example: “
Add just [amount] more to get free shipping!“
- Example: “
- Craft the Success Message: In the Goal Completion Text field, write the celebratory message customers will see when they hit the target.
- Example: “
Congratulations! You've unlocked free shipping!“
- Example: “
Step 5: Add a Clear Call-to-Action (CTA)
Guide your customers to the next step with a clear and clickable button.
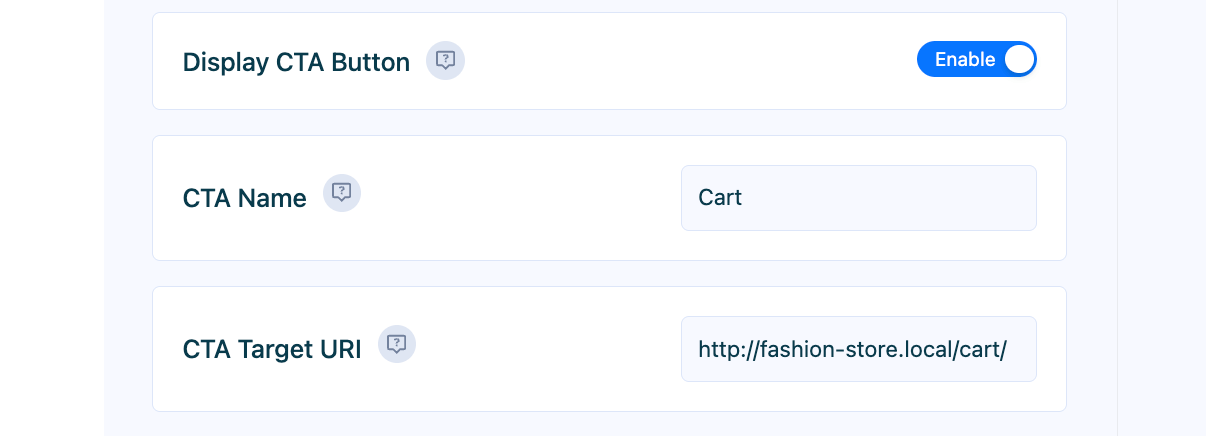
- Enable the CTA: Toggle the Display CTA Button to “Enable.”
- Configure the CTA: Give your button a CTA Name (e.g., “View Cart”) and paste the link to your cart or checkout page in the CTA Target URI field. This removes friction and makes it easy for them to complete their purchase.
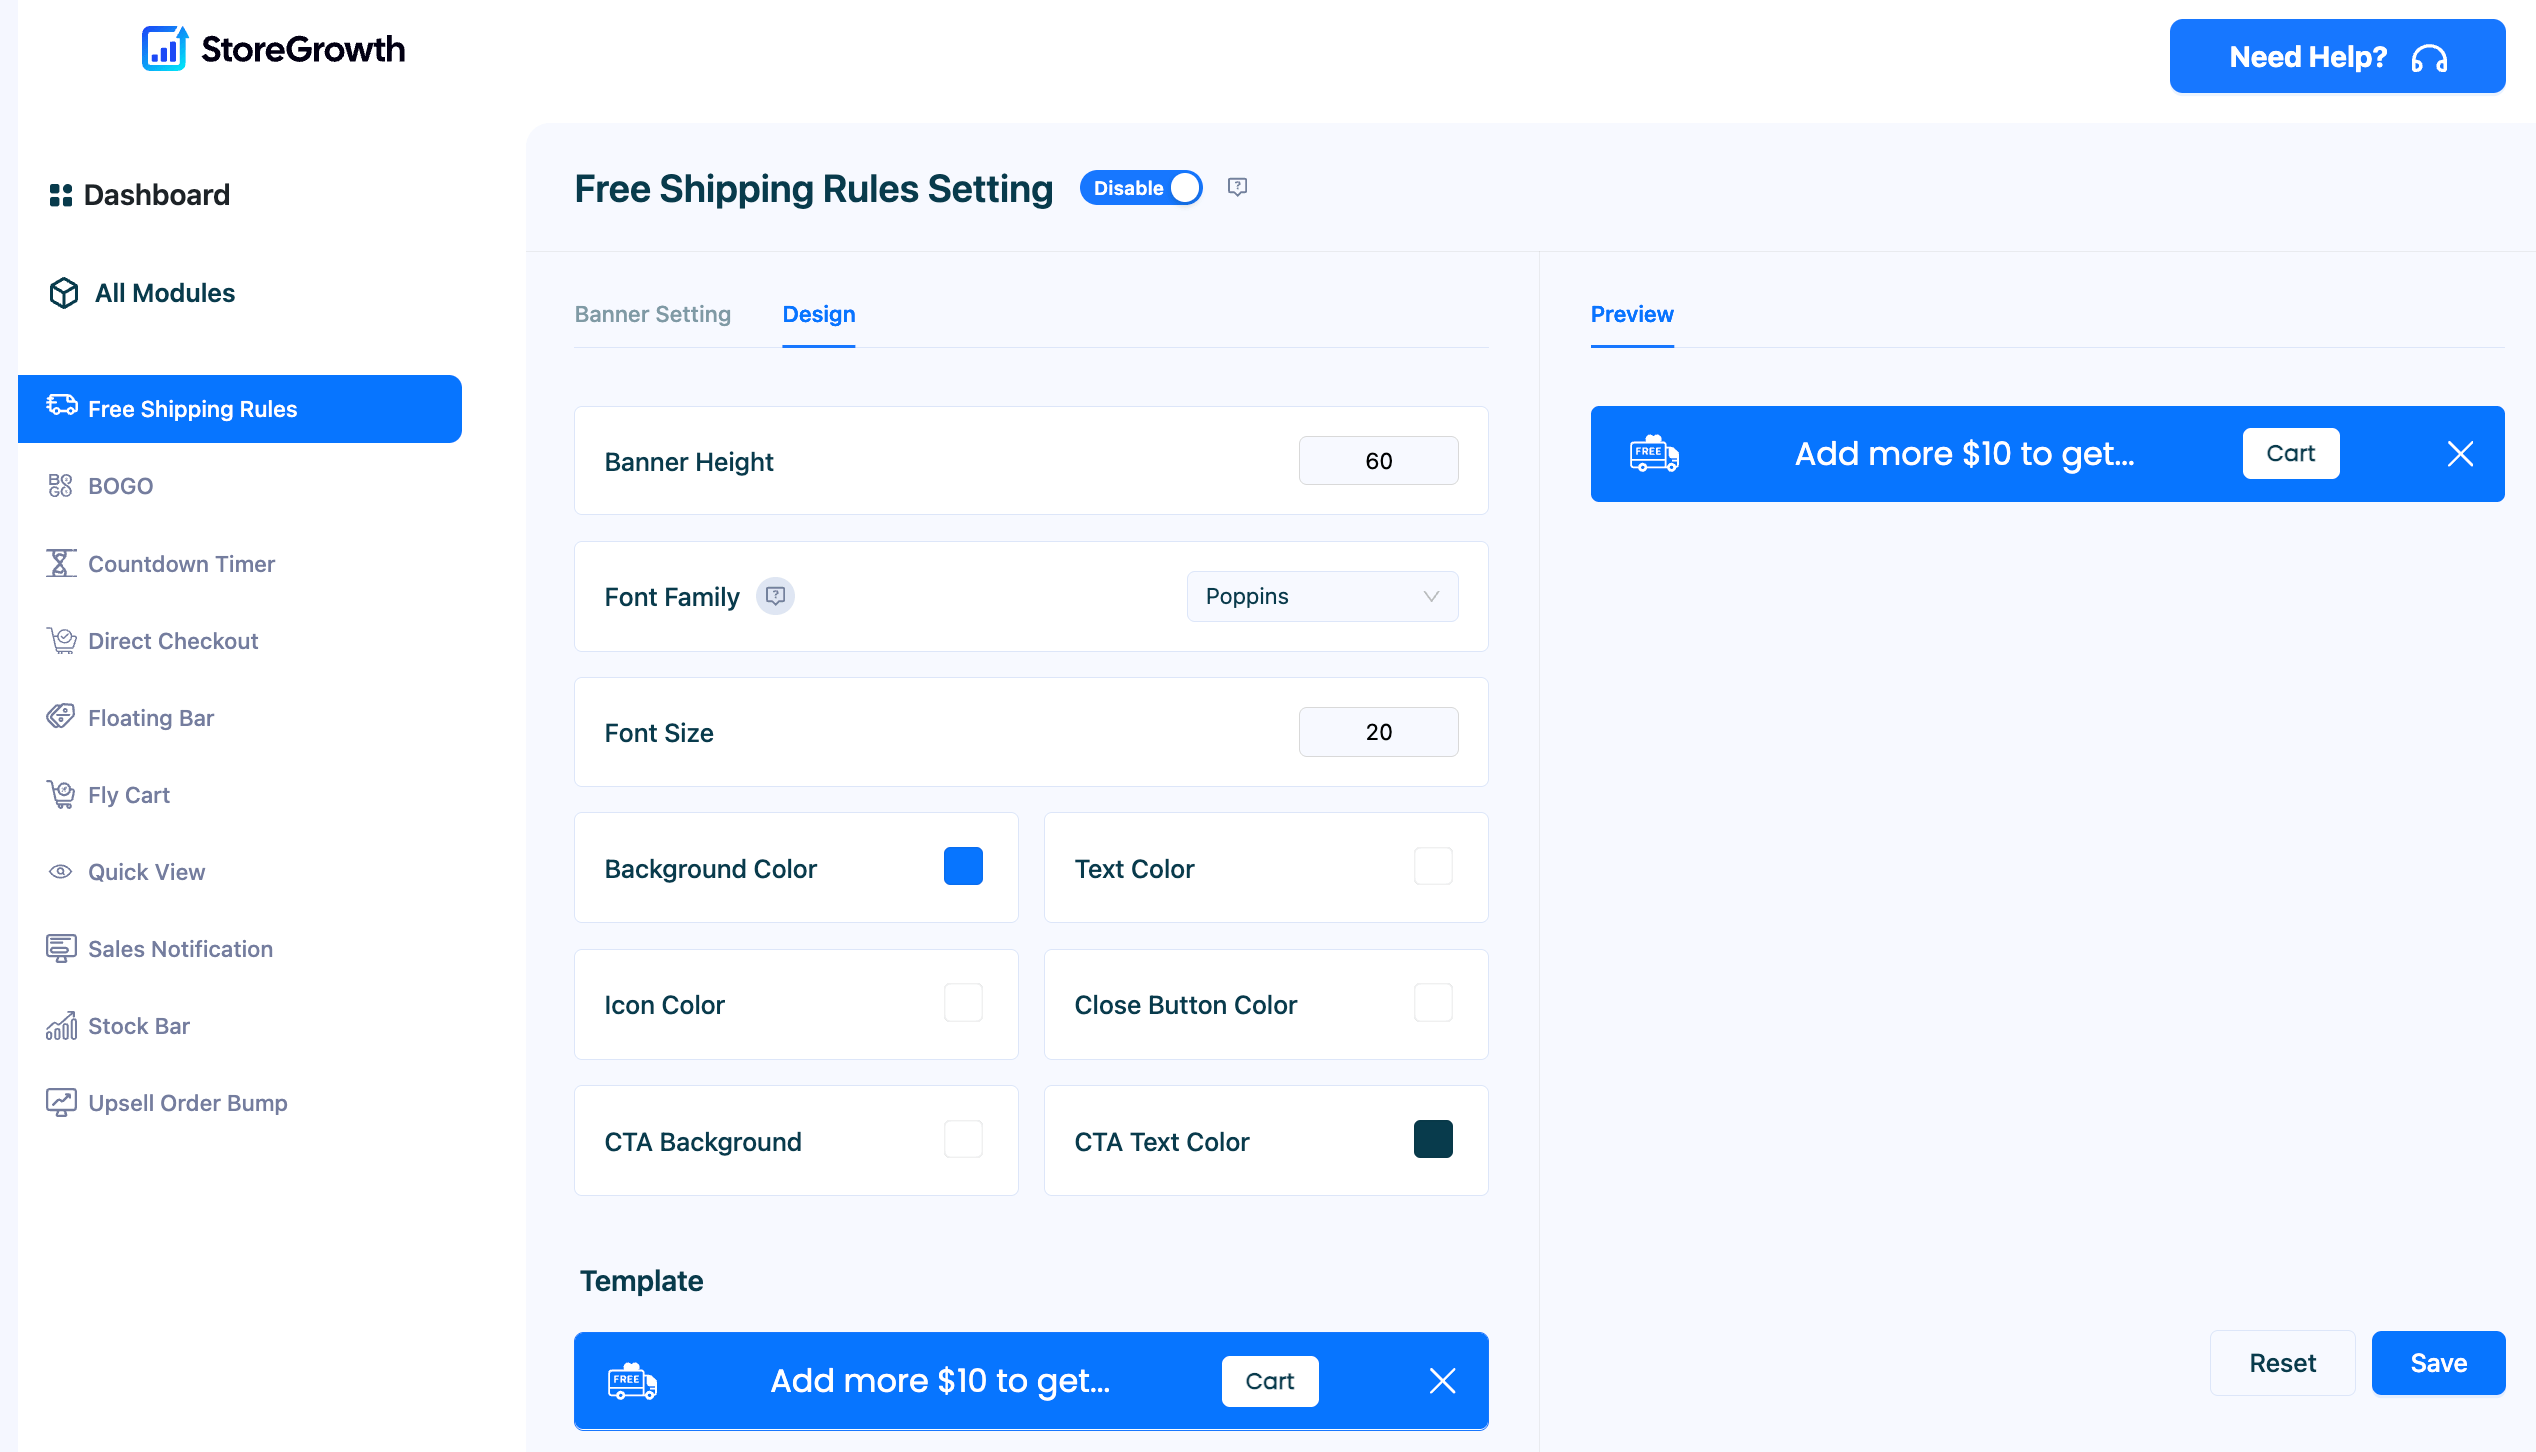
Step 6: Customize the Design to Match Your Brand
Now, click the “Design” tab. A shipping bar that looks native to your site builds trust and feels more professional.
Here, you can easily:
- Select your brand’s Background Color and Text Color.
- Choose a Font Family that matches your site’s typography.
- Customize the colors for the CTA Background and CTA Text Color to make your call-to-action pop.
- Pro users can also define the exact Banner Height and Font Size for pixel-perfect branding.
Step 7: Activate and Go Live!
Finally, navigate back to the main settings and ensure the master “Enable” toggle at the top is on. Click “Save”.
That’s it. You now have a powerful, dynamic, and psychologically persuasive sales tool live on your WooCommerce store.
StoreGrowth Pro: Advanced Strategies to Maximize Revenue
You’ve now built a powerful sales tool with the free version of StoreGrowth. But for serious entrepreneurs ready to move from general marketing to precision-targeted campaigns, the Pro version unlocks a new level of control and profitability. This is how you gain a competitive advantage.
Strategy 1: Precision Targeting & Smart Triggers (Pro)
A one-size-fits-all approach works, but a targeted one works better. With StoreGrowth Pro, you can control exactly who sees your bar and when.
- Page Targeting: Why show a shipping bar on your “About Us” page? It’s irrelevant there. Use Pro’s Page Targeting rules to display the bar only on your shop, product, and cart pages where it has the most impact.
- Device Targeting: The mobile shopping experience is different. With Pro, you can show a more compact bar for Mobile users versus Desktop users, optimizing the experience for every visitor.
- Smart Triggers: Don’t show the bar to every visitor immediately. Use the After Scroll trigger to reveal your offer only to customers who have shown engagement by scrolling down the page.
Strategy 2: Advanced Design & Branding (Pro)
Your brand is unique. Your marketing tools should be too. StoreGrowth Pro gives you granular design control to ensure the shipping bar is a seamless part of your store.
- Custom Icons: Upload your own branded logo or a custom icon to the shipping bar, moving beyond generic symbols.
- Pixel-Perfect Design: Control the exact Banner Height and Font Size in pixels to perfectly match your theme’s aesthetic.
- Bar Position: Test what converts best for your audience. With Pro, you can instantly switch the Bar Position from the default Top to the Bottom of the page.
Strategy 3: Flexible Offer Types (Pro)
Free shipping is powerful, but it’s not the only offer you can make.
- Discount Amount: With the Pro version’s Discount Type setting, you can offer a fixed discount instead. For example, “
Spend $100 and get $10 off your order!” This is a fantastic alternative for stores that sell heavy items or have fixed shipping costs.

Frequently Asked Questions (FAQ)
Q: Will StoreGrowth slow down my website?
Absolutely not. StoreGrowth is a lightweight, focused plugin built for performance. Unlike bloated, all-in-one marketing suites, it’s designed to do one thing perfectly without adding unnecessary code that can slow down your site.9
Q: Is StoreGrowth compatible with my theme?
Yes. StoreGrowth is built to modern WordPress standards and is tested to work seamlessly with all major WooCommerce themes, including Store Front, Avada, Flatsome, and Divi.
Q: What’s the main difference between the Free and Pro versions?
The free version gives you the core dynamic progress bar—a powerful tool on its own. The Pro version unlocks advanced targeting (by page, device), smart triggers (like after scroll), and deeper design customization to give you maximum control and profitability.
Q: How do I choose the right free shipping amount?
A great rule of thumb is to calculate your current Average Order Value (AOV) and set the threshold about 15-20% higher. This encourages customers to add just one more item to their cart, making the goal feel achievable and worthwhile.

Final Thoughts: Stop Losing Sales, Start Guiding Customers
Cart abandonment isn’t just a statistic; it’s lost revenue and a sign that your customers are hitting a point of friction. The number one cause is a surprise they encounter right before they pay: shipping costs.
By implementing a dynamic free shipping bar for WooCommerce, you transform that point of friction into a moment of motivation. You stop surprising your customers and start guiding them toward a rewarding goal.
With StoreGrowth, you are leveraging a proven psychological principle to create a better shopping experience and a more profitable business. You are empowering your customers to spend more, and rewarding them for doing so.
Ready to turn your biggest sales obstacle into your most effective growth tool?
Download StoreGrowth for free and launch the proven tool that turns shipping costs into sales growth.
Leave a Reply
You must be logged in to post a comment.