

Dokan is the leading multivendor marketplace solution for WordPress, powering thousands of online marketplaces and giving vendors their own storefronts, dashboards, and tools to manage sales.
StoreGrowth has deep integration with Dokan. With this integration, marketplace admins can activate StoreGrowth modules across their entire site, while vendors gain access to powerful sales-boosting tools right inside their Dokan dashboard.
With StoreGrowth + Dokan, you’re not just running a marketplace – you’re running a high-conversion sales engine where both vendors and admins win.
Why It’s Important
A multivendor marketplace only grows when vendors sell more. The challenge is that most vendors lack built-in tools to run promotions or increase order value.
StoreGrowth brings in powerful and smart marketing modules, accessible directly from the Dokan dashboard. Admins don’t have to install complex, heavy, or incompatible plugins to launch smart marketing promotions, and vendors can access the modules right from their Vendor Dashboard.
The Outcome: More vendor sales, higher commissions for admins, and a more competitive marketplace overall.
How to Use StoreGrowth with Dokan
Once StoreGrowth is installed alongside Dokan, vendors gain direct access to powerful sales tools right from their dashboards.
They can create BOGO offers, schedule countdown discounts, and benefit from enhanced fly cart functionality, while admins retain full control over which features are available.
Let’s see how these tools work and how vendors can start using them effectively in your marketplace.
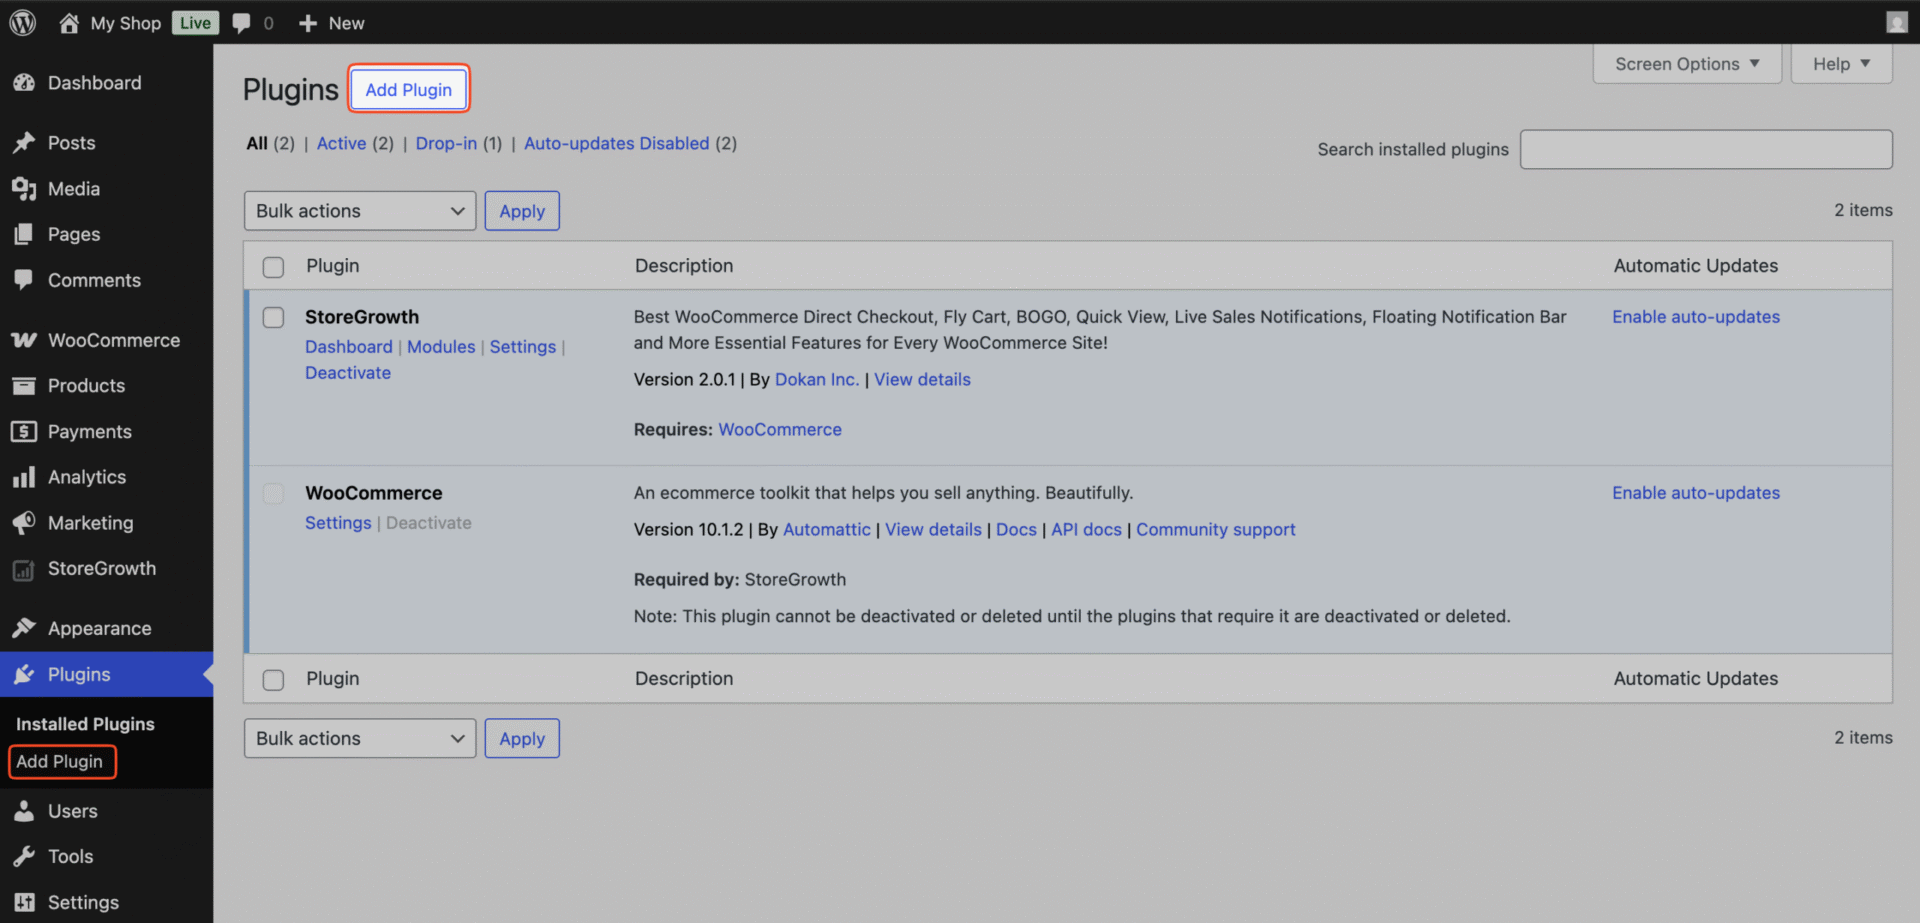
Installing Dokan
We are assuming that you already have StoreGrowth installed in your store. The next step would be installing Dokan.
Follow these steps to install Dokan:
- Navigate to Plugins » Add Plugin.
- In the search bar, type “Dokan”.
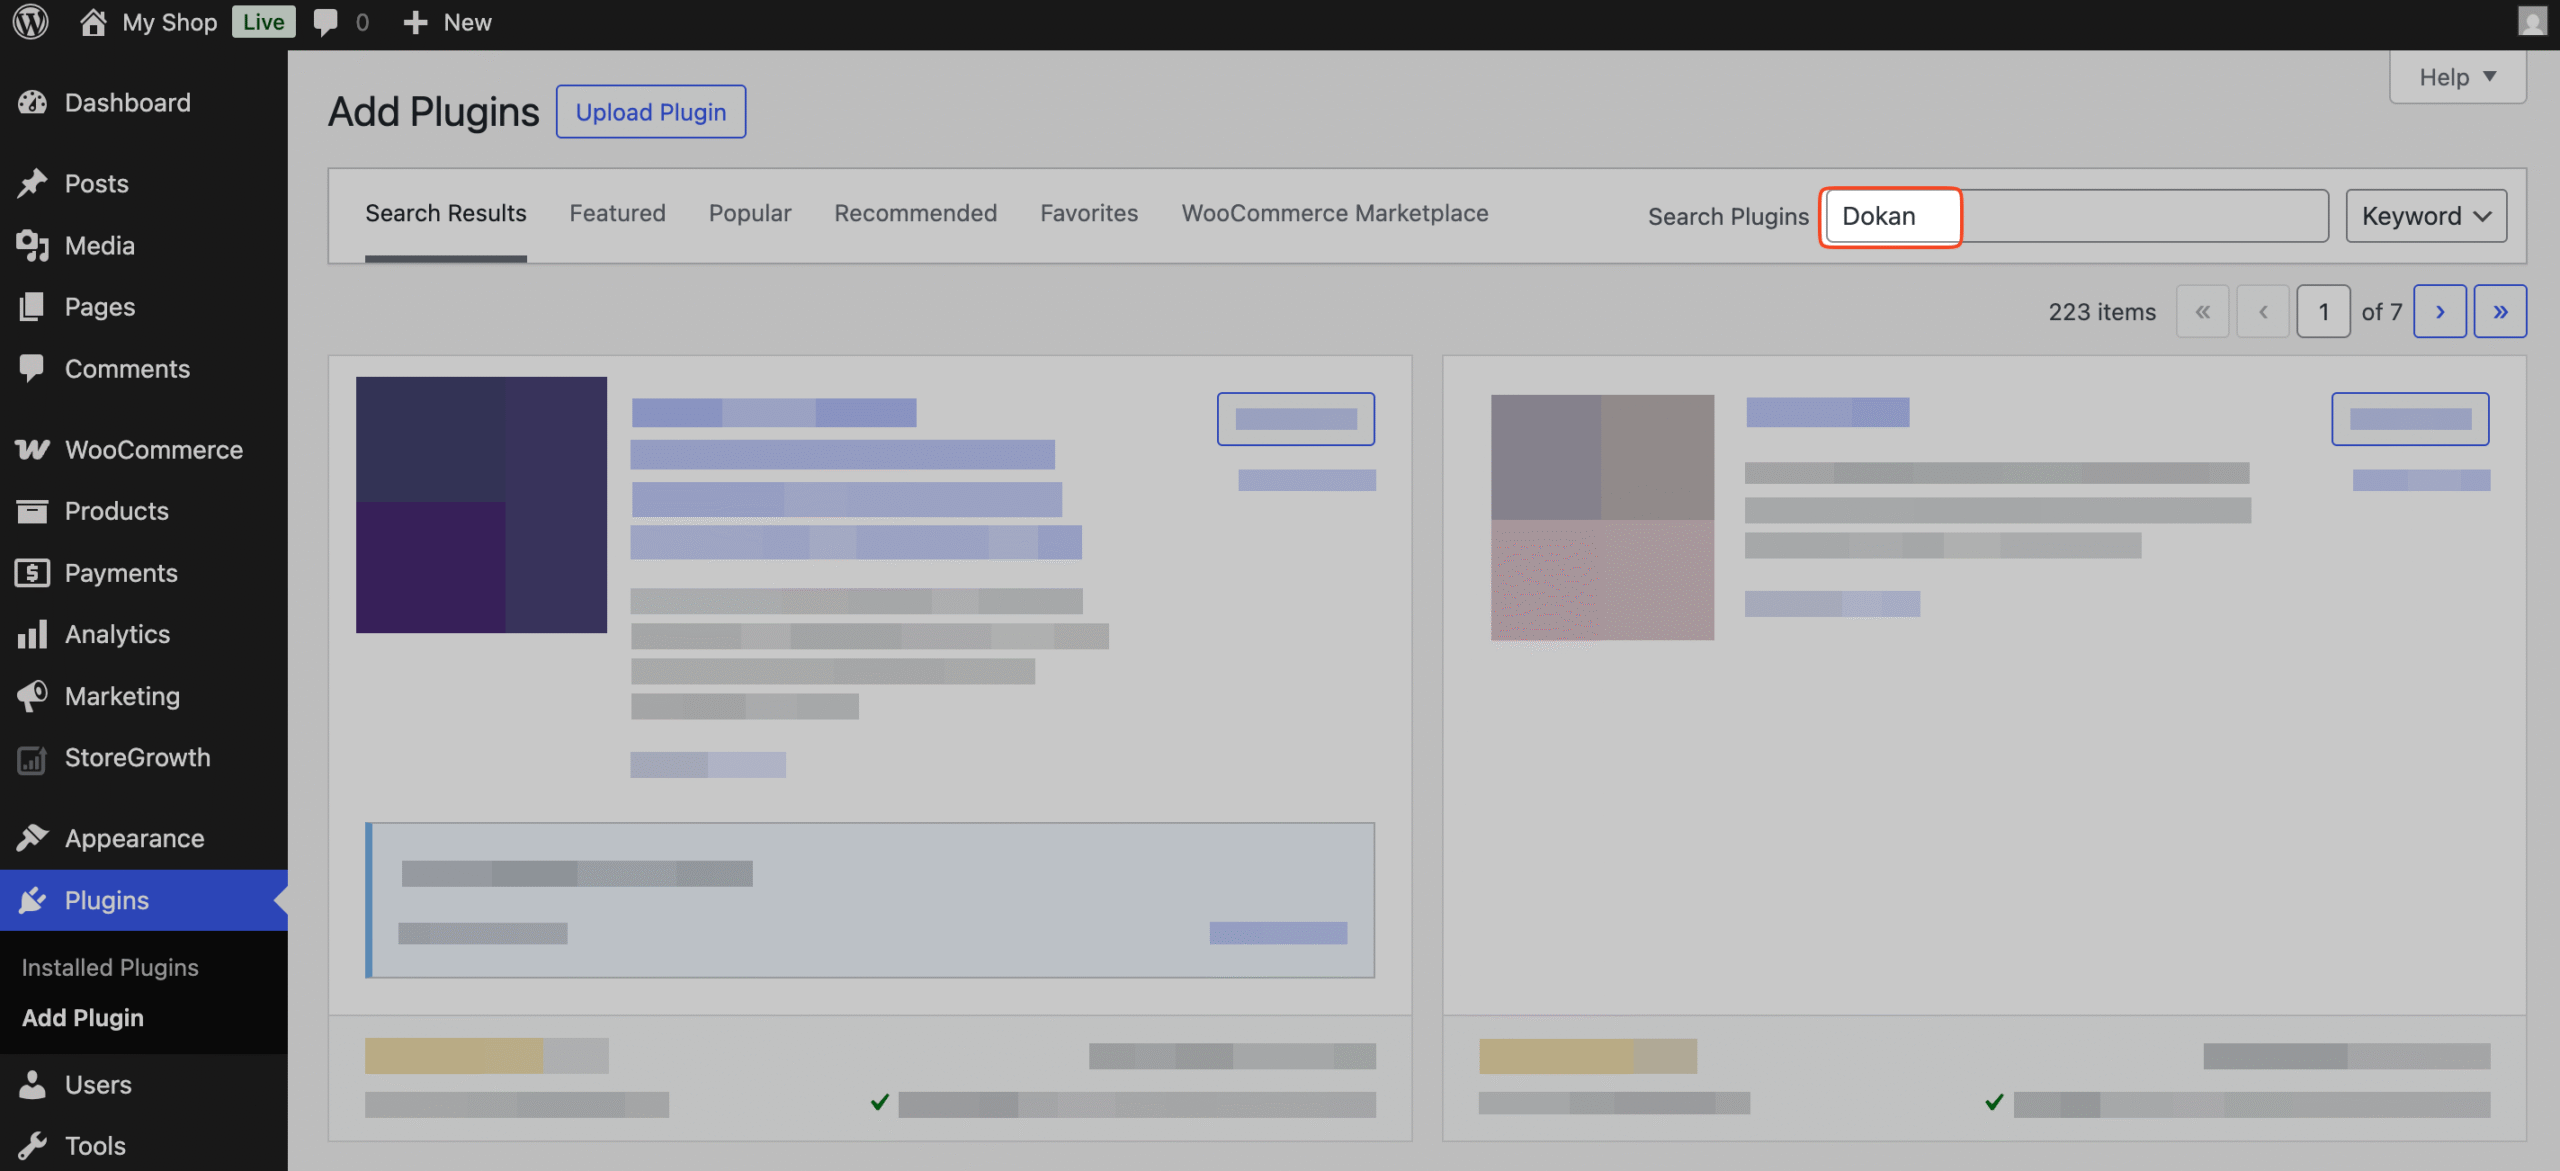
- Locate the plugin in the search results and click Install Now.
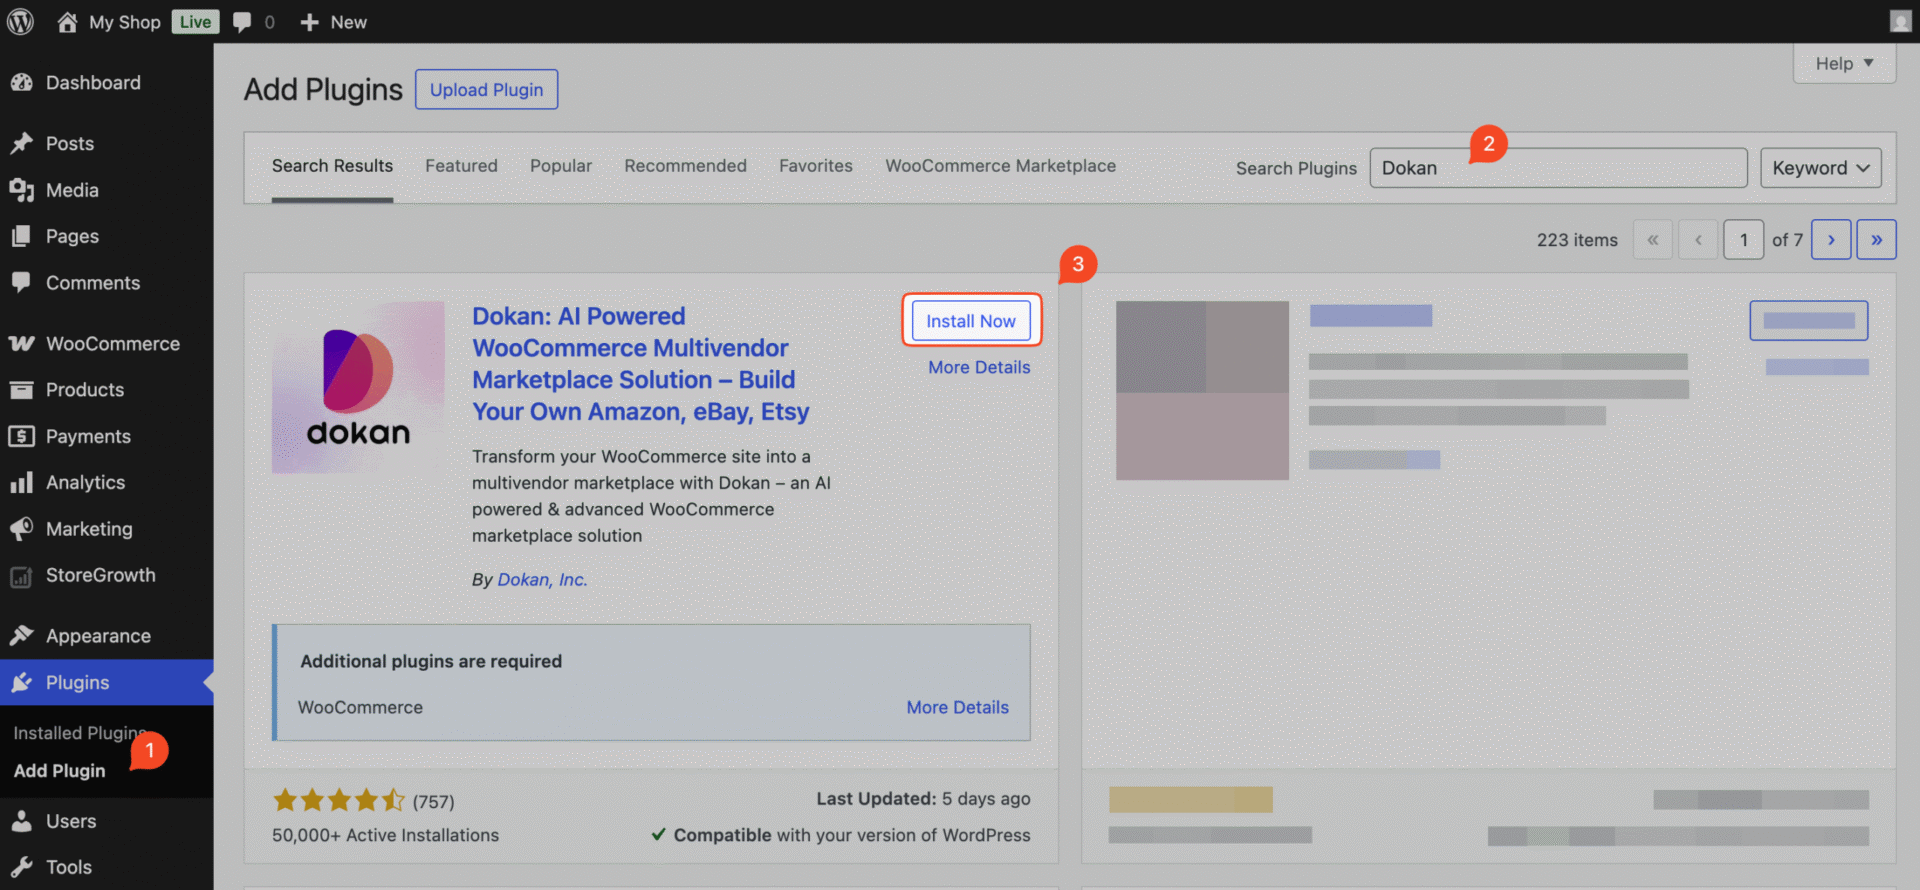
- After the installation finishes, click the Activate button.
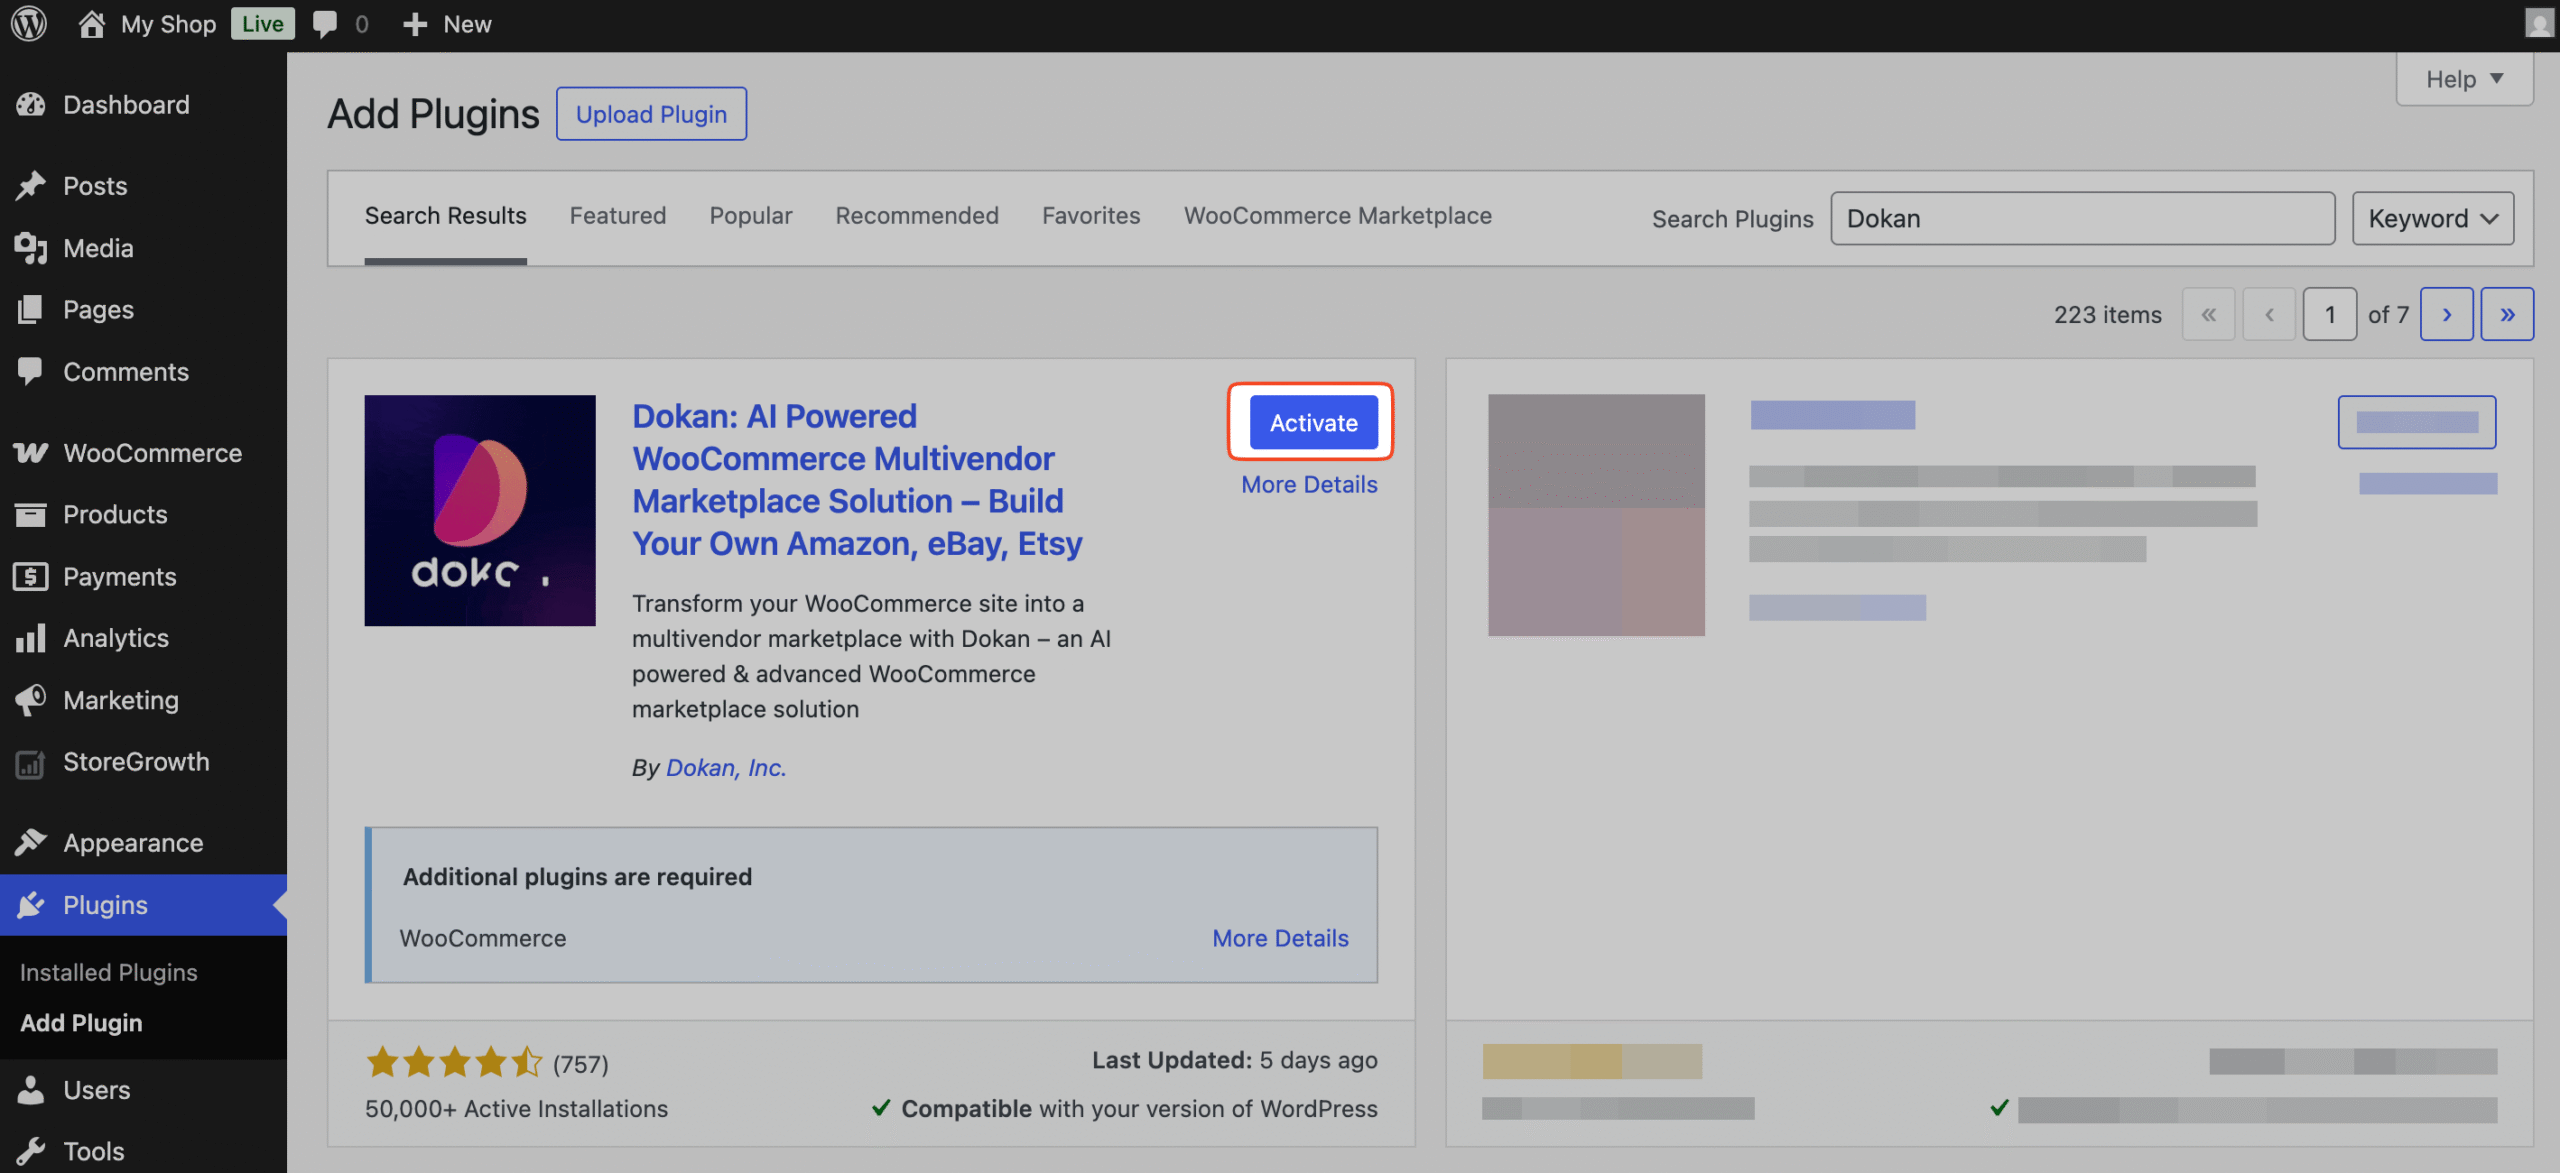
Now that you have activated Dokan, you are ready to start using StoreGrowth’s advanced marketing modules natively in your multivendor marketplace and empower your vendors to boost sales.
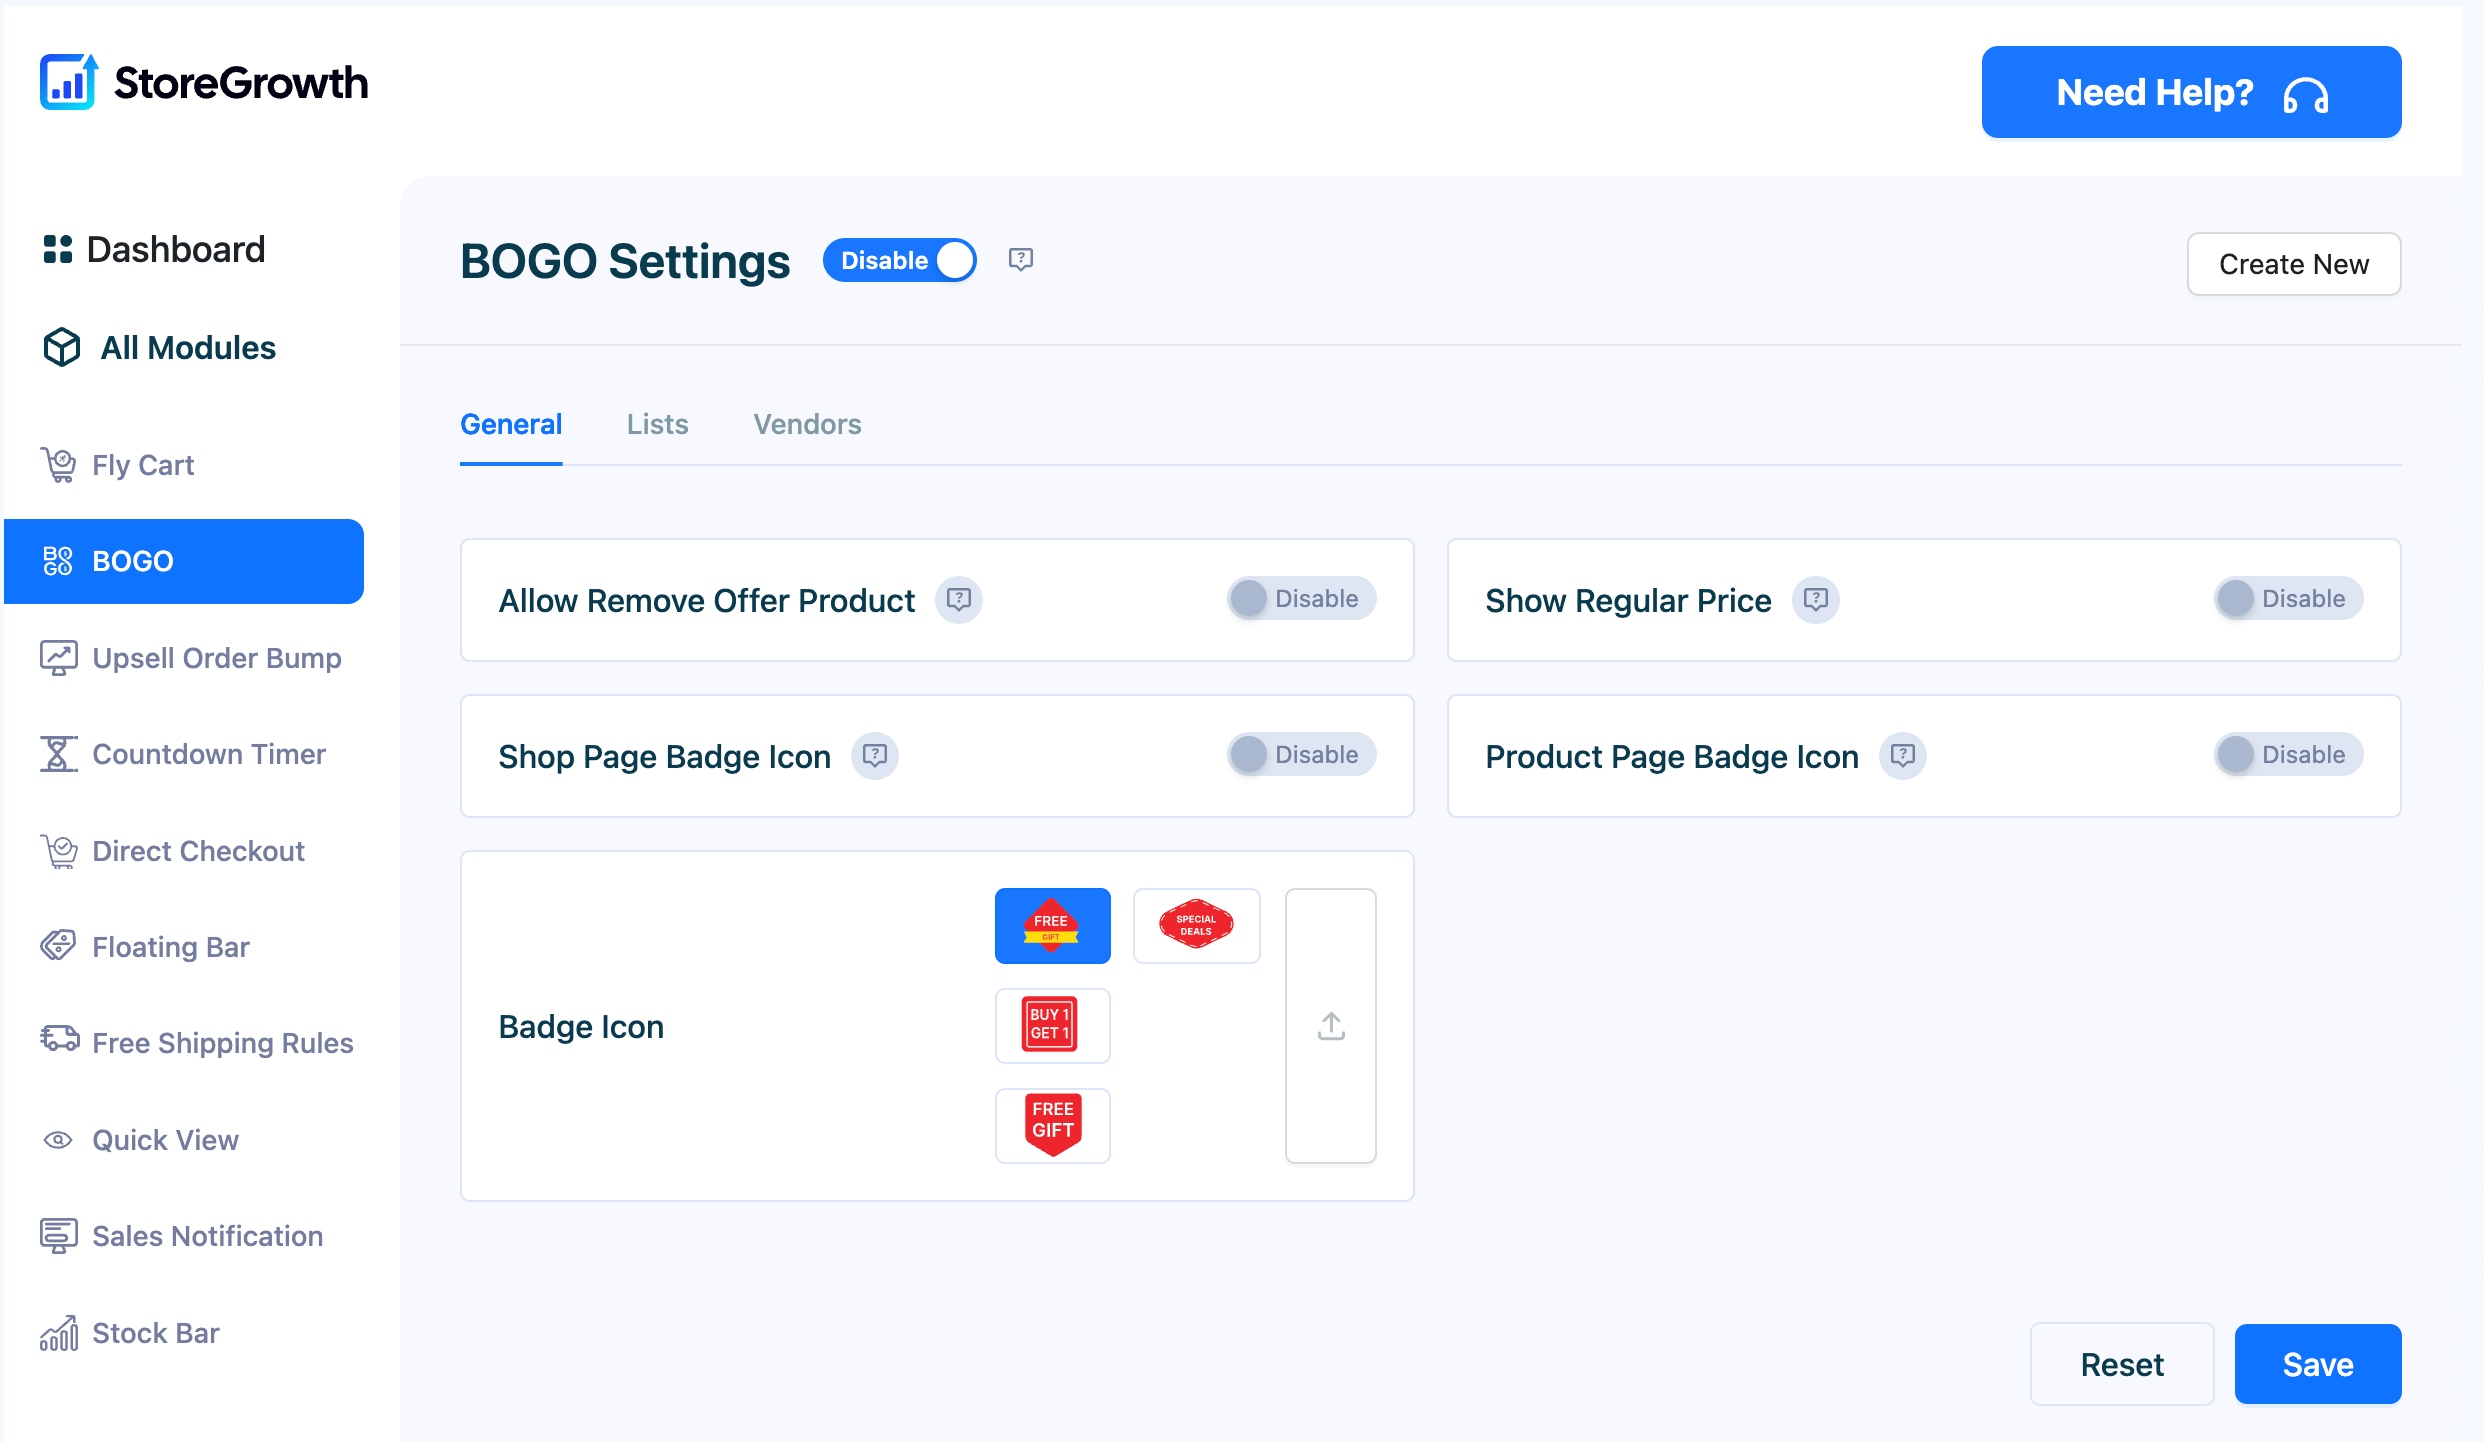
How to Enable BOGO Offers – Admins
To allow vendors to create BOGO offers for their customers, the admin first needs to enable this feature from the backend.
- Make sure the BOGO module is activated in StoreGrowth → Modules.
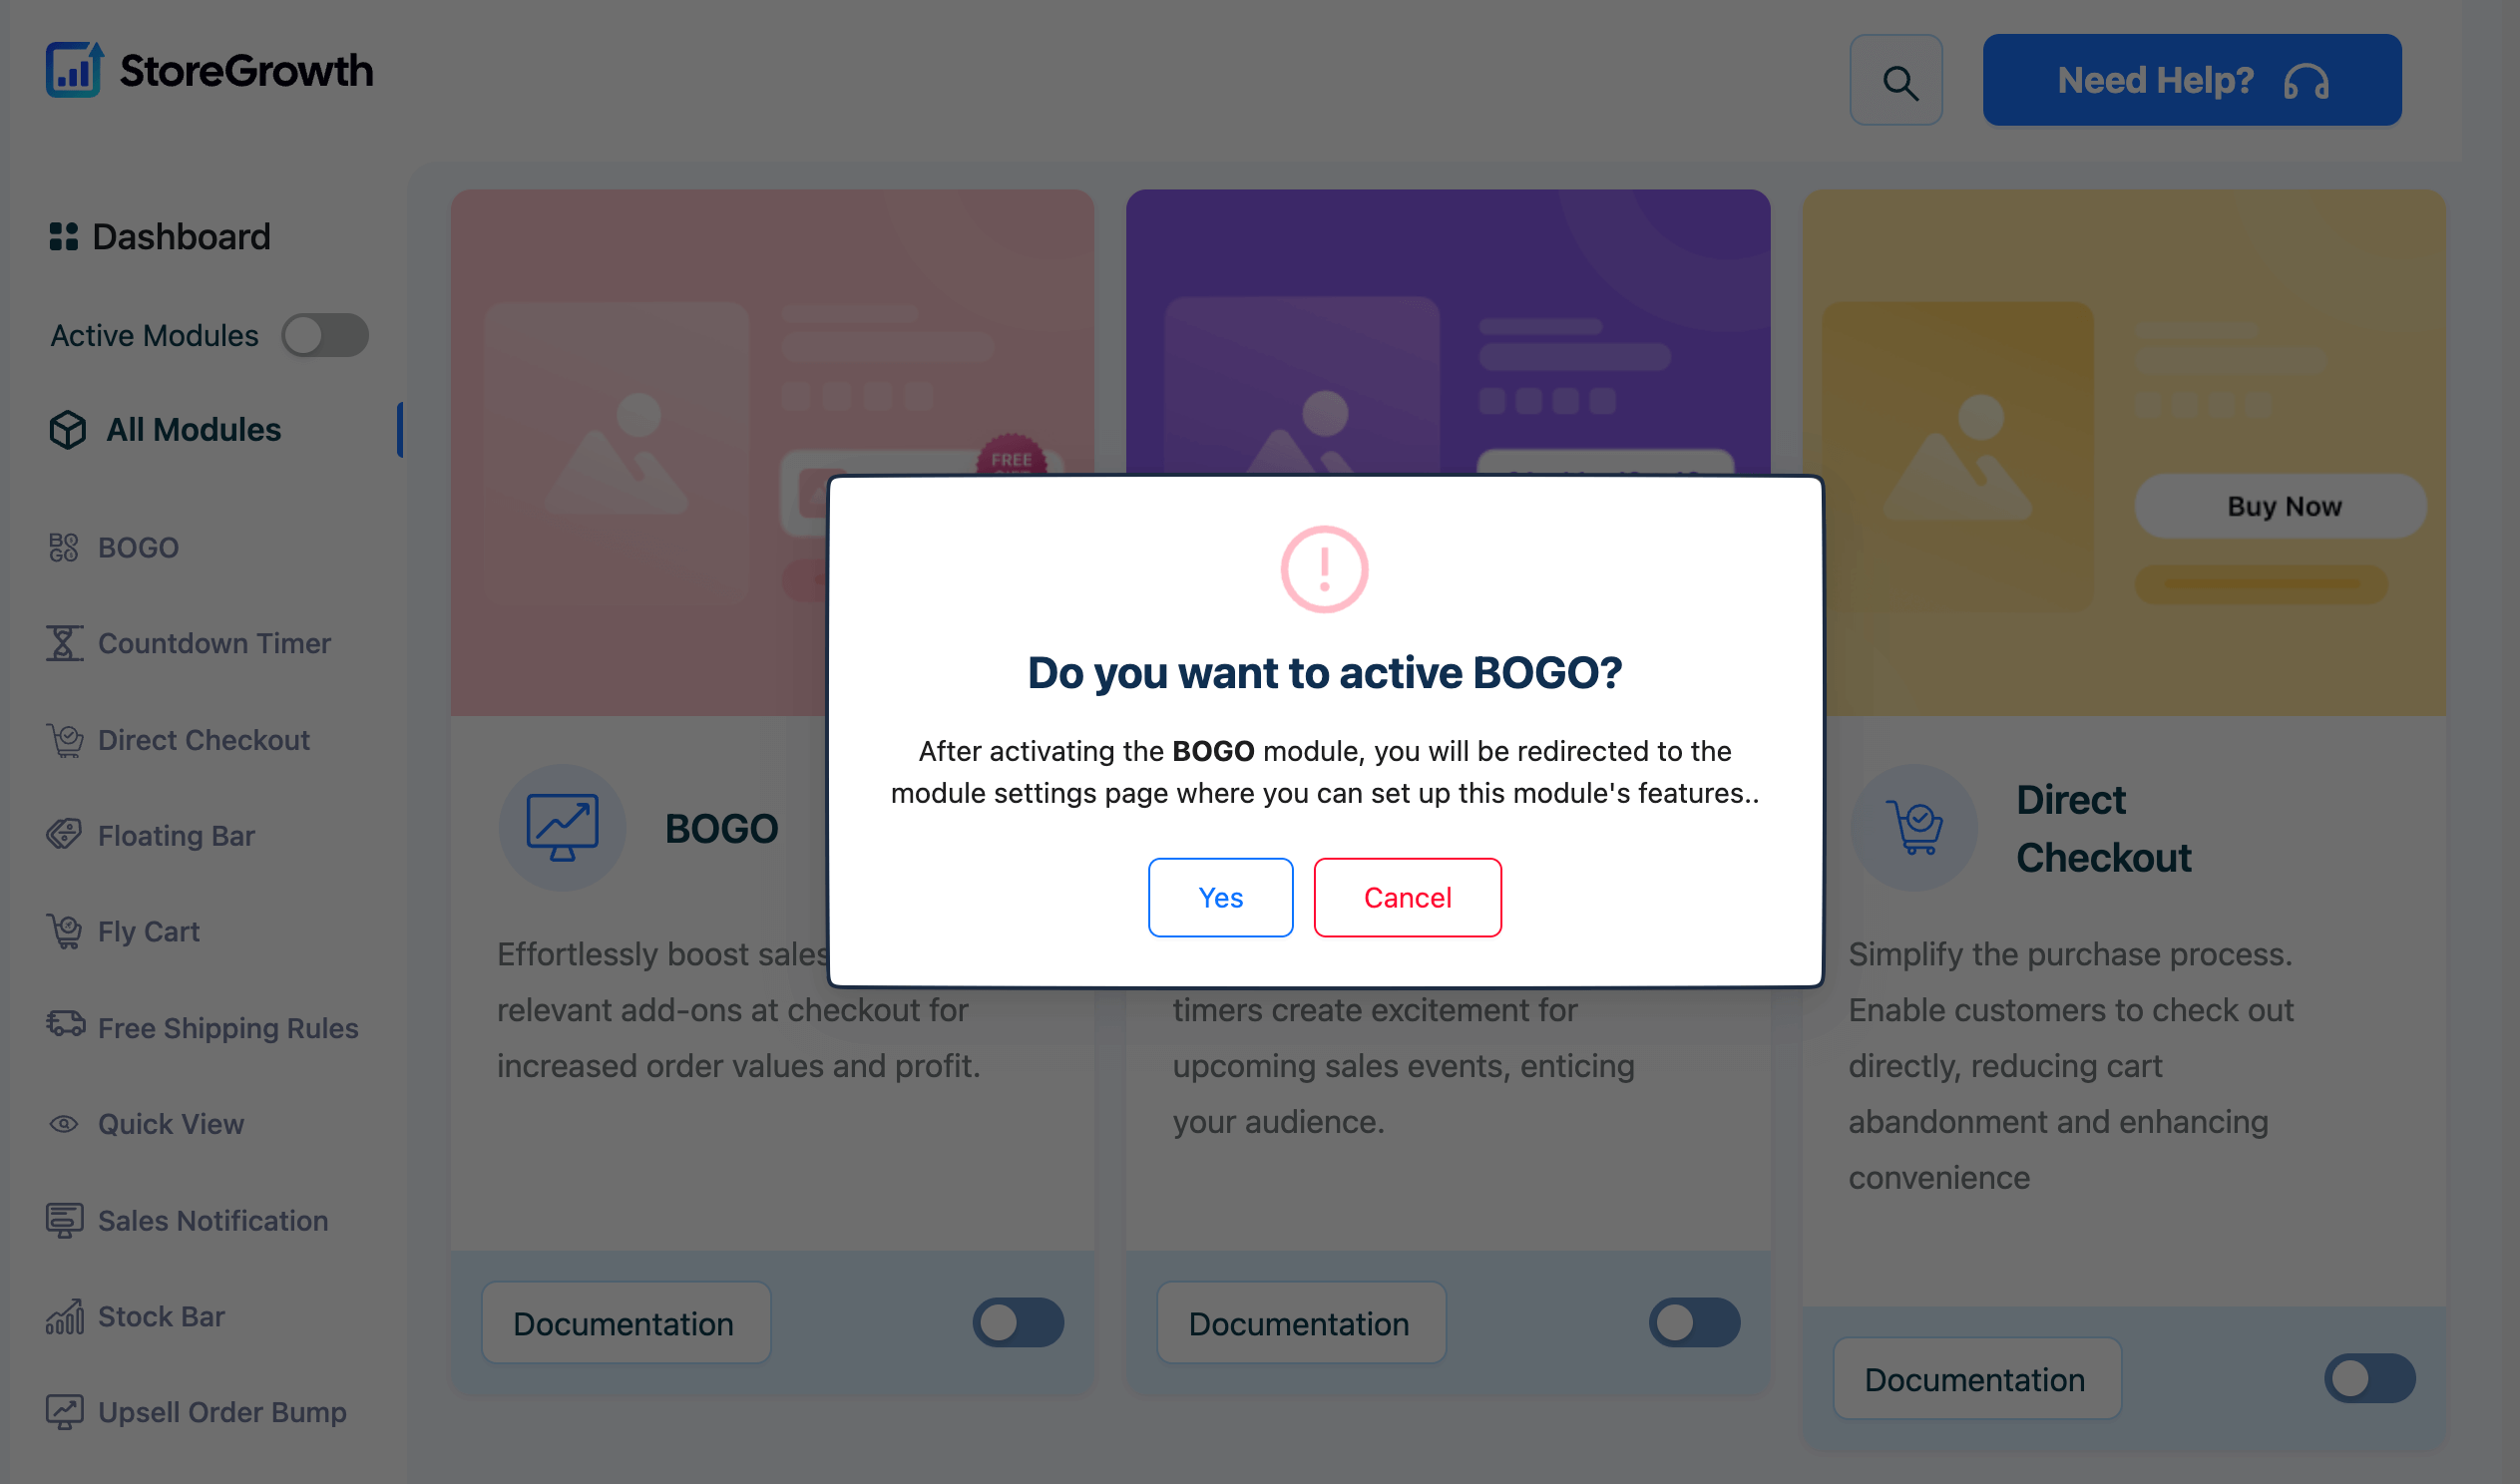
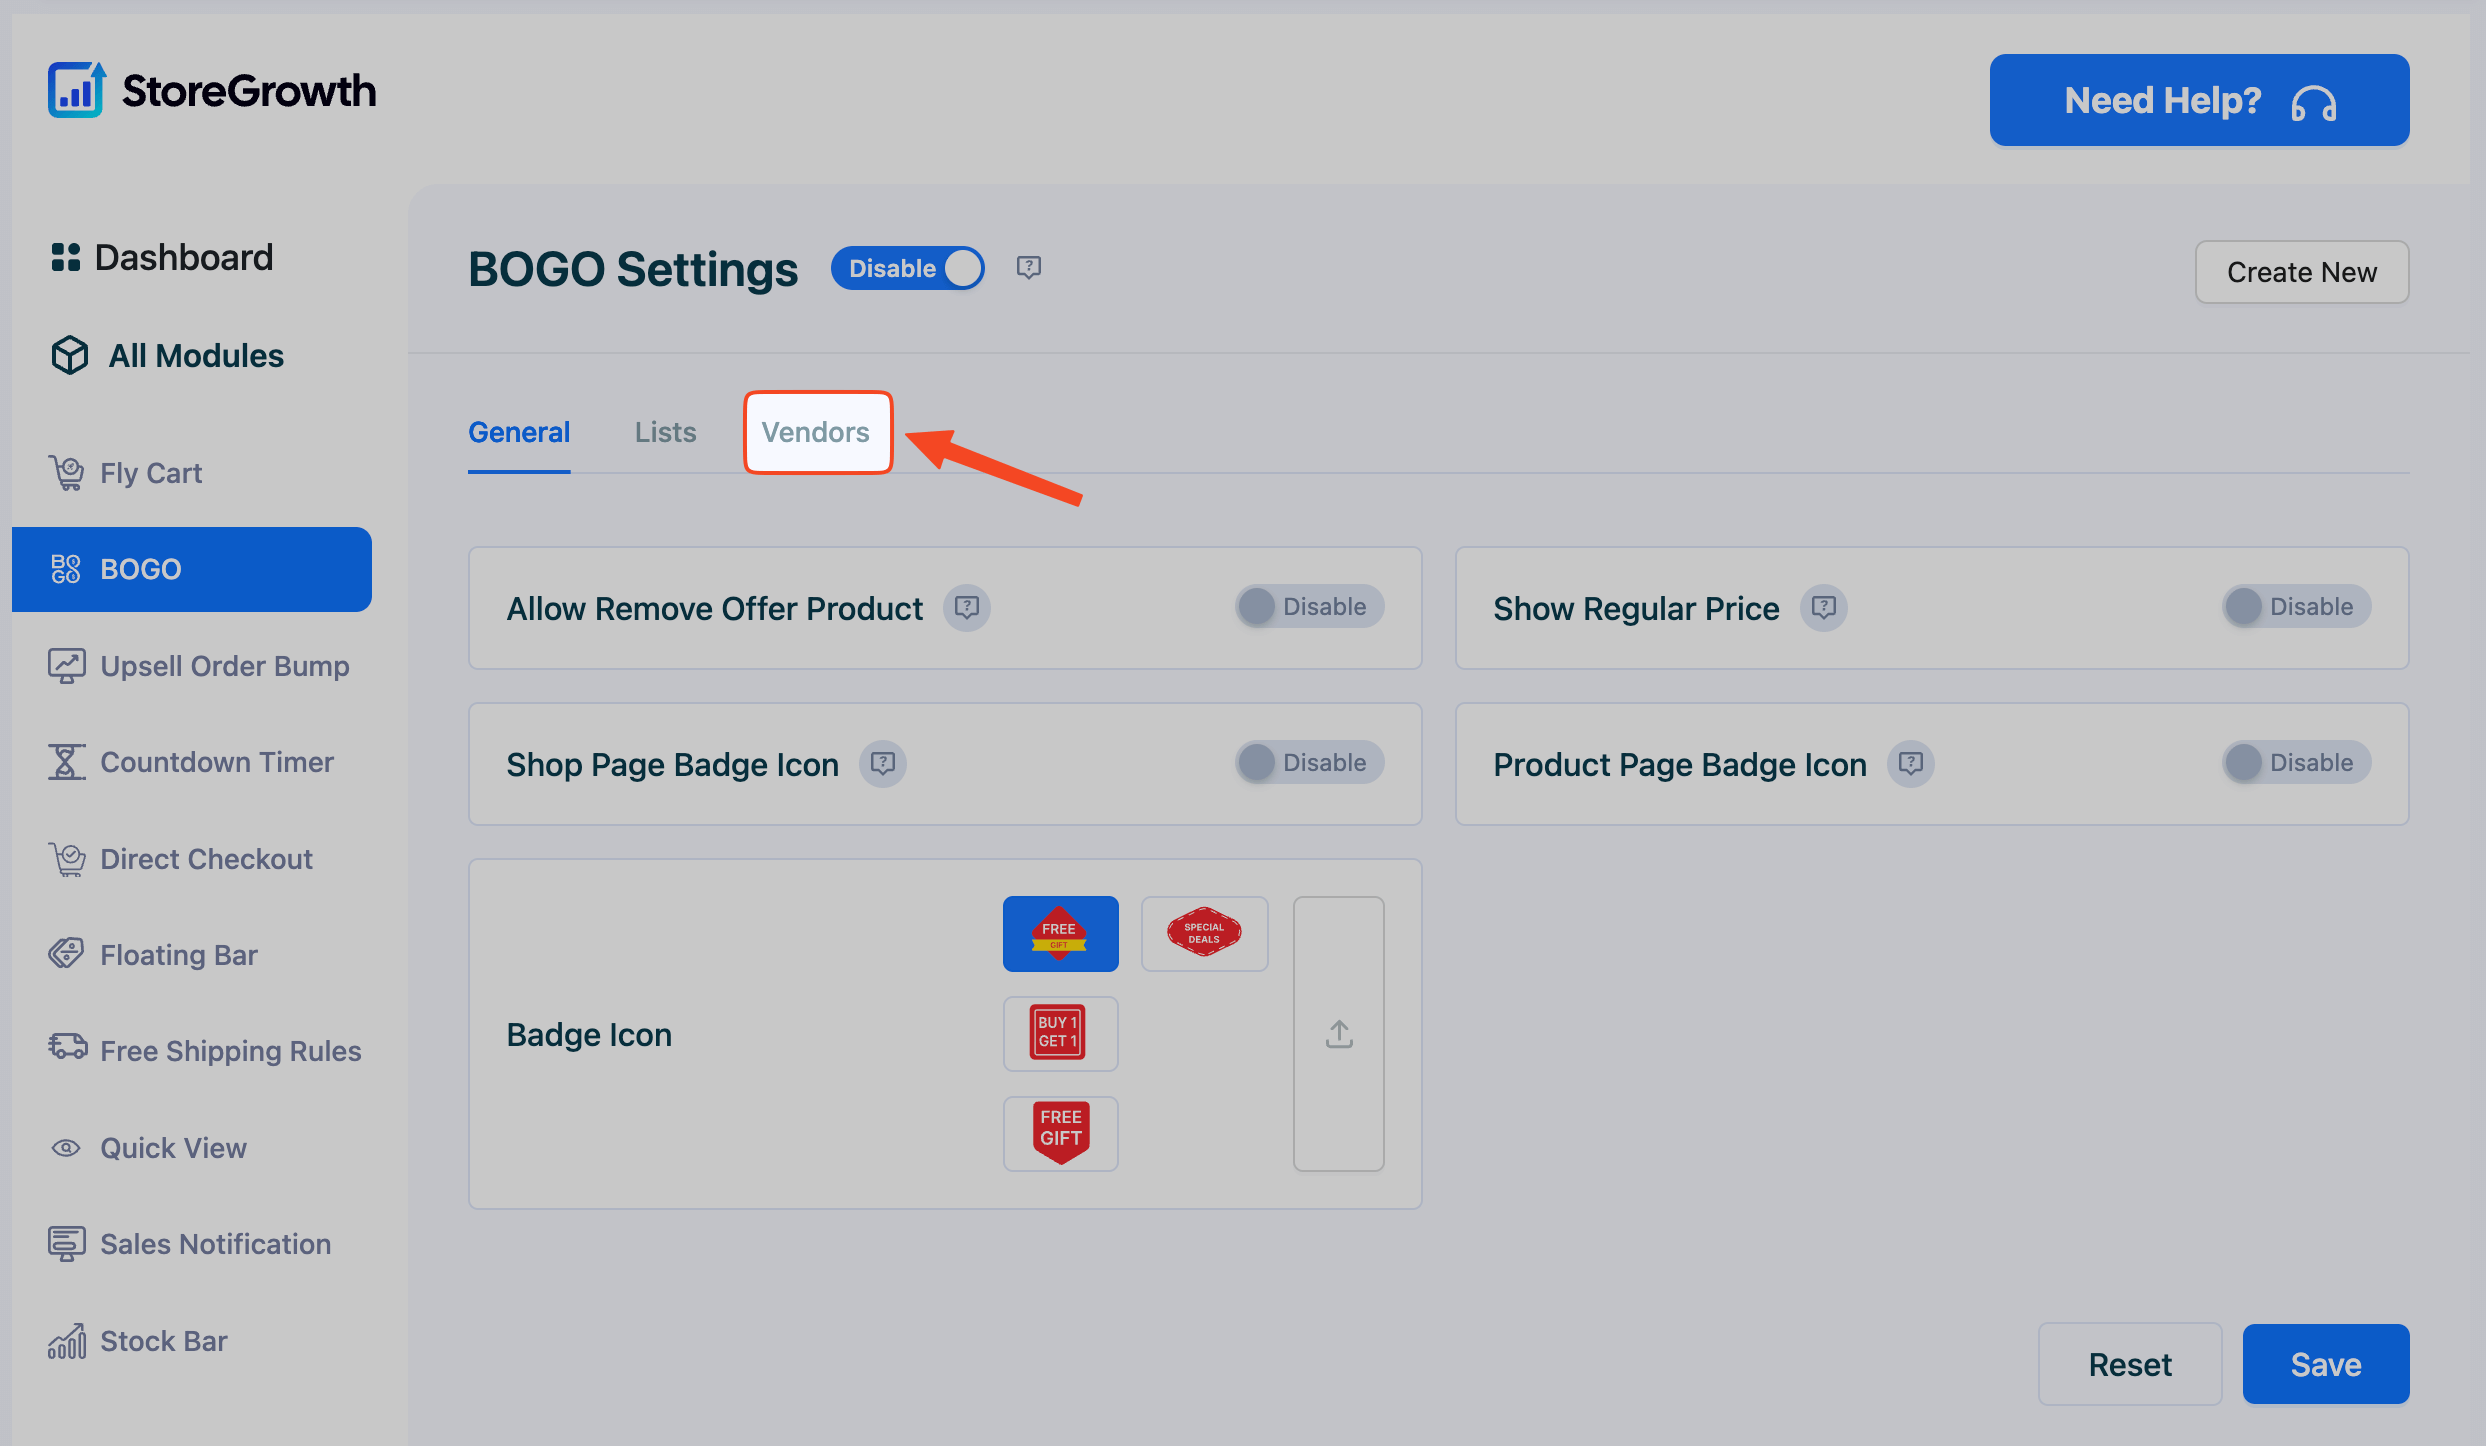
- Navigate to StoreGrowth → Modules → BOGO.
- Click on the Vendors tab.
- Enable the Buy X Get X option for vendors.
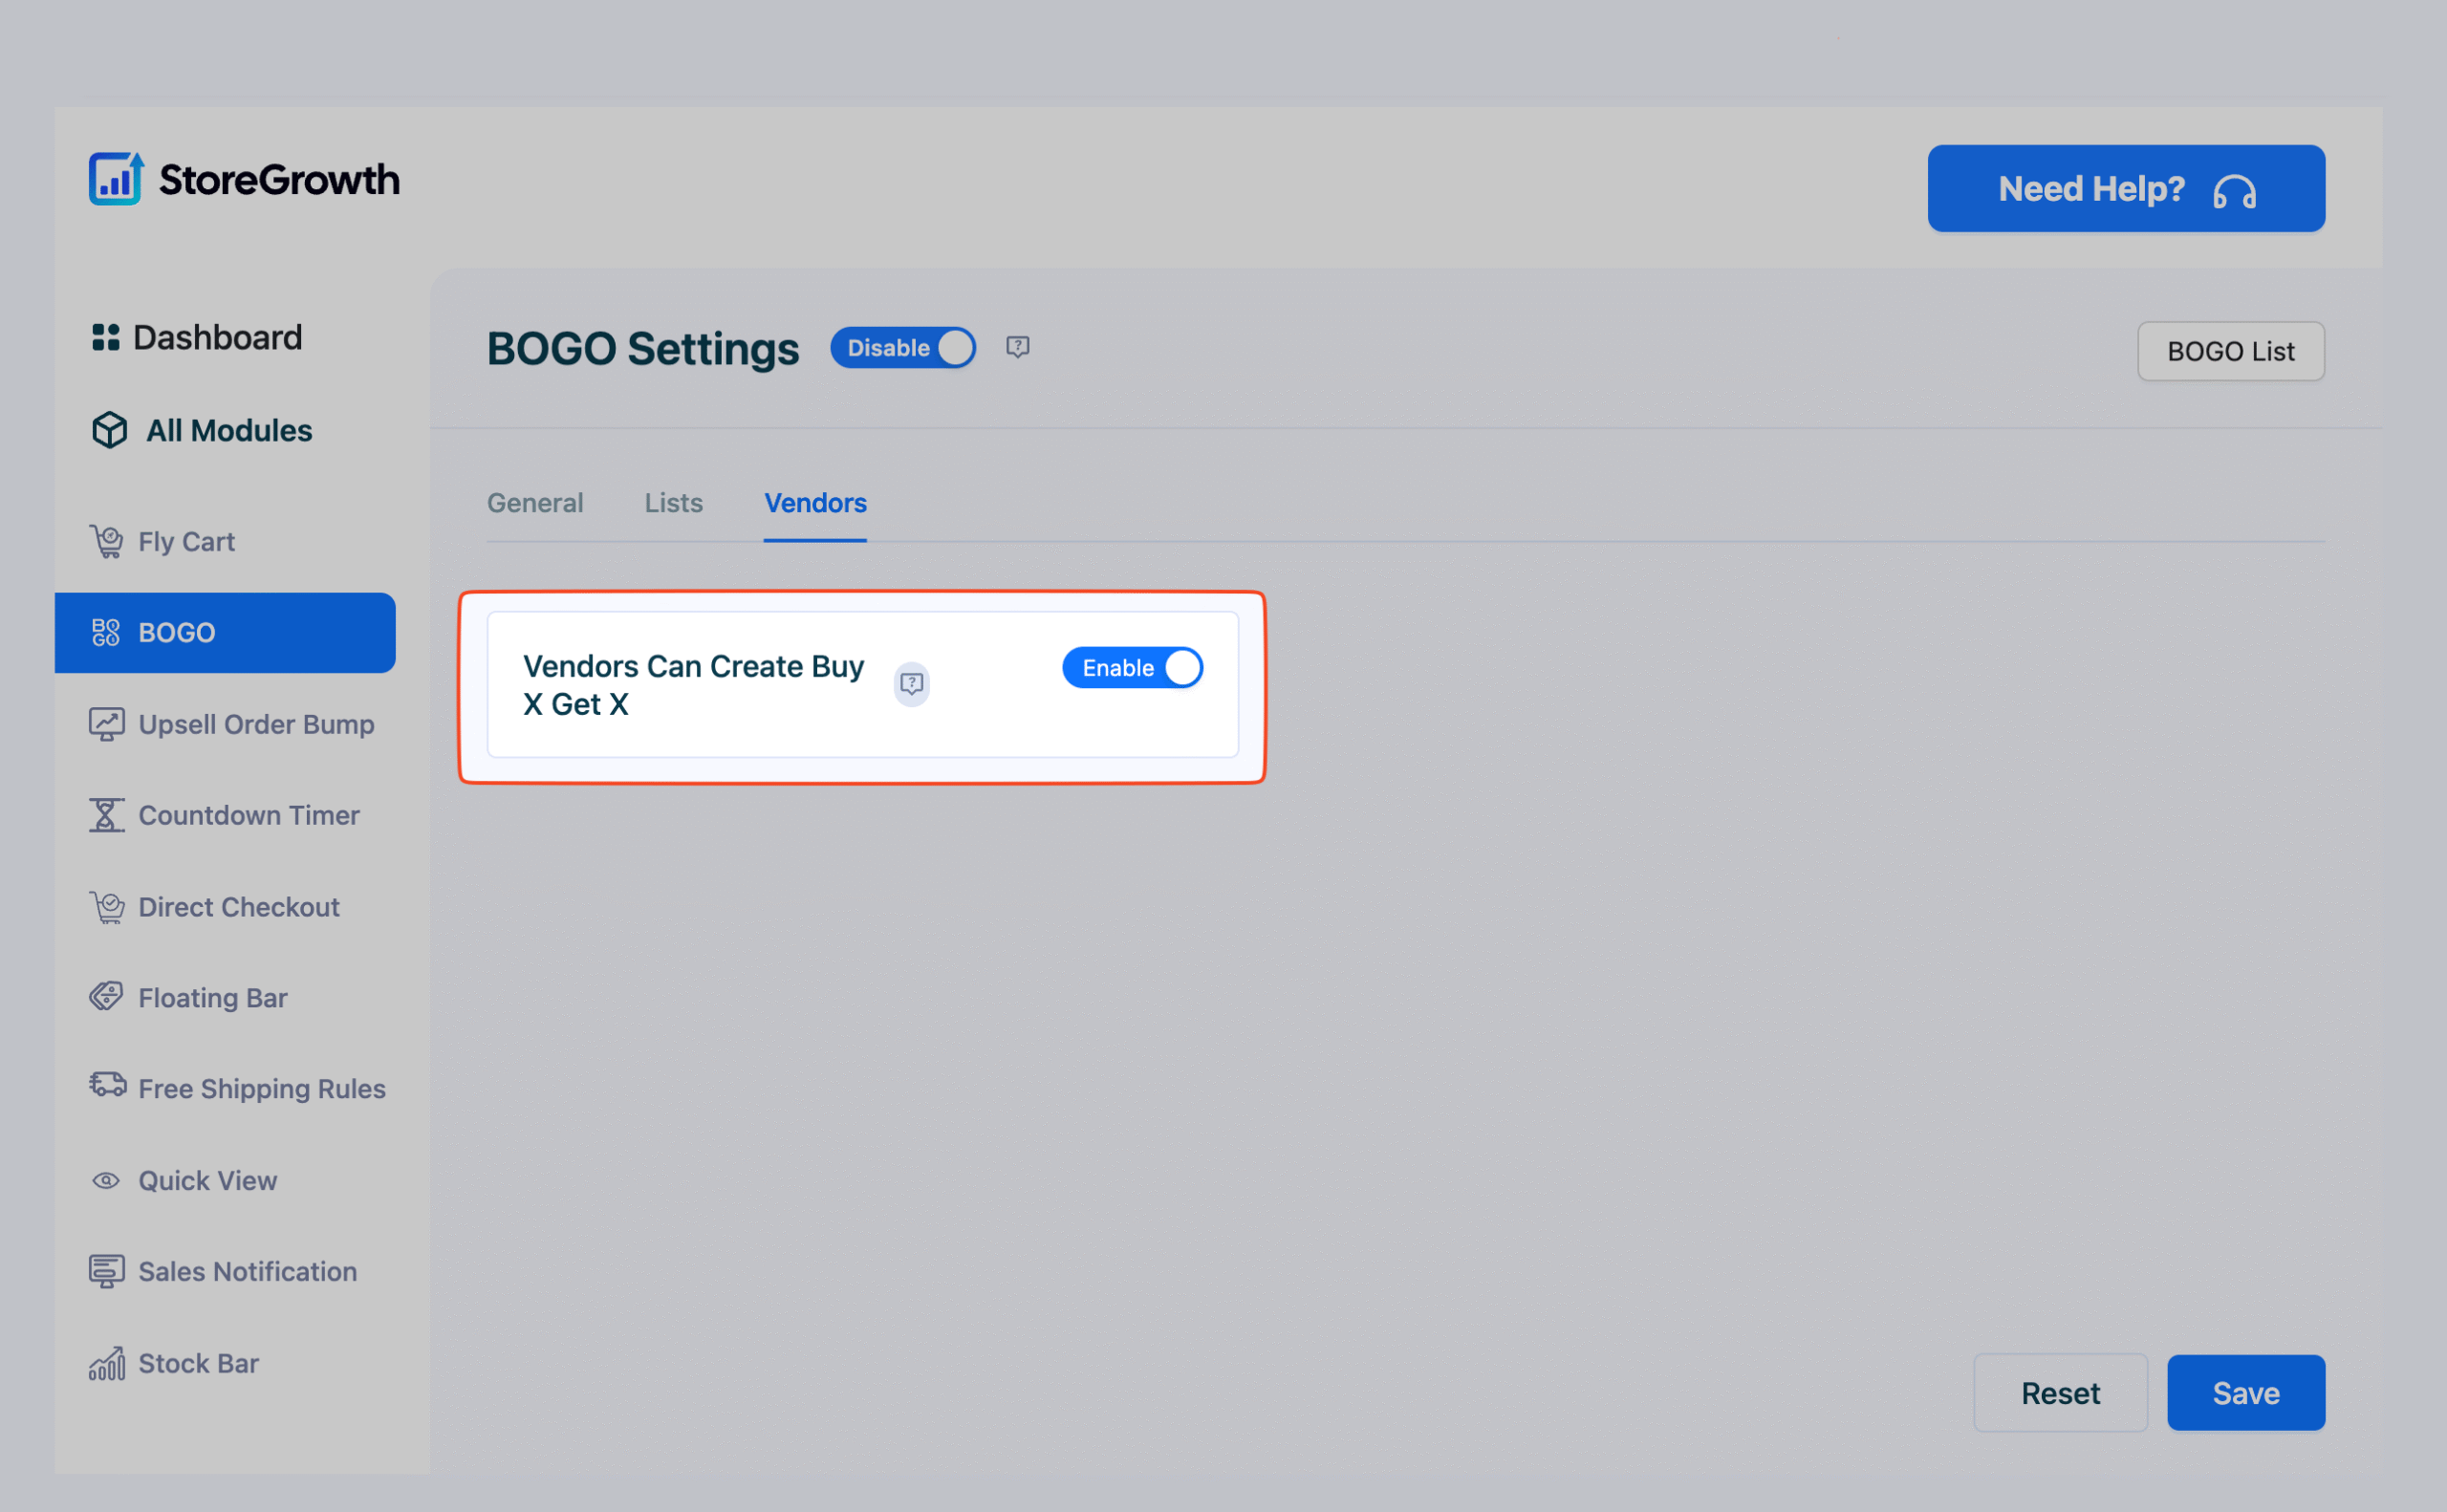
- Click Save to apply the changes.
How to Enable BOGO Offers – Vendors
Once the admin has enabled BOGO for vendors, you can start creating your own BOGO deals directly from your dashboard. Here’s how:
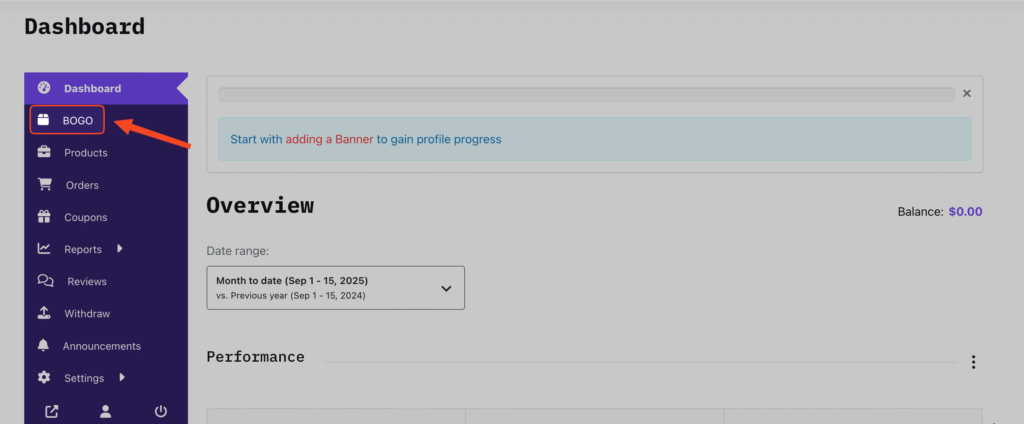
- Log in to your Dokan vendor dashboard.
- A new BOGO menu will appear in the left-hand side. Click on the menu.
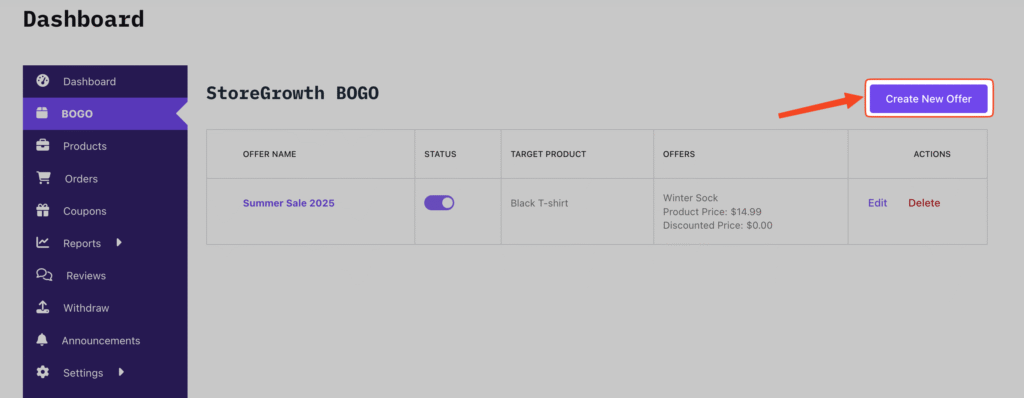
- Click on Create New Offer. This will open a settings page where you can configure your BOGO deal.
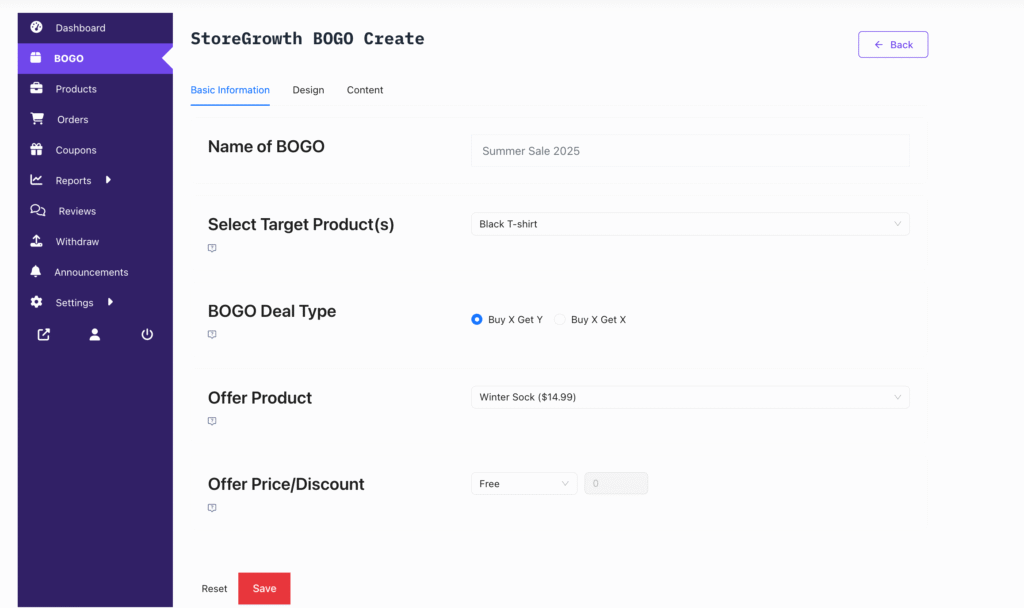
- Now, simply enter a name for the offer, select the offer products that will be a part of the deal, and choose the offer type (Buy X Get Y if you want to give a different product with purchase, or Buy X Get X if you want to offer extra units of the same product). Then set the offer product and offer price.
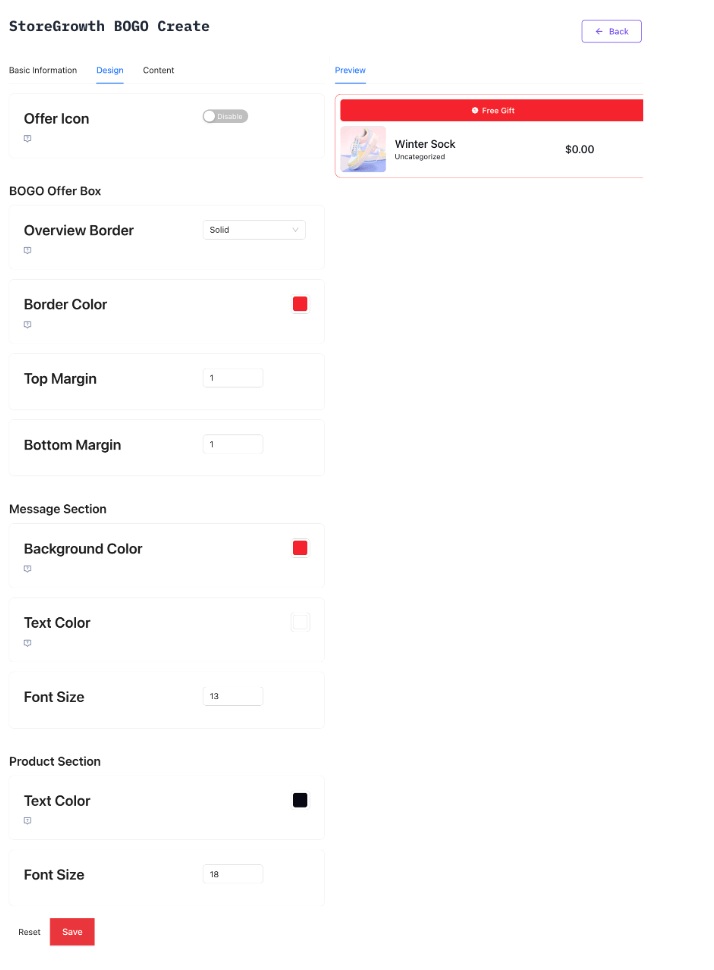
- Once you have set your BOGO settings, you can also customize the banner text, colors, and buttons to match your store style by finding the Design tab on the top.
- Click Save to make the BOGO offer live. This will take you back to the BOGO menu.
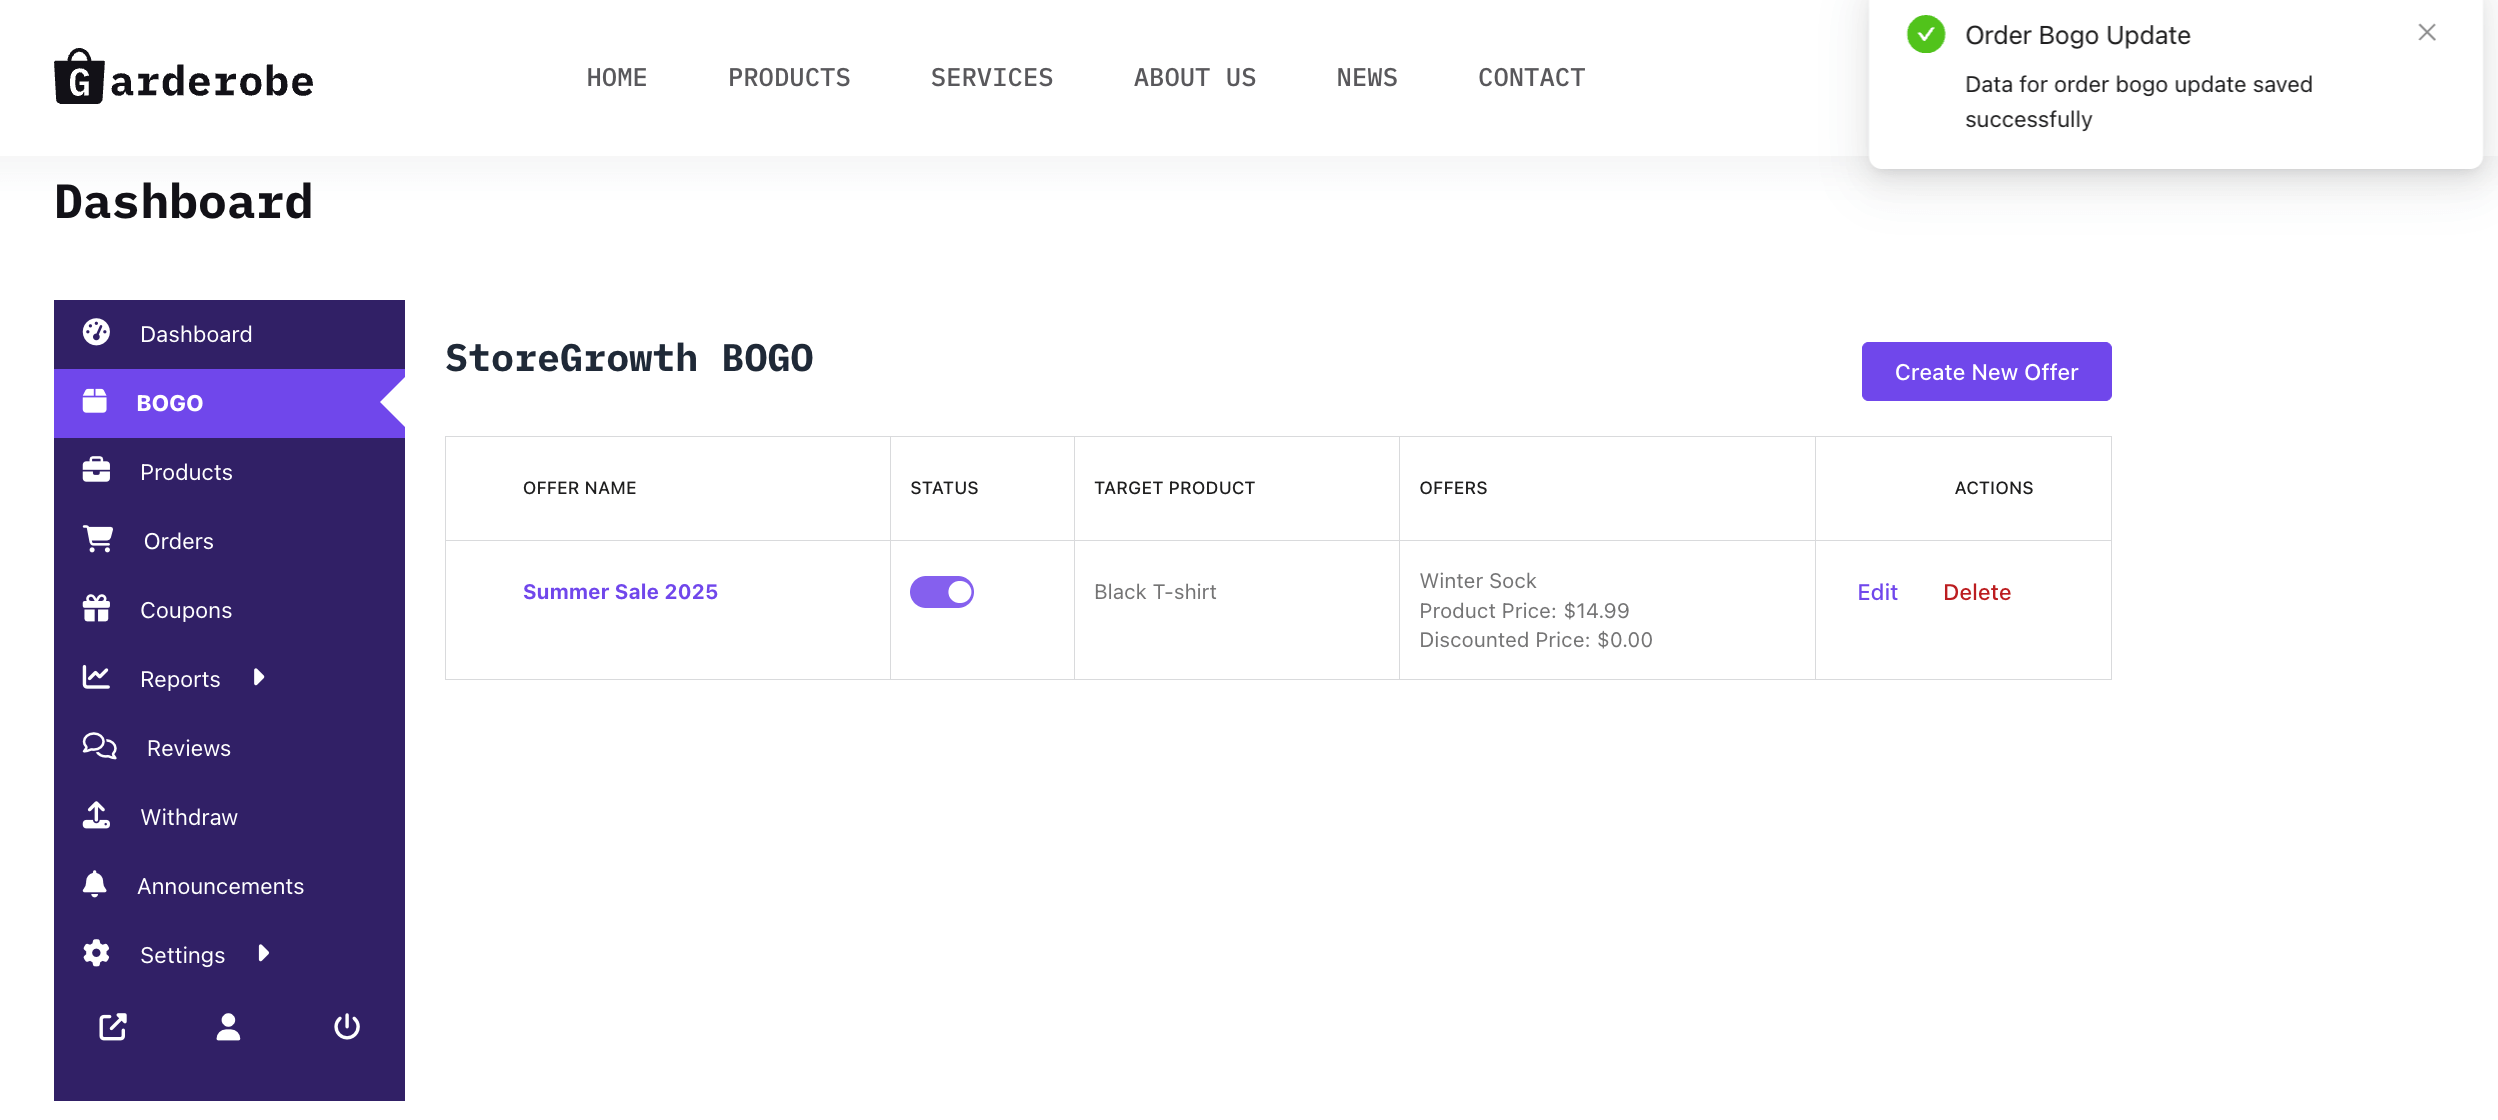
- Edit or deactivate offers anytime from the BOGO menu. You can also make additional changes by clicking on the Edit button.
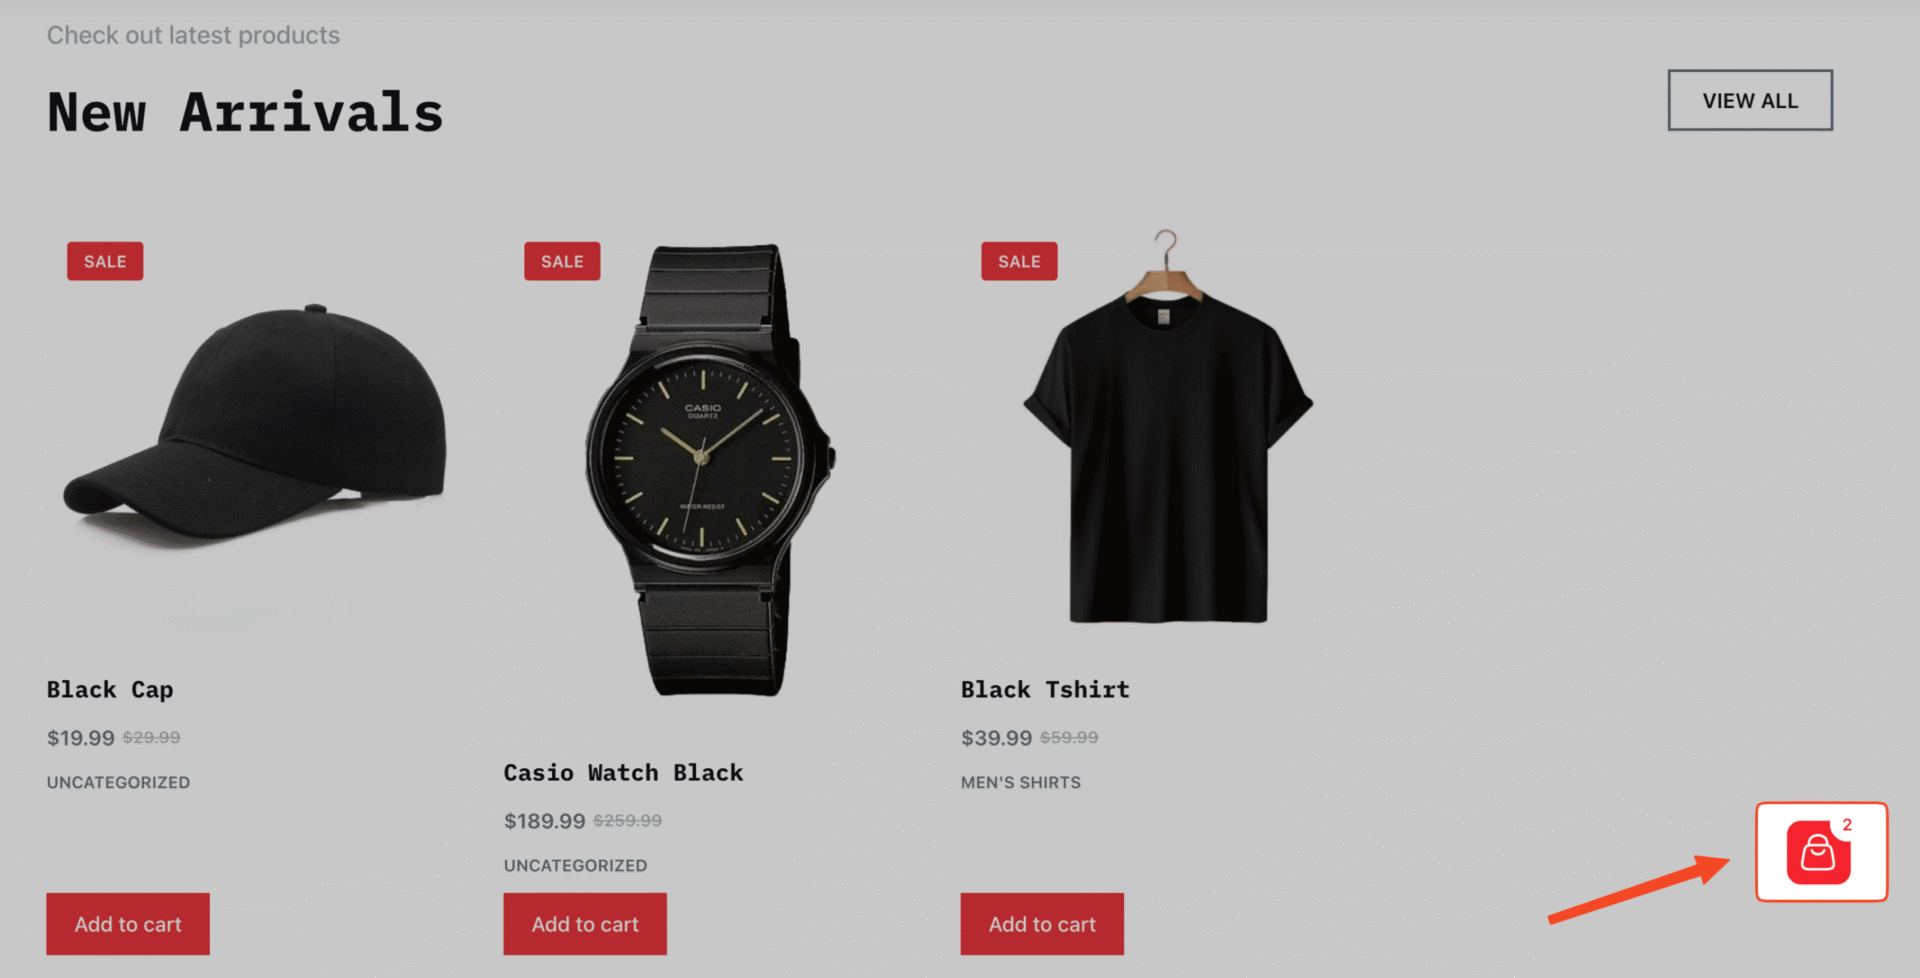
After you publish your offer, shoppers will see it right on the product page. For example, if you set up a Summer Sale 2025 deal where customers get a Winter Sock for free with a Black T-Shirt, the offer will be highlighted with your chosen banner and messaging.
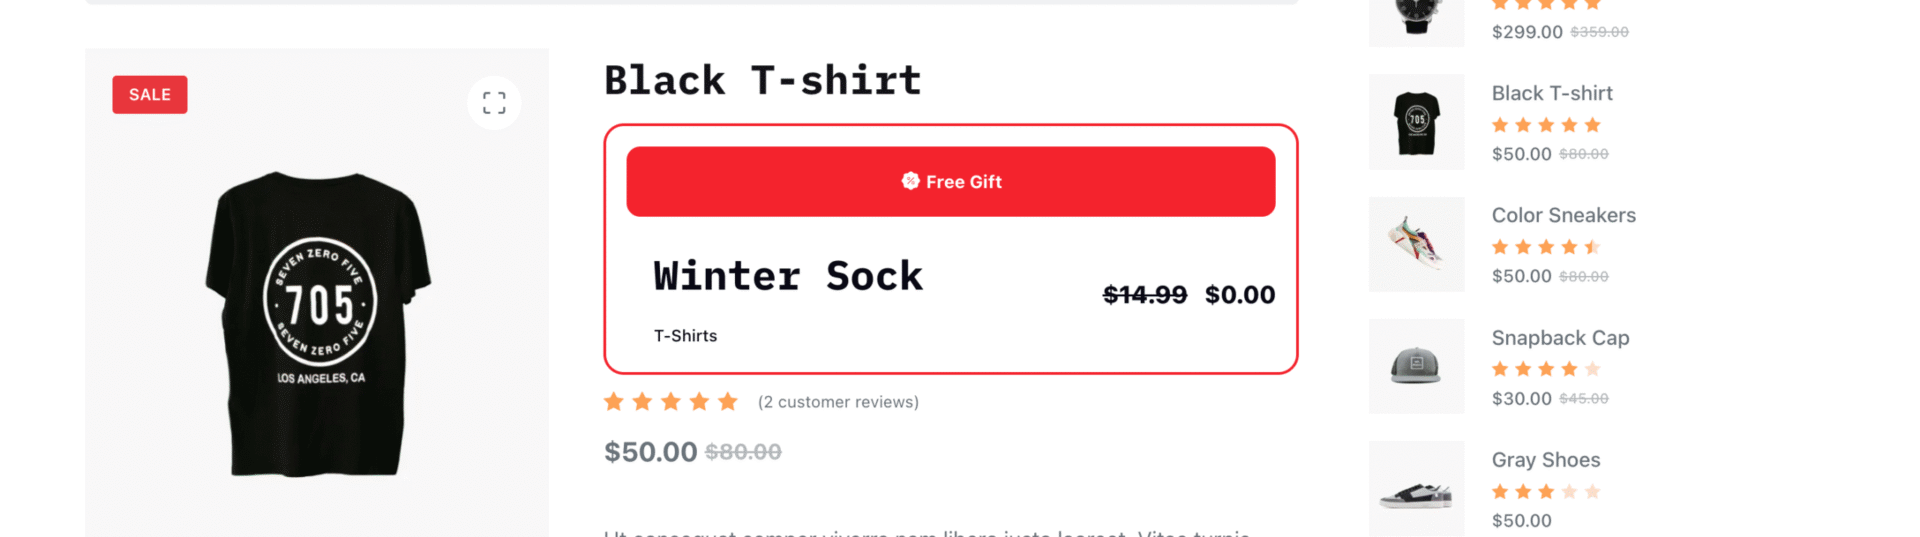
When a shopper adds the Black T-Shirt to their cart, the Winter Sock will automatically be included, showing them the savings instantly. This makes the deal clear, exciting, and irresistible for customers.

How to Create a Countdown Timer – Admin
As the marketplace admin, you decide whether vendors can use countdown timers for their products. Countdown timers help create urgency, highlight discounts, and drive faster purchases.
Enabling Countdown Timer in your storefront is very simple.
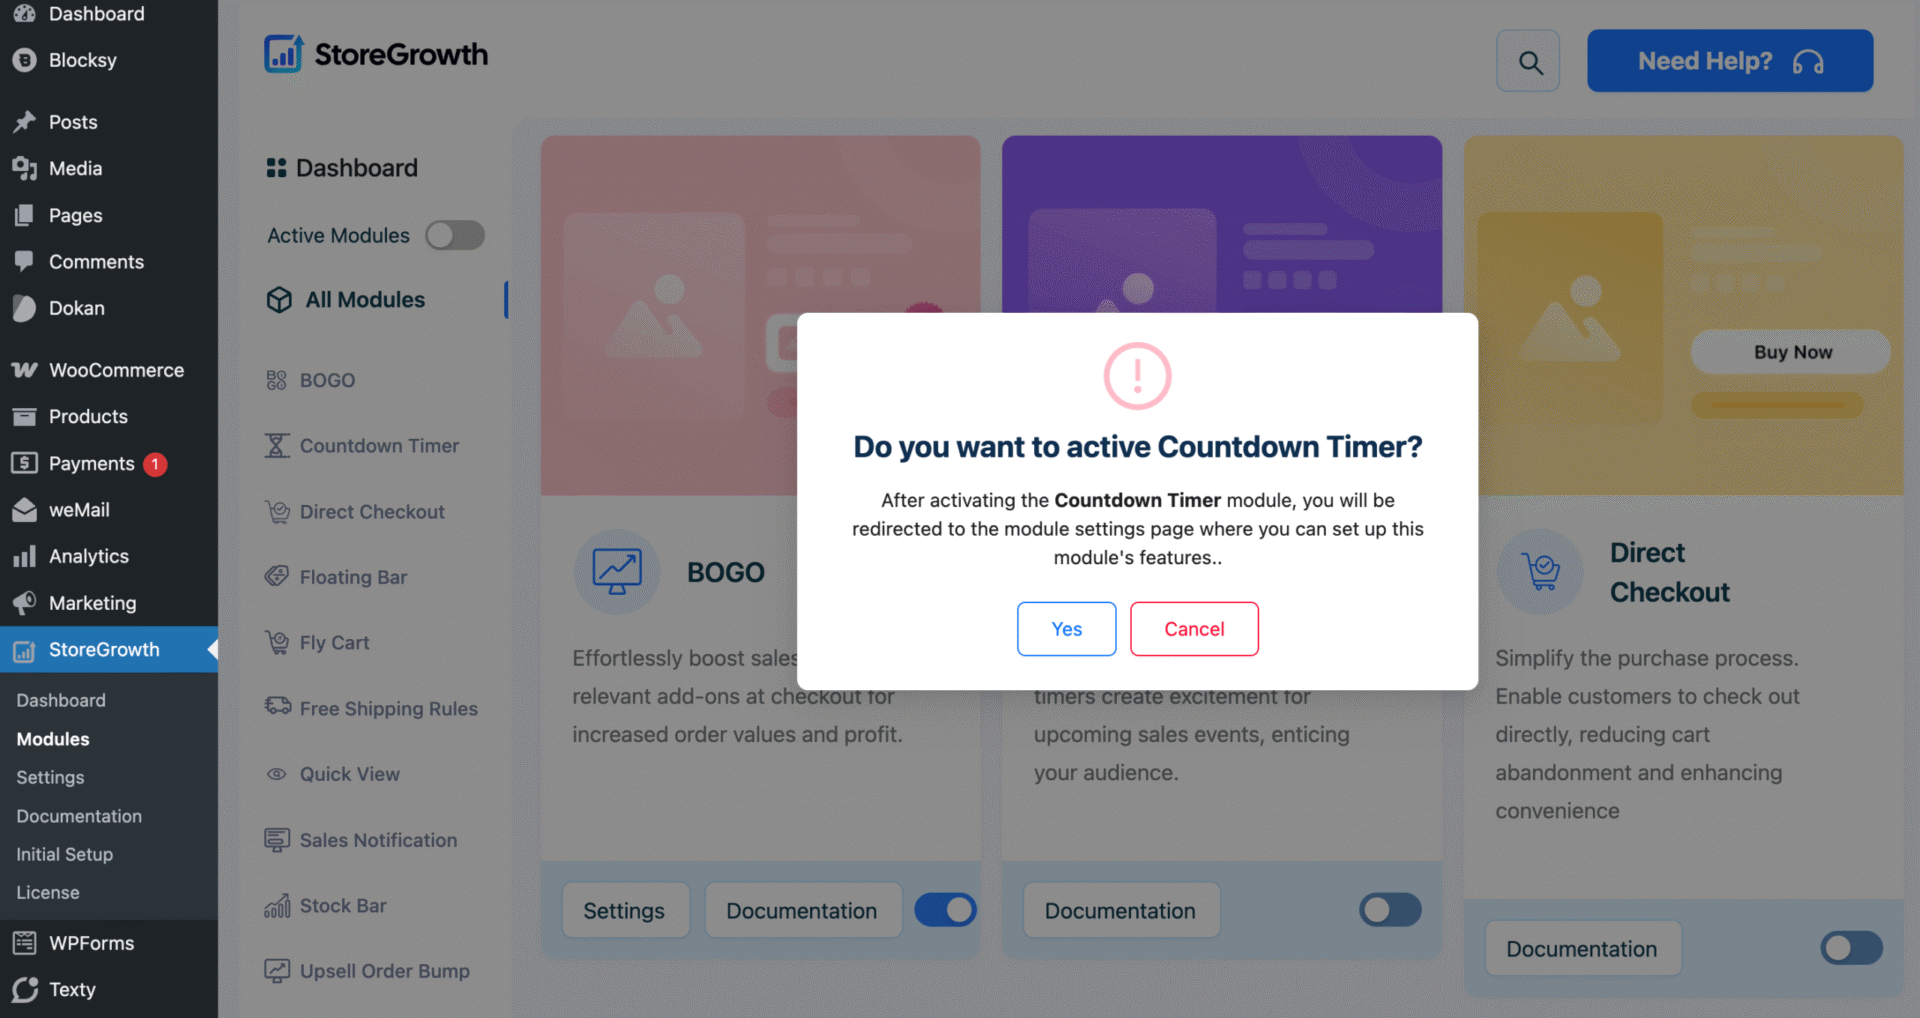
First navigate to StoreGrowth → Modules → Countdown Timer
A popup will appear, simply click Yes to activate the Countdown Timer module in your storefront.
As you can see, a new Vendors tab appears in the Countdown Timer settings page. Click on the tab.
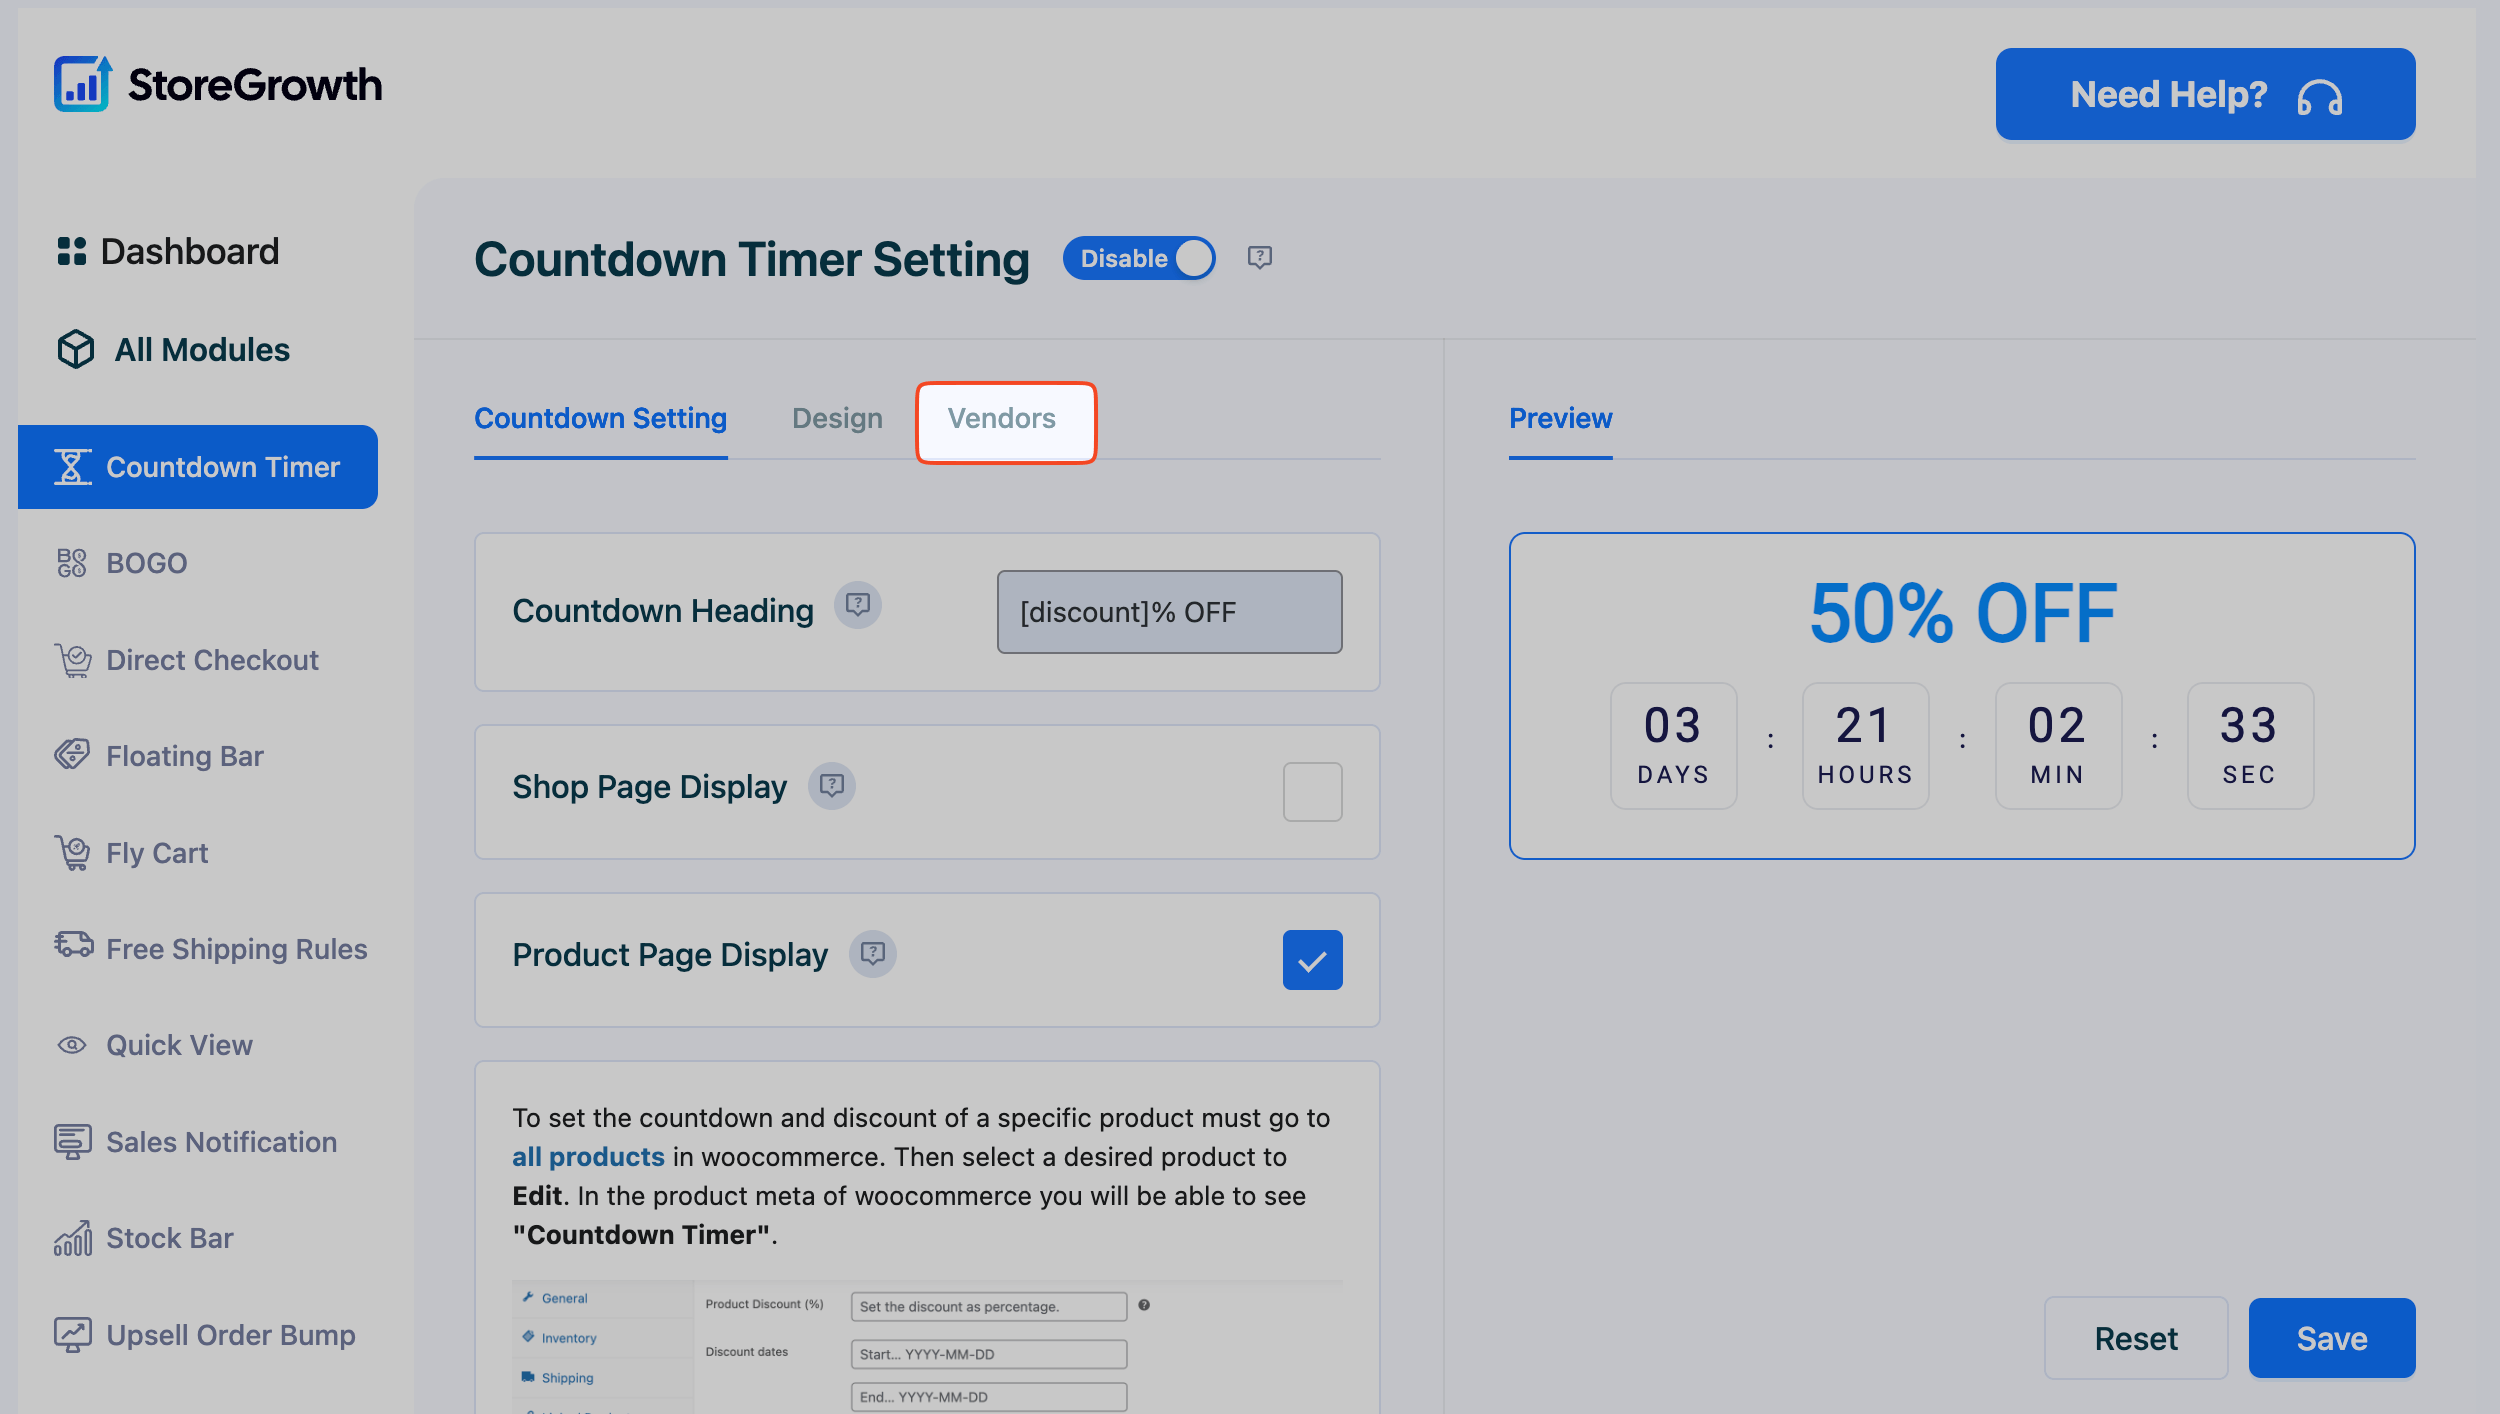
Toggle the options to:
- Allow vendors to schedule countdowns
- Allow vendors to create countdown timers
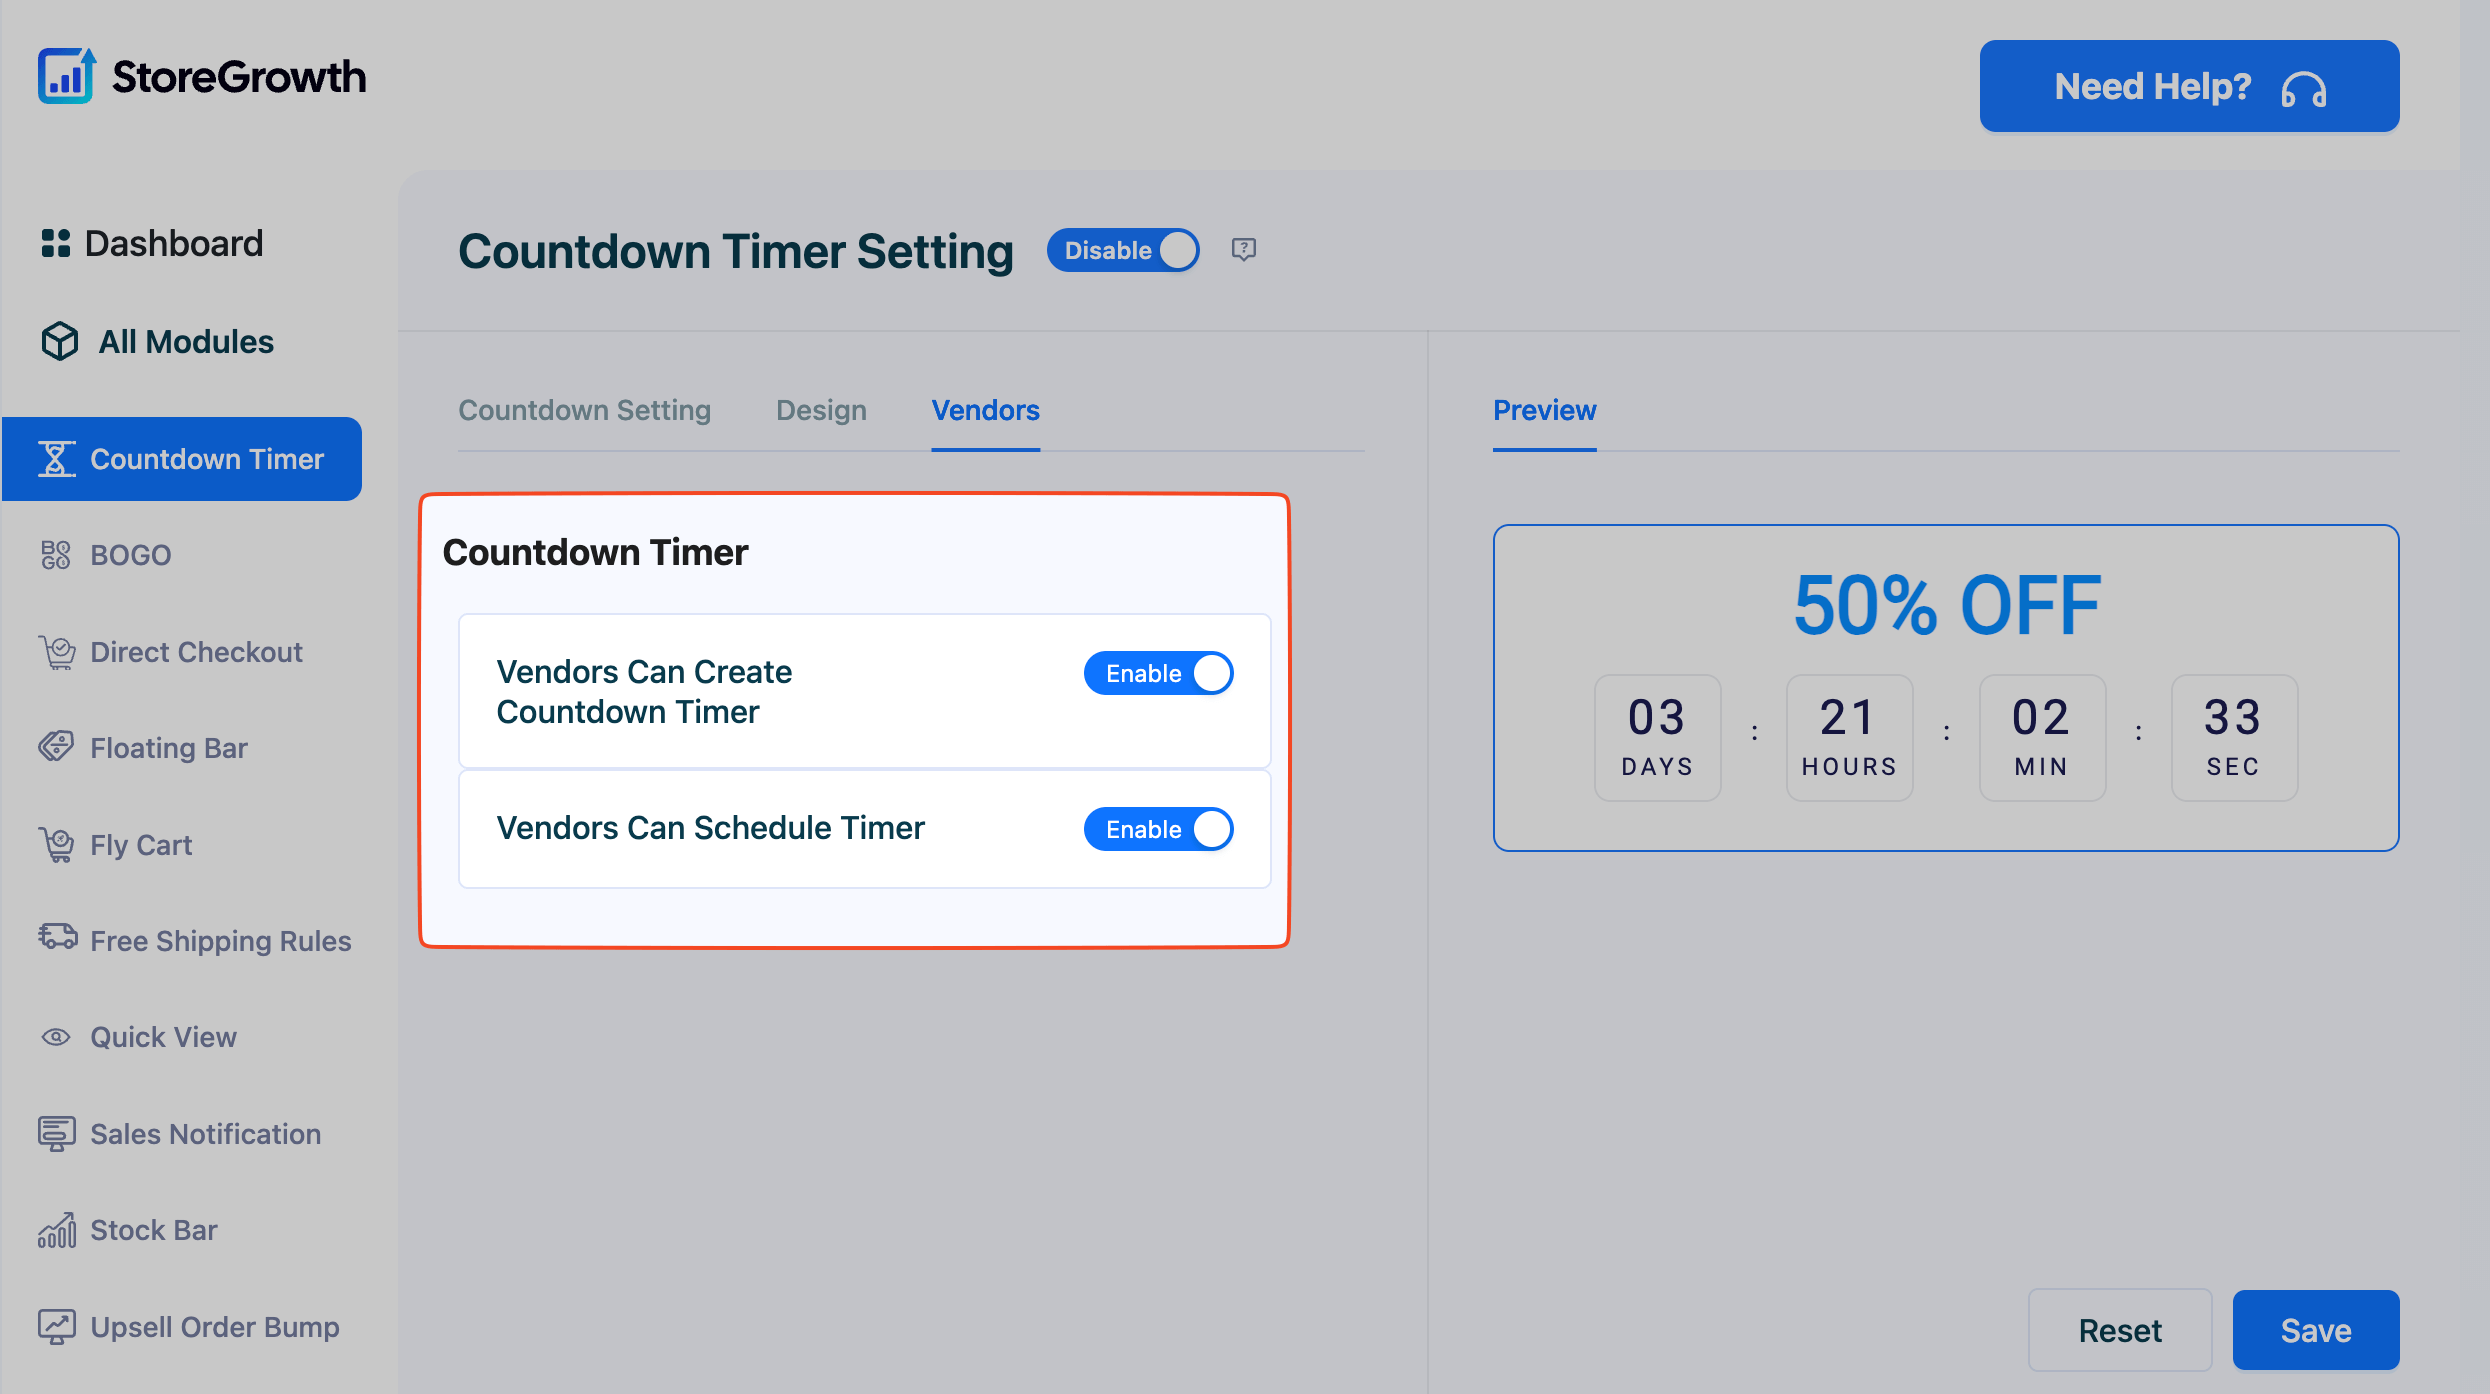
Once you’ve done this, vendors can now easily create and schedule countdown timers from their Vendor Dashboard. Let’s now see how vendors can create countdown timers from their end.
How to Create a Countdown Timer – Vendors
Once the admin has enabled Countdown Timer for vendors, you’ll see a new option inside your product settings. Countdown timers let you create urgency, highlight discounts, and encourage shoppers to act quickly.
Here’s how to set one up:
- Log in to your Dokan Vendor Dashboard.
- Go to Products and click Edit on the product you want to promote.
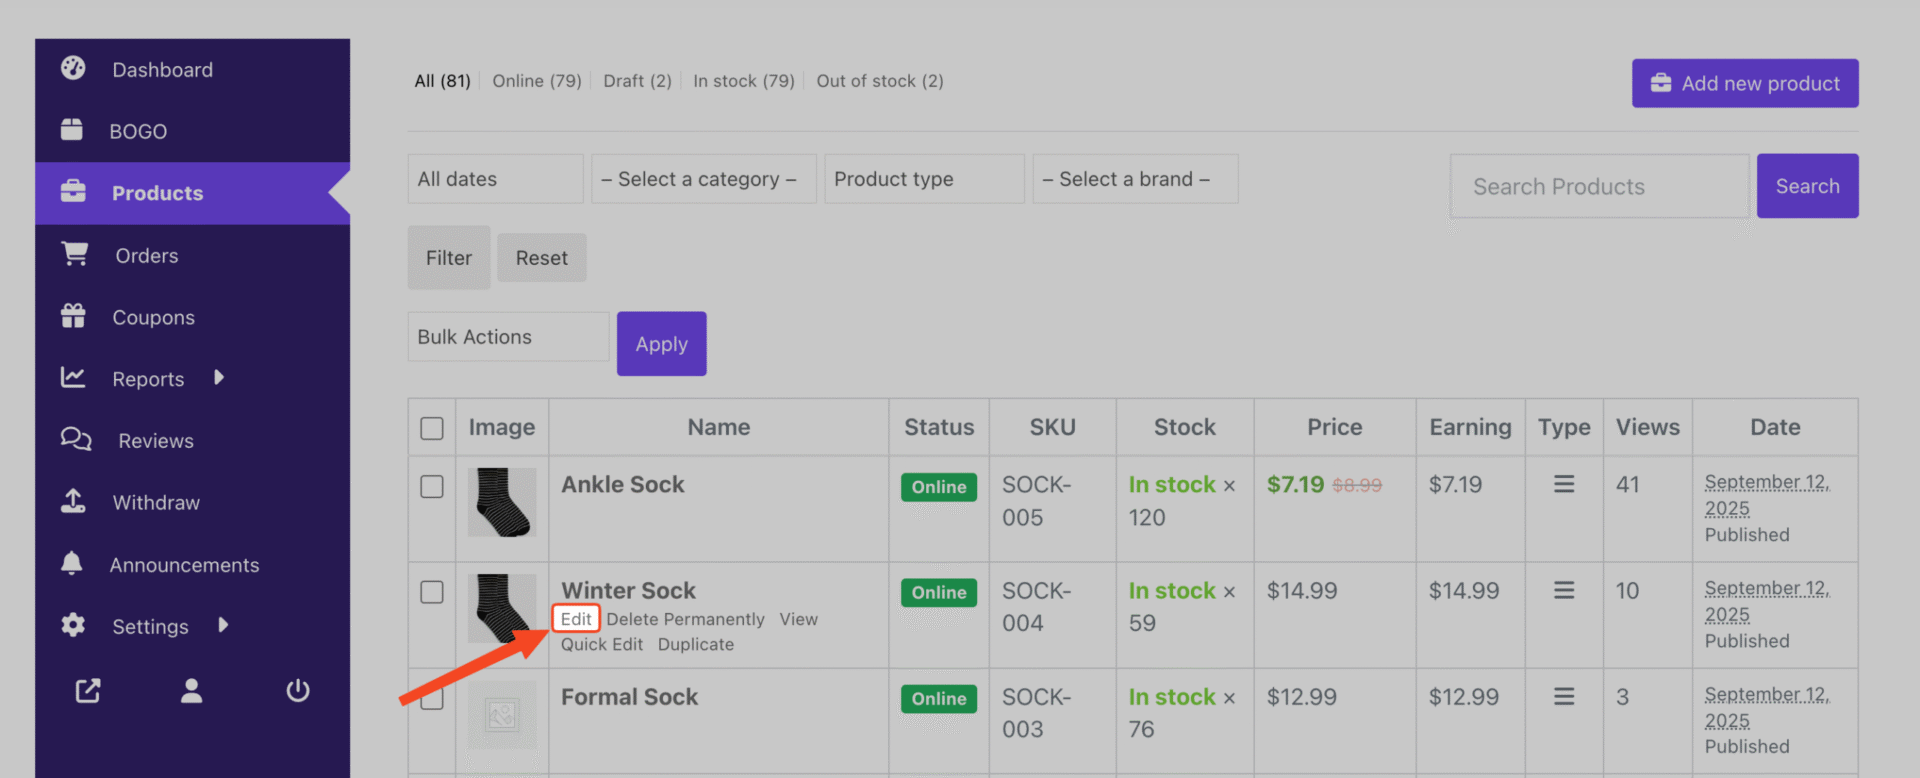
- Scroll down, and you’ll see a new Countdown Timer tab.
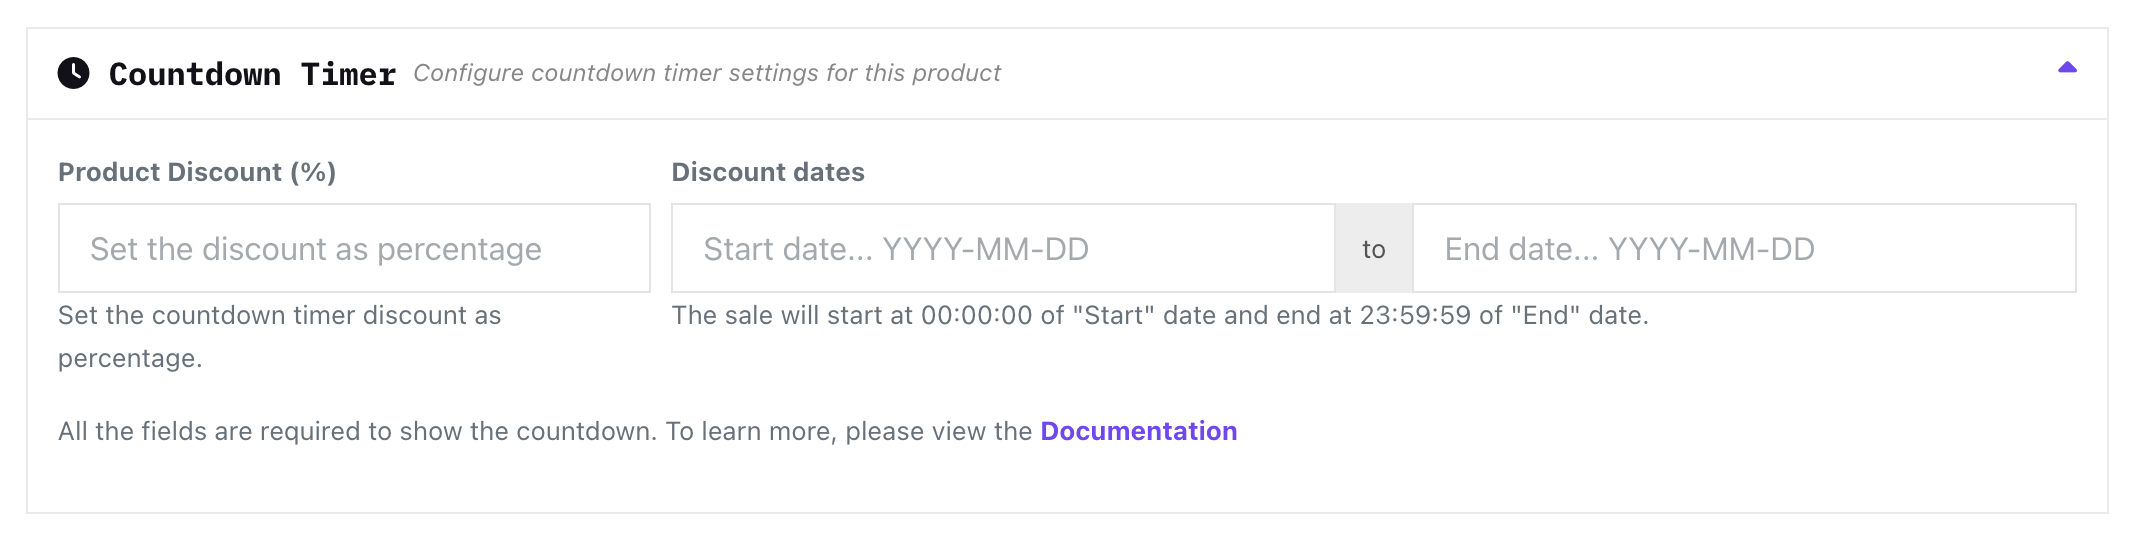
- In this tab, you can:
- Select the discount percentage.
- Set the start and end date for the countdown.
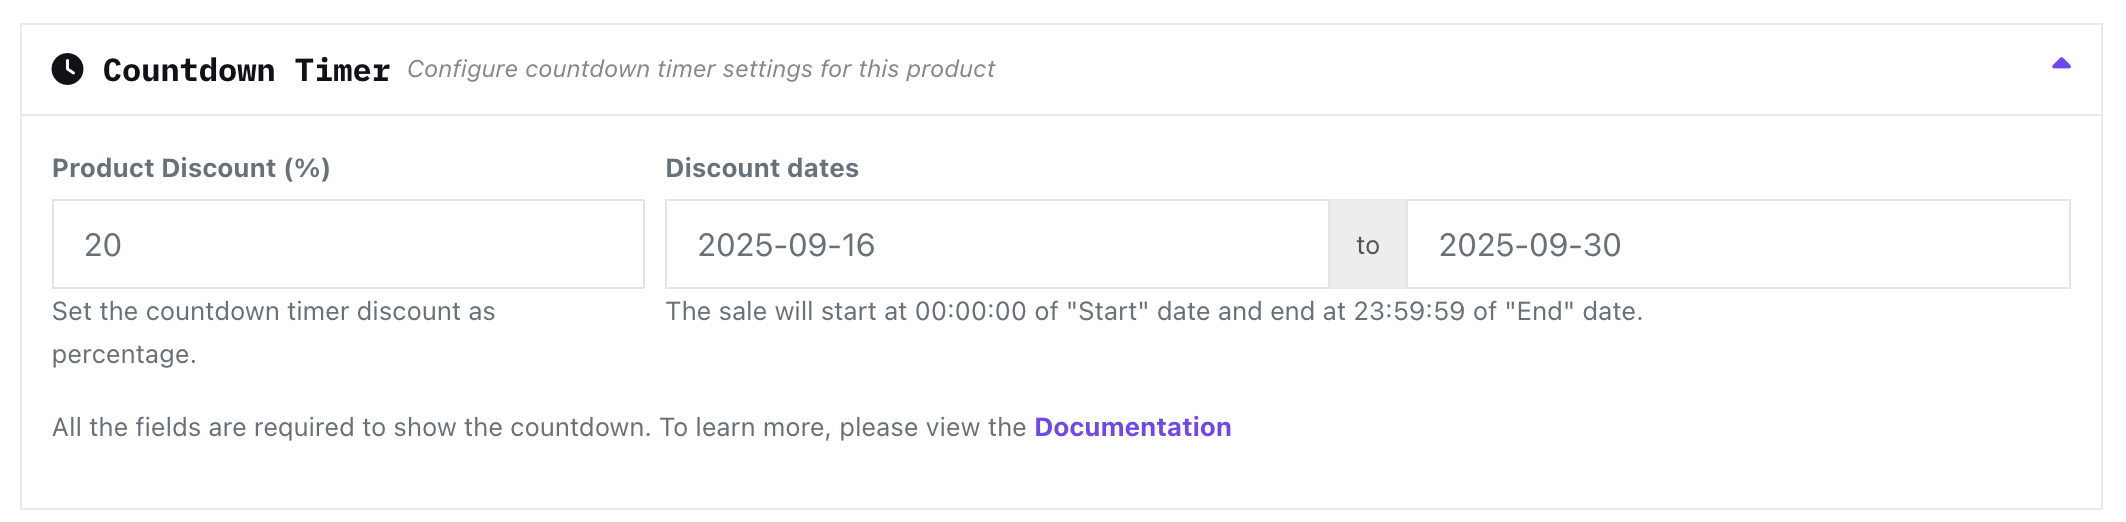
- Save your changes.
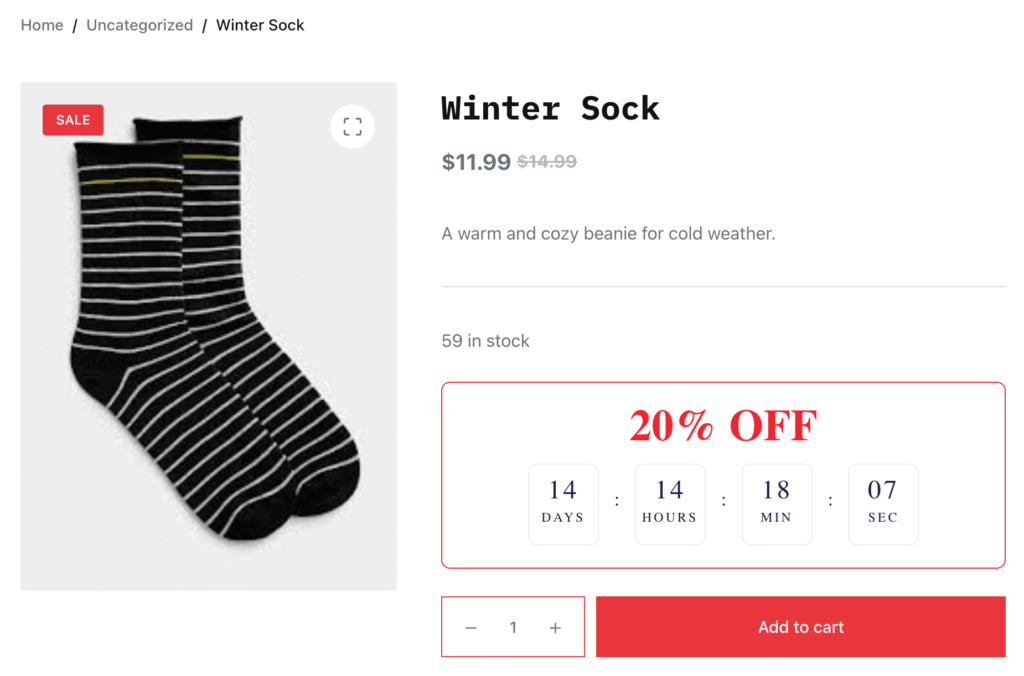
Your countdown timer is now live on the product page, showing customers exactly how long they have to grab the deal.
How to Enable Fly Cart – Admin
The Fly Cart is one of those little touches that makes a big difference. Instead of sending shoppers to a separate cart page, it slides in smoothly from the side – keeping them right where they are and ready to keep browsing. More browsing = more sales.
Enabling the Fly Cart in your storefront is quite simple.
Here’s how you can enable it:
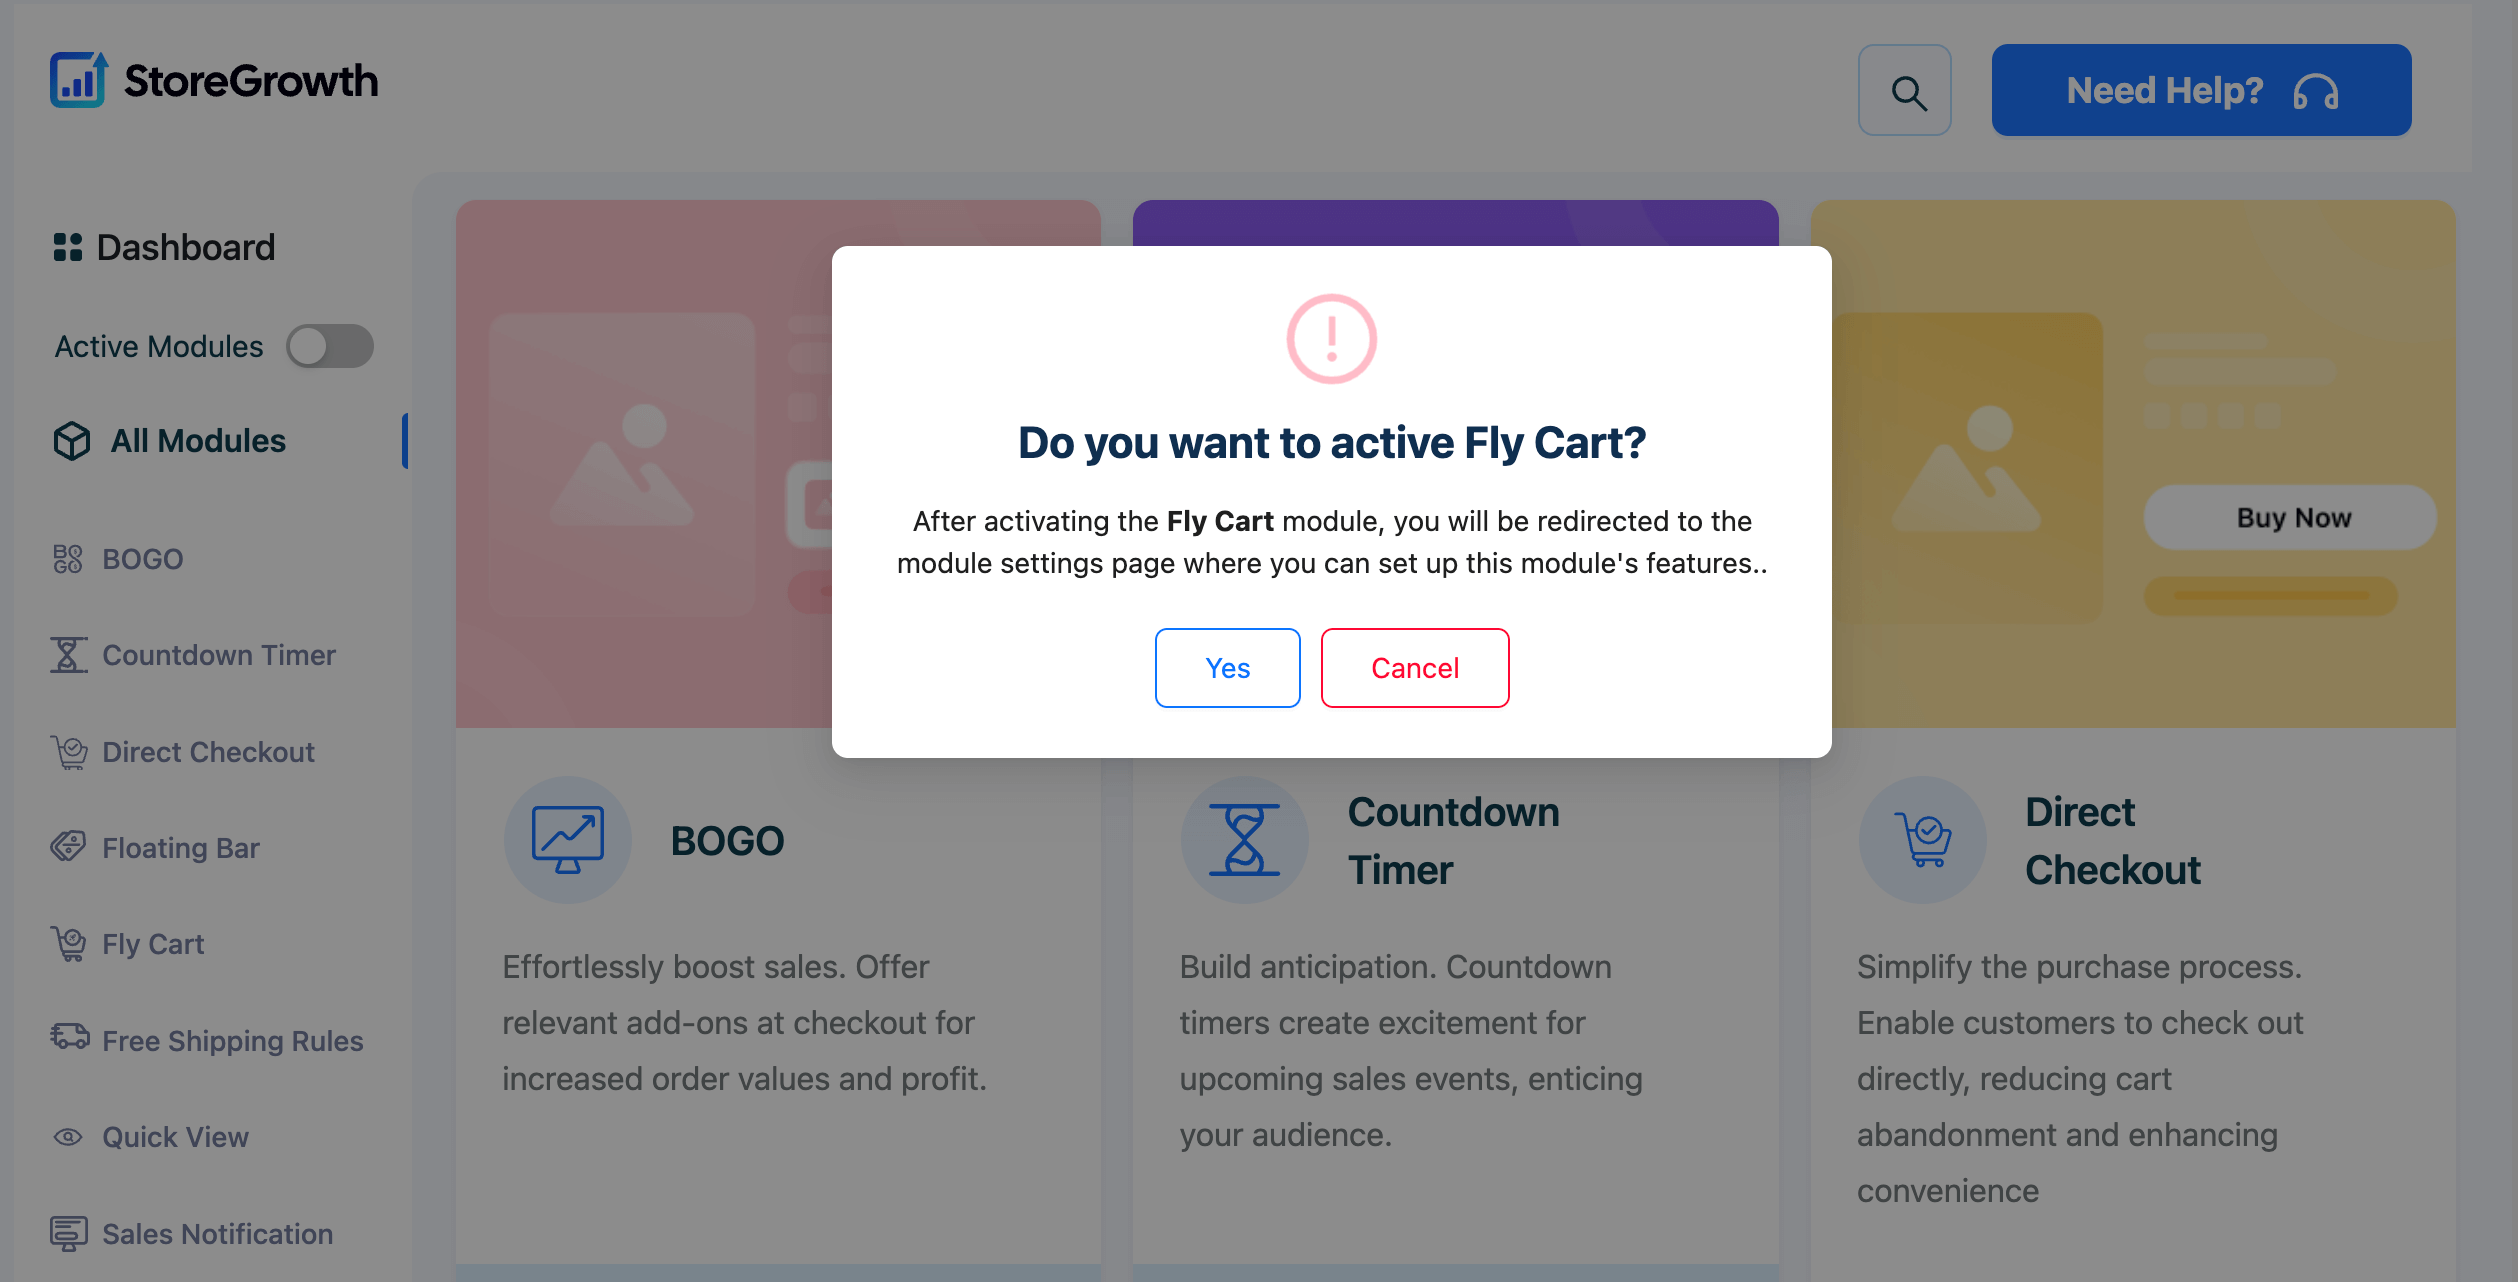
- Head over to StoreGrowth → Modules → Fly Cart.
- A popup will ask if you want to enable the module – hit Yes.
- After activation, go to StoreGrowth → Fly Cart → General Settings.
- You will see two checkboxes at the very bottom:
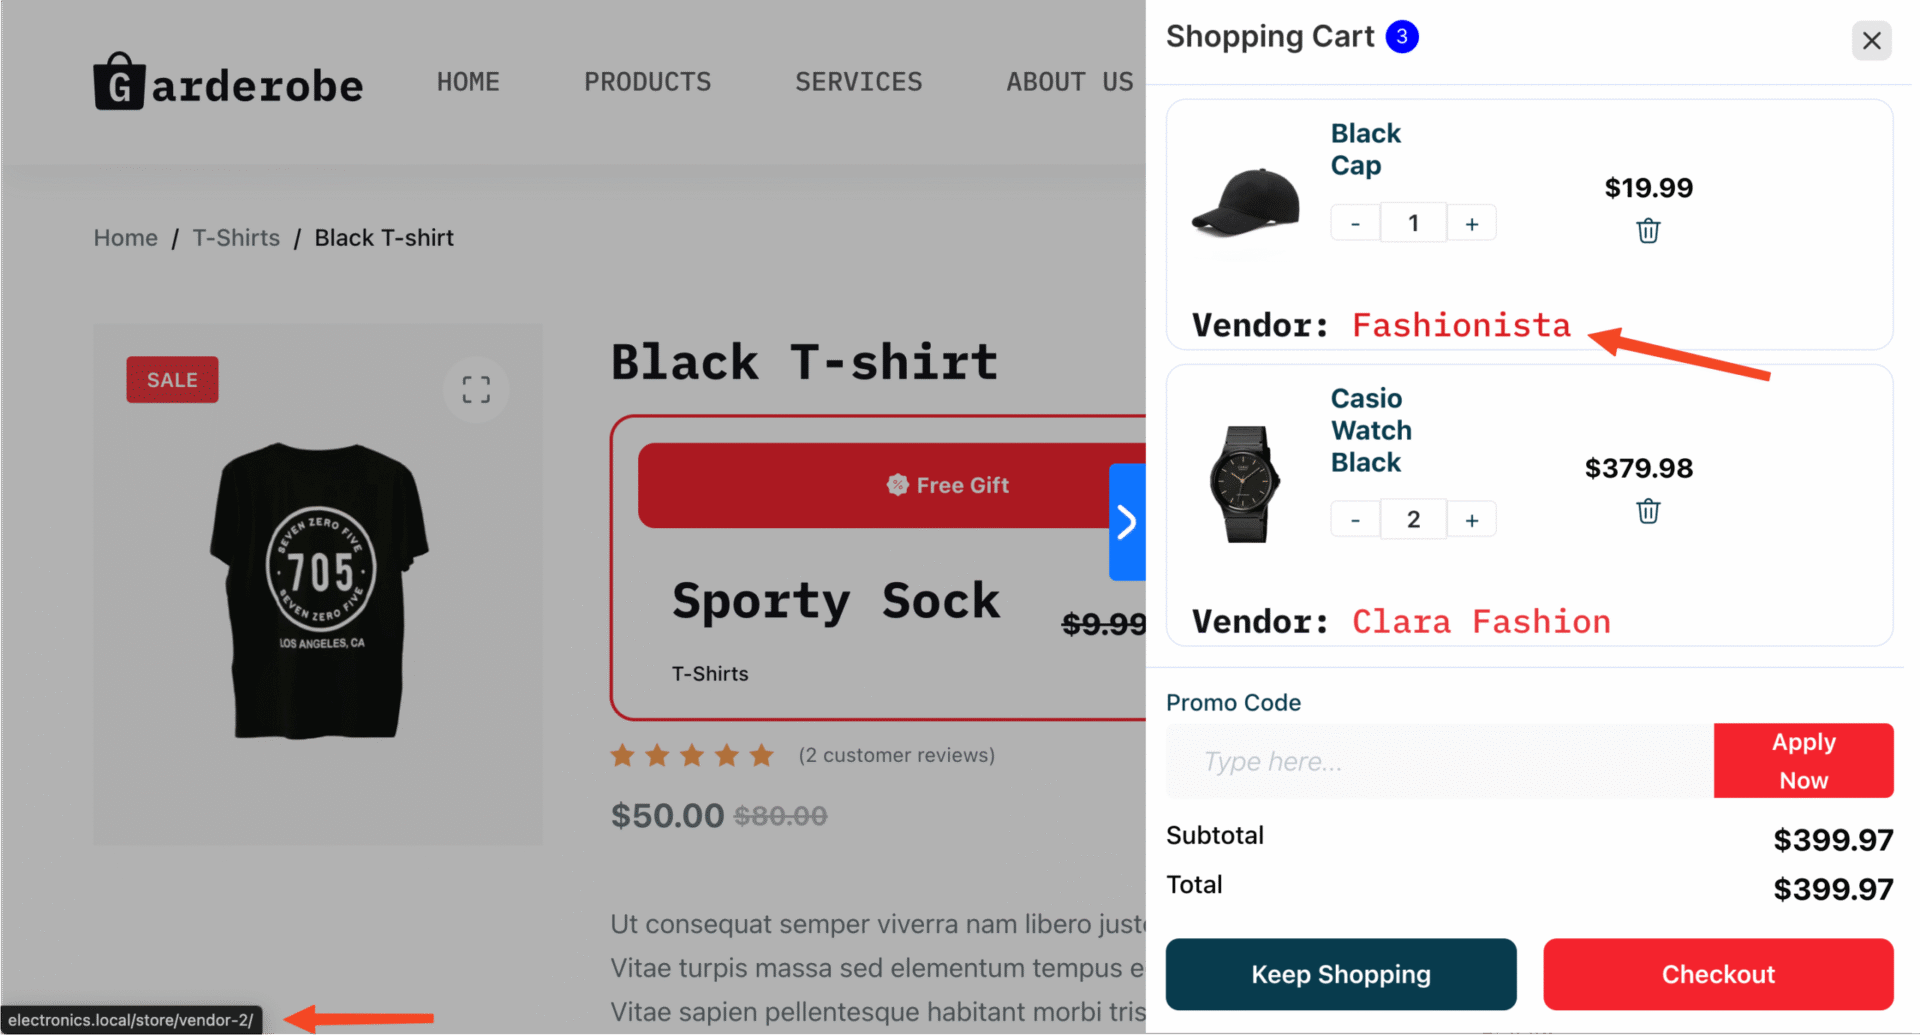
- Show Store Names – check this to display the vendor store name next to each product in the fly cart. This gives shoppers clarity on which vendor each item comes from in a multi-vendor order.
- Enable Store Links – check this to make the store name clickable, linking to the vendor storefront. Links open in a new tab to keep the checkout flow intact.
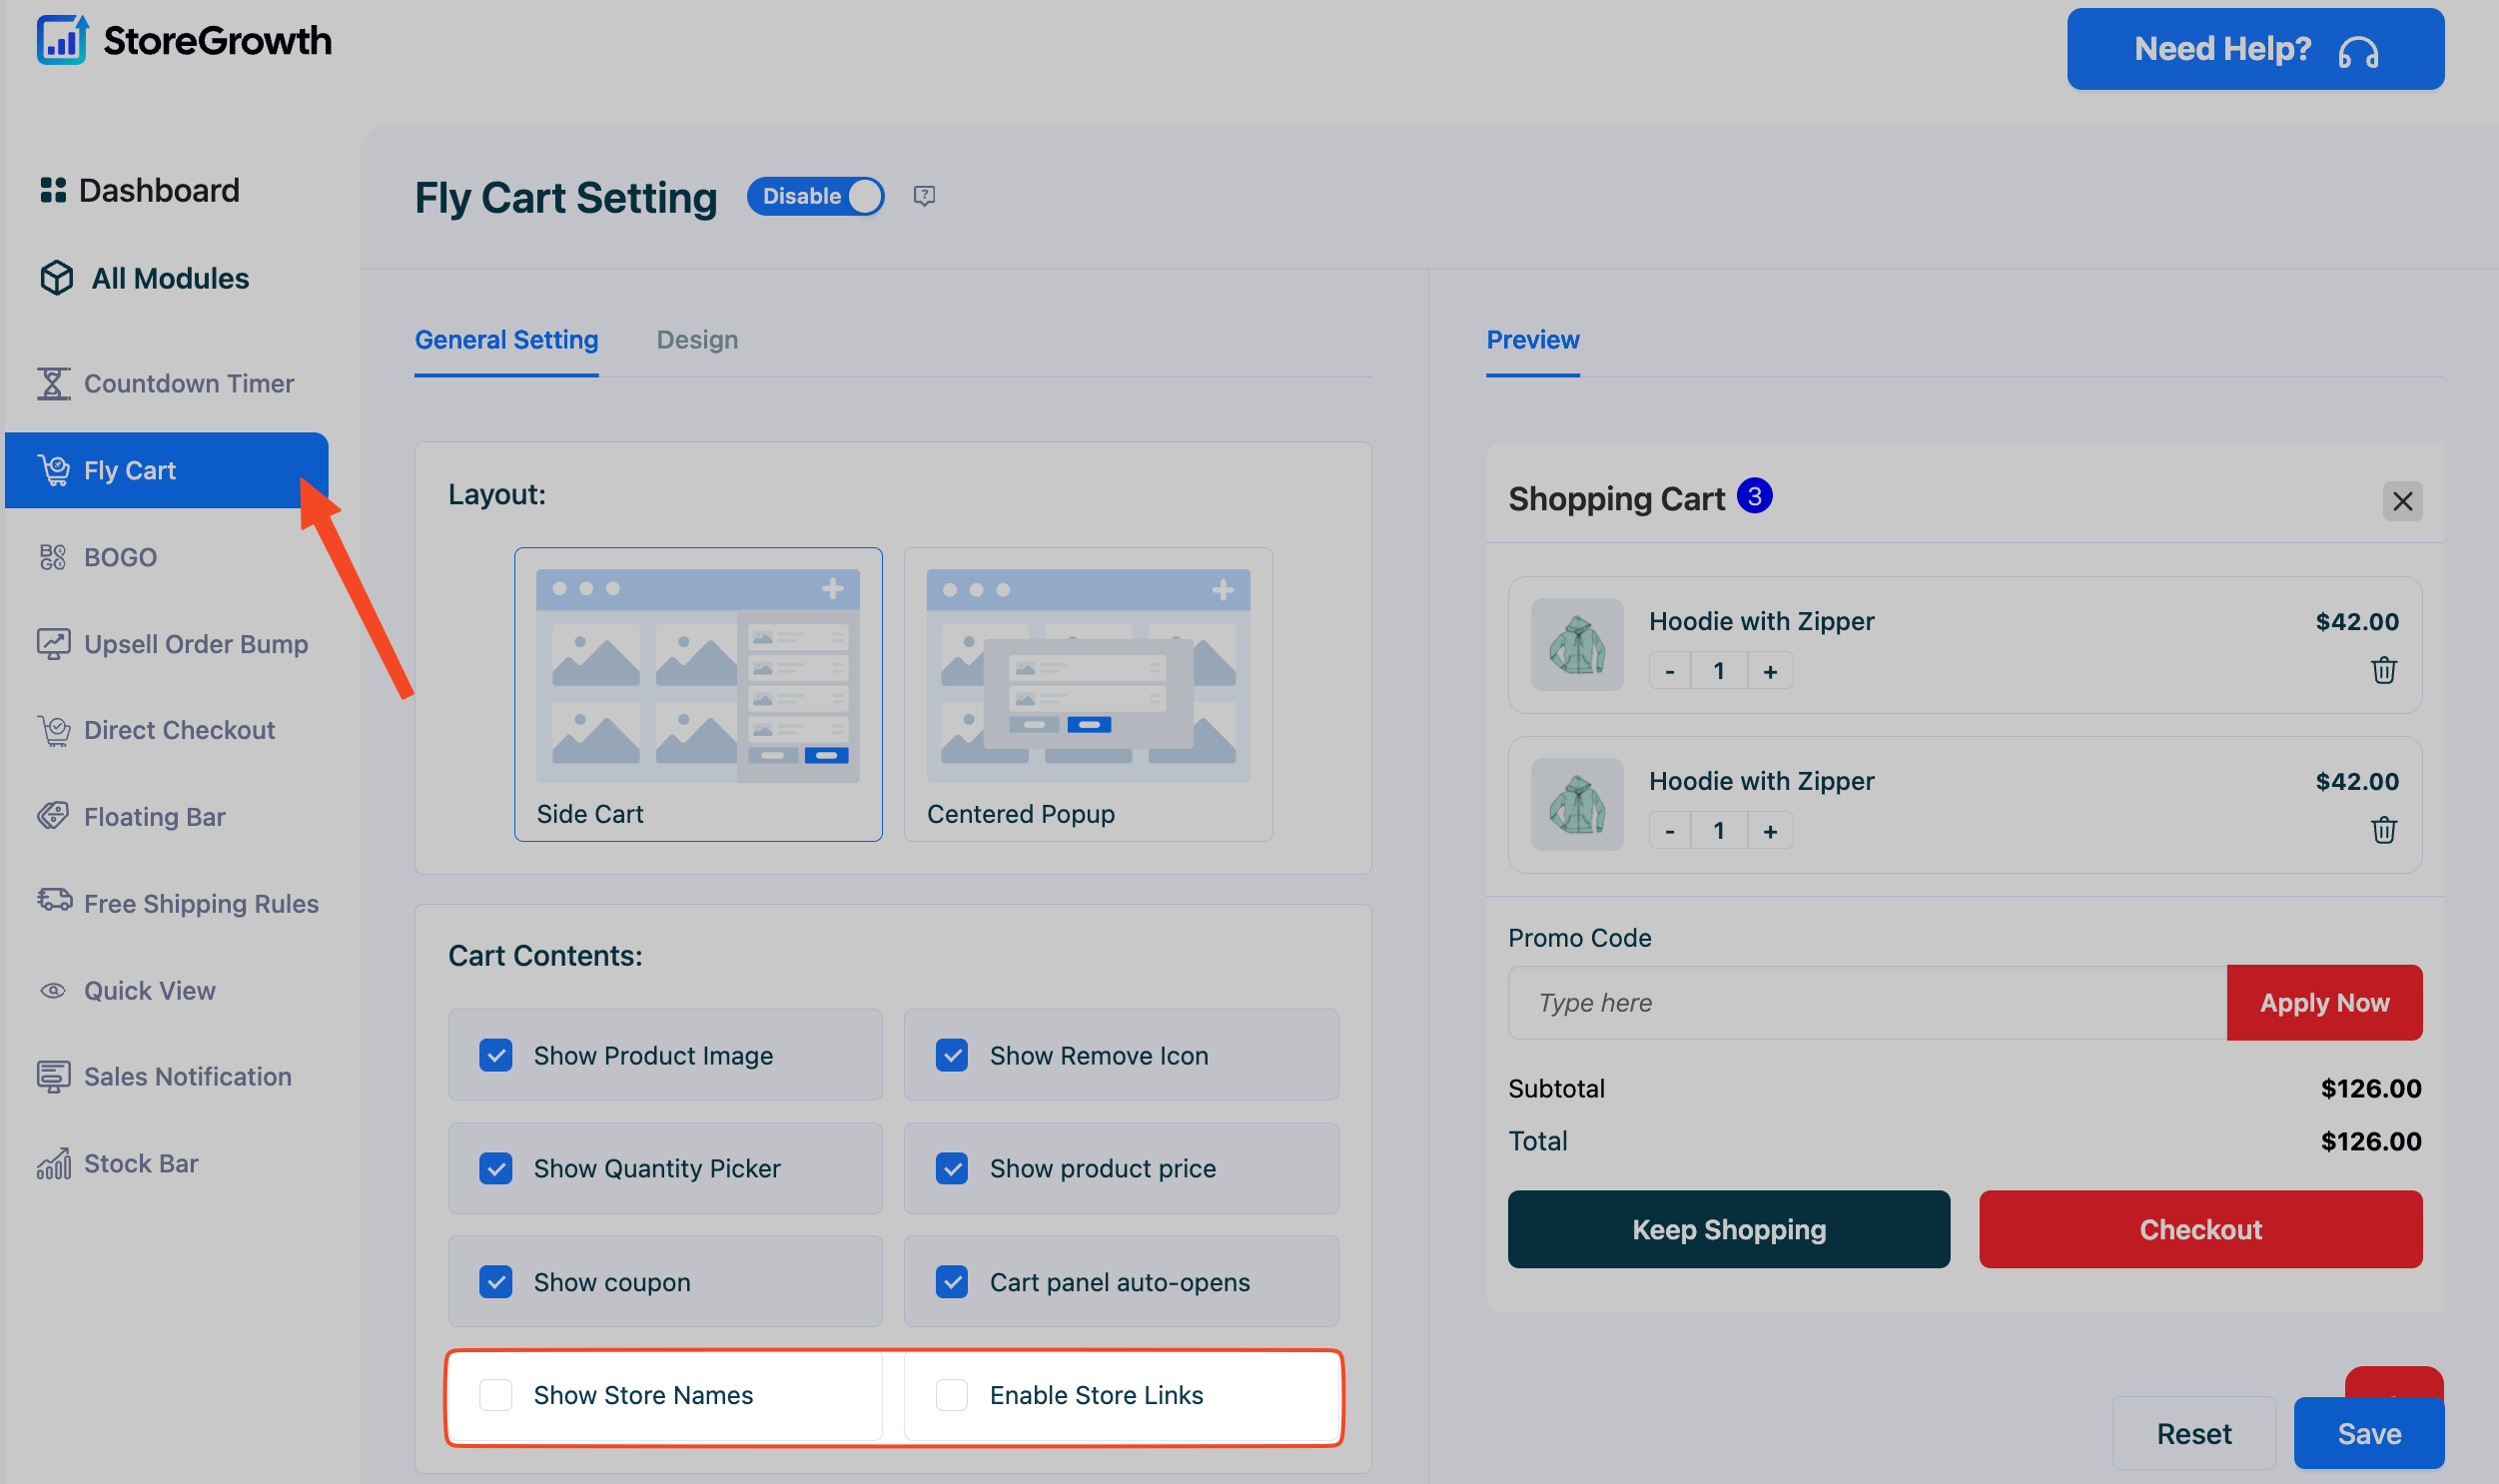
- Click Save to apply your settings. Once you’ve saved it, you can see the new Fly Cart in your site.
When a shopper adds a product to the cart, the fly cart displays the item row and the vendor name.
If you enable store links, the vendor name becomes clickable and opens the vendor storefront in a new tab, leaving the cart visible so the shopper can continue checking out or keep browsing.
Using Other StoreGrowth Modules
While BOGO Deals, Countdown Timers, and the Fly Cart are built to integrate directly with Dokan, StoreGrowth comes with many other conversion-boosting tools. As the admin, you can enable these modules site-wide so they work across your entire storefront.
This means features like Direct Checkout, Upsells, Quick View, Live Sales Notifications, and more will automatically apply to all products and vendors. You stay in full control of which modules are active, while your marketplace becomes more optimized and sales-friendly for every shopper.
By activating StoreGrowth with Dokan, your marketplace is ready to compete at the next level – engaging, conversion-focused, and built to grow.