

The Stock Bar module is a powerful marketing tool that leverages scarcity to create urgency and encourage immediate purchases.
It displays a clear, visual progress bar on your product pages, showing customers the real-time availability of your inventory.
When shoppers see that stock is limited, it triggers a fear of missing out (FOMO), motivating them to buy before the product sells out.
Activating the Stock Bar Module
To begin using this feature, you must first activate it from the StoreGrowth dashboard.
- Navigate to StoreGrowth » Modules from your WordPress dashboard.
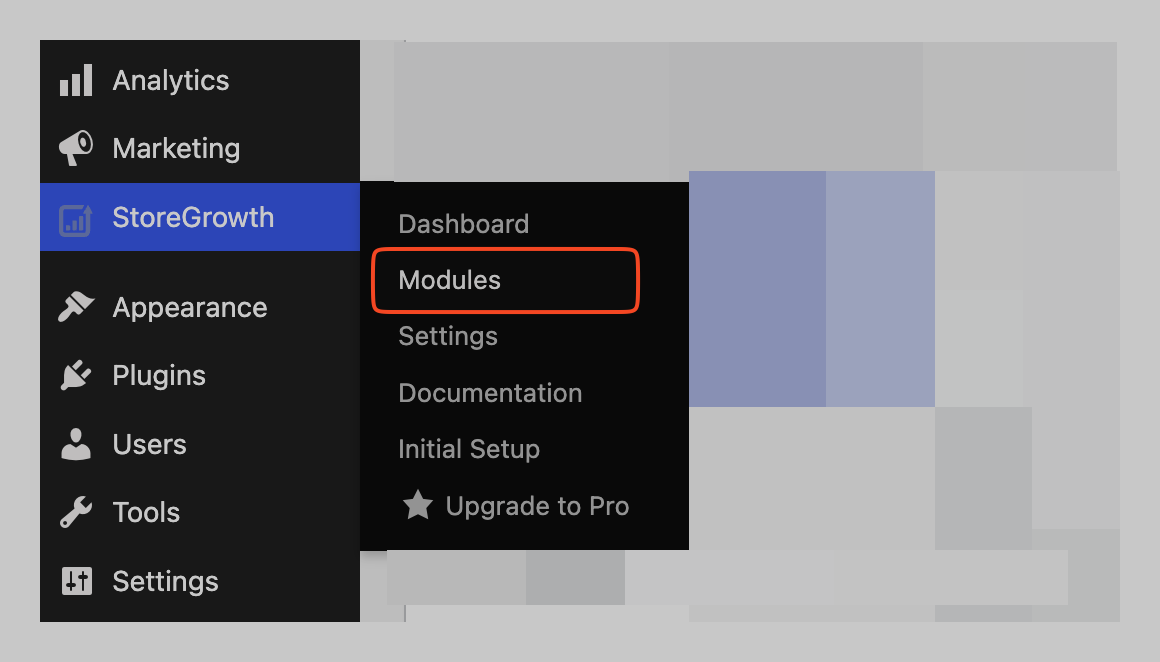
- Find the Stock Bar module card in the list.
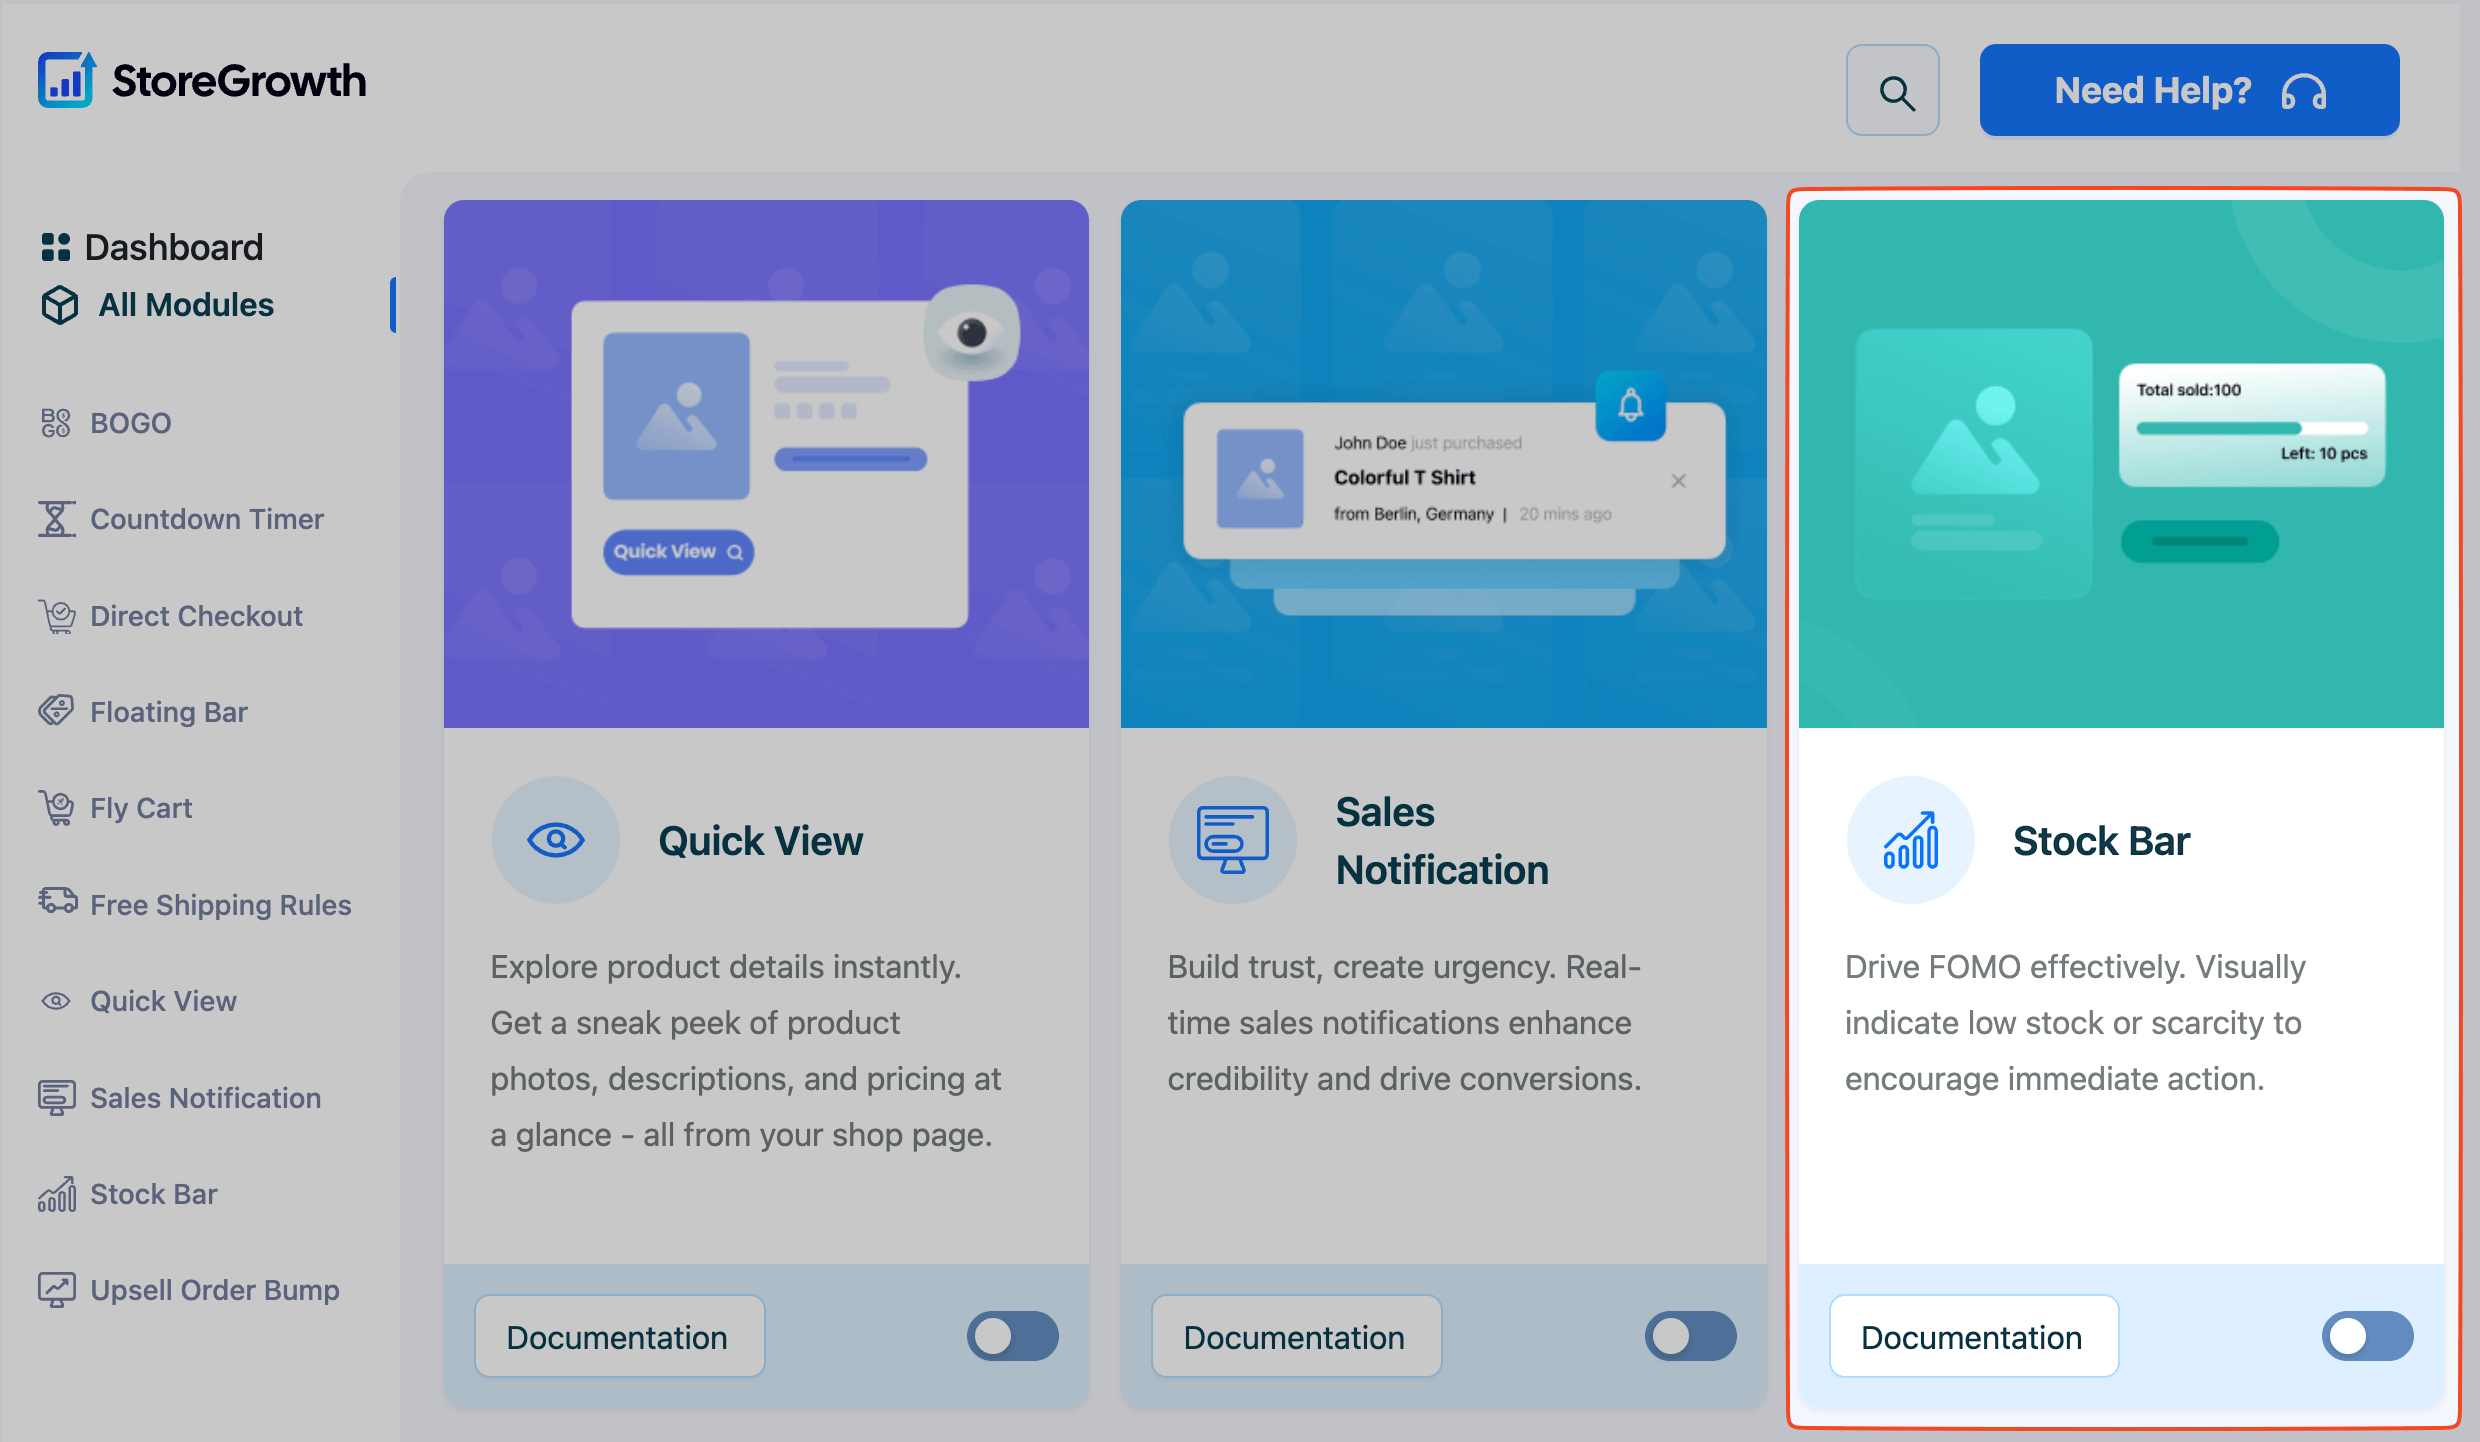
- Click the toggle switch to the “On” position to activate it.
Once enabled, a “Stock Bar” menu item will appear in the main StoreGrowth sidebar, where you can access all its settings.
Prerequisite: Enable Stock Management in WooCommerce
The Stock Bar module relies on WooCommerce’s inventory management system to function. You must enable stock tracking for each product where you want the bar to appear.
For Simple Products:
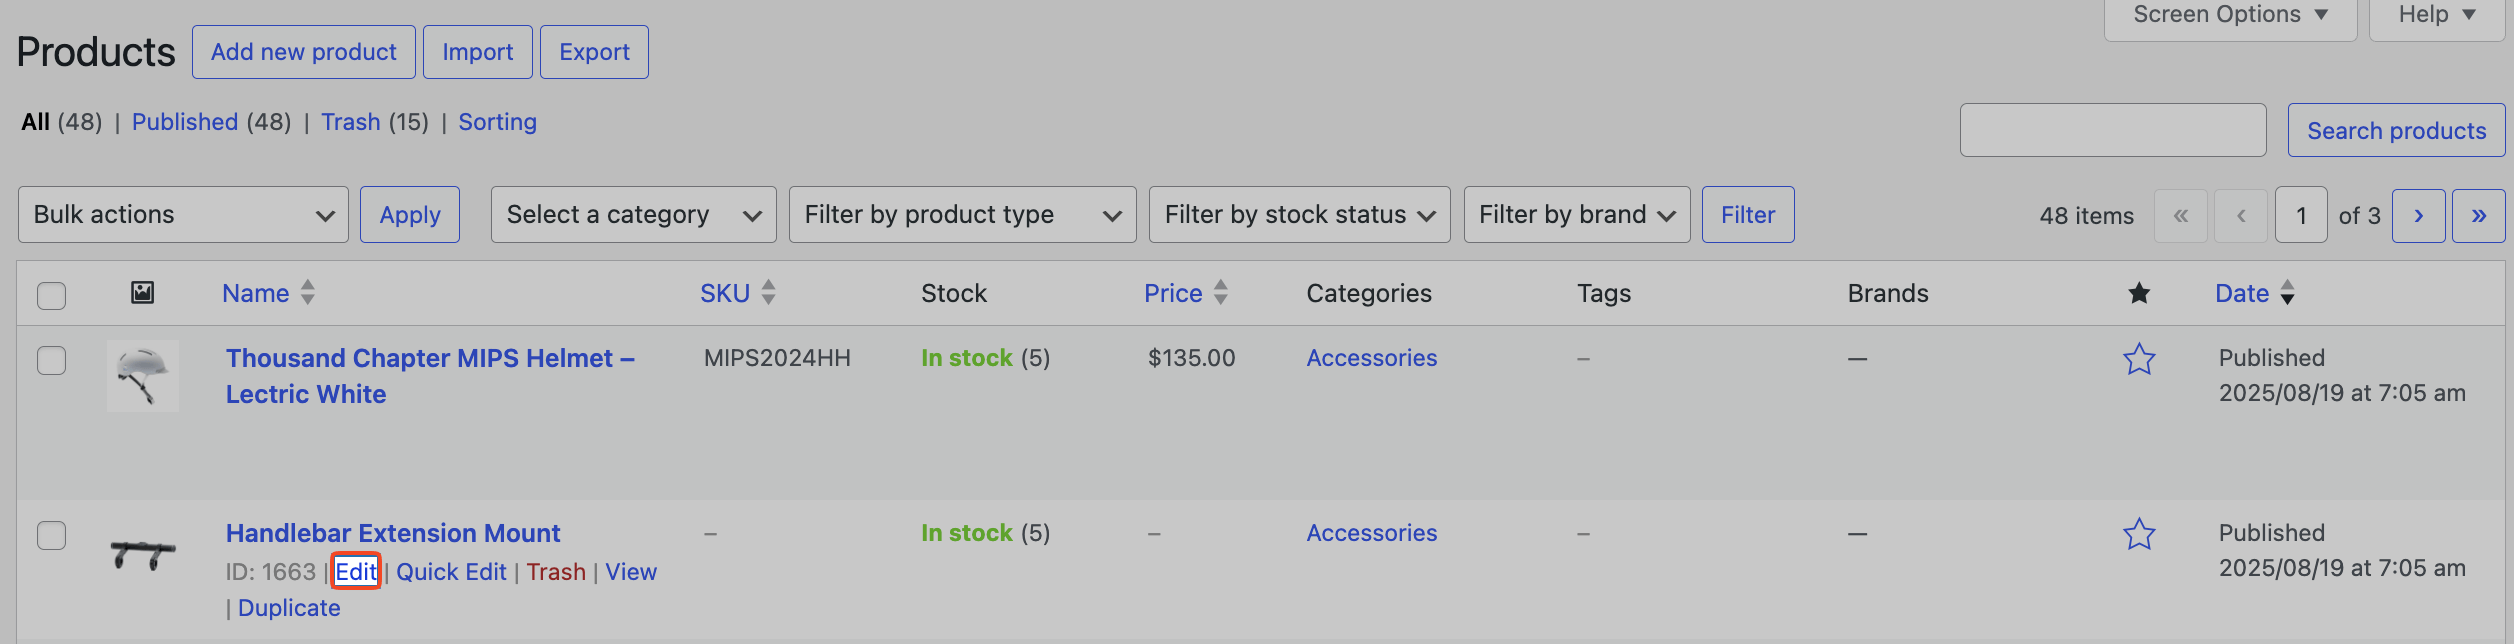
- Navigate to Products » All Products and select the product you wish to edit.
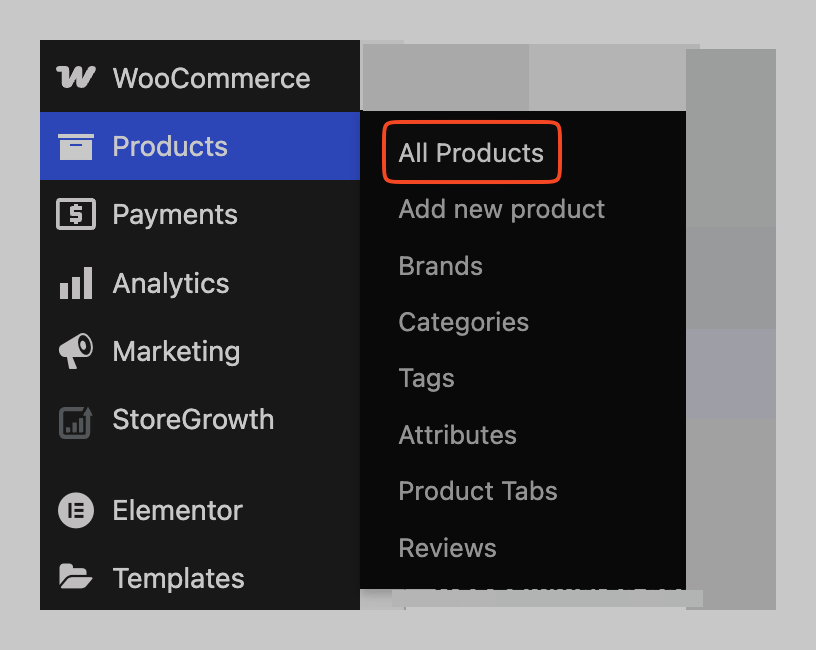
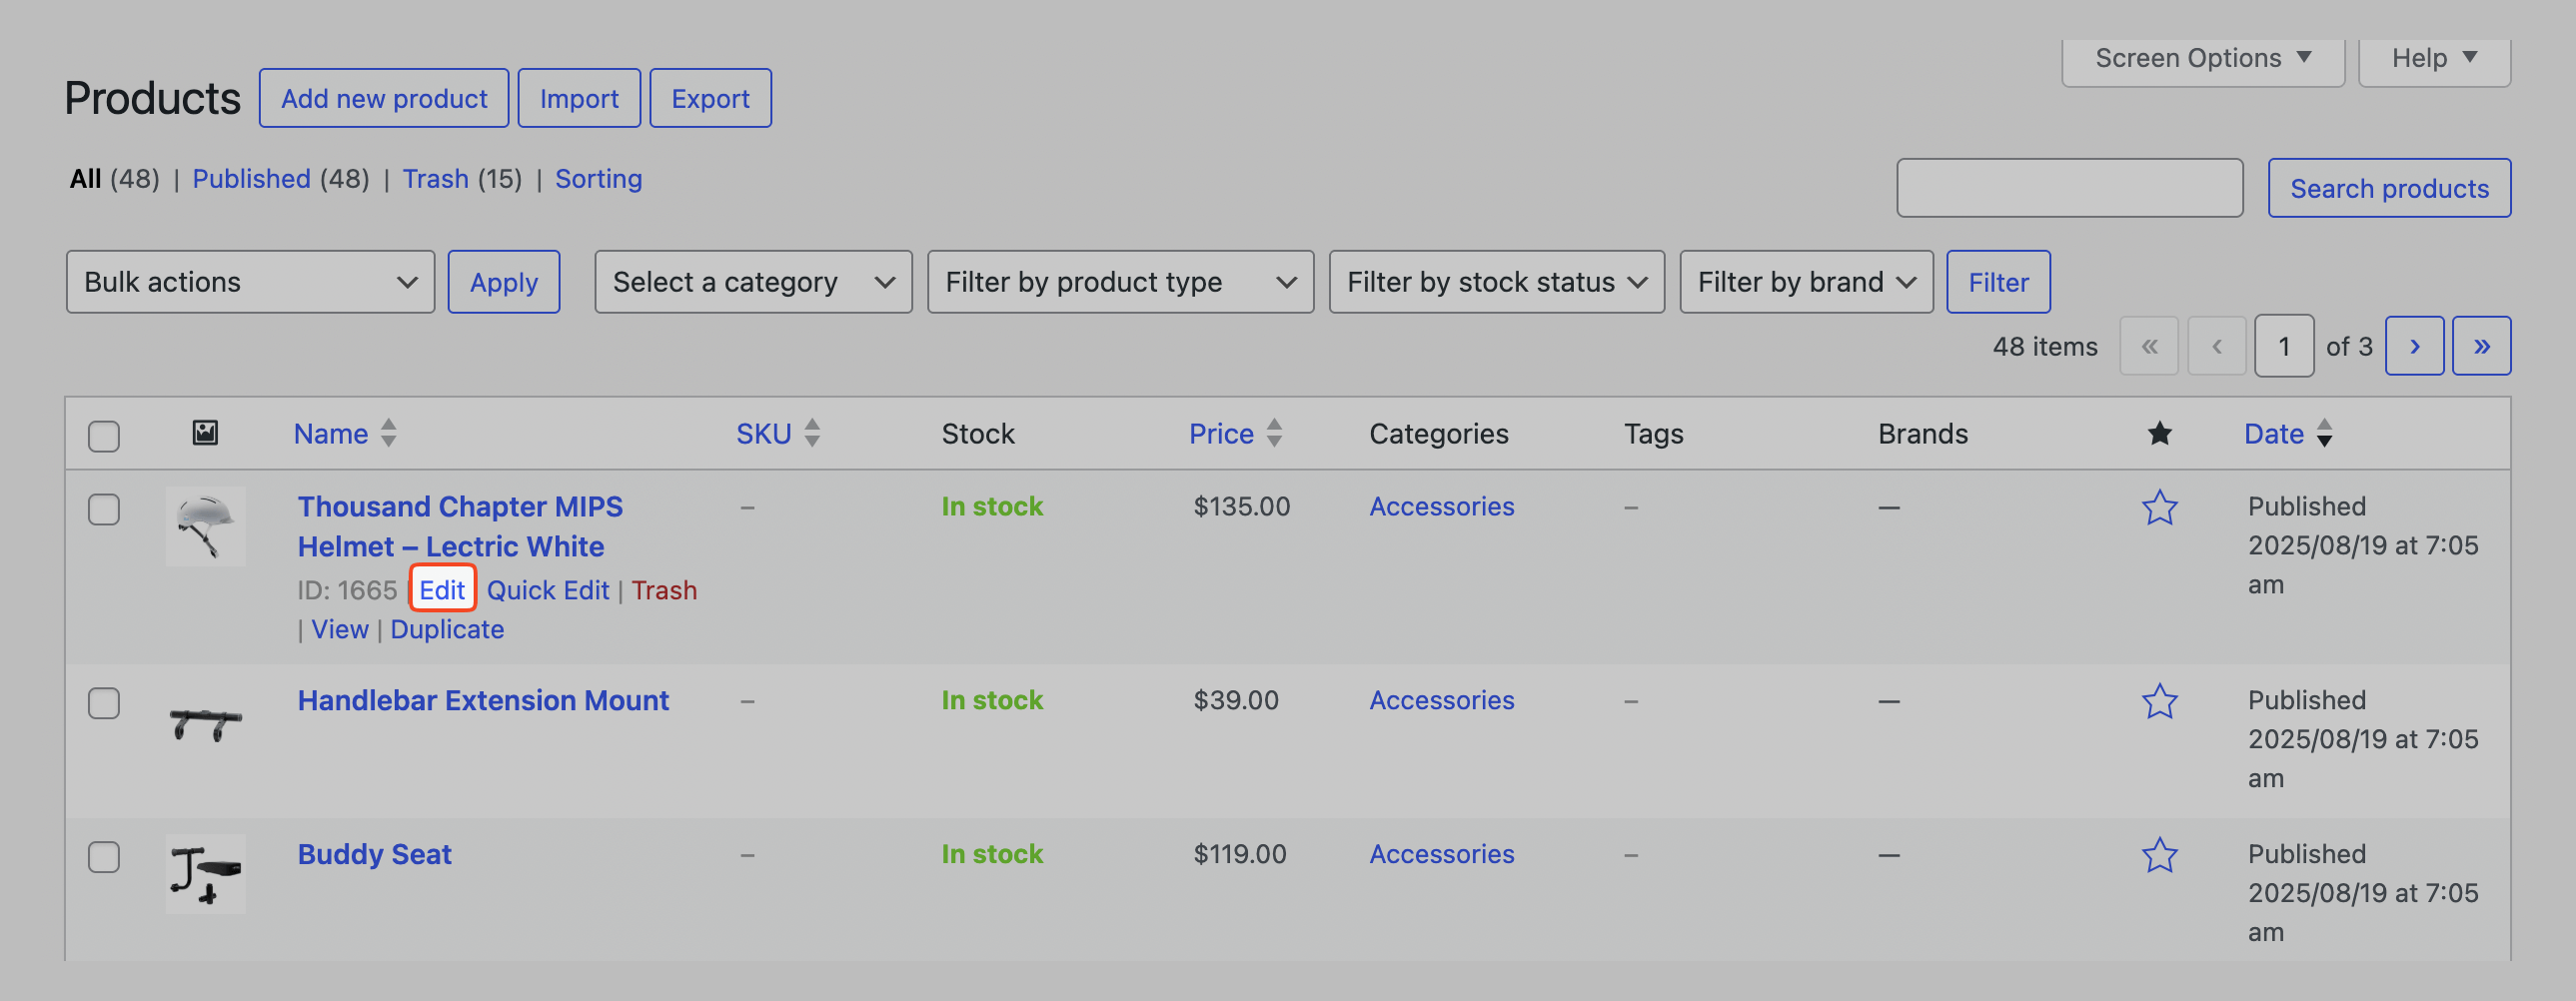
- Scroll down to the Product data panel and click on the Inventory tab.
- In the Stock Management checkbox, click on Track stock quantity for this product.
- Enter the current inventory number in the Quantity field.
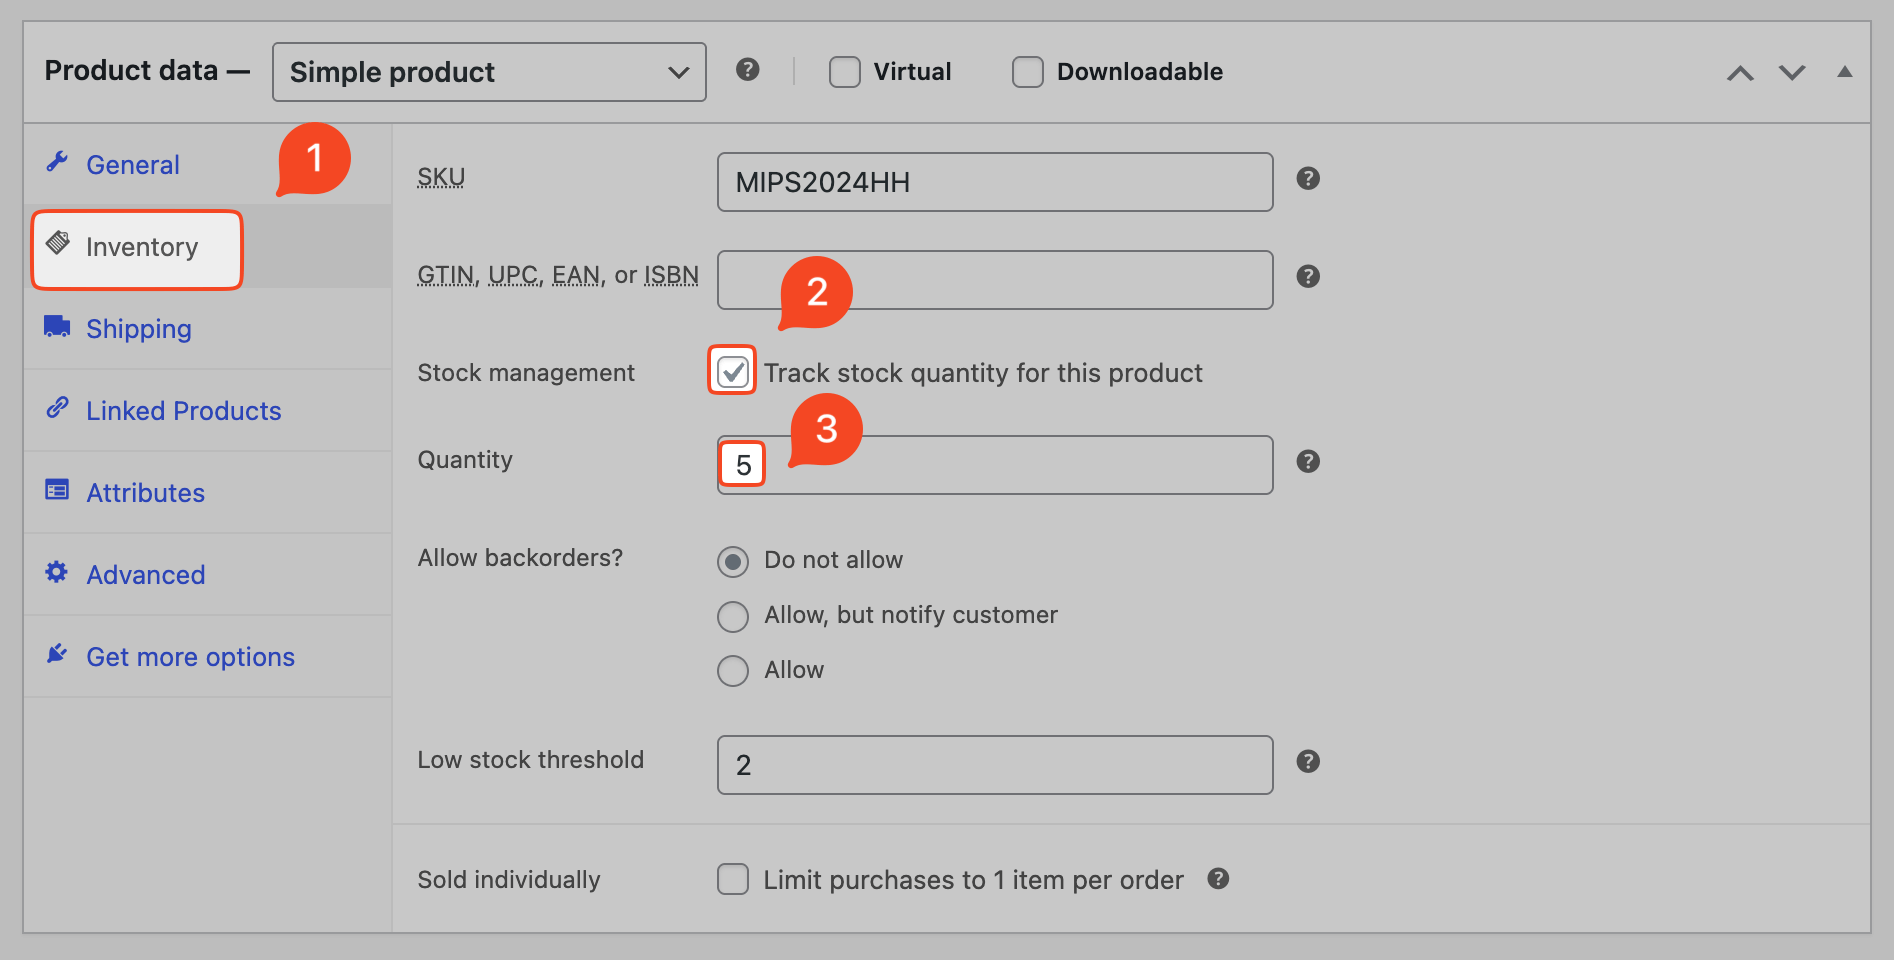
- Click Update to save the product.
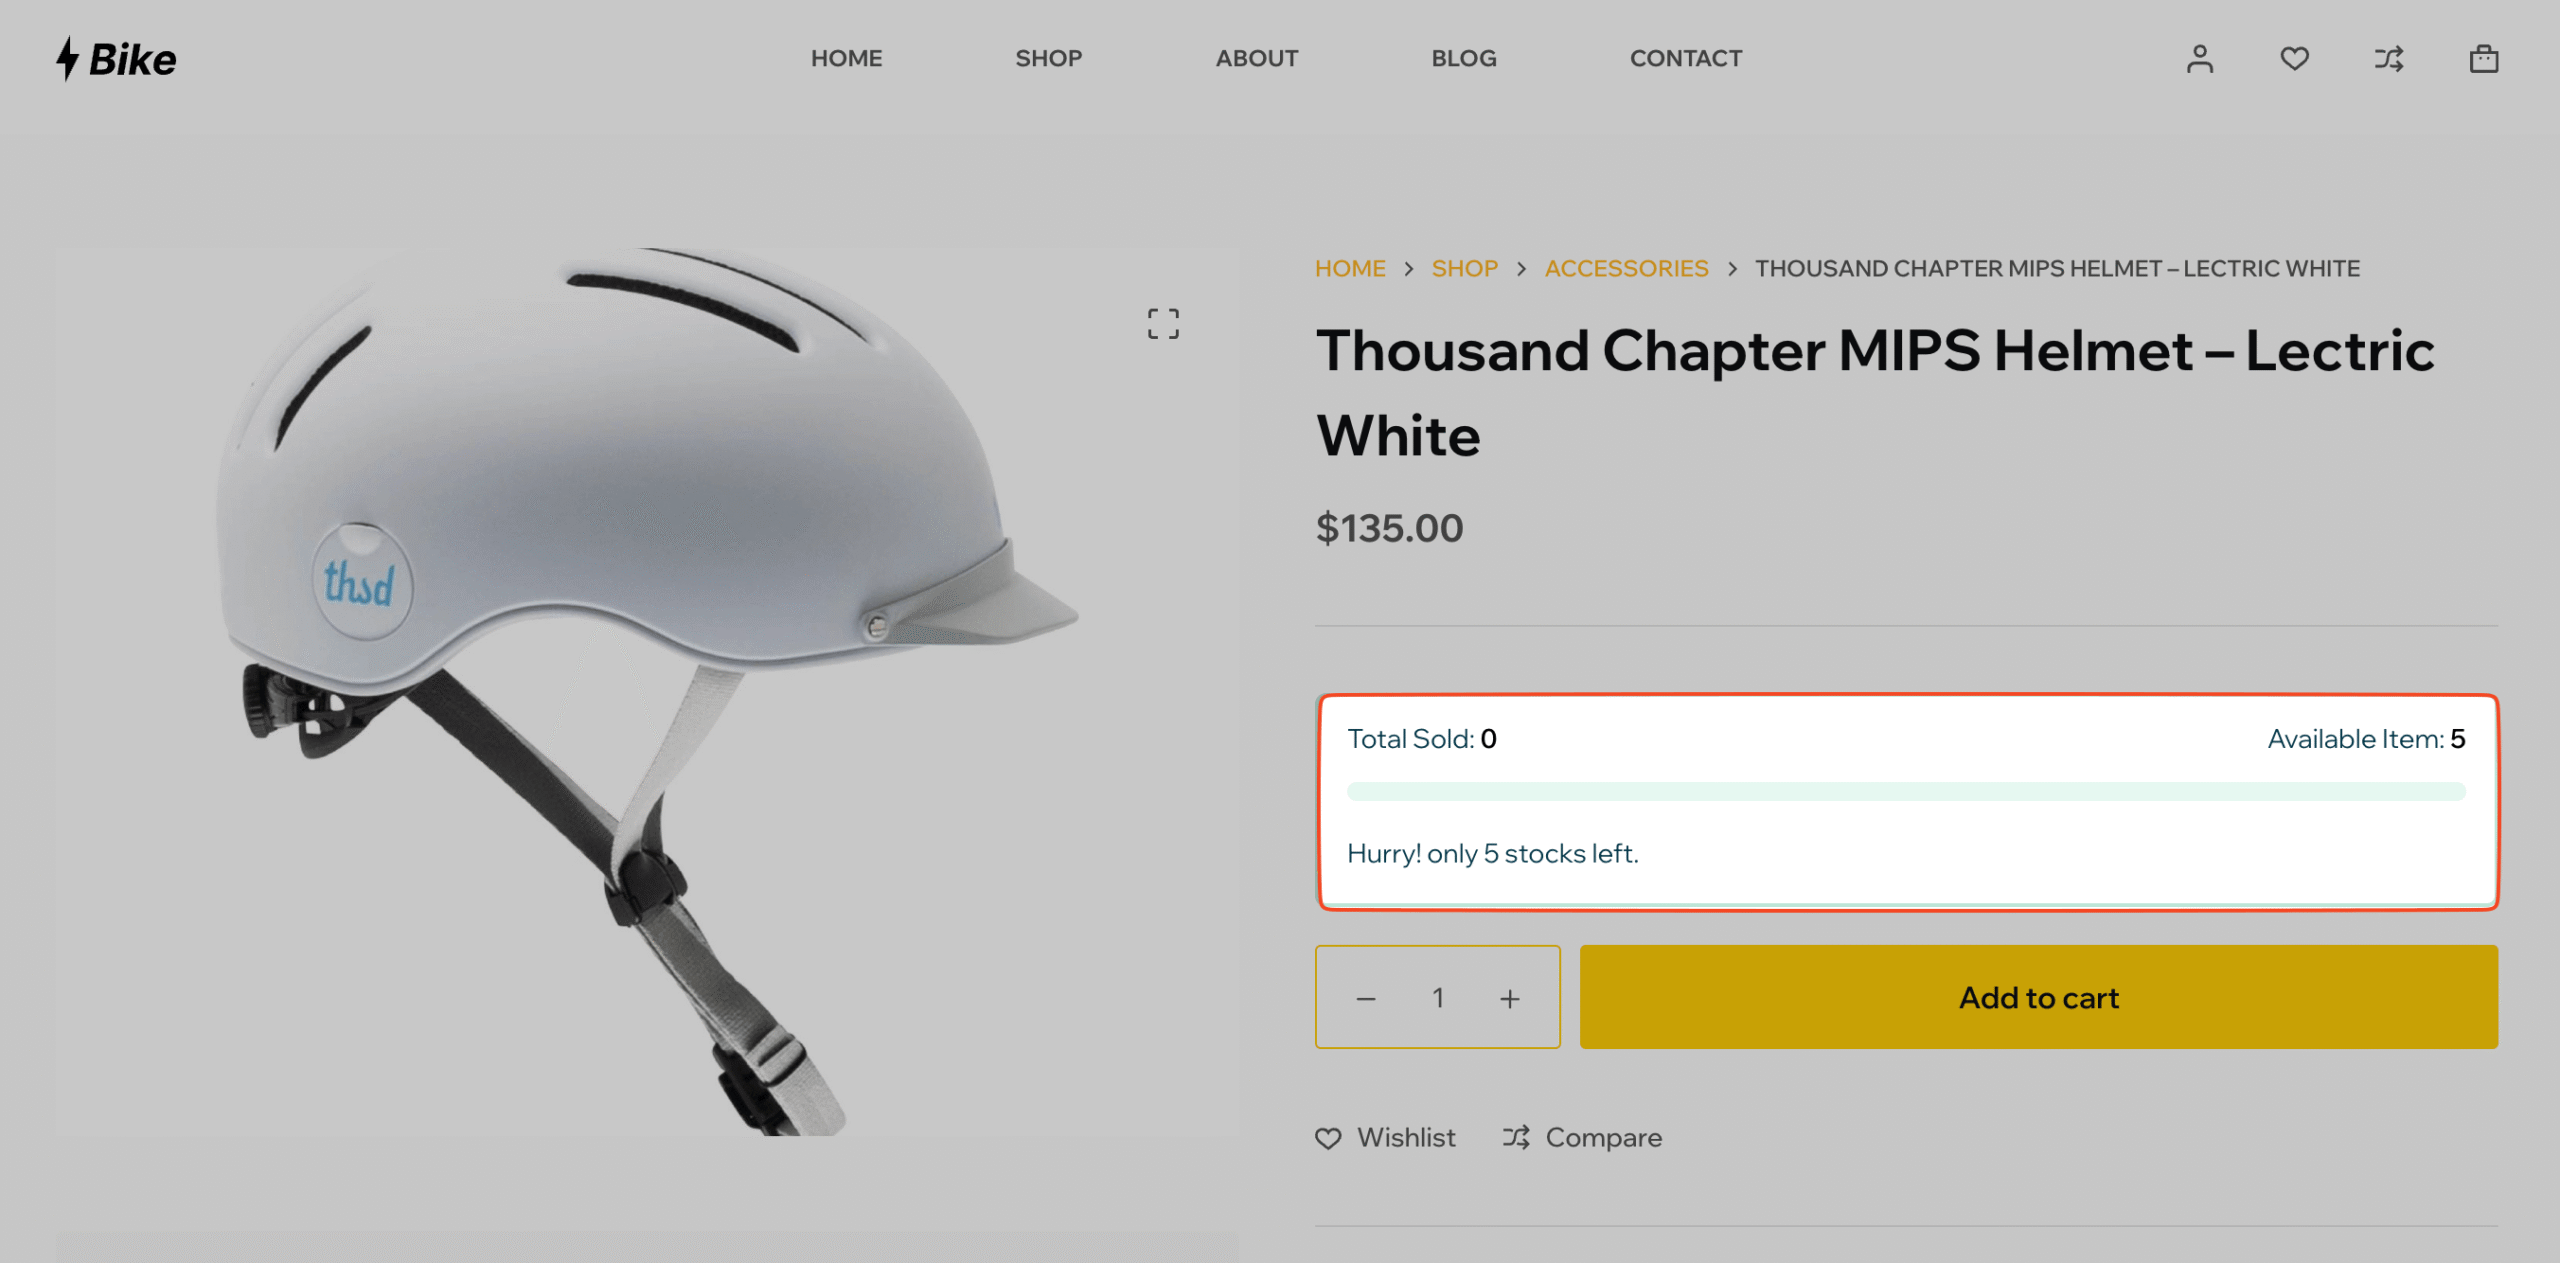
Once you have successfully enabled the Stock Management (and have the Stock Bar active), your product page will have a stock bar.
For Variable Products:
Stock for variable products is managed for each variation individually.
- Navigate to Products » All Products and edit the variable product.
- Go to the Product data panel and click on the Variations tab.
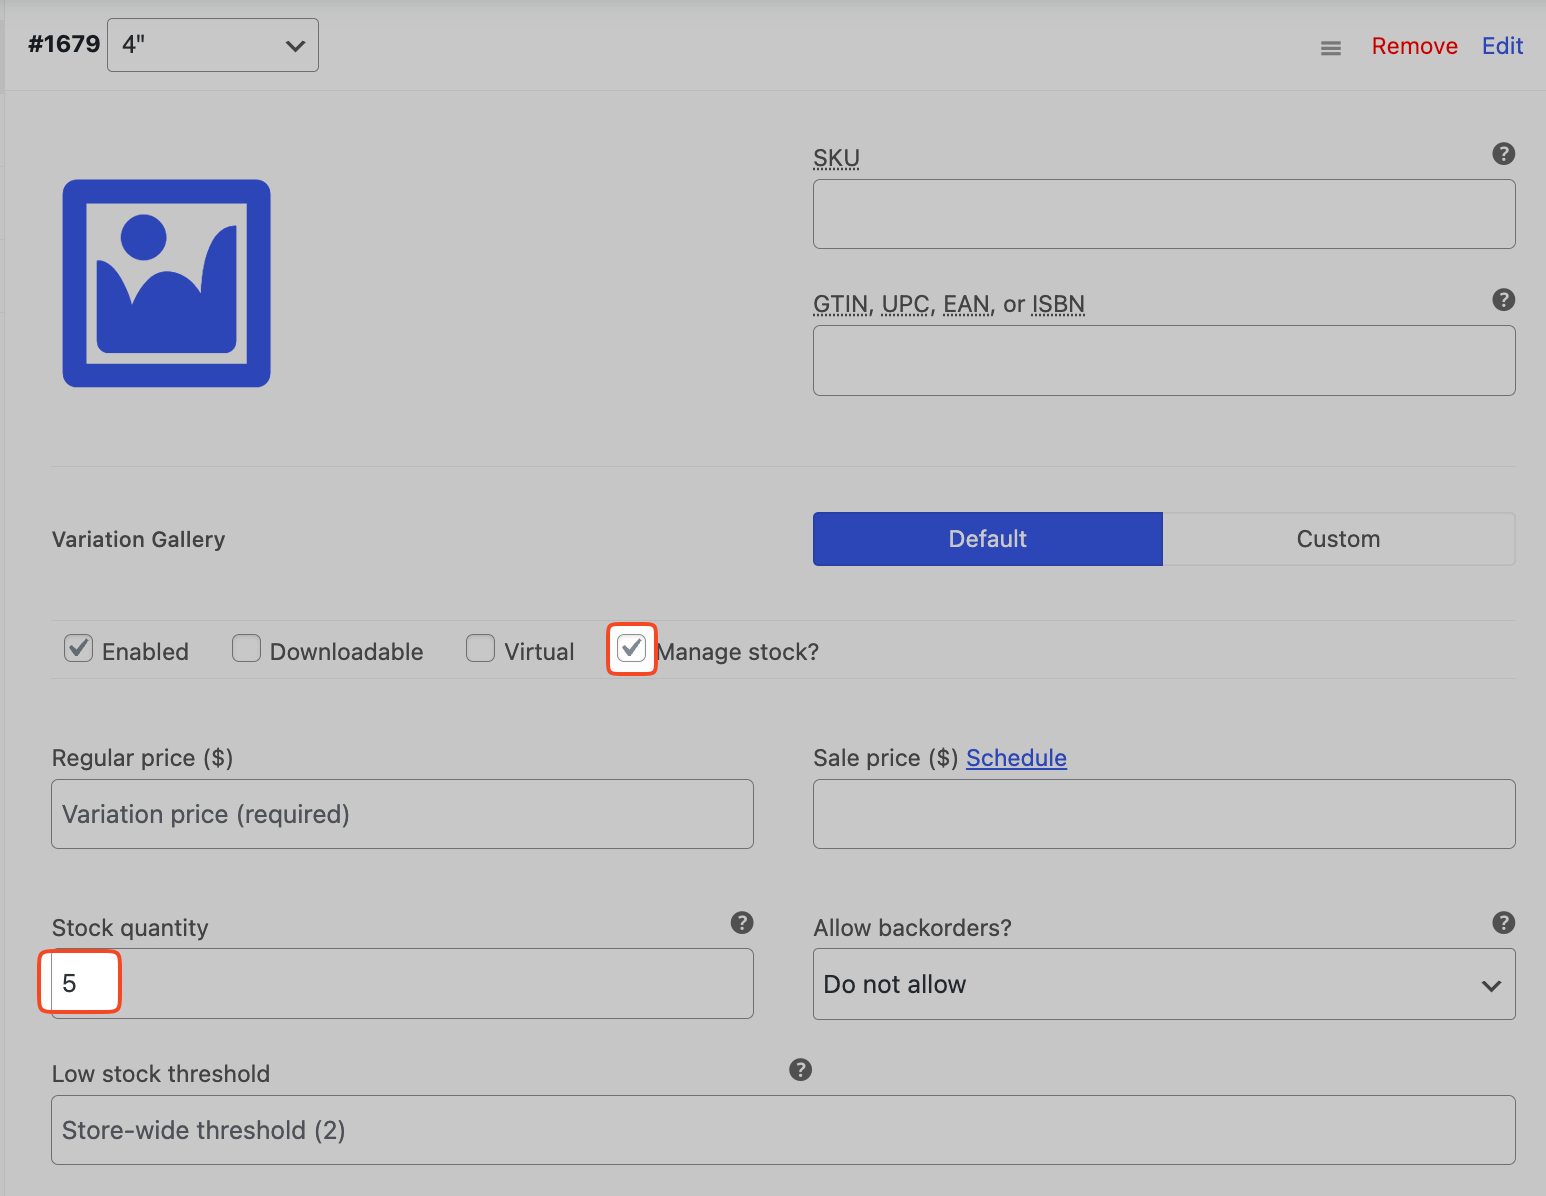
- Expand the variation you wish to track.
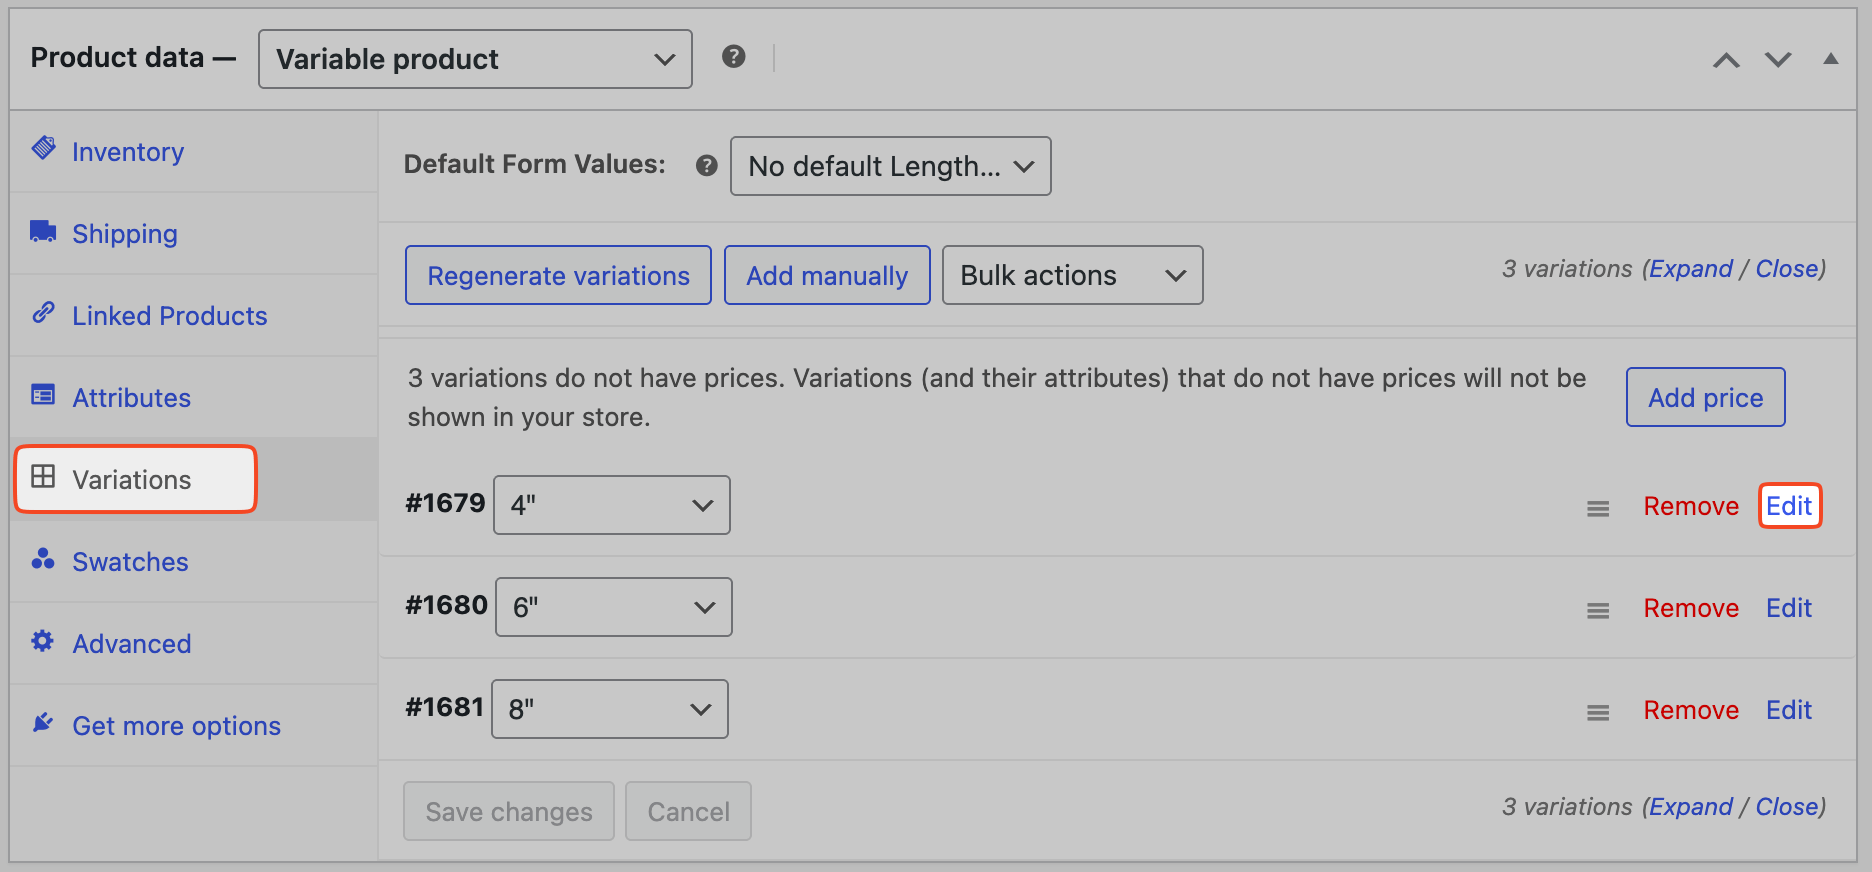
- Check the box for Manage stock? and enter the Stock quantity for that specific variation.
- Repeat for all other variations you want to track.
- Click Save changes.
Configuring the Stock Bar
Navigate to StoreGrowth » Modules » Stock Bar to access the main settings panel.
This area is divided into two tabs:
- Stock Bar Setting
- Design
Stock Bar Setting Tab
This tab controls where the stock bar will be displayed on your site.
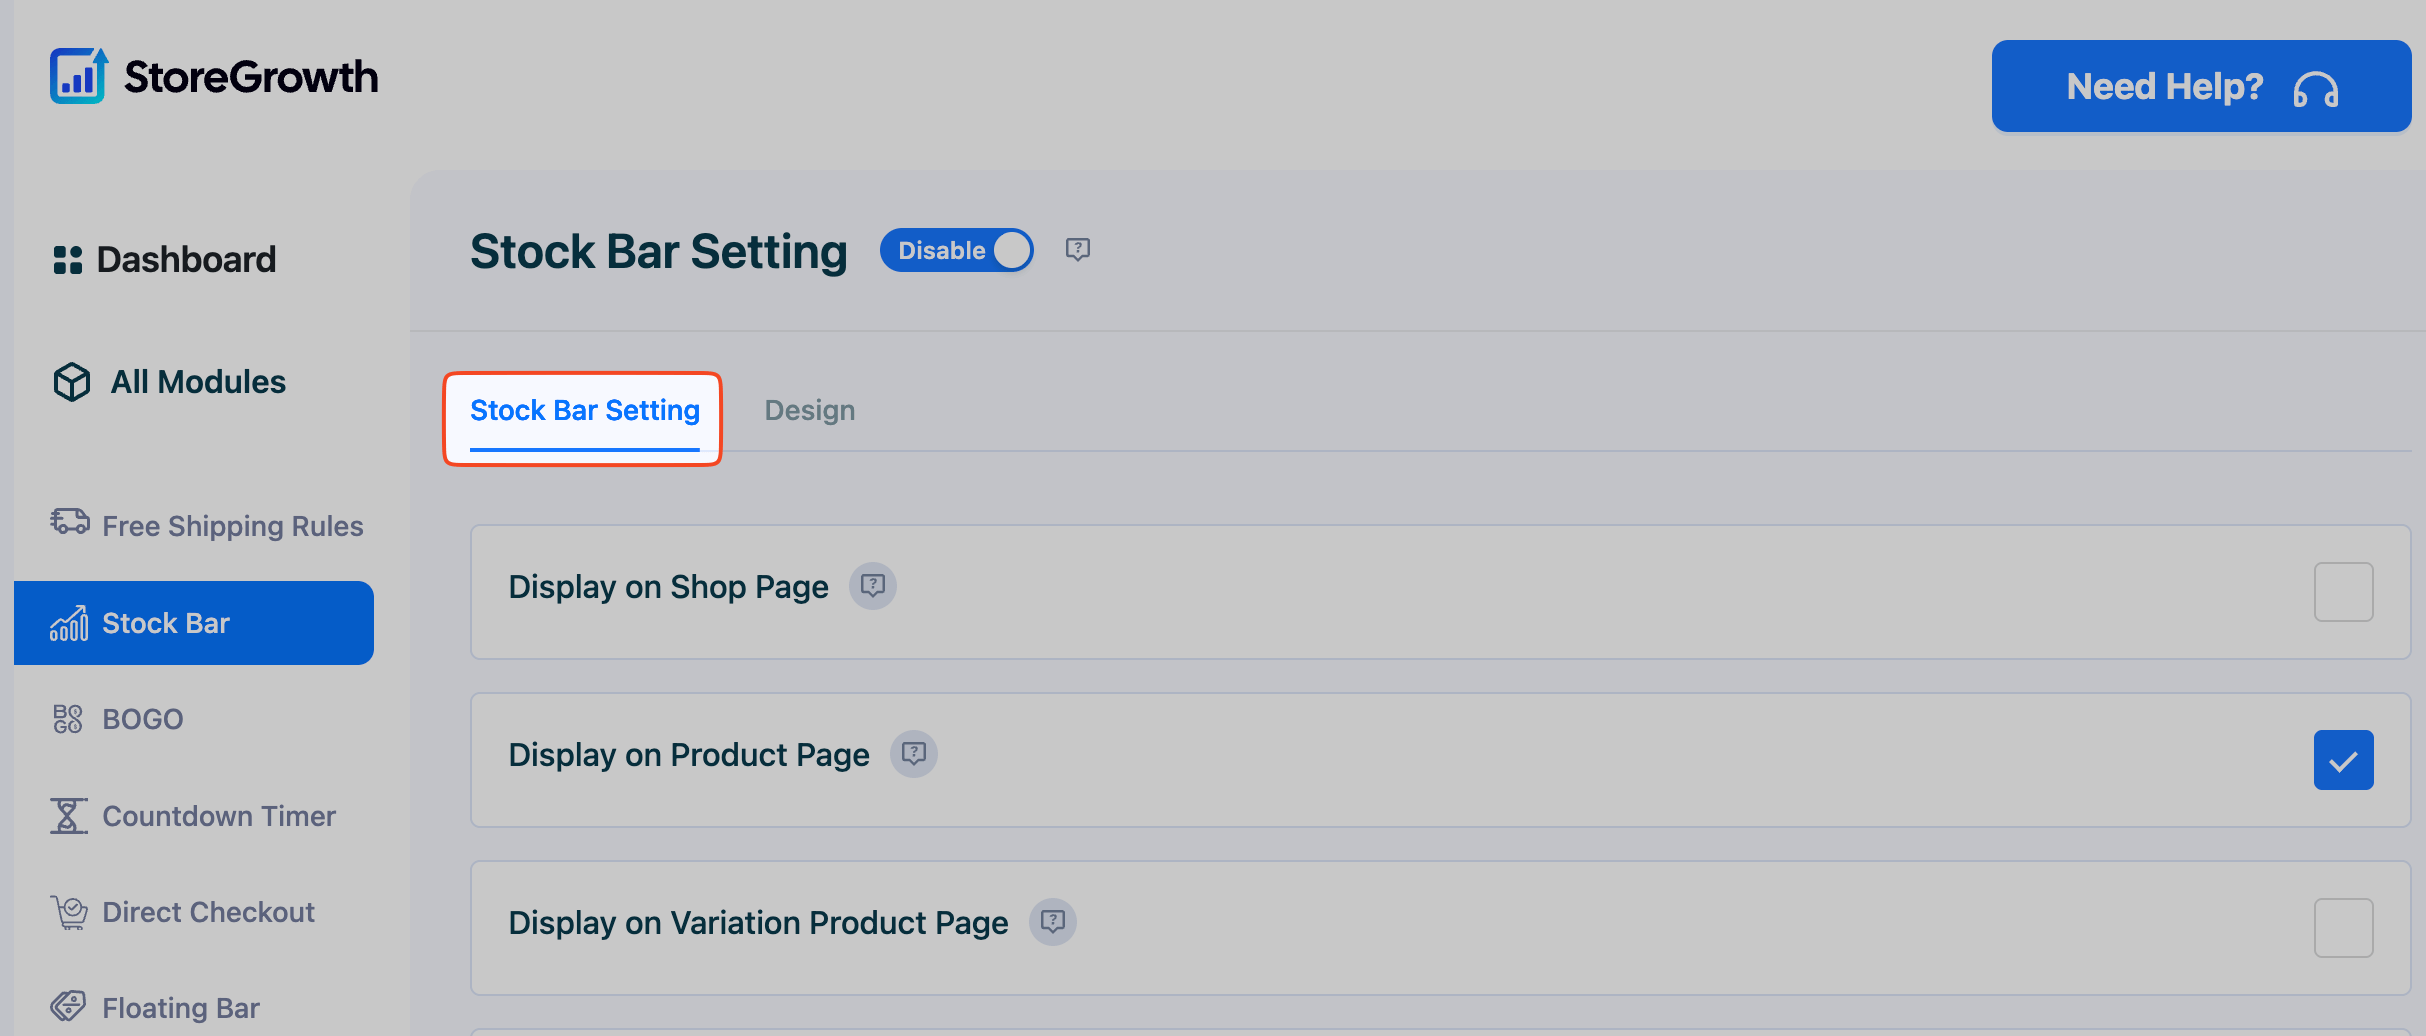
- Display on Shop Page: Enable this to show the stock bar on your main shop and category pages, giving customers an immediate sense of product availability while browsing.
- Display on Product Page: Enable this to show the stock bar on individual product pages. This is the most common and effective placement.
- Display on Variation Product Page: For variable products, enable this to show a unique stock bar for each specific variation when a customer selects it.
Design Tab
This tab gives you full control over the visual appearance and messaging of your stock bar. A live preview on the right updates as you make changes.

- Foreground Color: Sets the color of the progress bar itself (the part that indicates the stock level).
- Bar Color: Sets the background color of the bar’s track.
- Border Color: Sets the color of the border around the entire stock bar widget.
- Stock Bar Height: Adjust the thickness of the bar in pixels.
- Stock Display Format: Choose the position of the “Total Sold” and “Available Item” text, either Above Stock Bar or Below Stock Bar.
- Total Sell Count Text: Customize the label for the number of items sold (e.g., “Total Sold,” “Gone”).
- Available Item Count Text: Customize the label for the remaining items (e.g., “Available Item,” “Remaining”).
- Stock Status: Enable this to display an additional custom text message below the bar, which is perfect for creating urgency.
- Minimum Quantity Required: Set a threshold for when the stock status message should appear. For example, setting this to 10 means the message will only show when the stock quantity drops to 10 or less.
- Stock Status Text: Craft your urgency message. Use the
{quantity}placeholder to dynamically show the remaining stock number (e.g., “Hurry! only {quantity} stocks left.”). - Stock Status Color: Choose the color for your custom stock status text.
- Template: Select from several pre-designed templates for a quick and professional look.
After configuring these settings, be sure to click the Save button to apply your changes.