

The Sales Notification module is a powerful social proof tool that builds trust and creates a sense of urgency for your customers.
By displaying small, non-intrusive popups of recent purchases, you can show visitors that your store is active and your products are popular.
This encourages hesitant shoppers to make a purchase, leveraging the psychological principle of FOMO (Fear of Missing Out).
Activating the Sales Notification Module
To begin using this feature, you must first activate it from the StoreGrowth dashboard.
- Navigate to StoreGrowth » Modules from your WordPress dashboard.
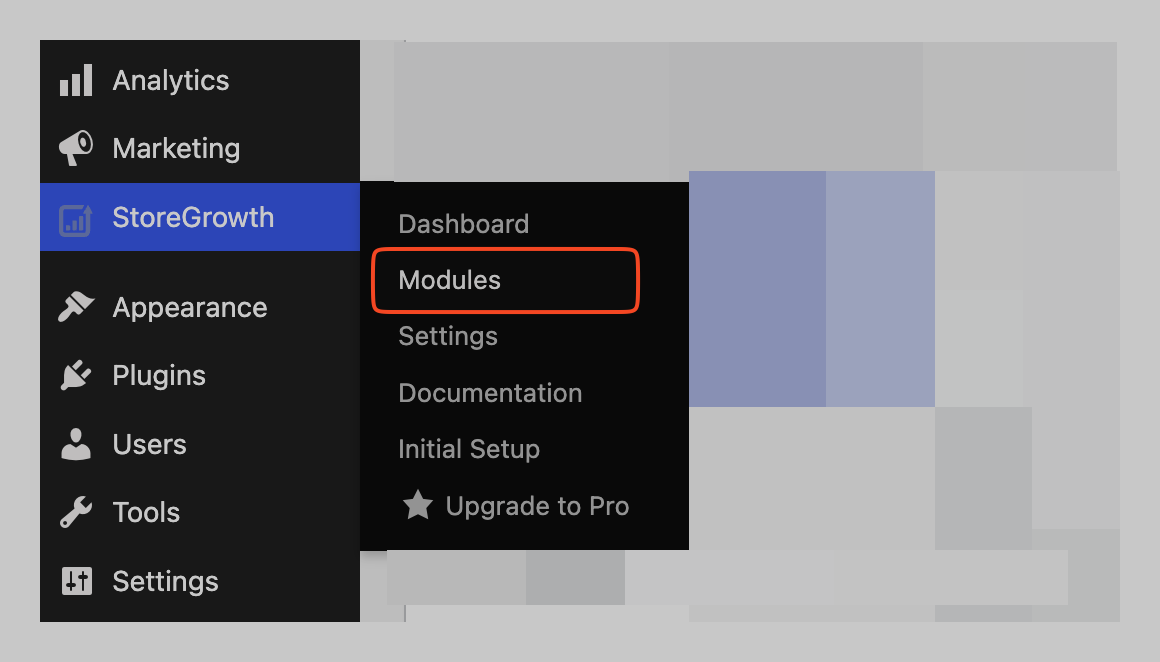
- Find the Sales Notification module card in the list.
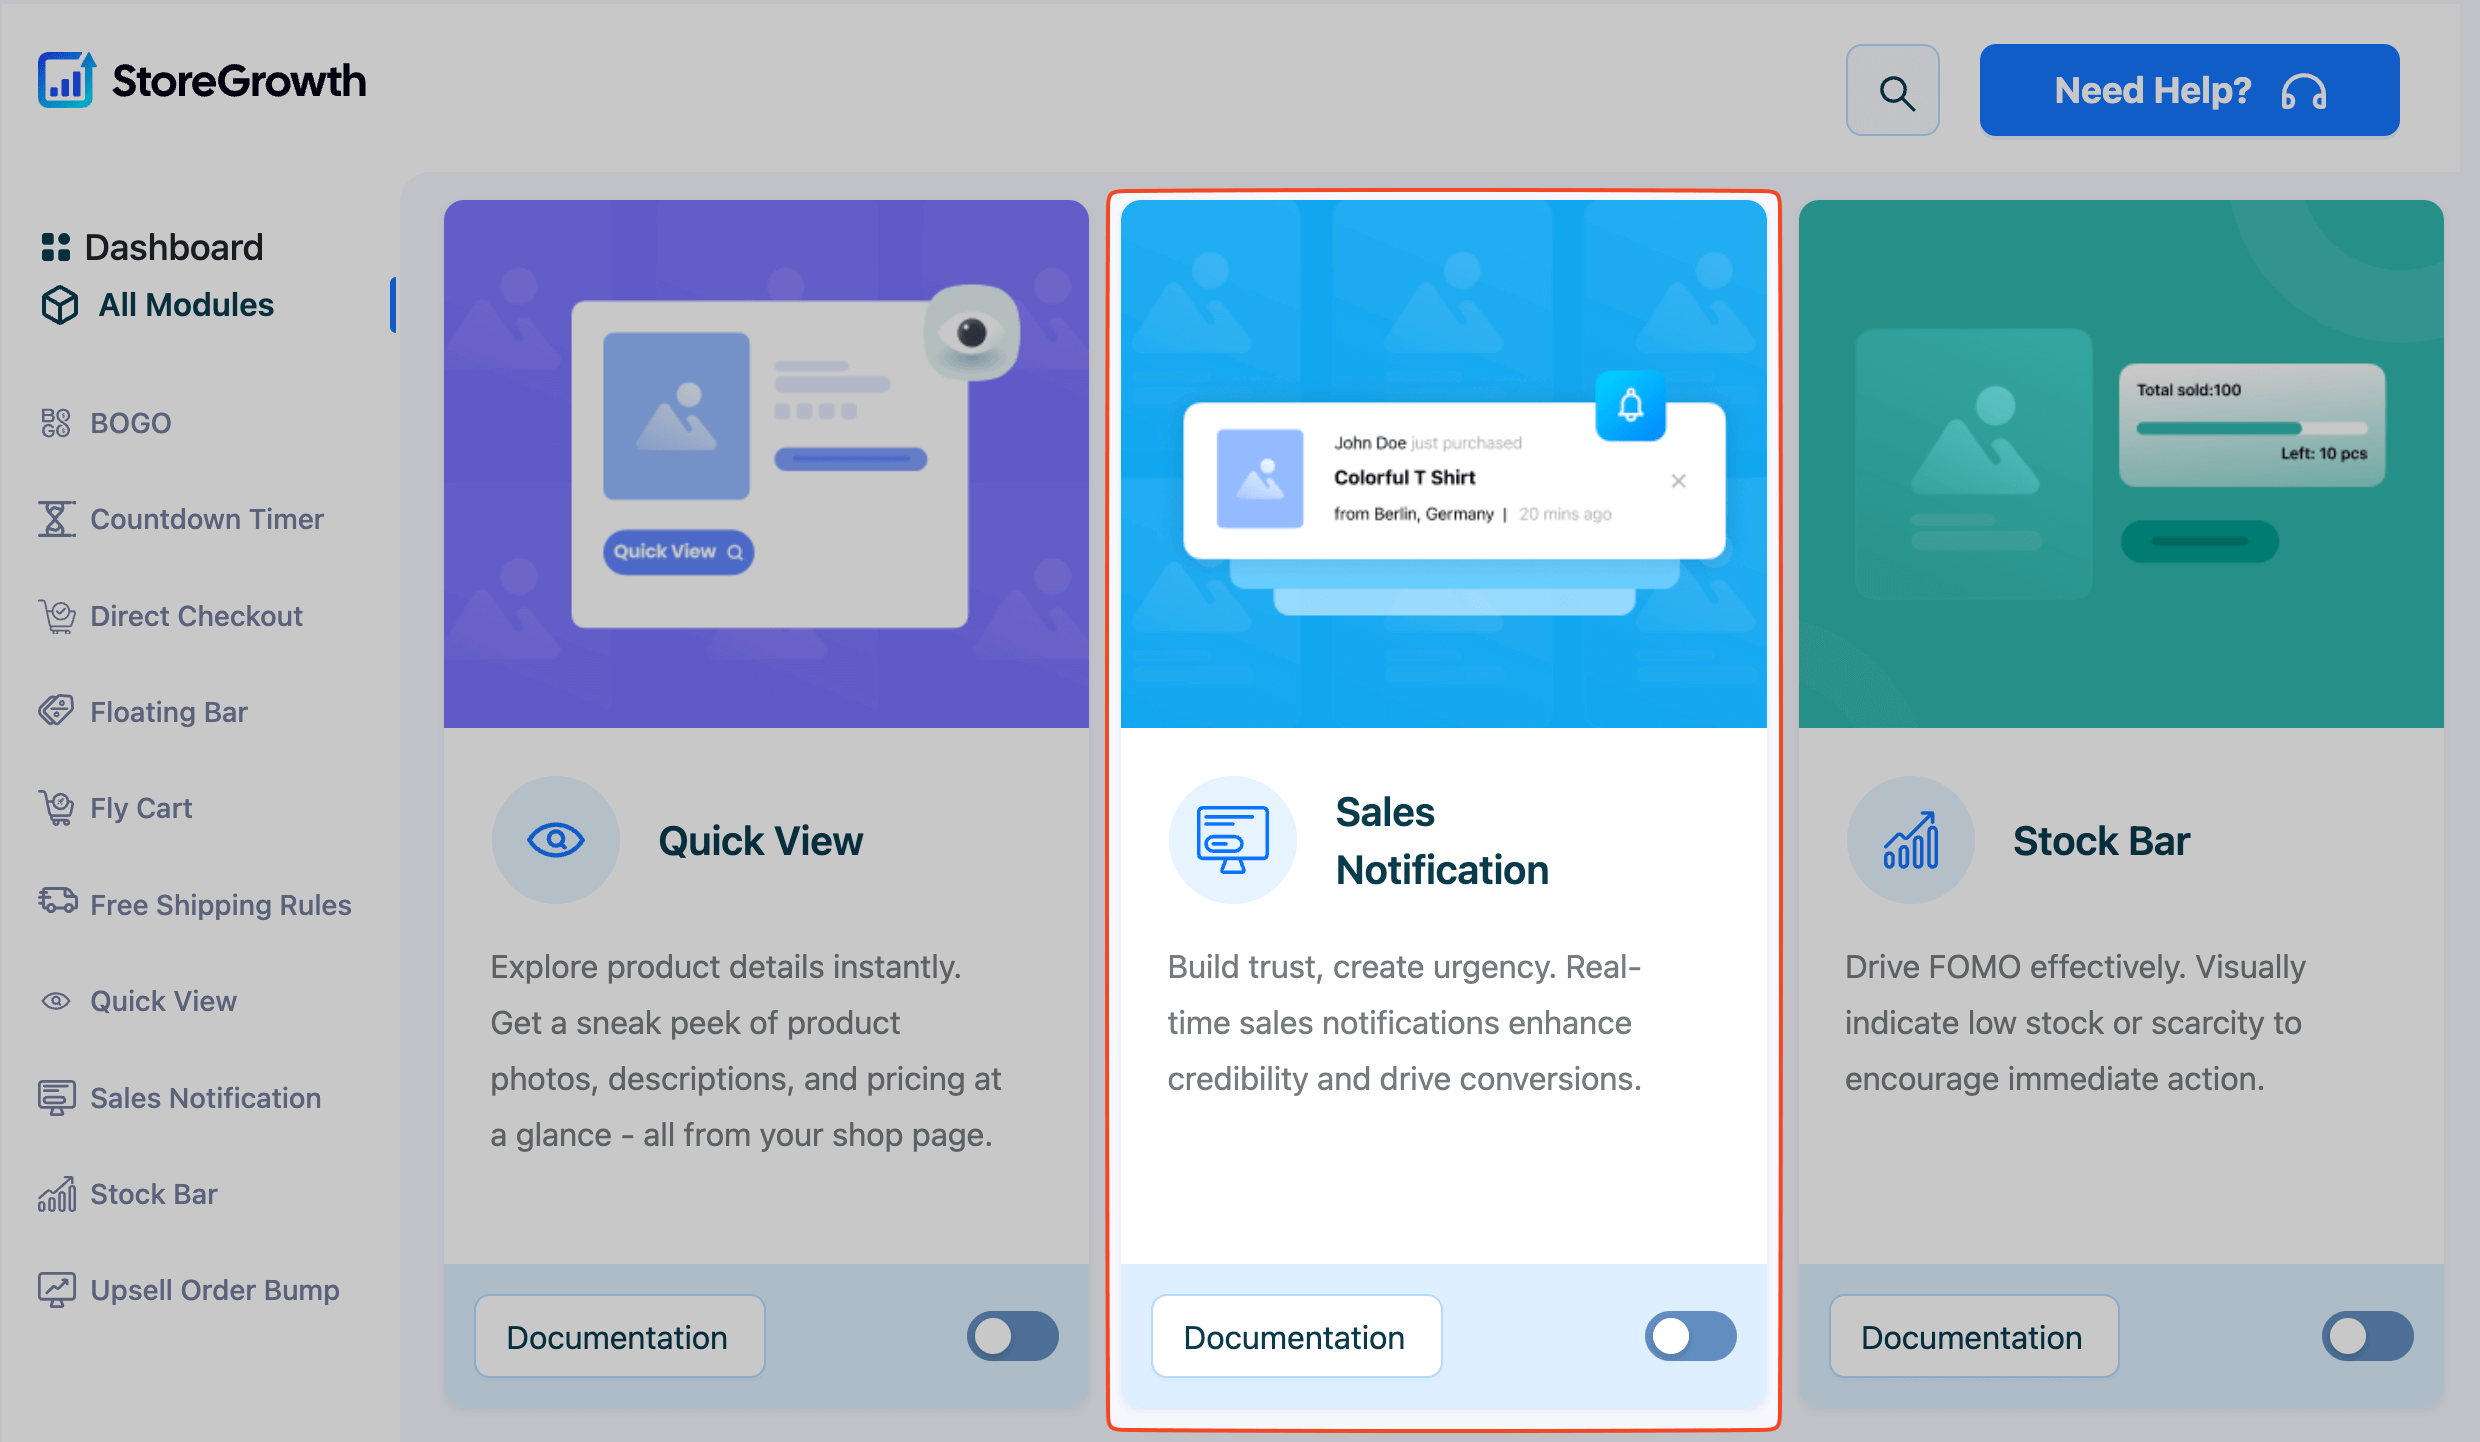
- Click the toggle switch to the “On” position to activate it.
Once enabled, a “Sales Notification” menu item will appear in the main StoreGrowth sidebar, where you can access all its settings.
Configuring Sales Notification Settings
- Navigate to StoreGrowth » Modules » Sales Notification to access the main settings panel. This area is divided into six tabs:
- General Setting
- Template
- Design
- Products
- Message
- Time
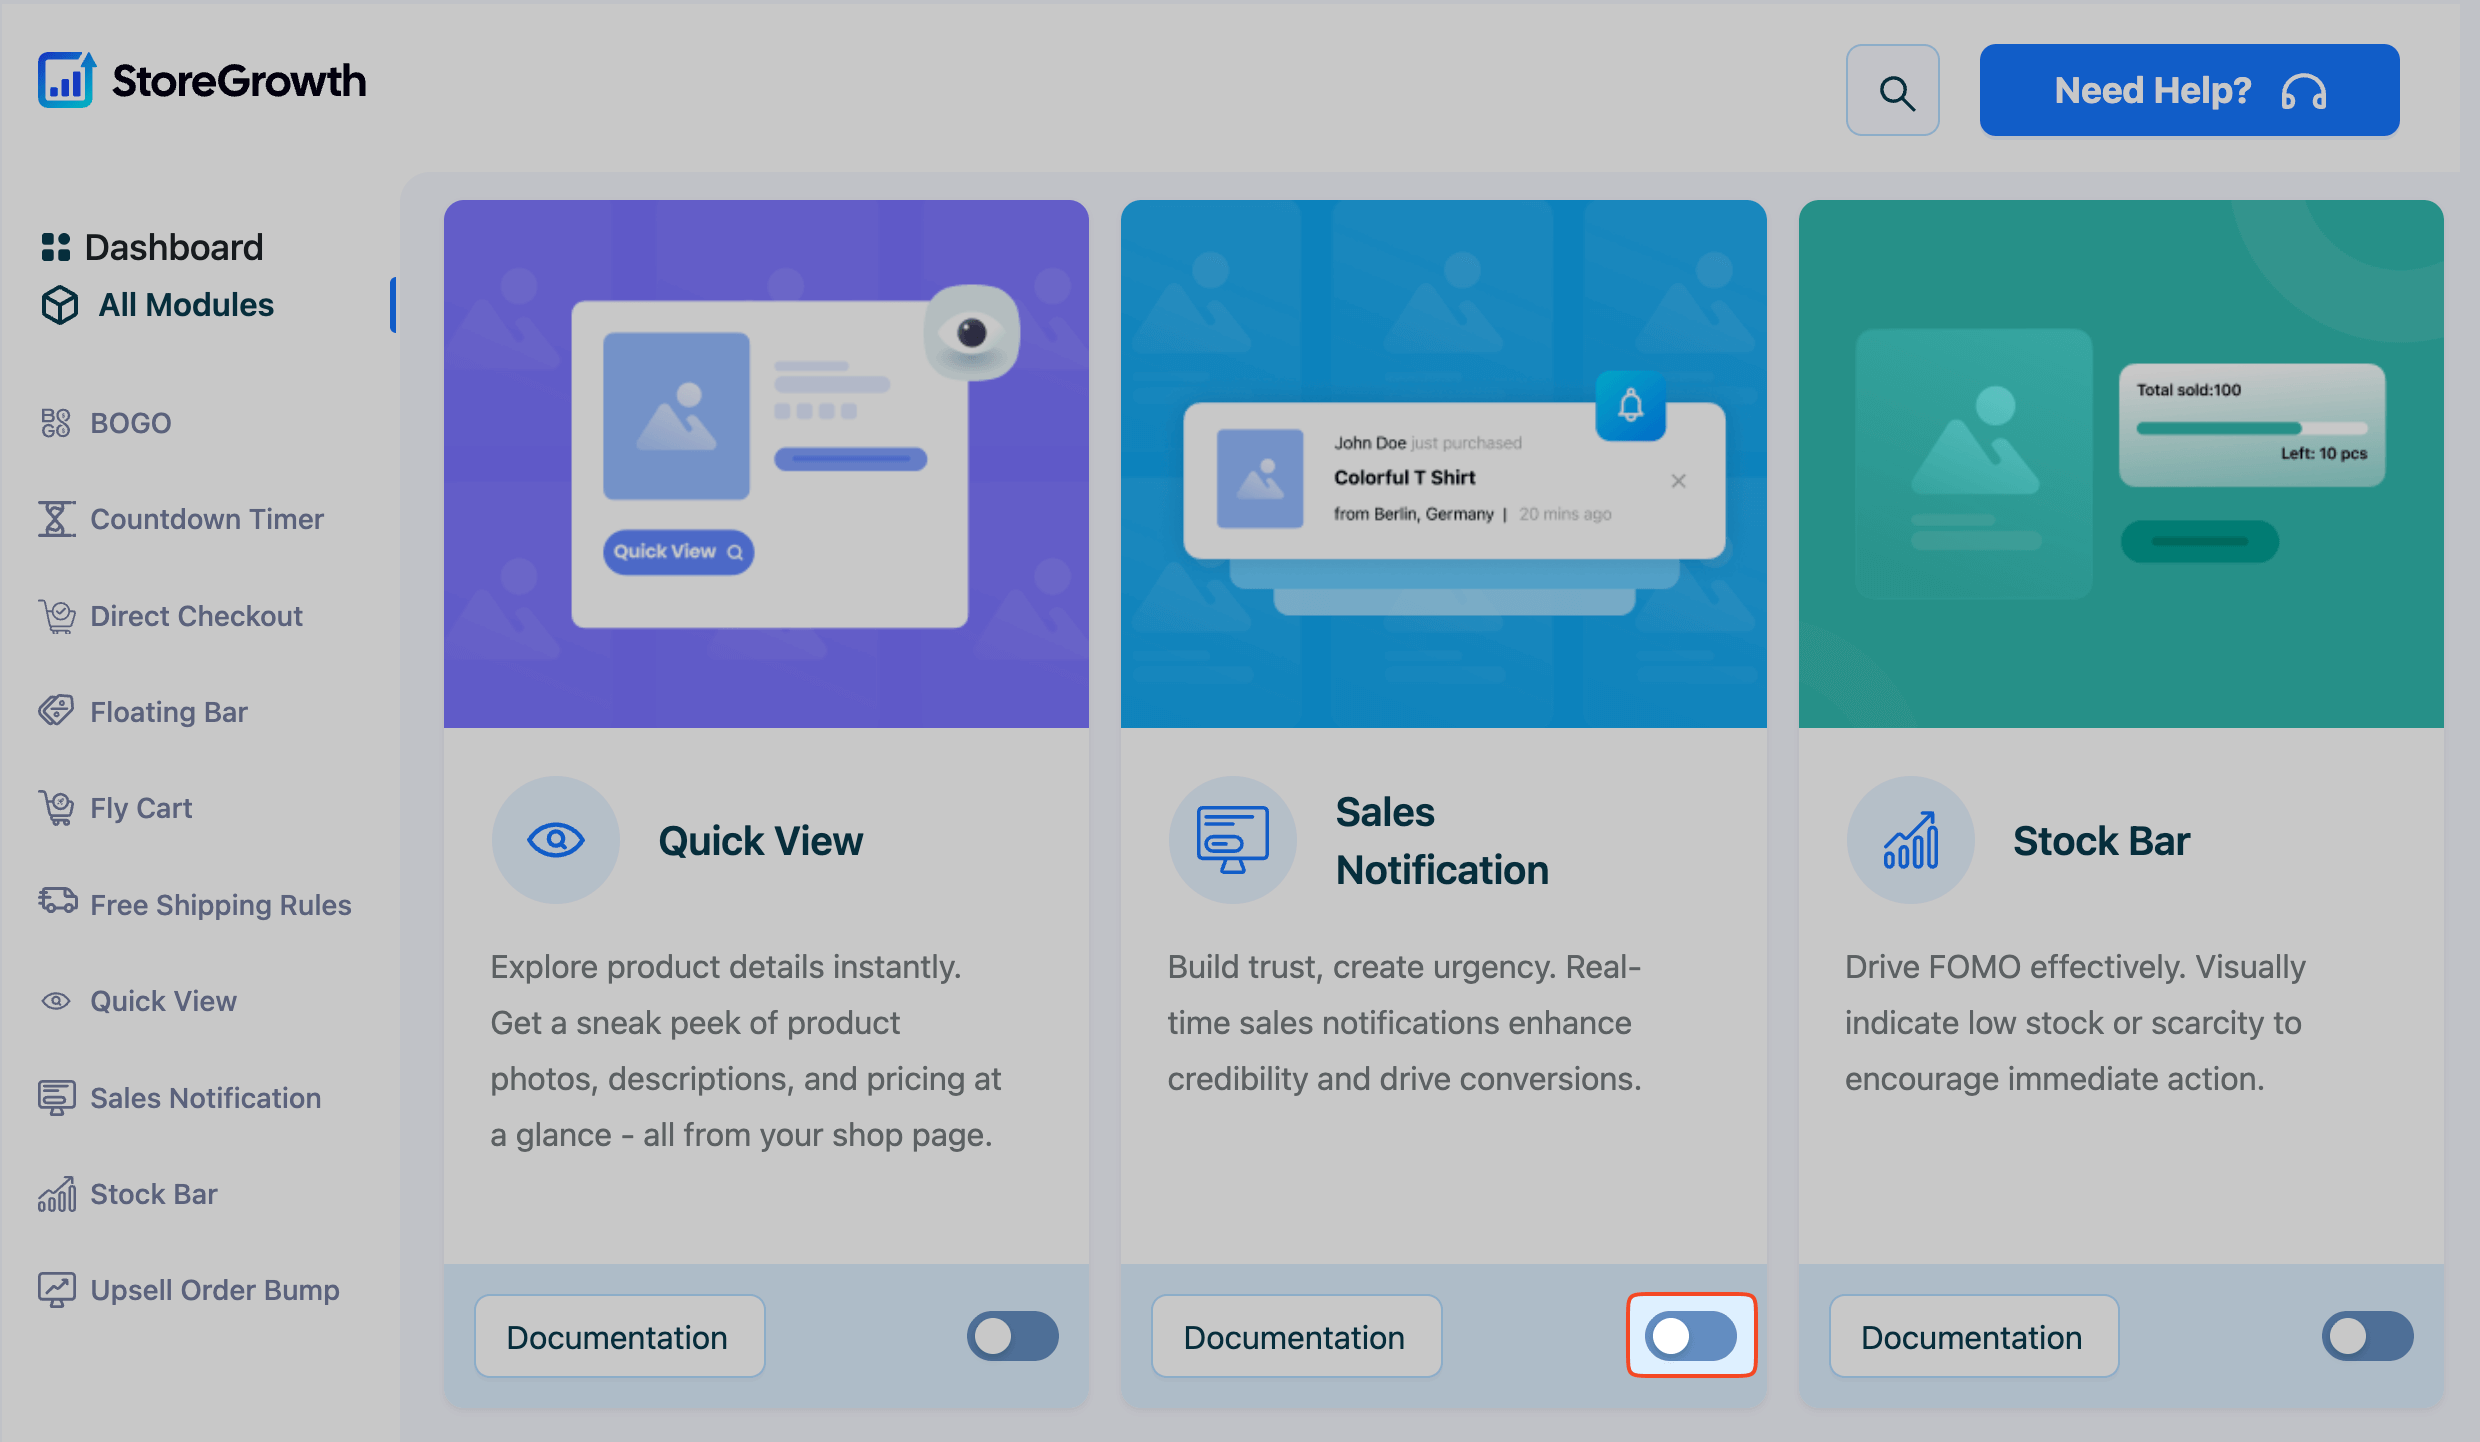
General Setting Tab
This tab contains the primary controls for enabling or disabling the popups on different devices.
- Enable Popup: This is the master switch. Toggle this on to activate the sales notifications across your site.
- Stop Popup Visibility On Close: If enabled, the popups will stop appearing for a visitor after they have manually closed one. This is a user-friendly option that respects visitor preferences.
- Popup in Mobile: Toggle this on to display sales notifications to users browsing on mobile devices.
Template Tab
This tab allows you to choose the visual style of your notification popups from a selection of pre-designed templates. A live preview on the right side of the screen shows you how each template will look.
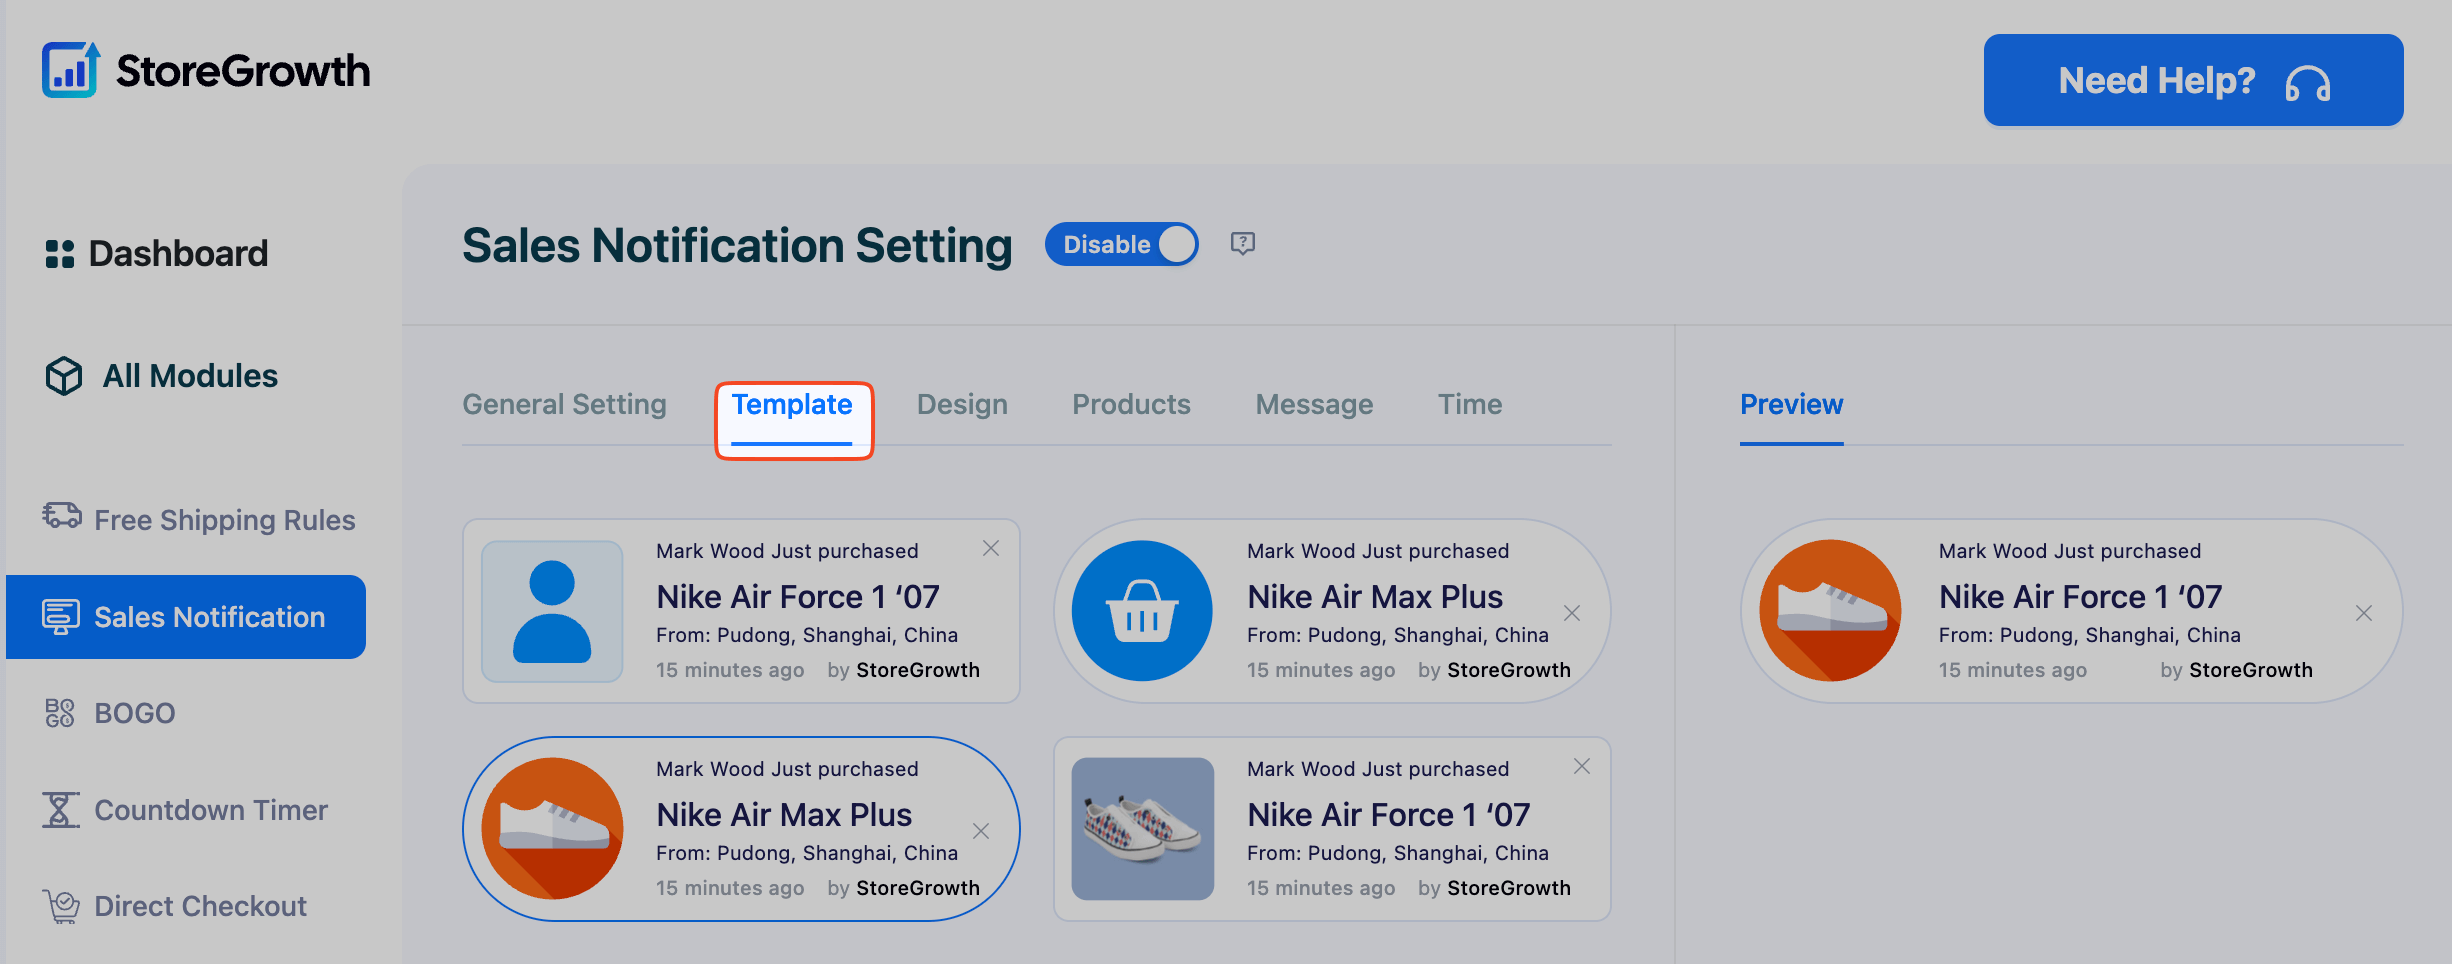
Simply click on a template to select it. The preview will update instantly, and your design choices in the “Design” tab will be applied to the selected template.
Design Tab
This tab gives you granular control over every visual aspect of the notification popup, allowing you to perfectly match your store’s branding.
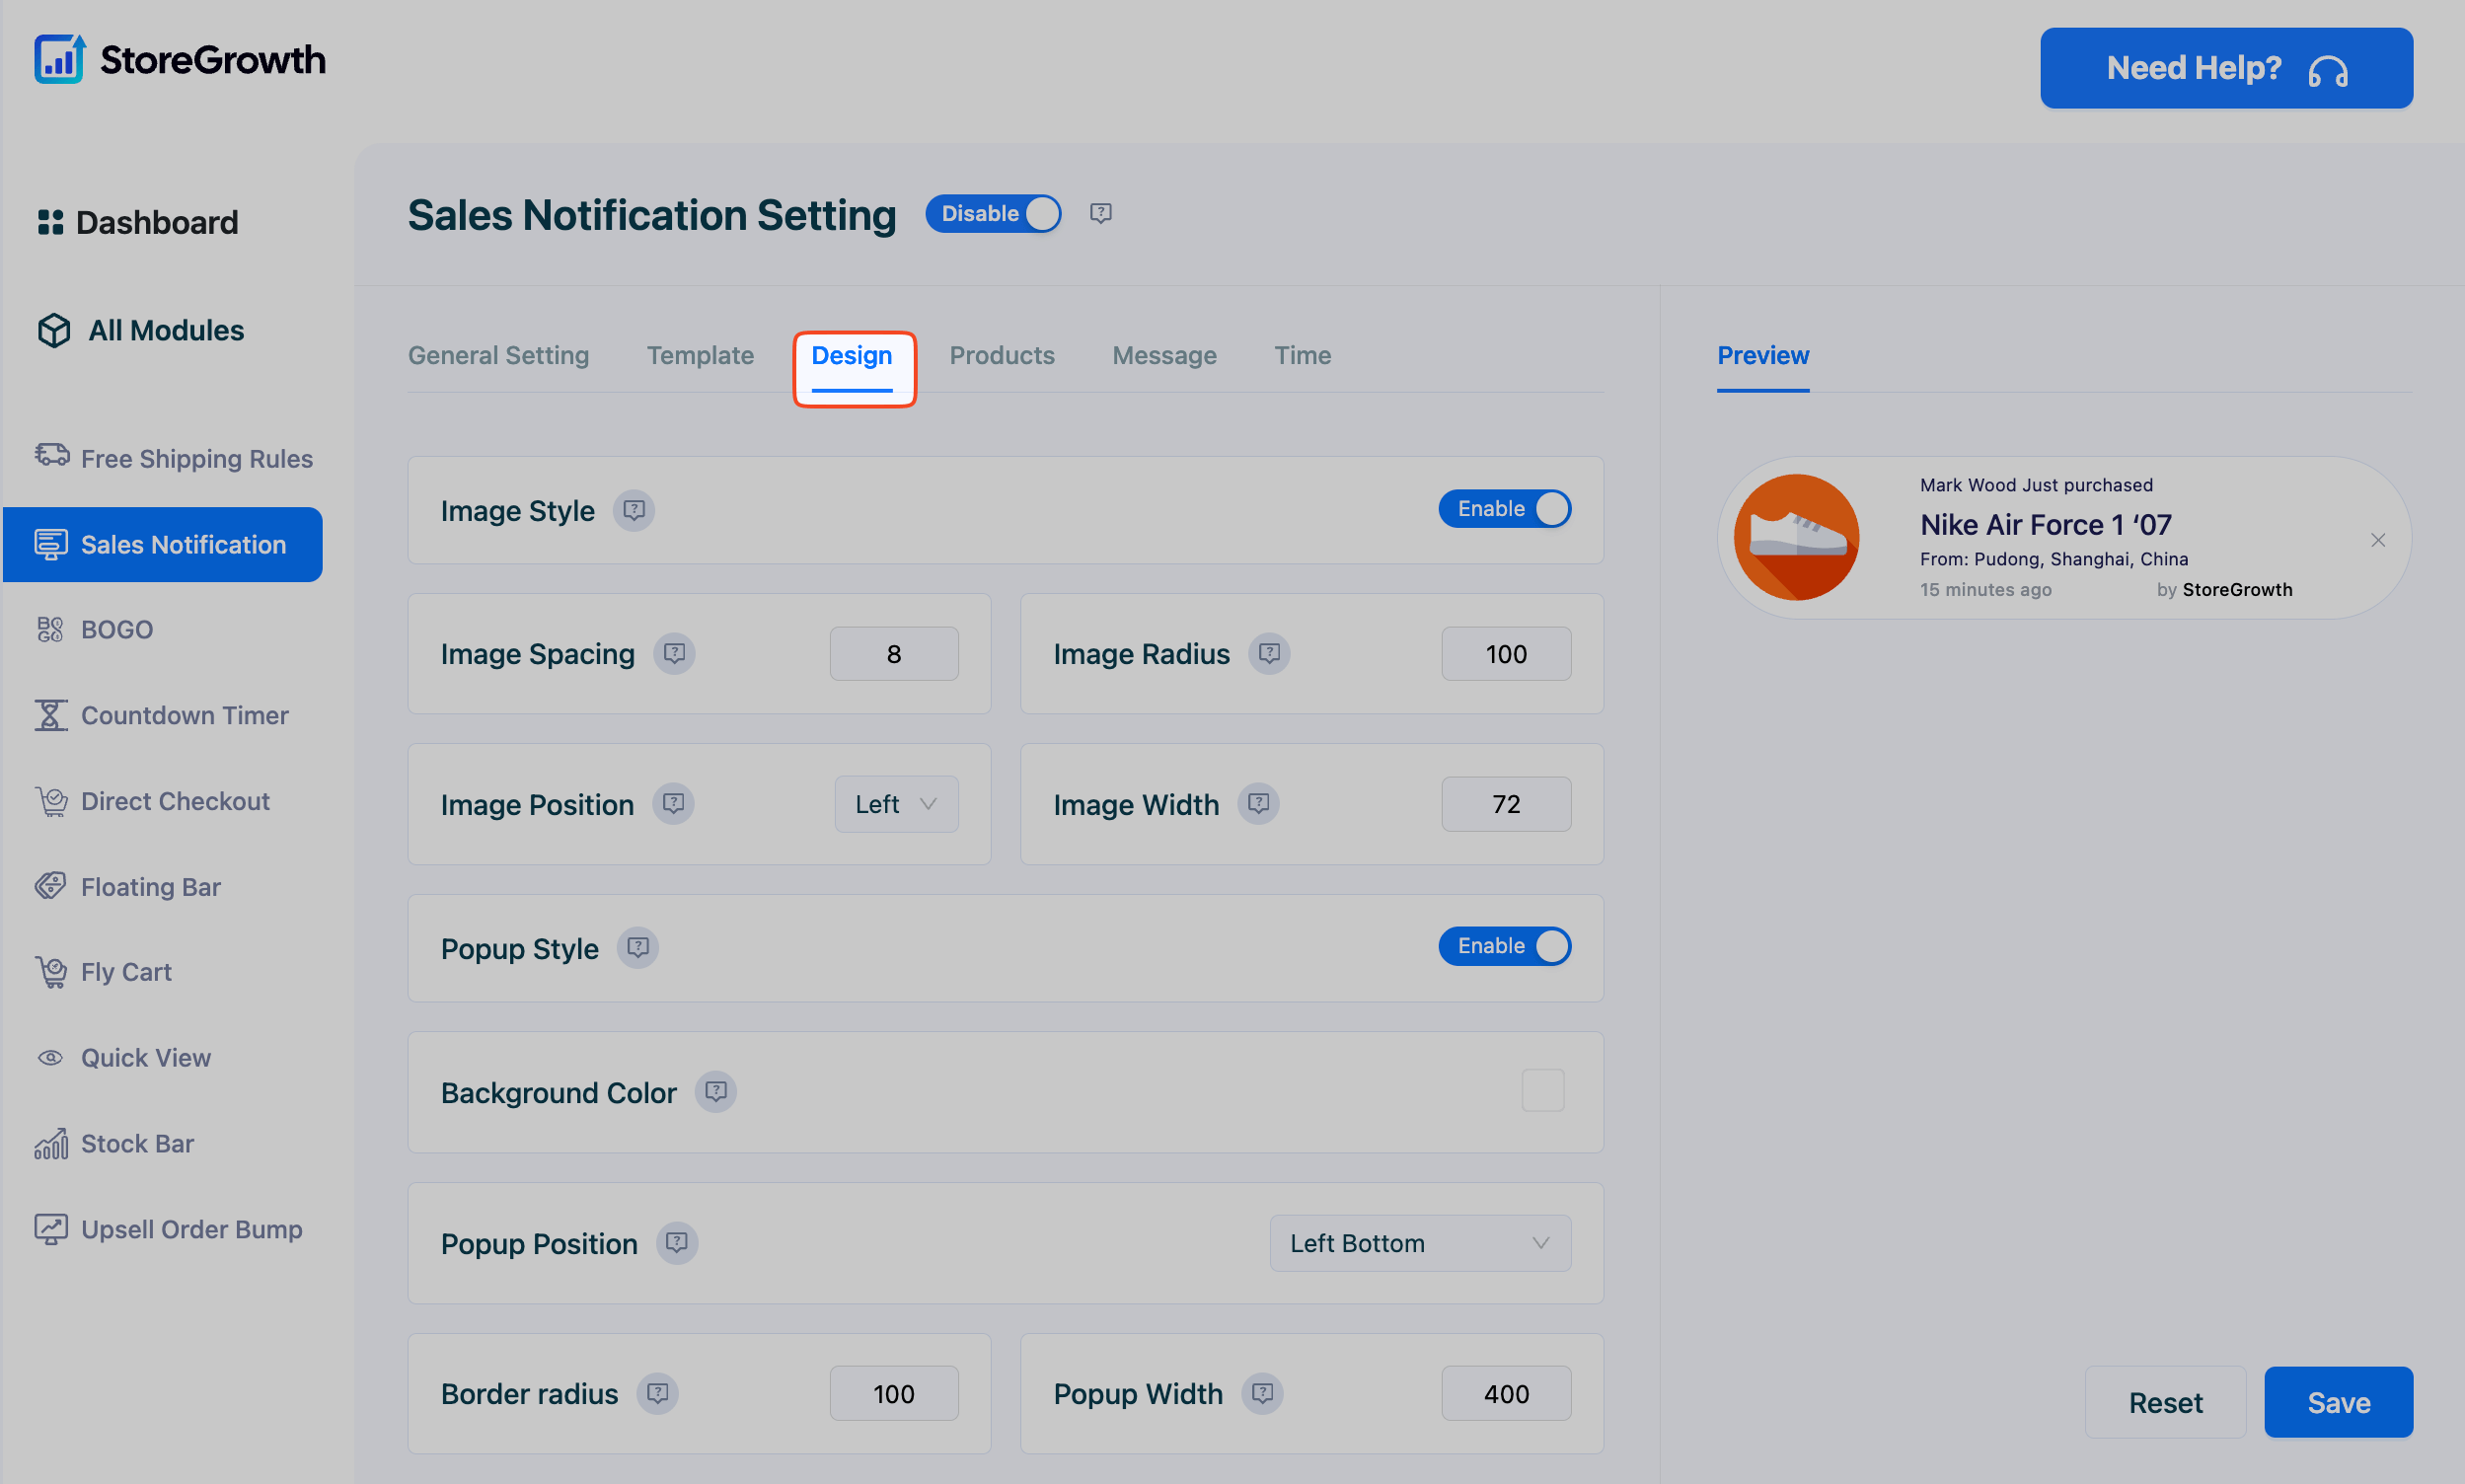
- Image Style:
- Image Spacing, Radius, and Width: Adjust the spacing around the product image, the roundness of its corners (radius), and its overall width.
- Popup Style: Choose a display style for the popup itself.
- Popup Styling:
- Background Color: Set the background color of the notification.
- Popup Position: Choose where on the screen the notification will appear (e.g., Bottom Left, Top Right).
- Border Radius & Popup Width: Control the roundness of the popup’s corners and its overall width.
- Links & Buttons:
- Open product link in new tab: When enabled, clicking the product in the notification will open its page in a new browser tab.
- Link image to product page: Makes the product image a clickable link to the product page.
- Show close button: Displays an ‘X’ icon so users can dismiss the notification.
- Typography: Customize the font size, color, and weight for every piece of text within the notification, including Normal Text, Product Name, Time, Country, State, and City.
Products Tab
This tab controls the source of the information displayed in your popups. You can choose to show real, recent orders or create simulated notifications to highlight specific products.
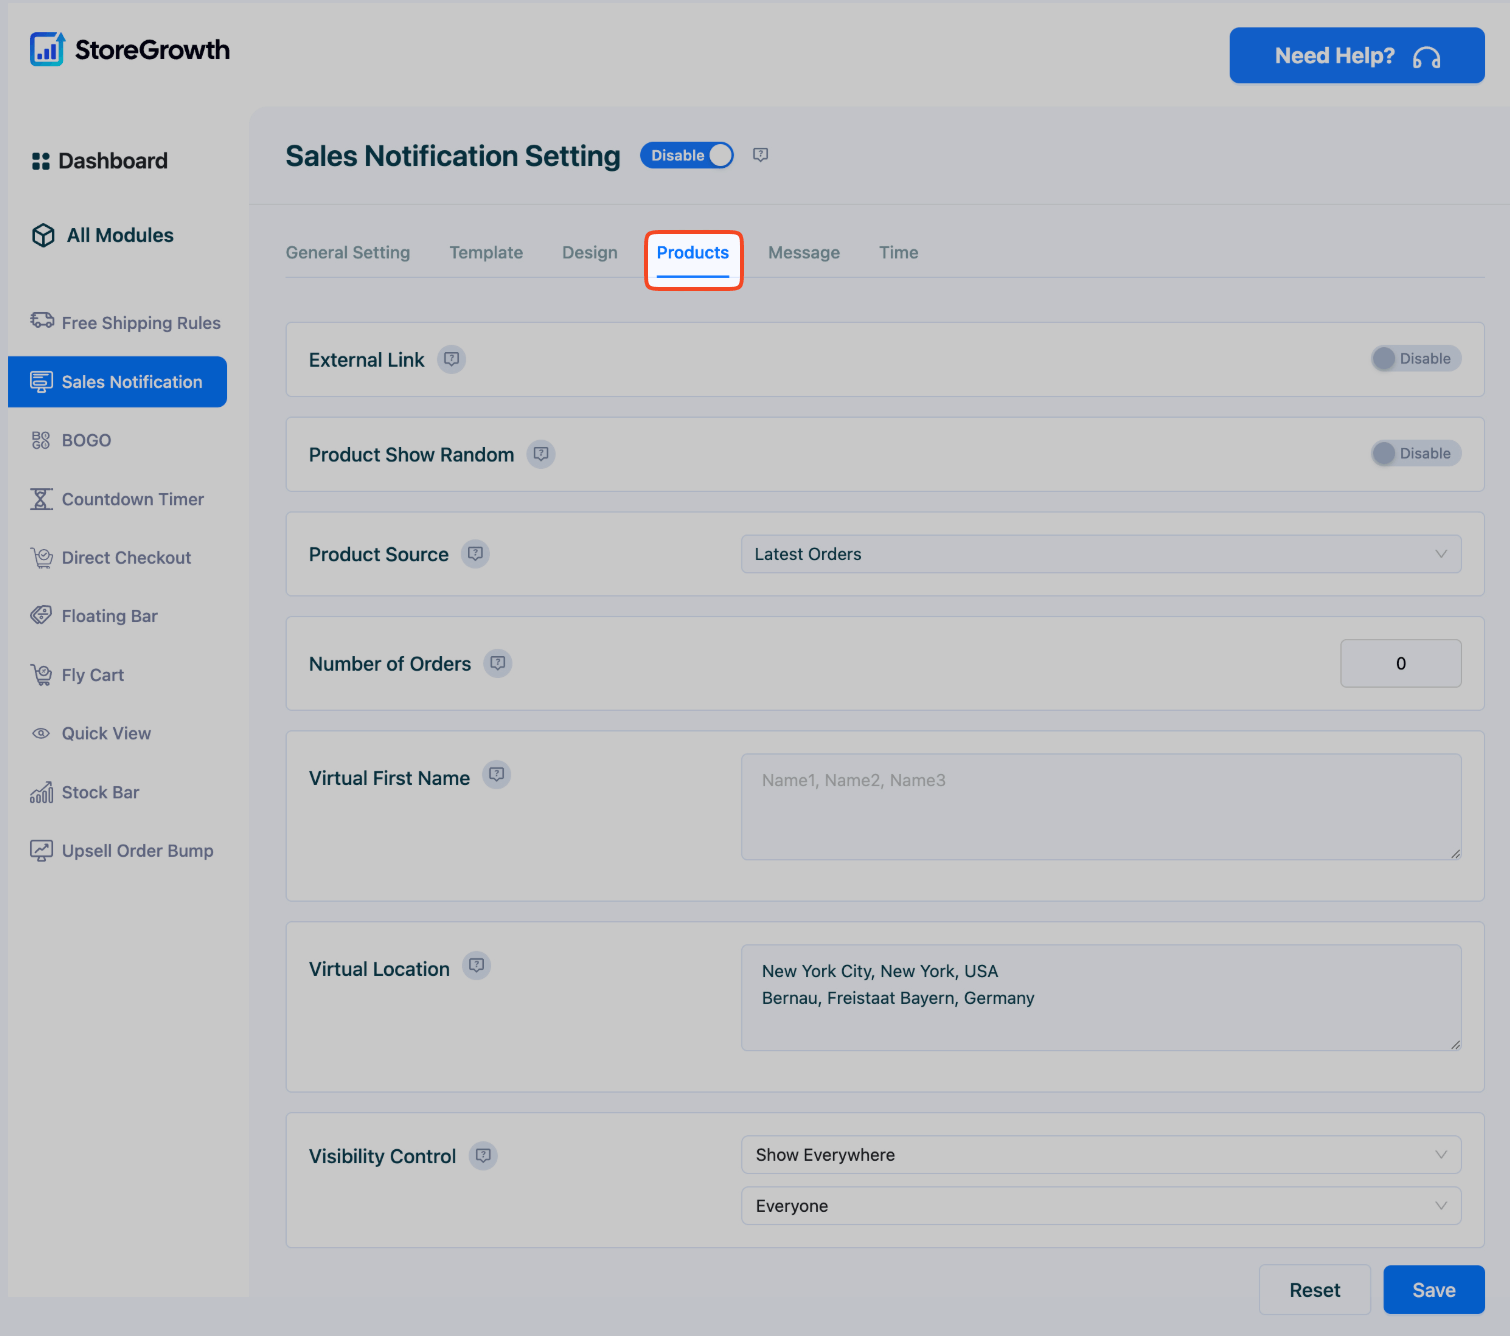
- External Link: Enable this to make the product link an external URL.
- Product Show Random: When enabled, notifications will be displayed in a random order.
- Product Source: This is a key setting that determines what is shown.
- Latest Orders: This option uses data from your actual recent WooCommerce orders to create authentic social proof.
- Select Products: This option allows you to create “virtual” or simulated notifications. You can choose specific products you want to promote, and the plugin will use the virtual names and locations you provide below.
- Number of Orders: Set the maximum number of recent orders to pull from when using the “Latest Orders” source.
- Virtual First Name: If using “Select Products,” enter a comma-separated list of first names to be used in the notifications (e.g., John, Jane, Alex).
- Virtual Location: If using “Select Products,” enter a comma-separated list of locations (e.g., New York City, New York, USA).
- Visibility Control: Choose where the notifications will appear, such as “Show Everywhere” or only on specific pages.
Message Tab
Customize the text content of your notification popup using dynamic variables. This allows you to structure the message exactly how you want it.
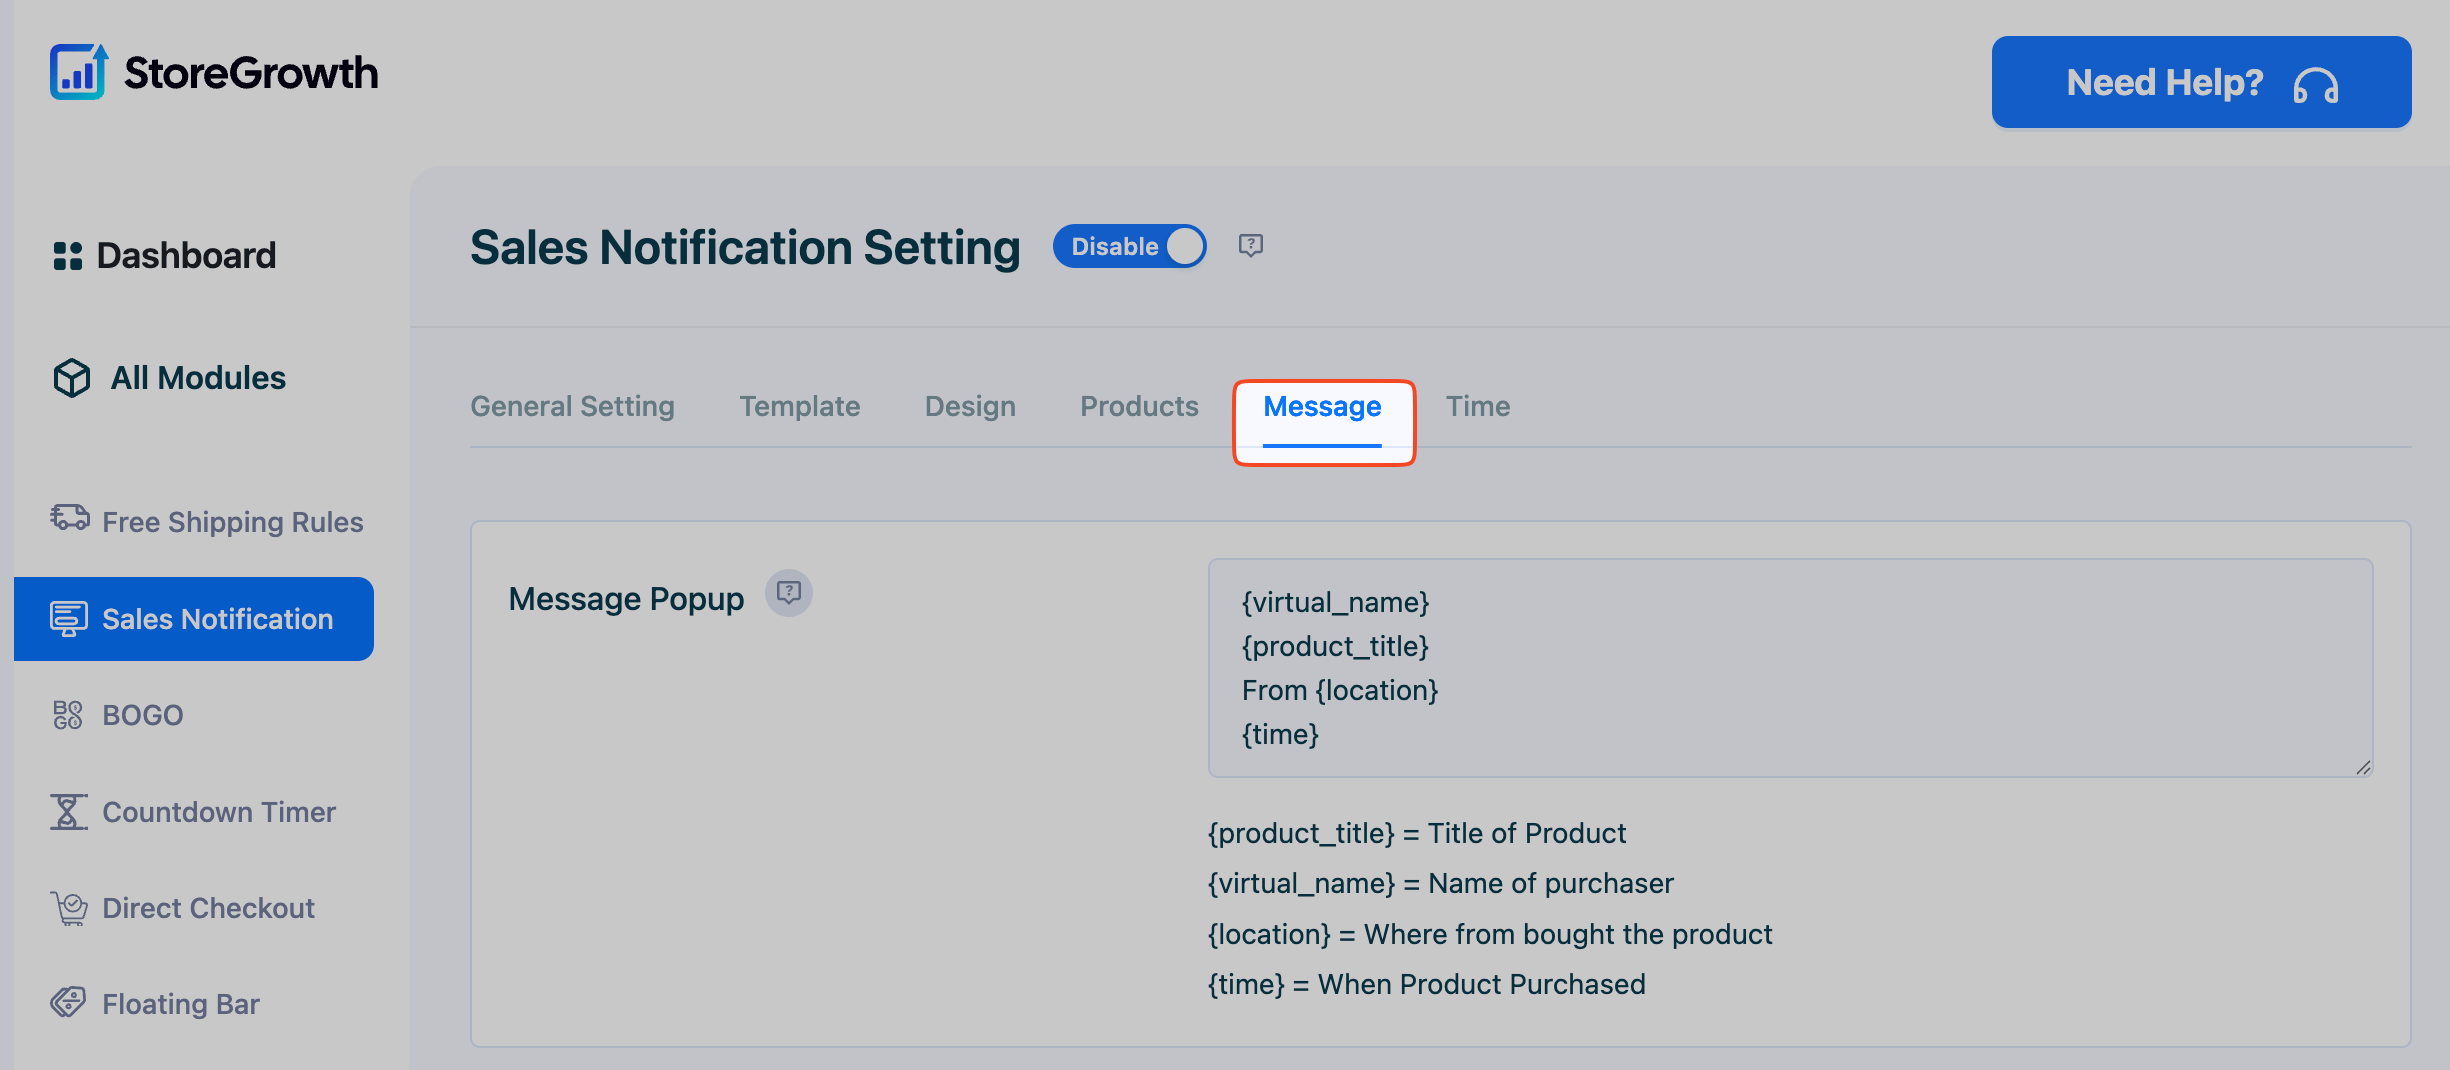
You can arrange the following variables in the Message Popup box:
{virtual_name}: Displays the name of the purchaser.{product_title}: Displays the name of the product.{location}: Shows where the product was bought.{time}: Shows when the product was purchased.
Time Tab
This tab controls the timing and frequency of your sales notifications, ensuring they are effective without being intrusive.
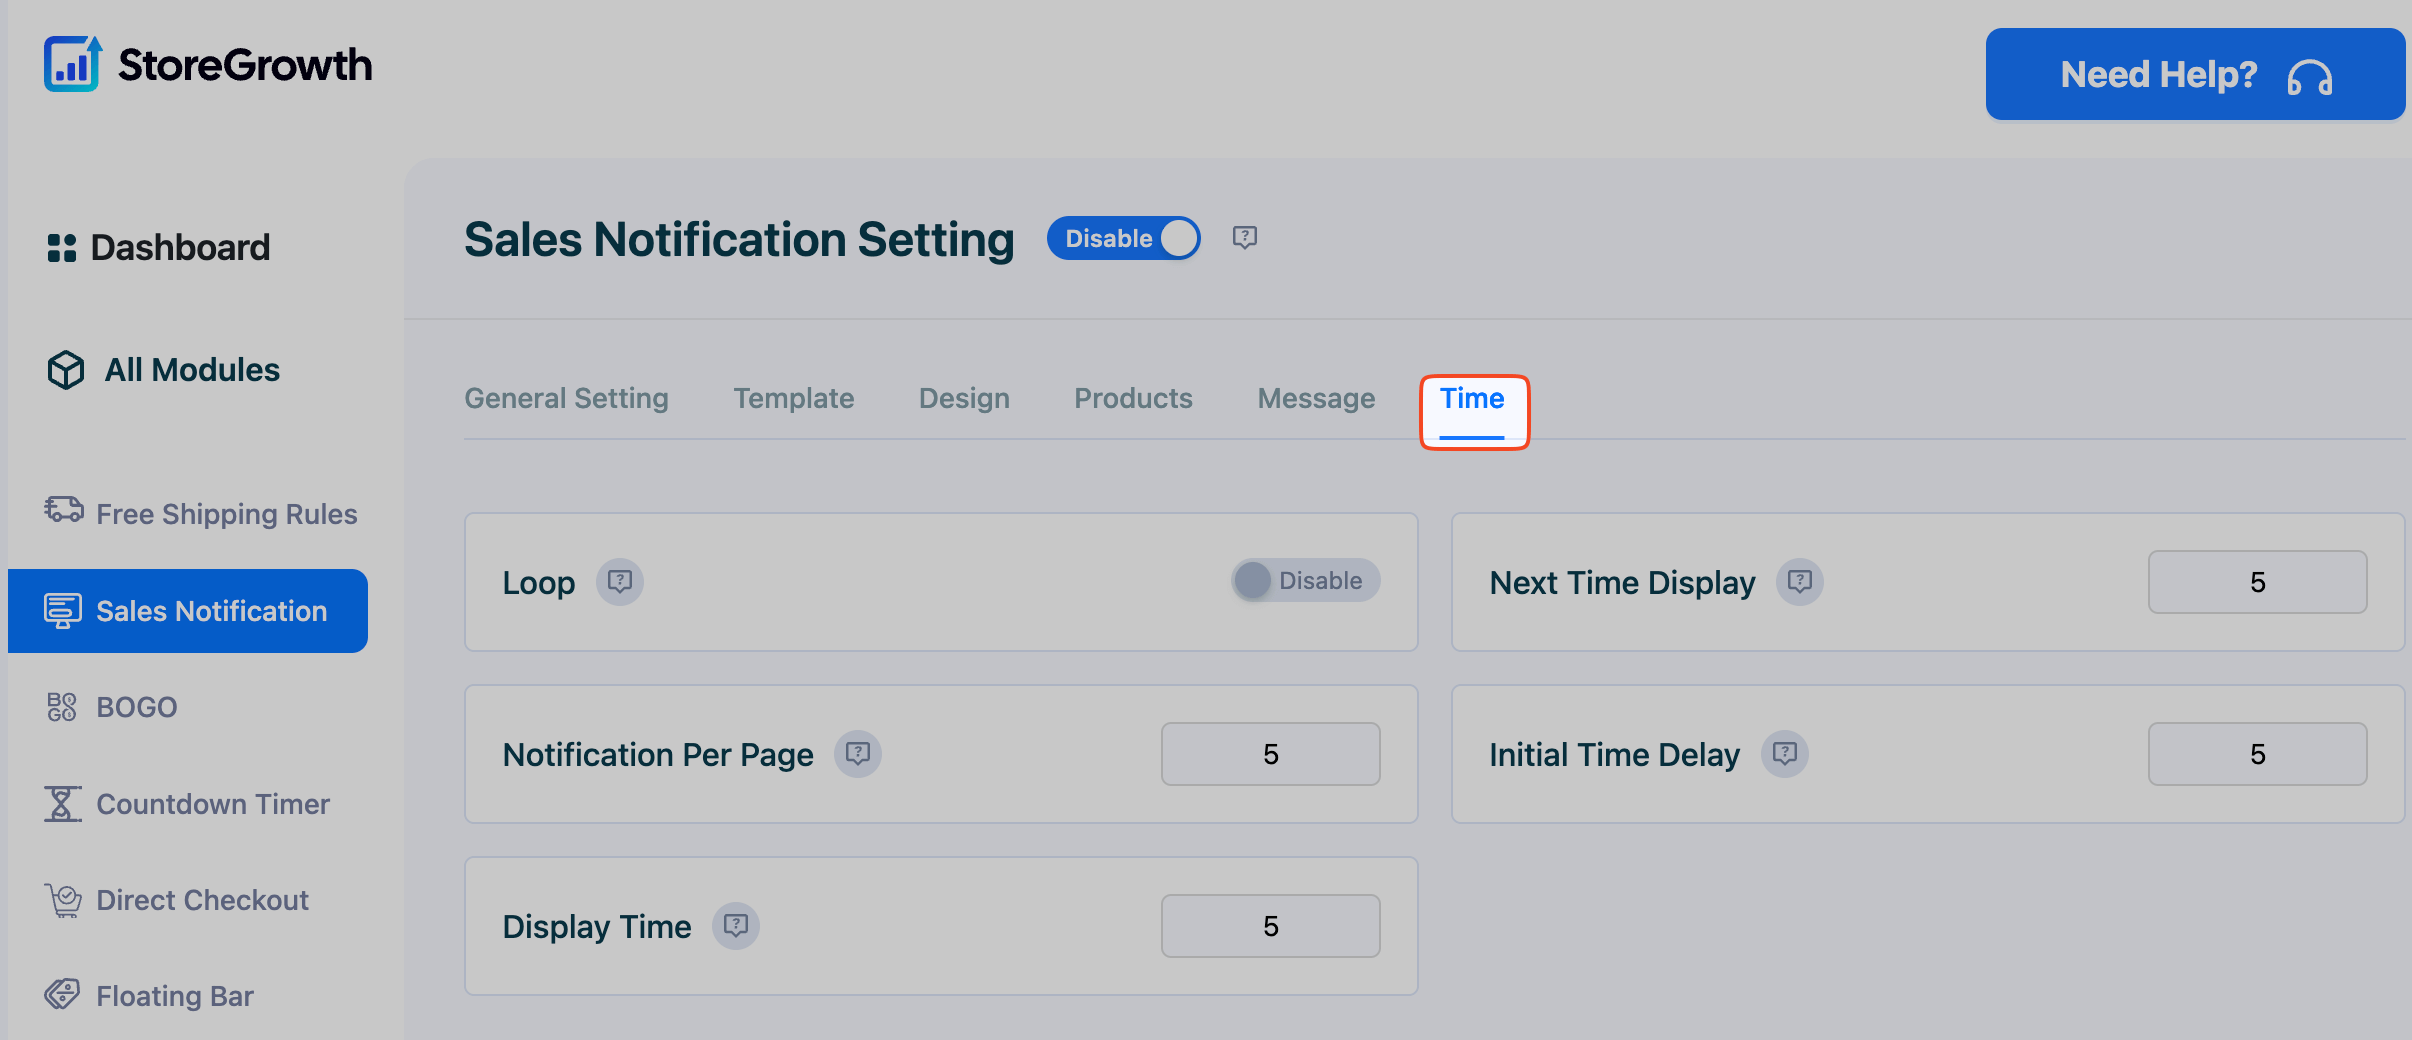
- Loop: When enabled, the notifications will repeat in a loop after all have been shown.
- Next Time Display: Set the time (in seconds) between each notification popup.
- Notification Per Page: Set the maximum number of notifications to show on a single page load.
- Initial Time Delay: Set the time (in seconds) to wait before the first notification appears after a page loads.
- Display Time: Set the duration (in seconds) that each notification will remain visible on the screen.
After configuring all the settings to your liking, click the Save button to apply your changes.