

The Floating Bar module is a versatile tool for displaying highly visible, site-wide announcements, promotions, or important messages to your customers.
Whether you want to announce a flash sale, offer a coupon code, or create urgency with a countdown timer, this customizable bar ensures your message is always in view without disrupting the shopping experience.
Activating the Floating Bar Module
To begin using the Floating Bar, you must first activate it from the main dashboard.
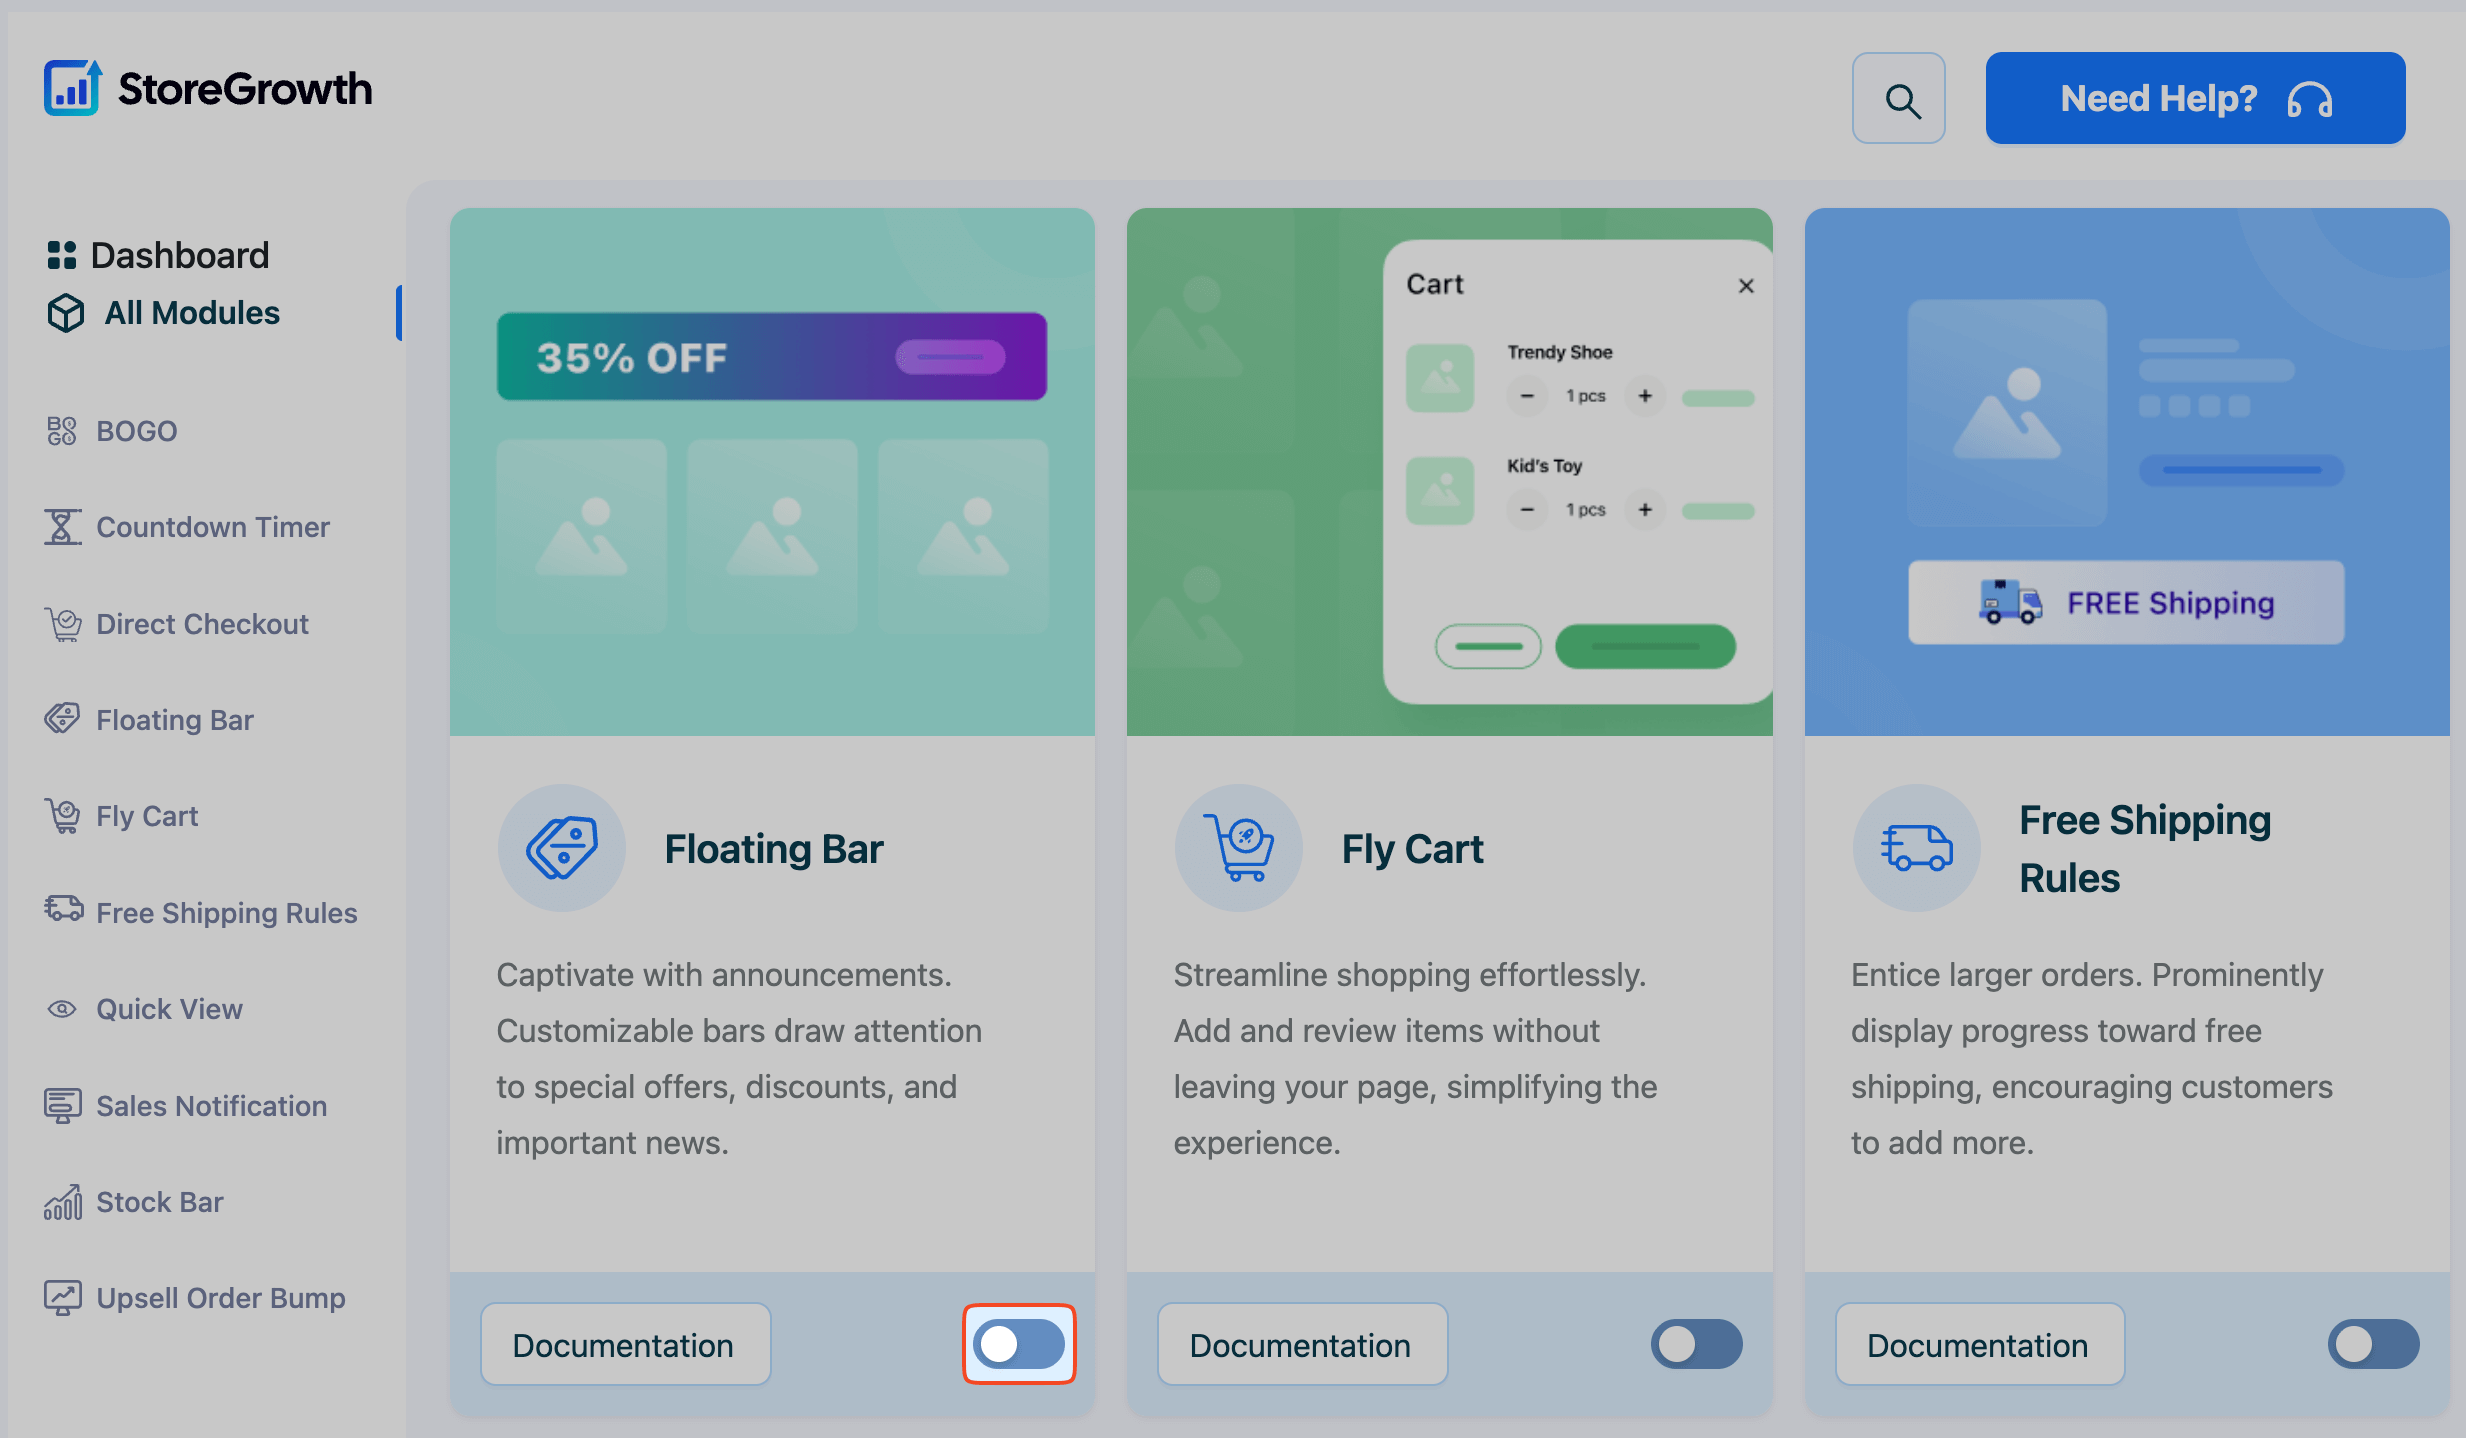
- Navigate to StoreGrowth » Modules from your WordPress dashboard.
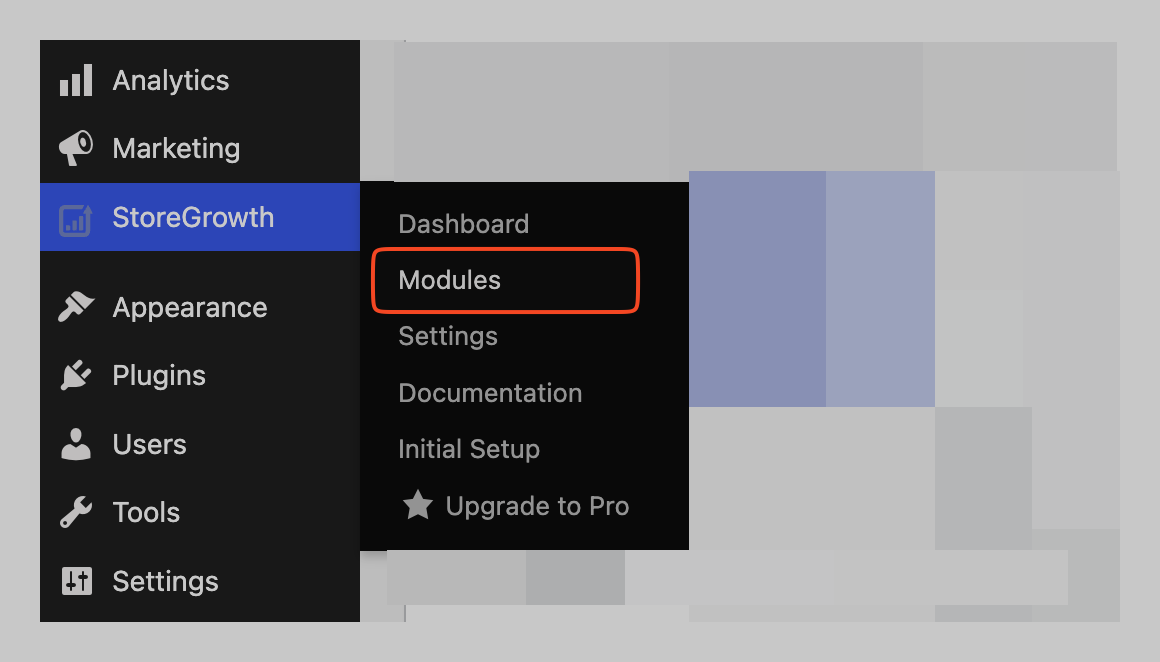
- Find the Floating Bar module card in the list.
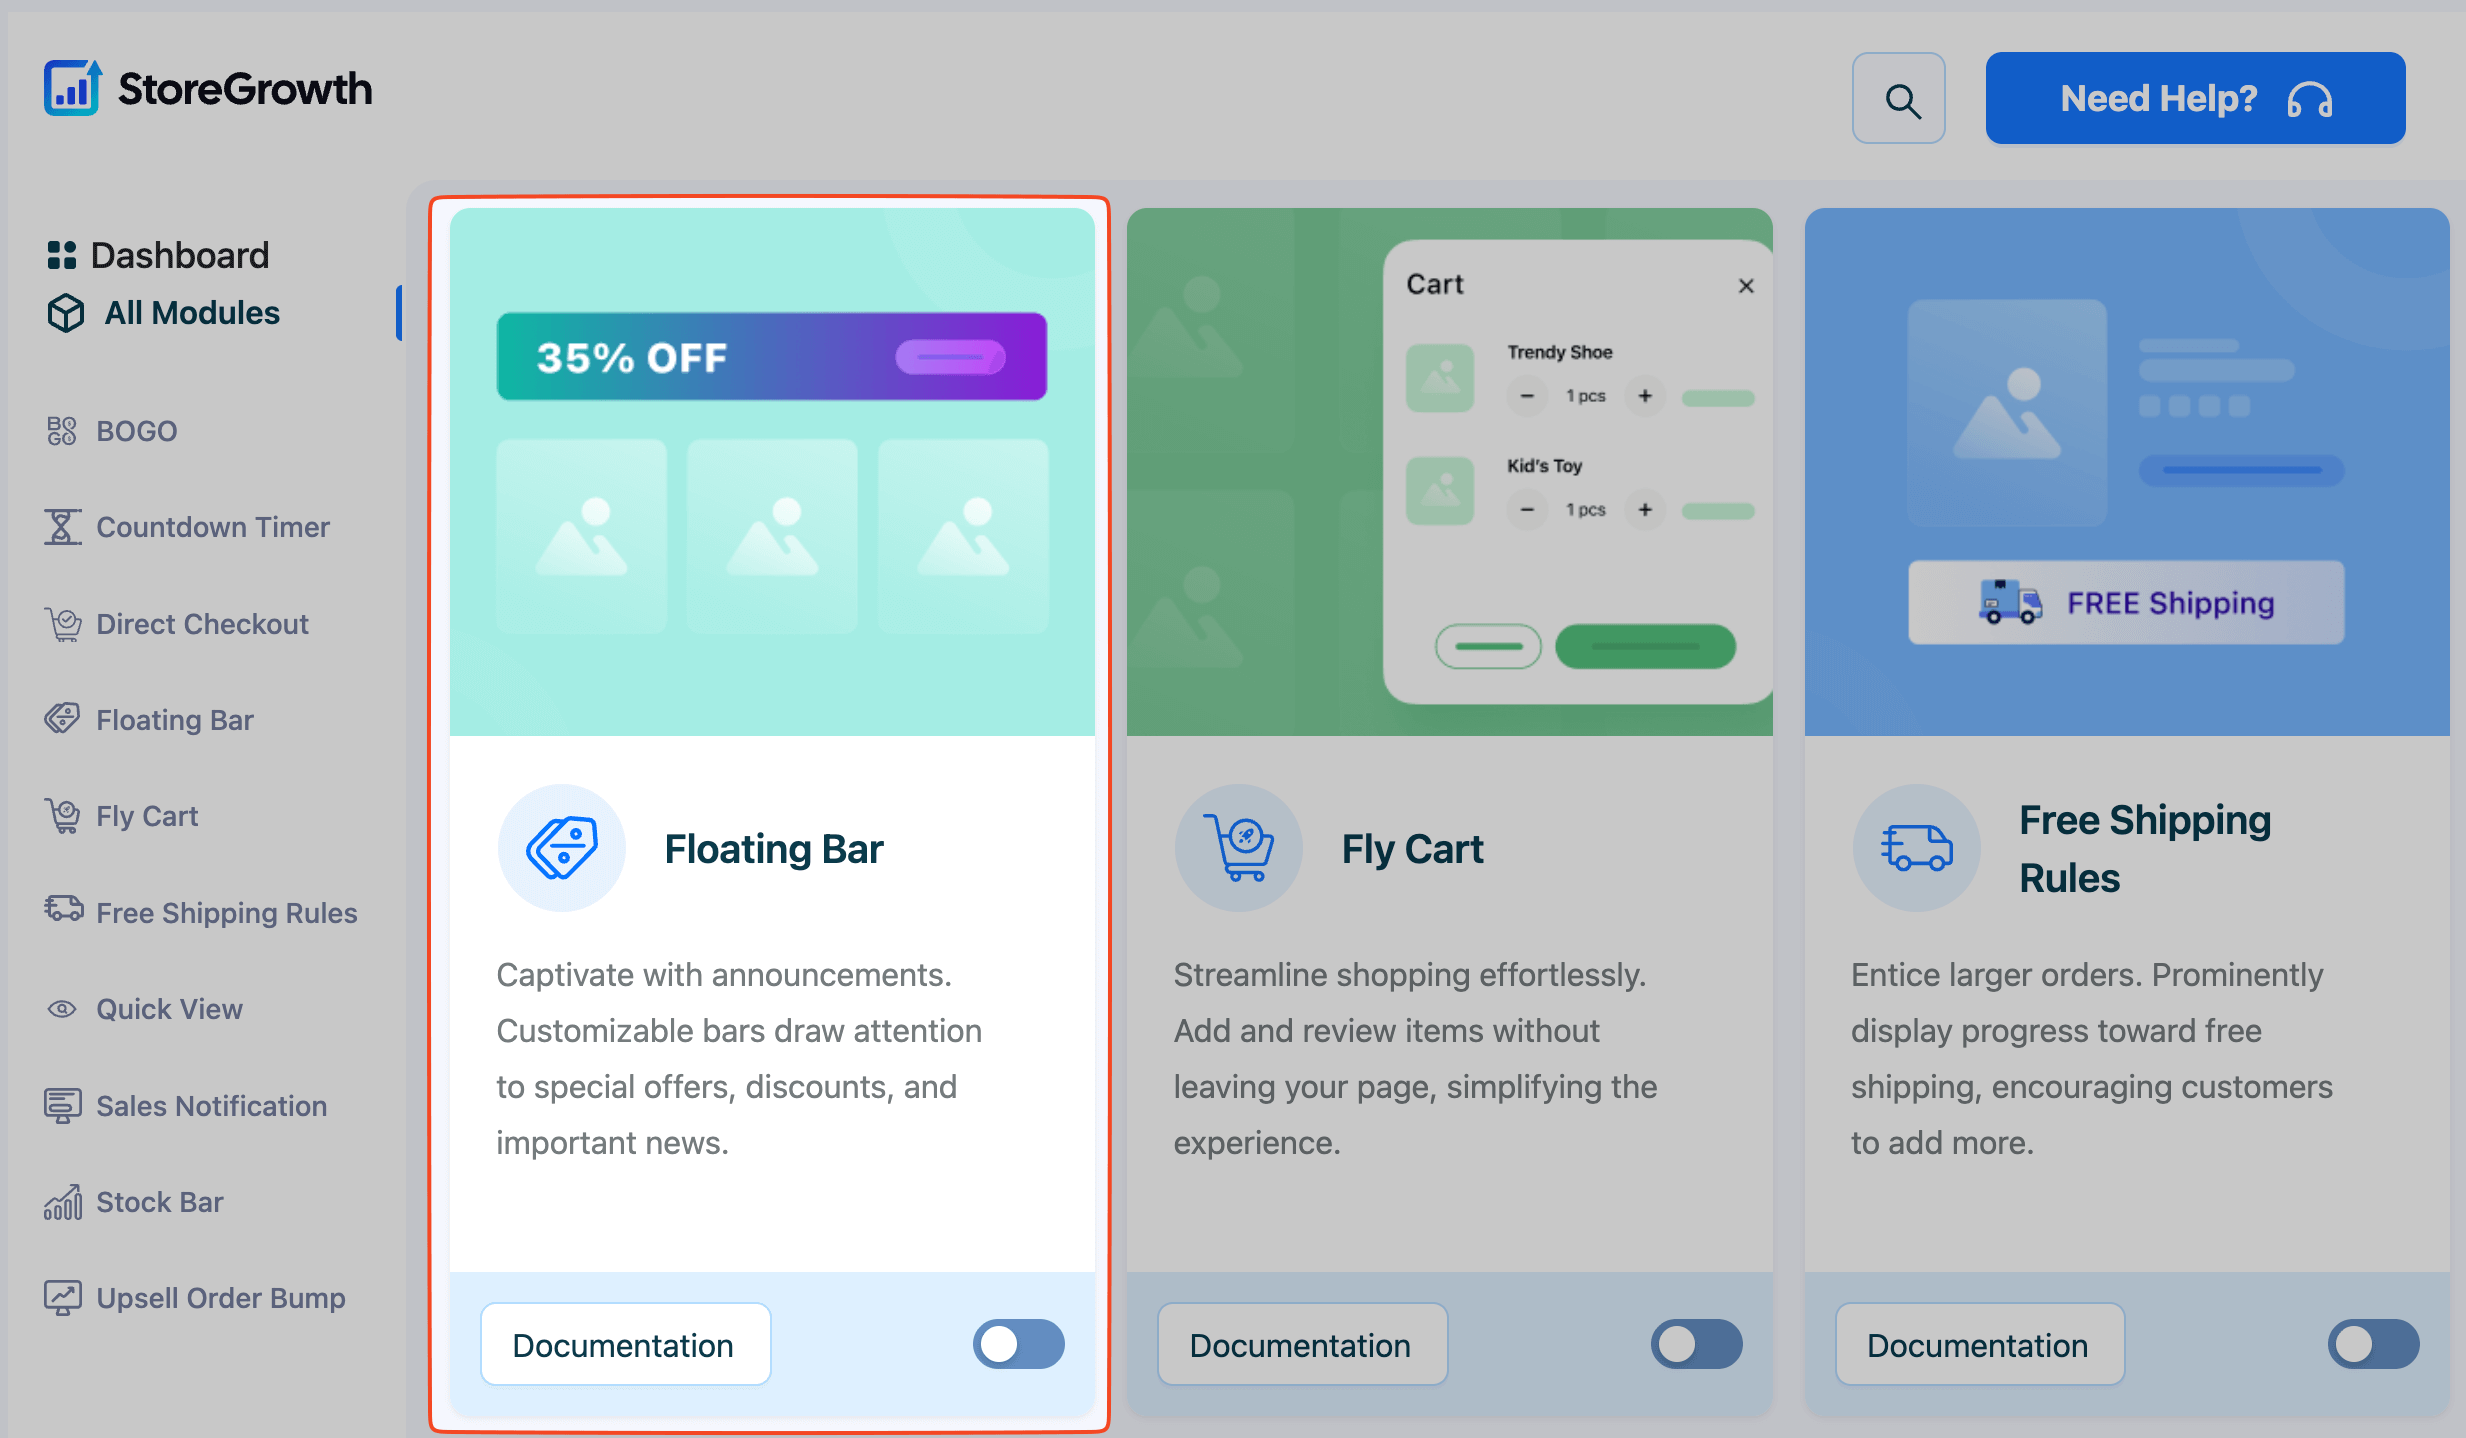
- Click the toggle switch to the “On” position to activate it.
Once enabled, a “Floating Bar” menu item will appear in the main StoreGrowth sidebar, where you can access all its settings.
Configuring the Floating Bar
Navigate to StoreGrowth » Modules » Floating Bar to access the main settings panel. This area is divided into two tabs: Banner Setting and Design.
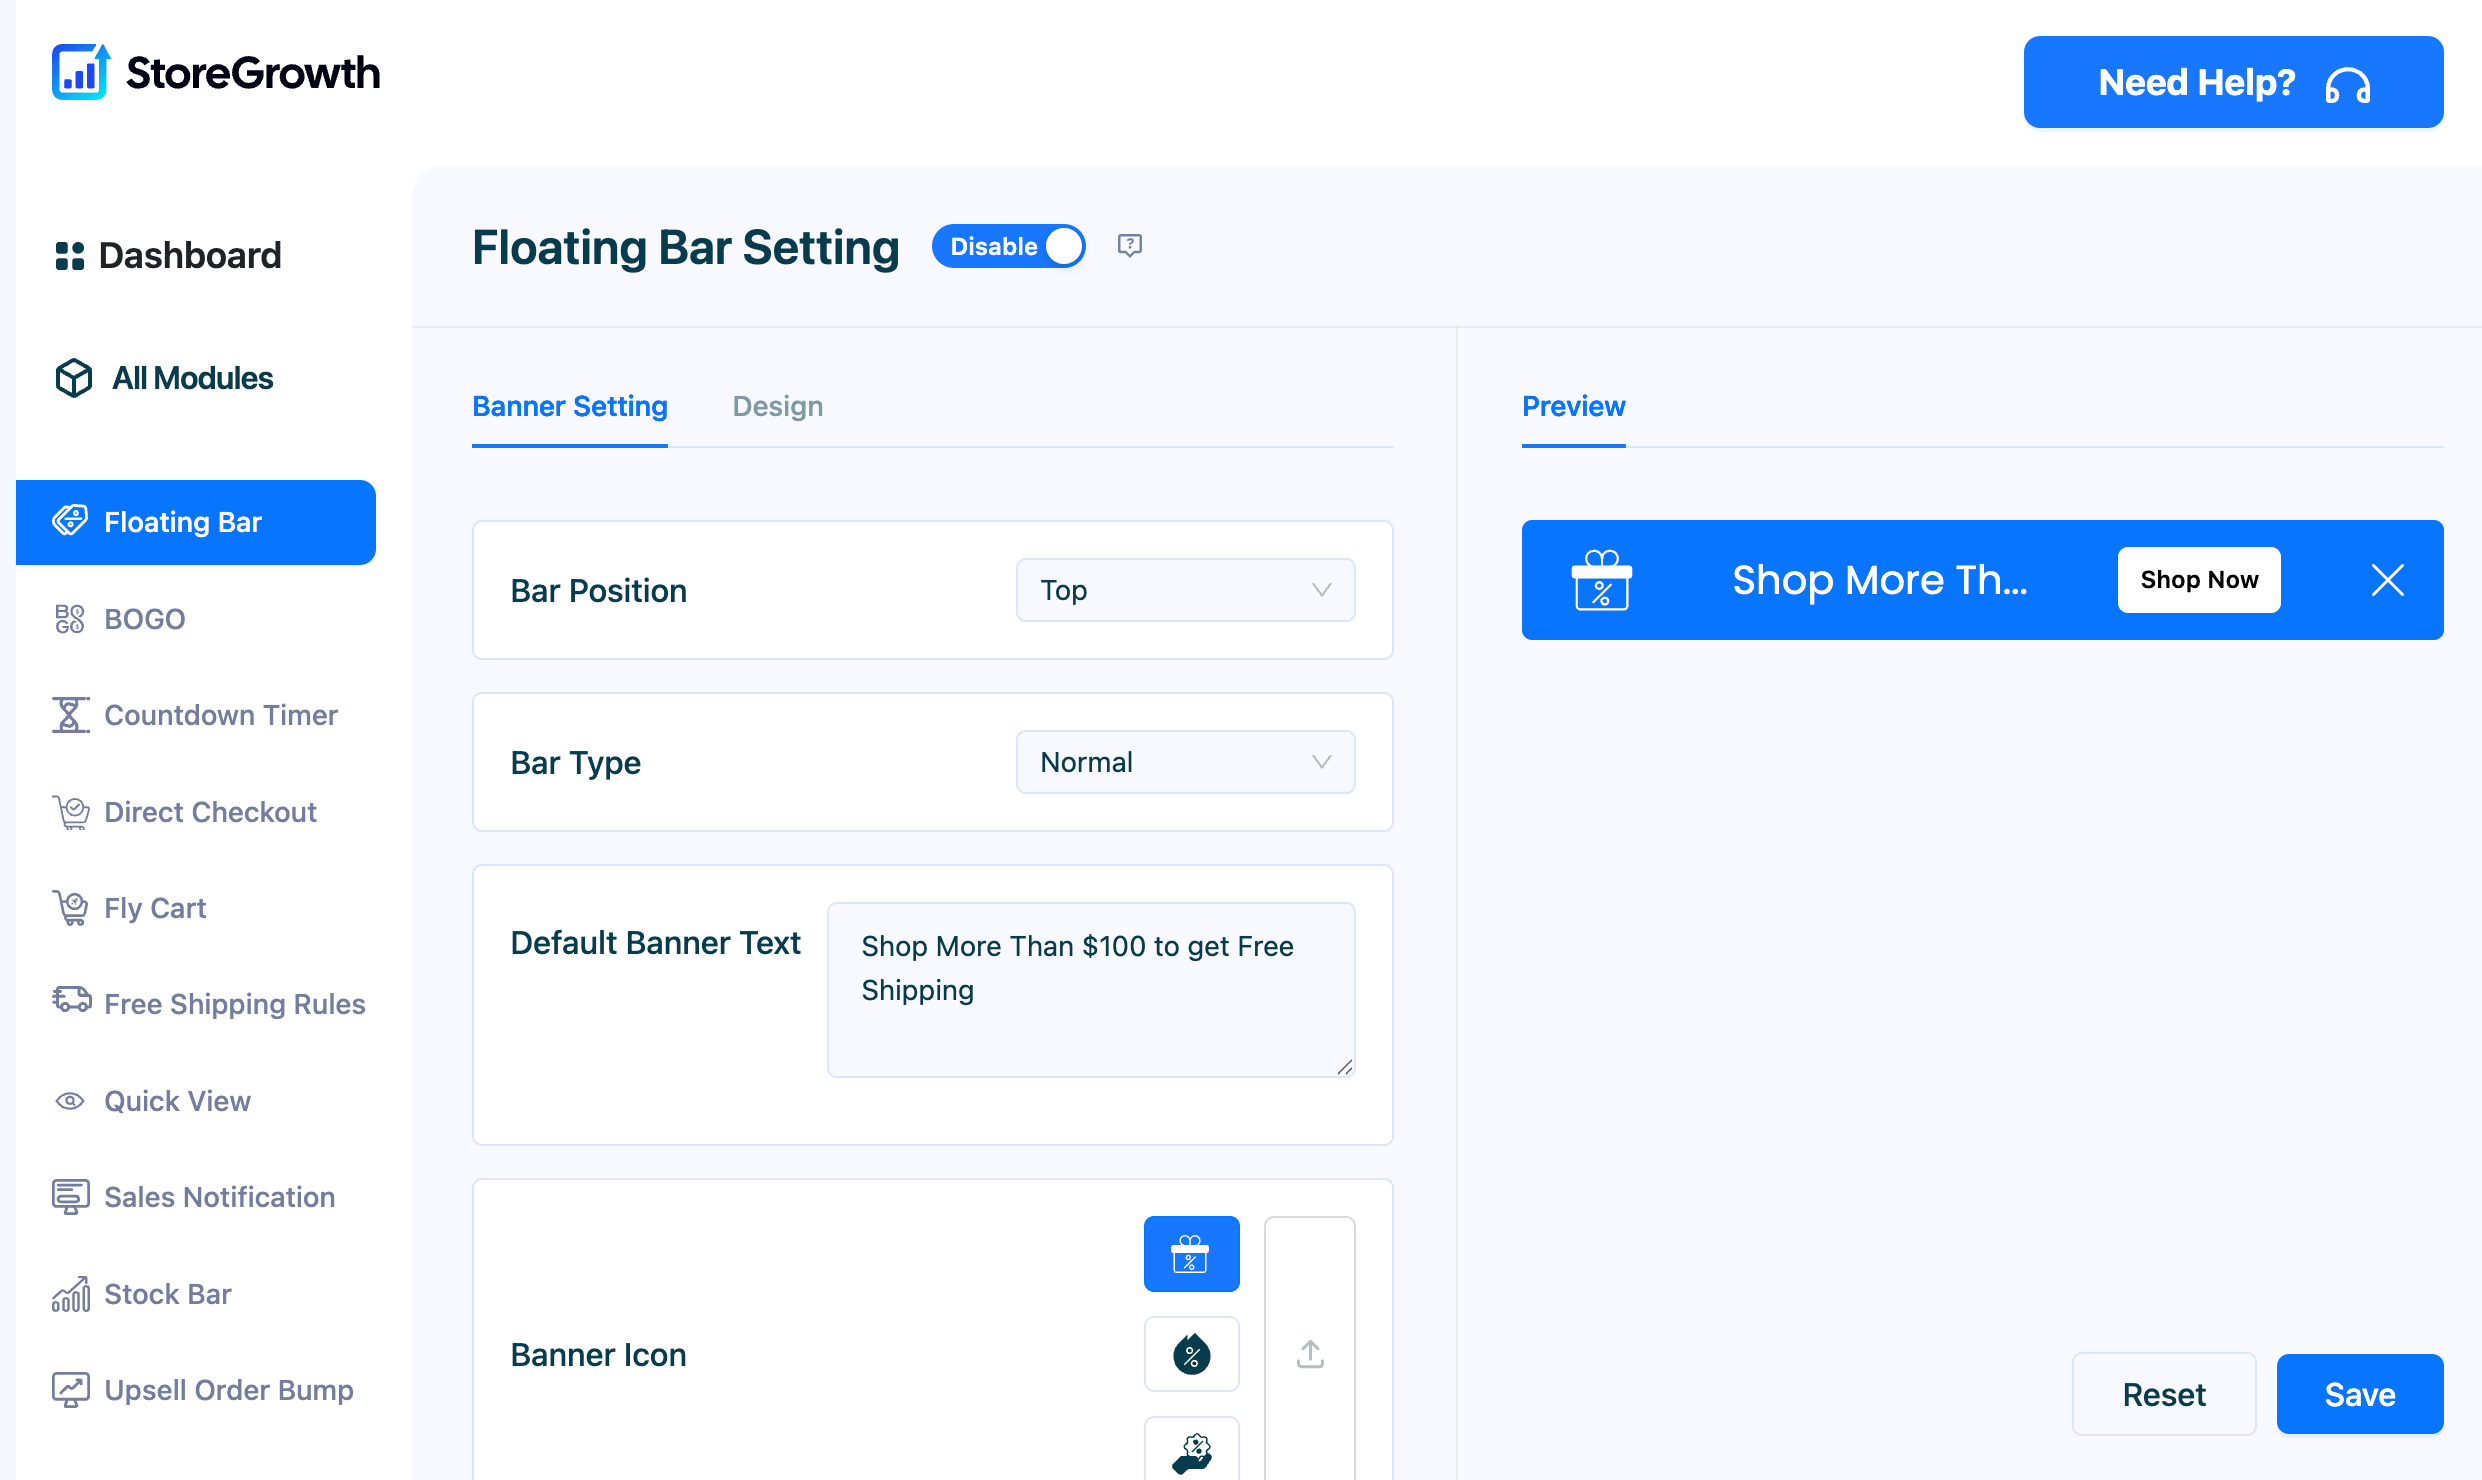
Banner Setting Tab
This tab controls the content, behavior, and display rules for your floating bar. A live preview at the bottom of the page shows how your bar will look on the front end.
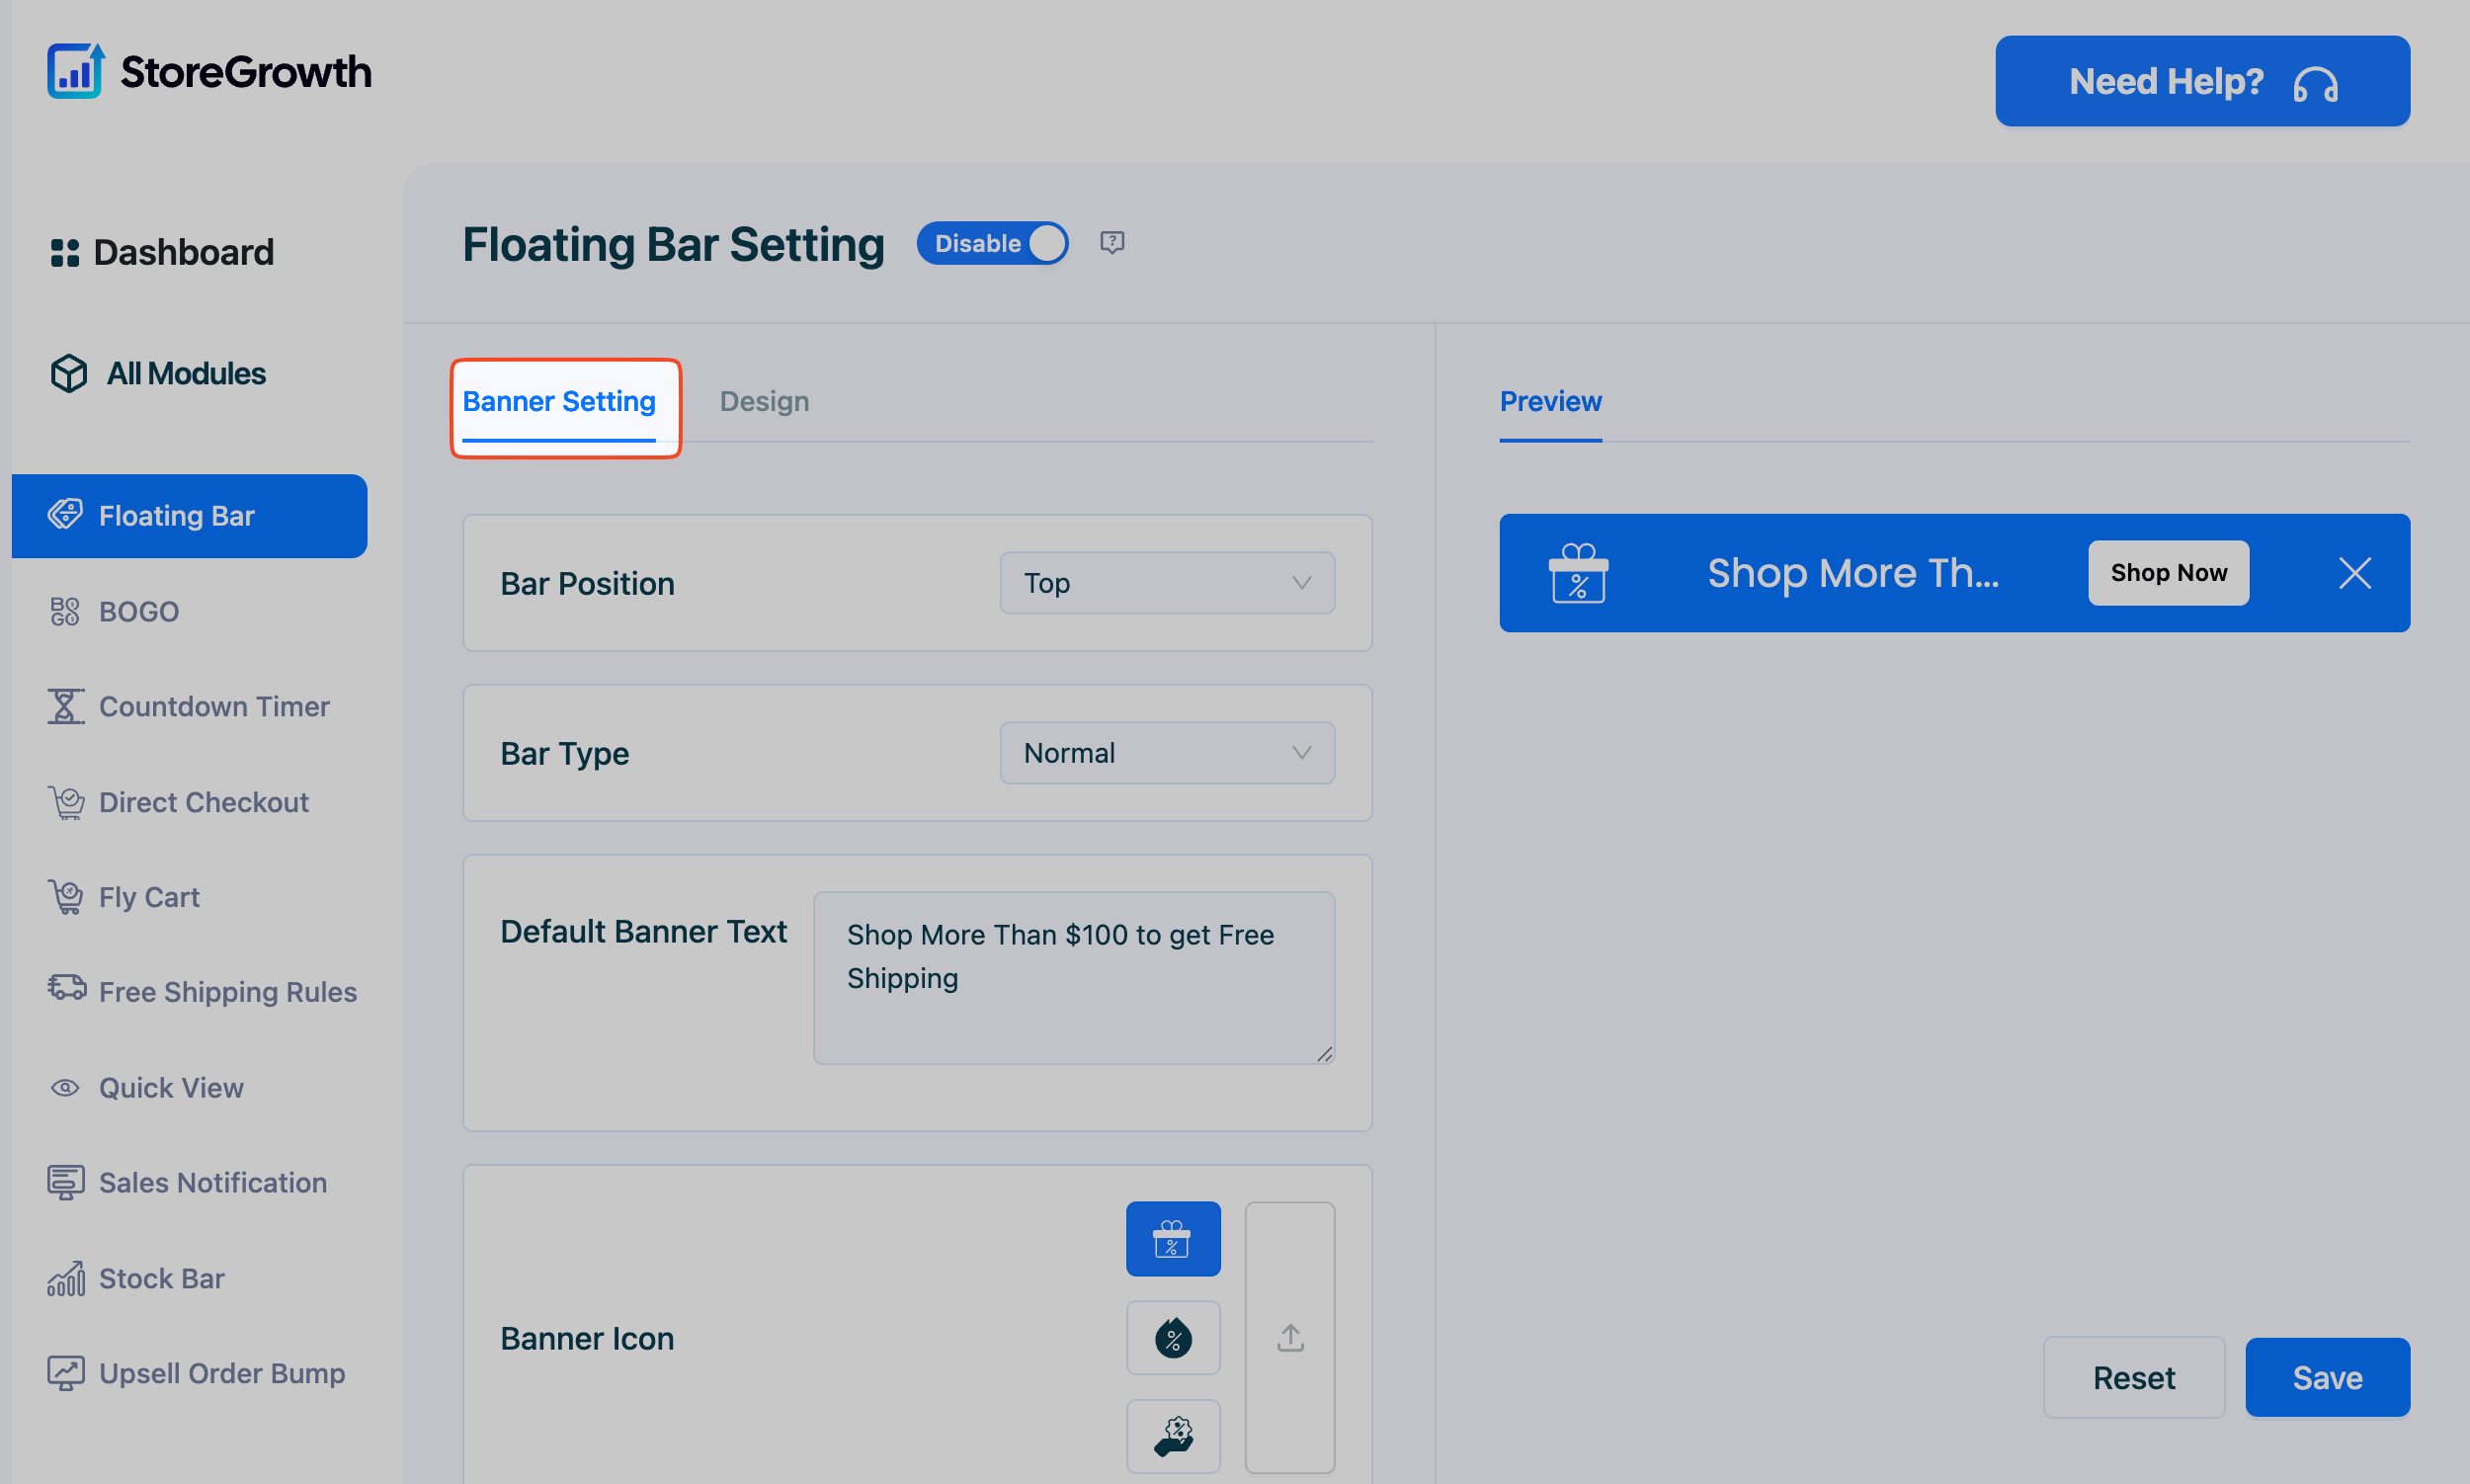
- Bar Position: Choose where the bar appears on the screen.
- Top: Displays the bar at the top of the page.
- Bottom: Displays the bar at the bottom of the page.
- Bar Type: Control how the bar behaves as users scroll.
- Normal: The bar stays at its position and will scroll out of view with the page.
- Sticky: The bar remains fixed at the top or bottom of the screen, staying visible as the user scrolls.
- Default Banner Text: Enter the main message you want to display to your customers (e.g., “Free Shipping on Orders Over $50!”).
- Banner Icon: Select from a library of pre-designed icons or upload your own custom icon to match your brand.
- Show Button: Toggle this on to display a call-to-action (CTA) button on the bar. You can choose to show it on Desktop, Mobile, or both.
- Button Text: Customize the text for the CTA button (e.g., “Shop Now,” “Learn More”).
- Button Action: Determine what happens when a customer clicks the button.
- Banner Close: The button will act as a close button, dismissing the bar.
- Redirect to URL: The button will link to a specific page, such as a sales category or promotional landing page.
- Countdown: Enable a countdown timer directly within the bar to create urgency. Set the Start Date and End Date for your promotion. Check the Show Countdown box to make it visible.
- Coupon Code: Display a coupon code for customers to use at checkout.
- Display Rules: Define precisely when and where the floating bar appears.
- Show Banner: Choose to display the bar on Desktop, Mobile, or both devices.
- Trigger: Set how the bar is triggered. You can make it appear After a few Seconds (specify the time) or After Scroll (specify the scroll percentage).
- Page Targeting: Control which pages the bar appears on. You can set it to show everywhere or target specific pages.
Design Tab
This tab allows you to fully customize the visual appearance of your floating bar to ensure it matches your store’s branding and captures attention.
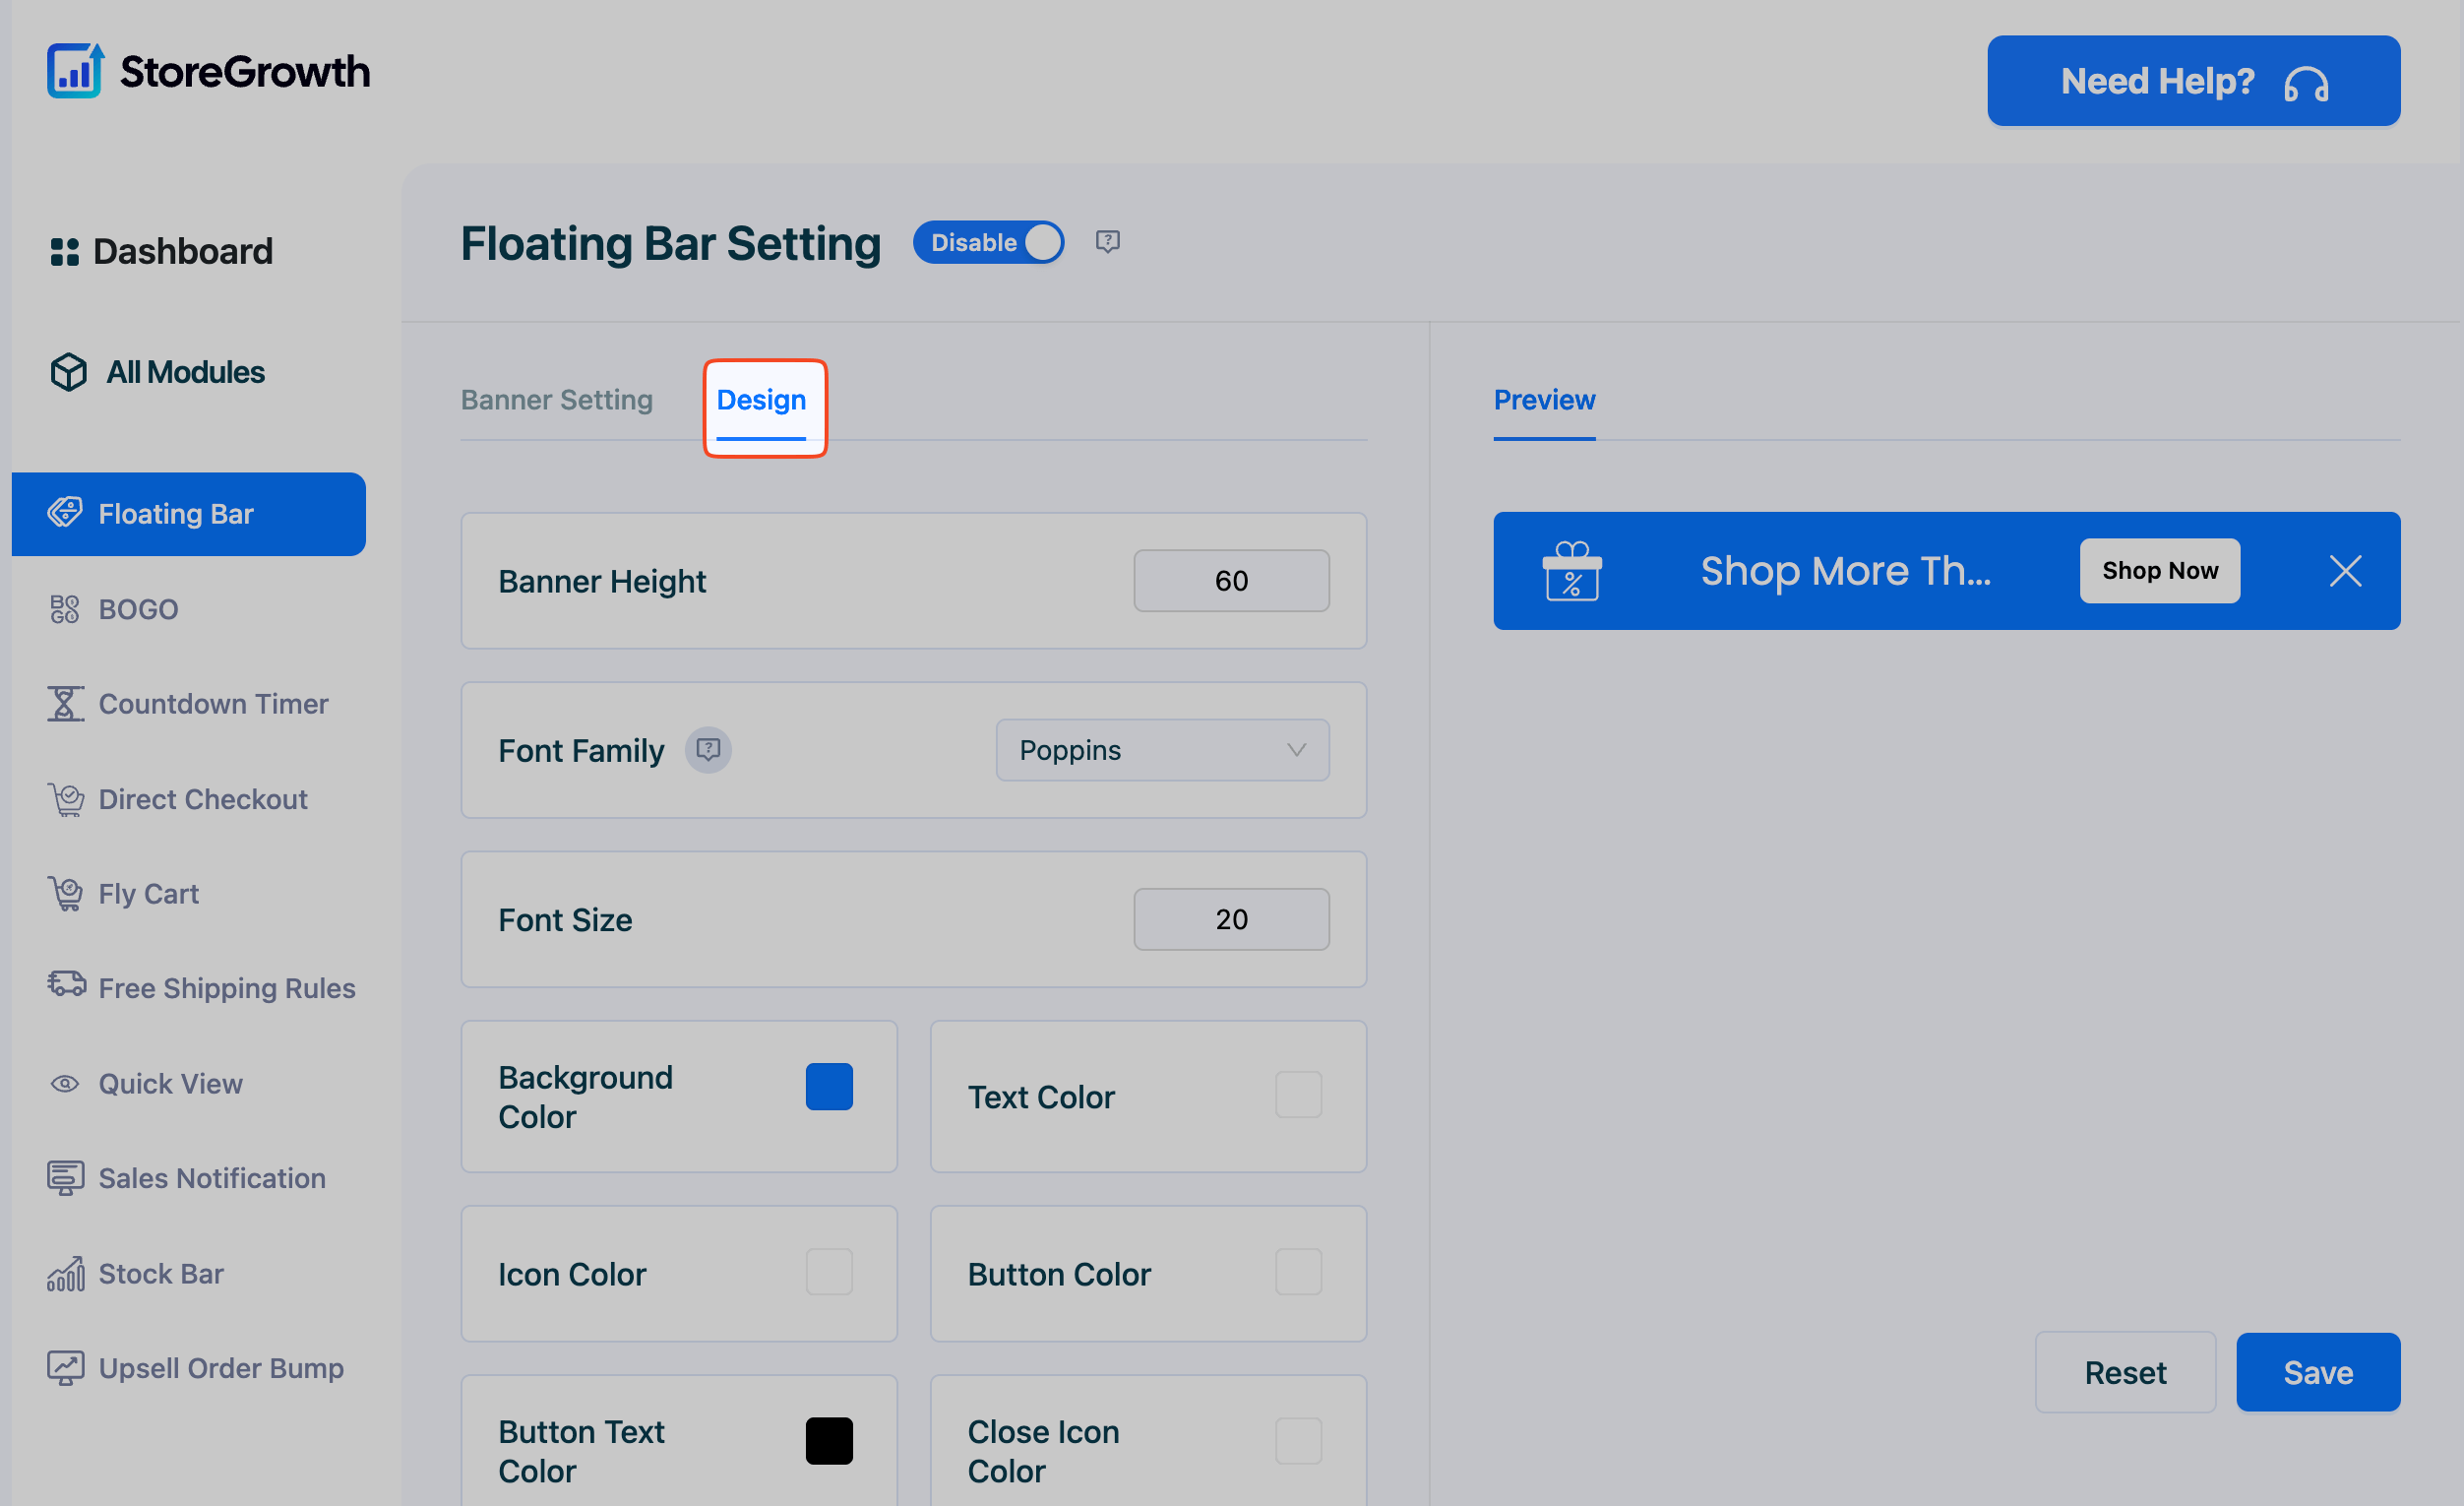
- Banner Height: Adjust the height of the bar in pixels.
- Font Family: Select the font for the banner text.
- Font Size: Set the size of the text in pixels.
- Color Customization: Use the color pickers to style every element of the bar:
- Background Color: Sets the main background of the bar.
- Text Color: Sets the color of the main banner text.
- Icon Color: Sets the color of the banner icon.
- Button Color: Sets the background color of the CTA button.
- Button Text Color: Sets the color of the text on the CTA button.
- Close Icon Color: Sets the color of the ‘X’ close icon.
- Template: Choose from pre-designed templates for a quick and professional look.
After configuring these settings, be sure to click the Save button to apply your changes.