

The Direct Checkout module is a powerful feature designed to reduce friction and speed up the purchasing process for your customers.
By allowing shoppers to skip the traditional cart page and go straight to checkout, you can significantly decrease cart abandonment and improve your conversion rate.
This is especially effective for single-product stores, flash sales, or high-demand items where customers are ready to buy immediately.
Activating the Direct Checkout Module
Before you can configure the module, you must first activate it.
- Navigate to StoreGrowth » Modules from your WordPress dashboard.
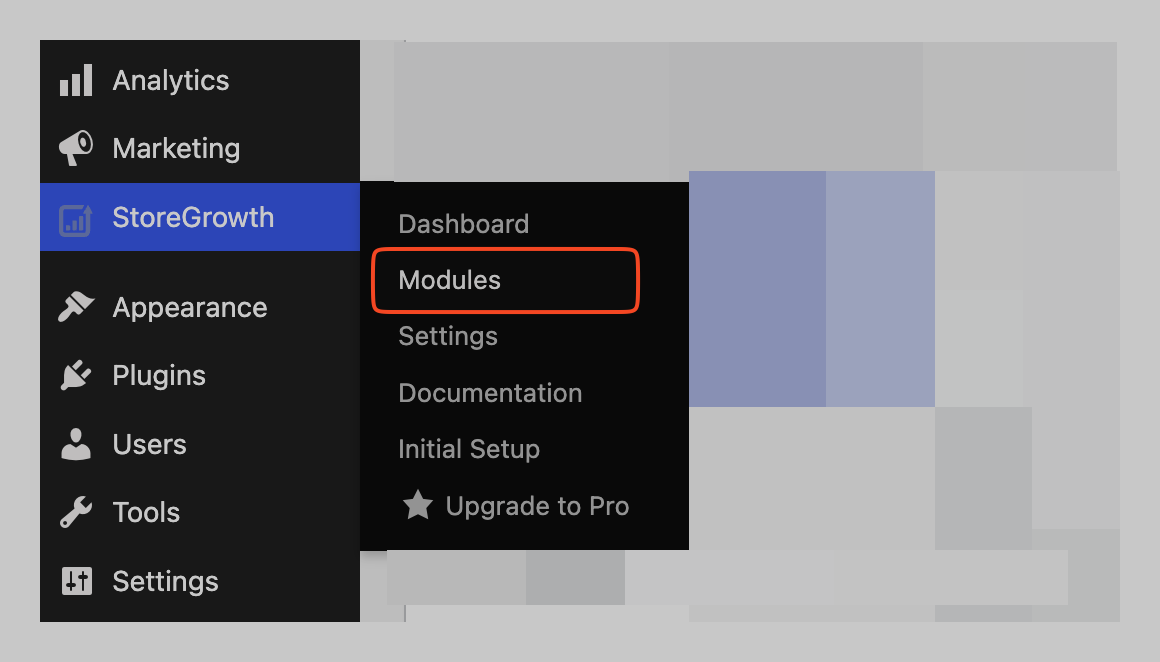
- Find the Direct Checkout module card in the list.
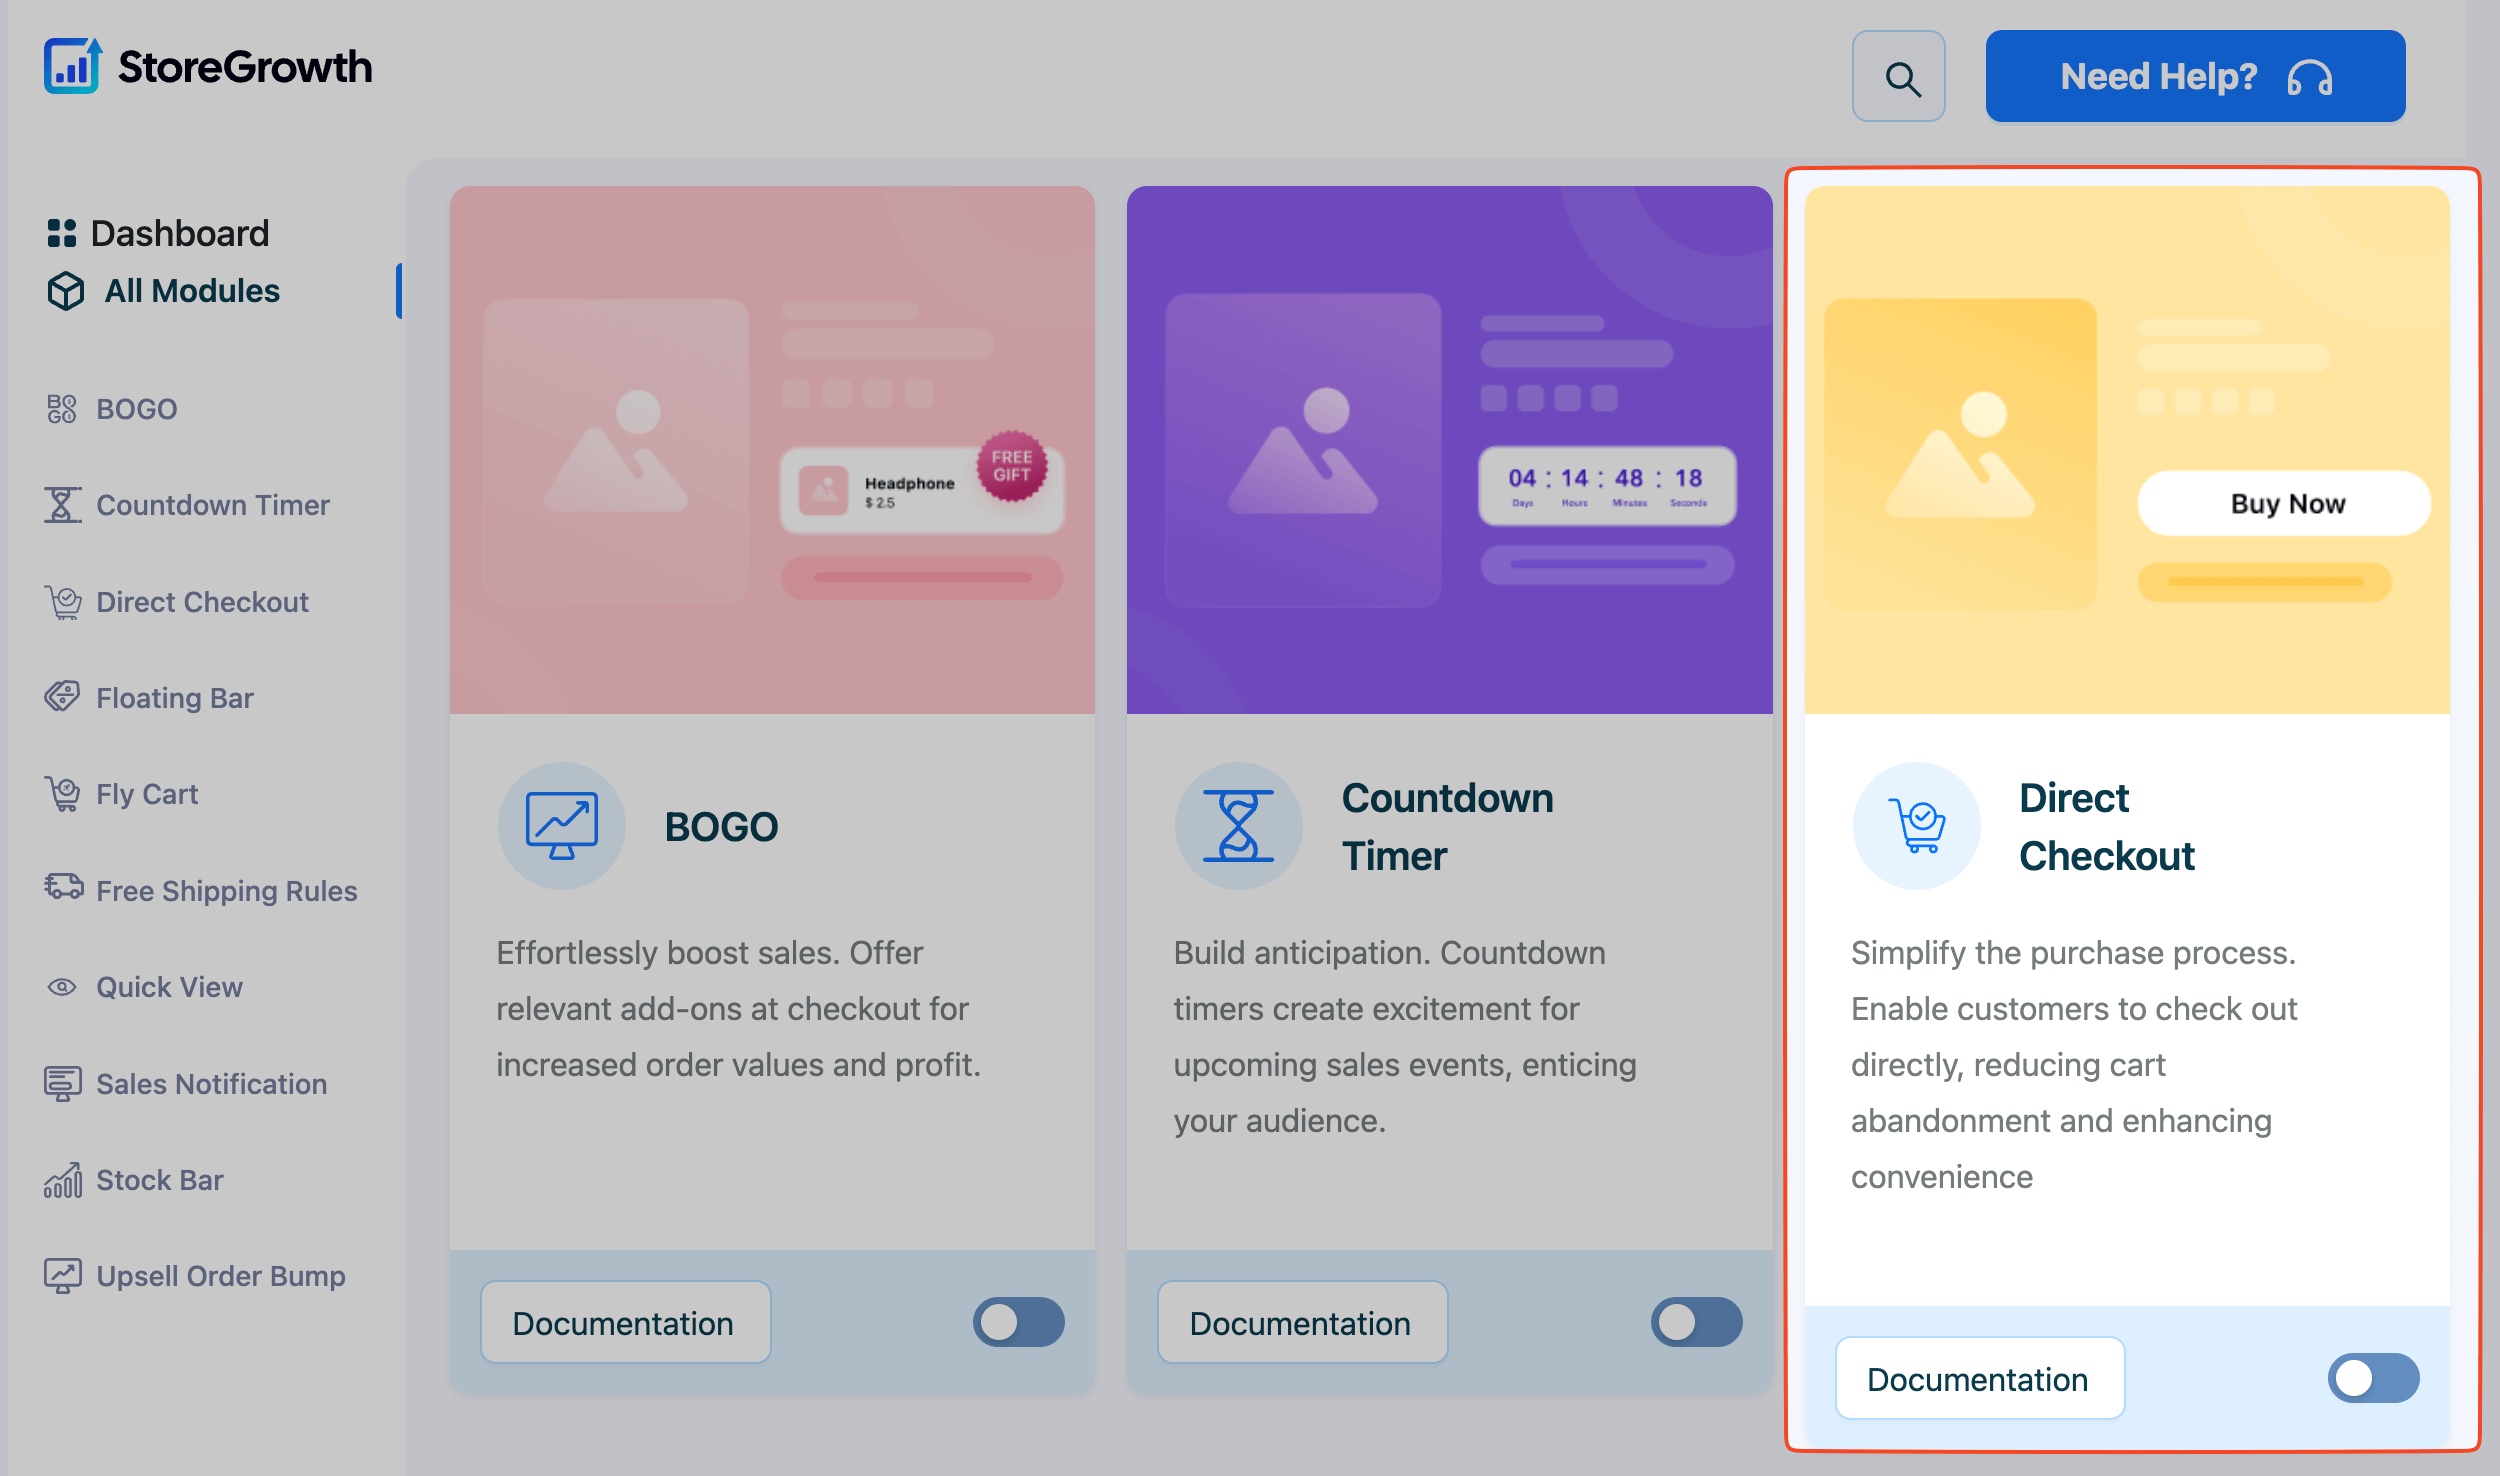
- Click the toggle switch to the “On” position to activate it.
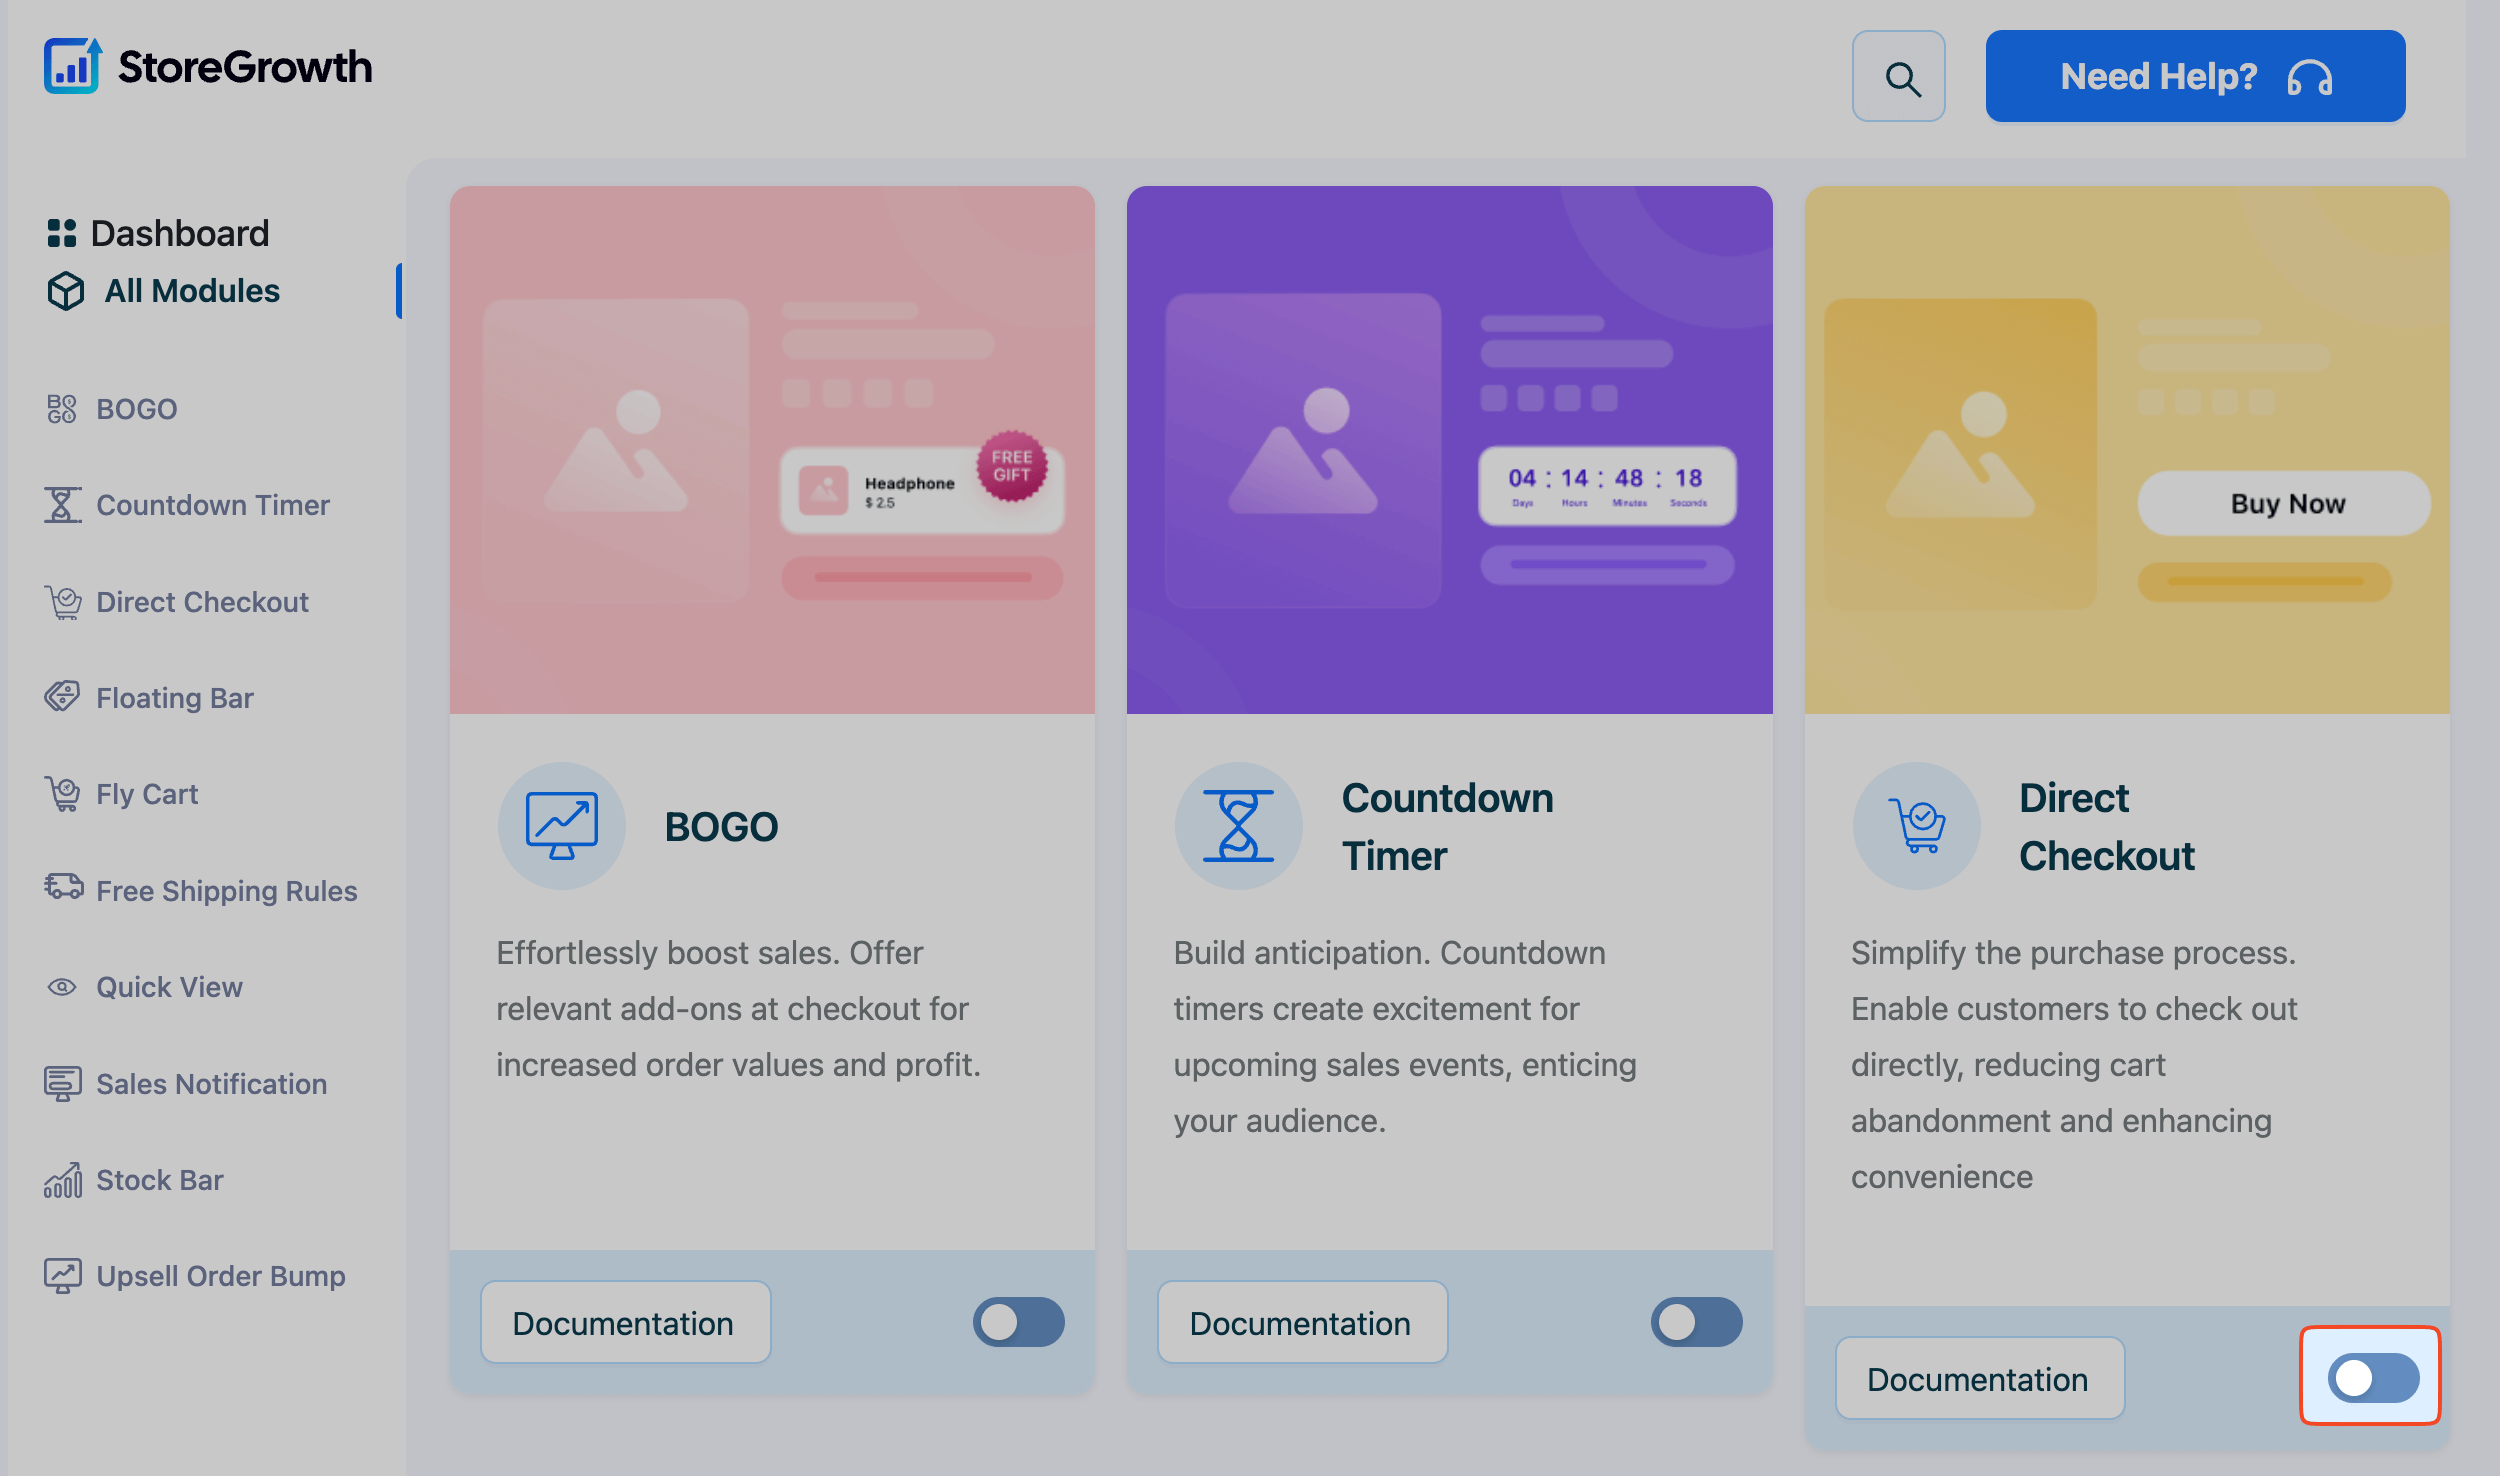
Once enabled, a “Direct Checkout” menu item will be added to the main StoreGrowth sidebar, where you can access its settings.
Configuring Direct Checkout Settings
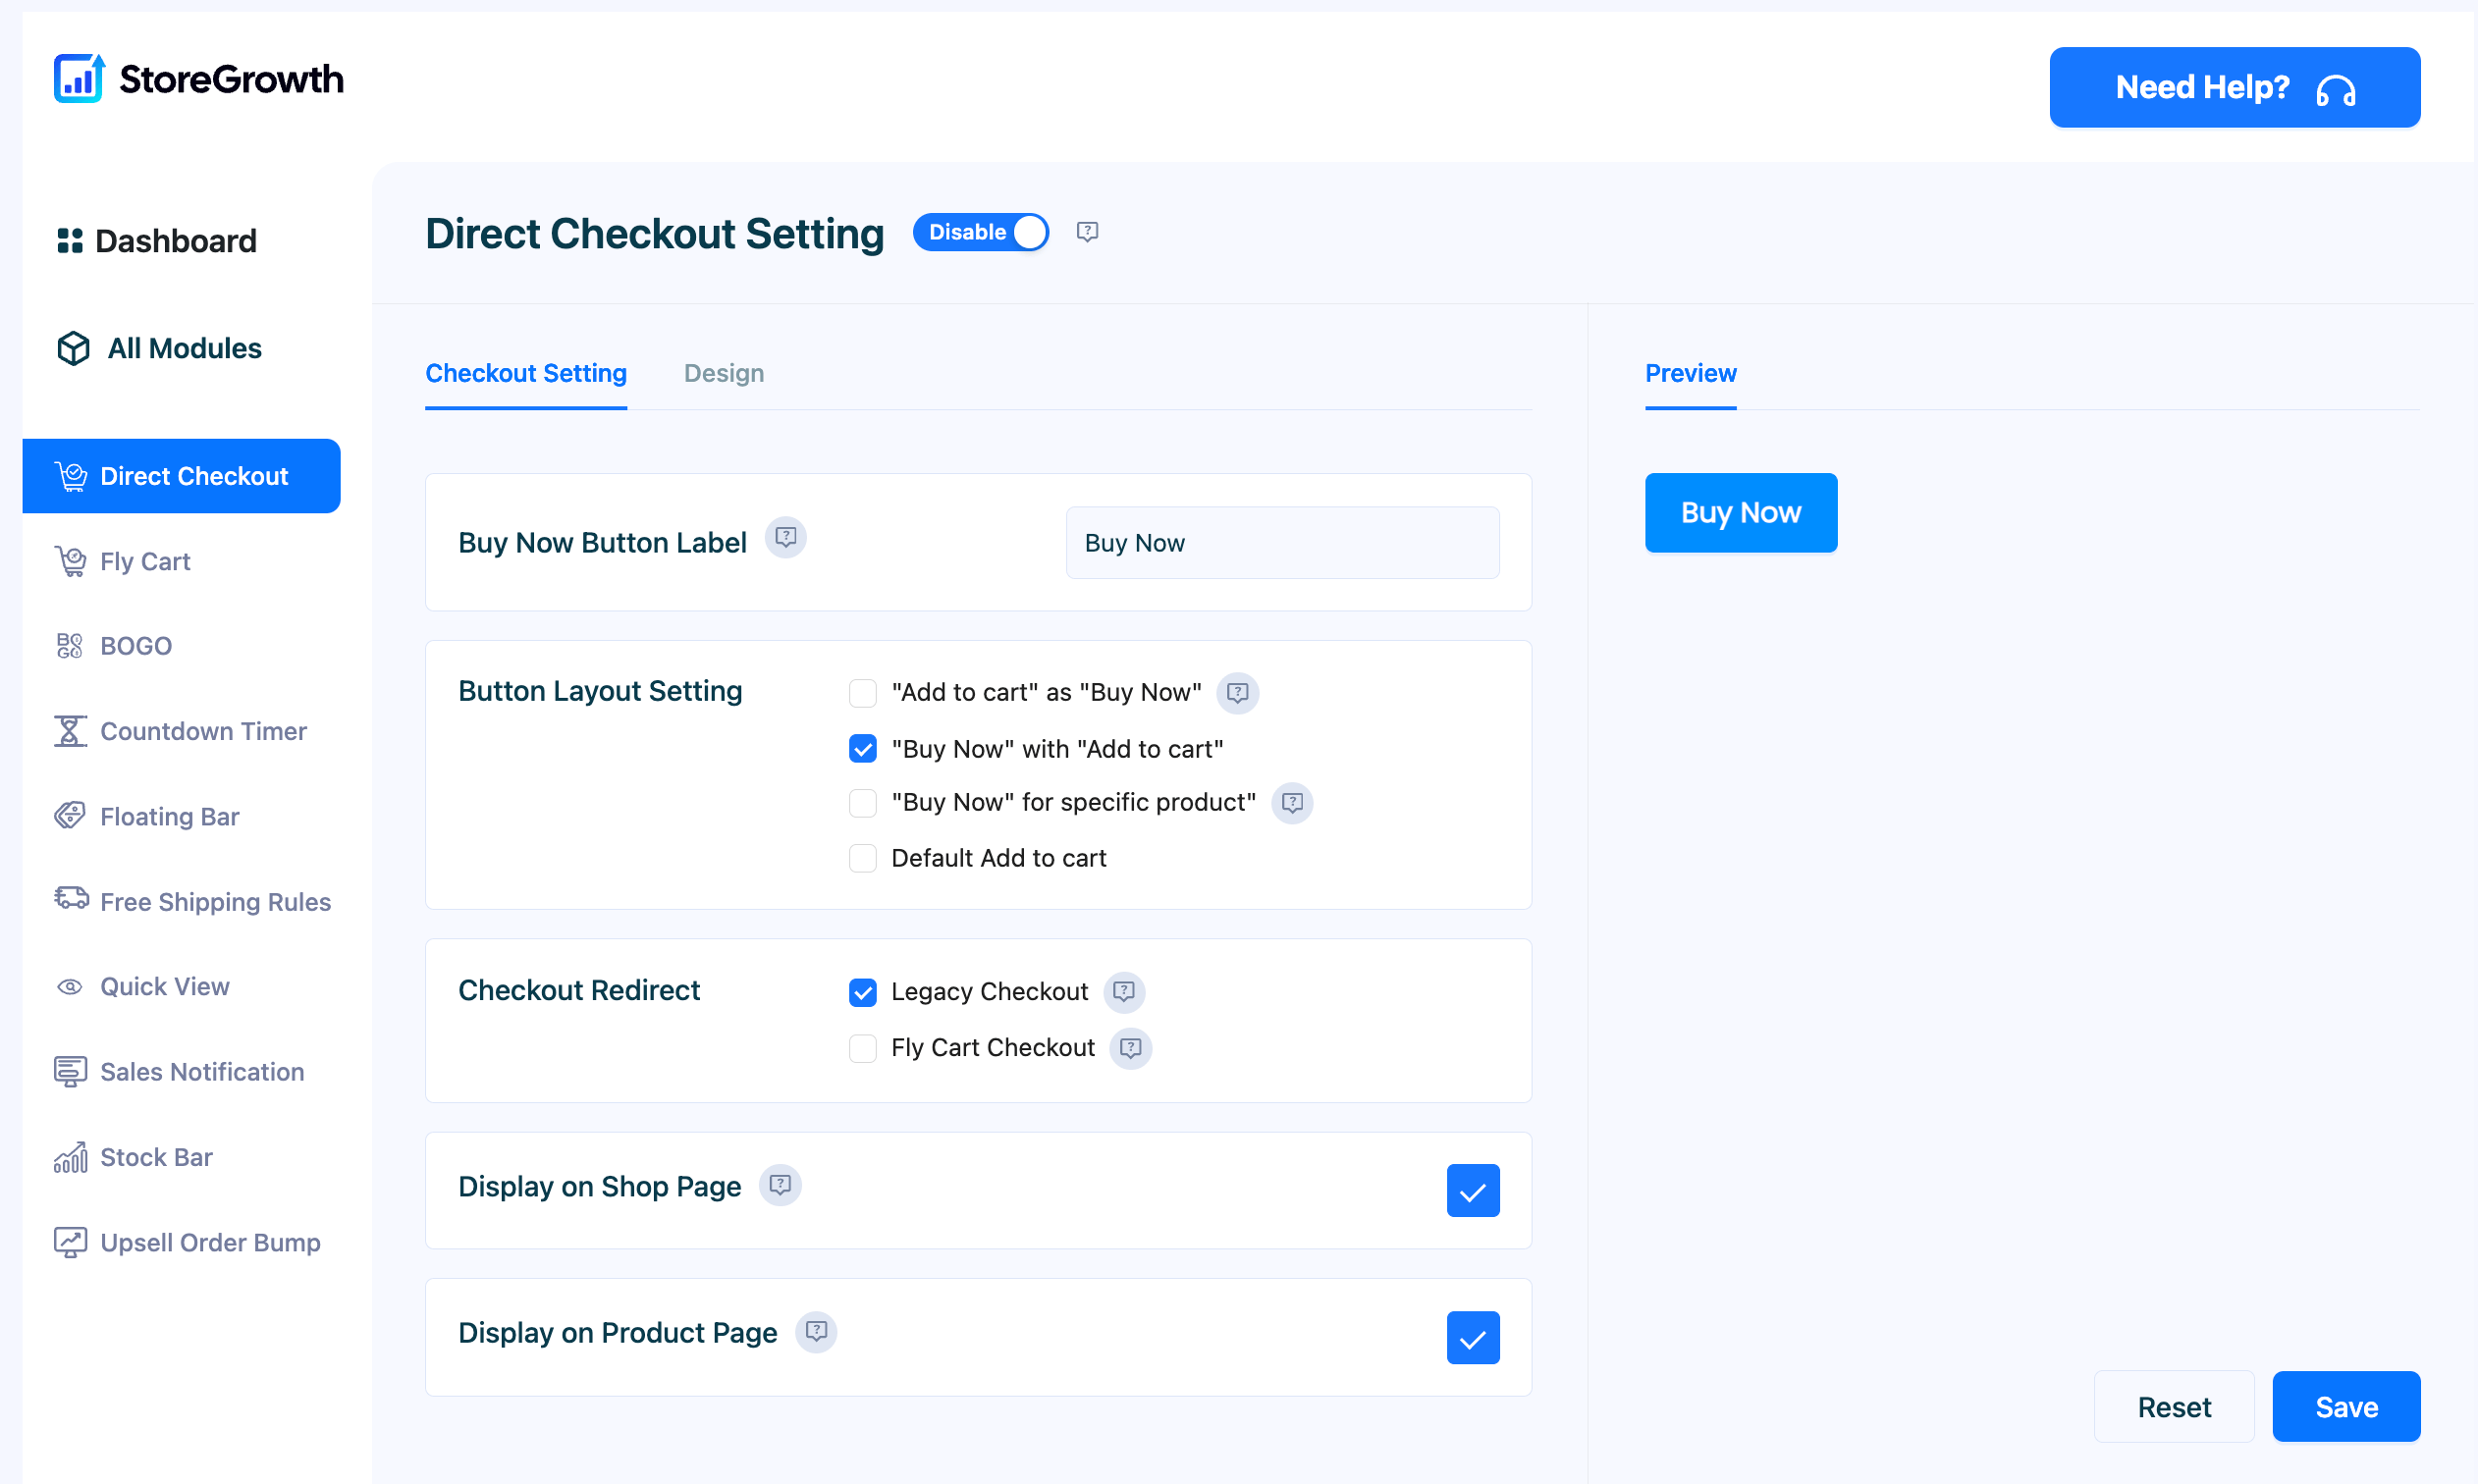
Navigate to StoreGrowth » Modules » Direct Checkout to access the main settings panel. This area is divided into two tabs: Checkout Setting and Design.
Checkout Setting Tab
This tab controls the core behavior of the “Buy Now” button, including its text, placement, and what happens when a customer clicks it. A live preview on the right side of the screen updates as you make changes.
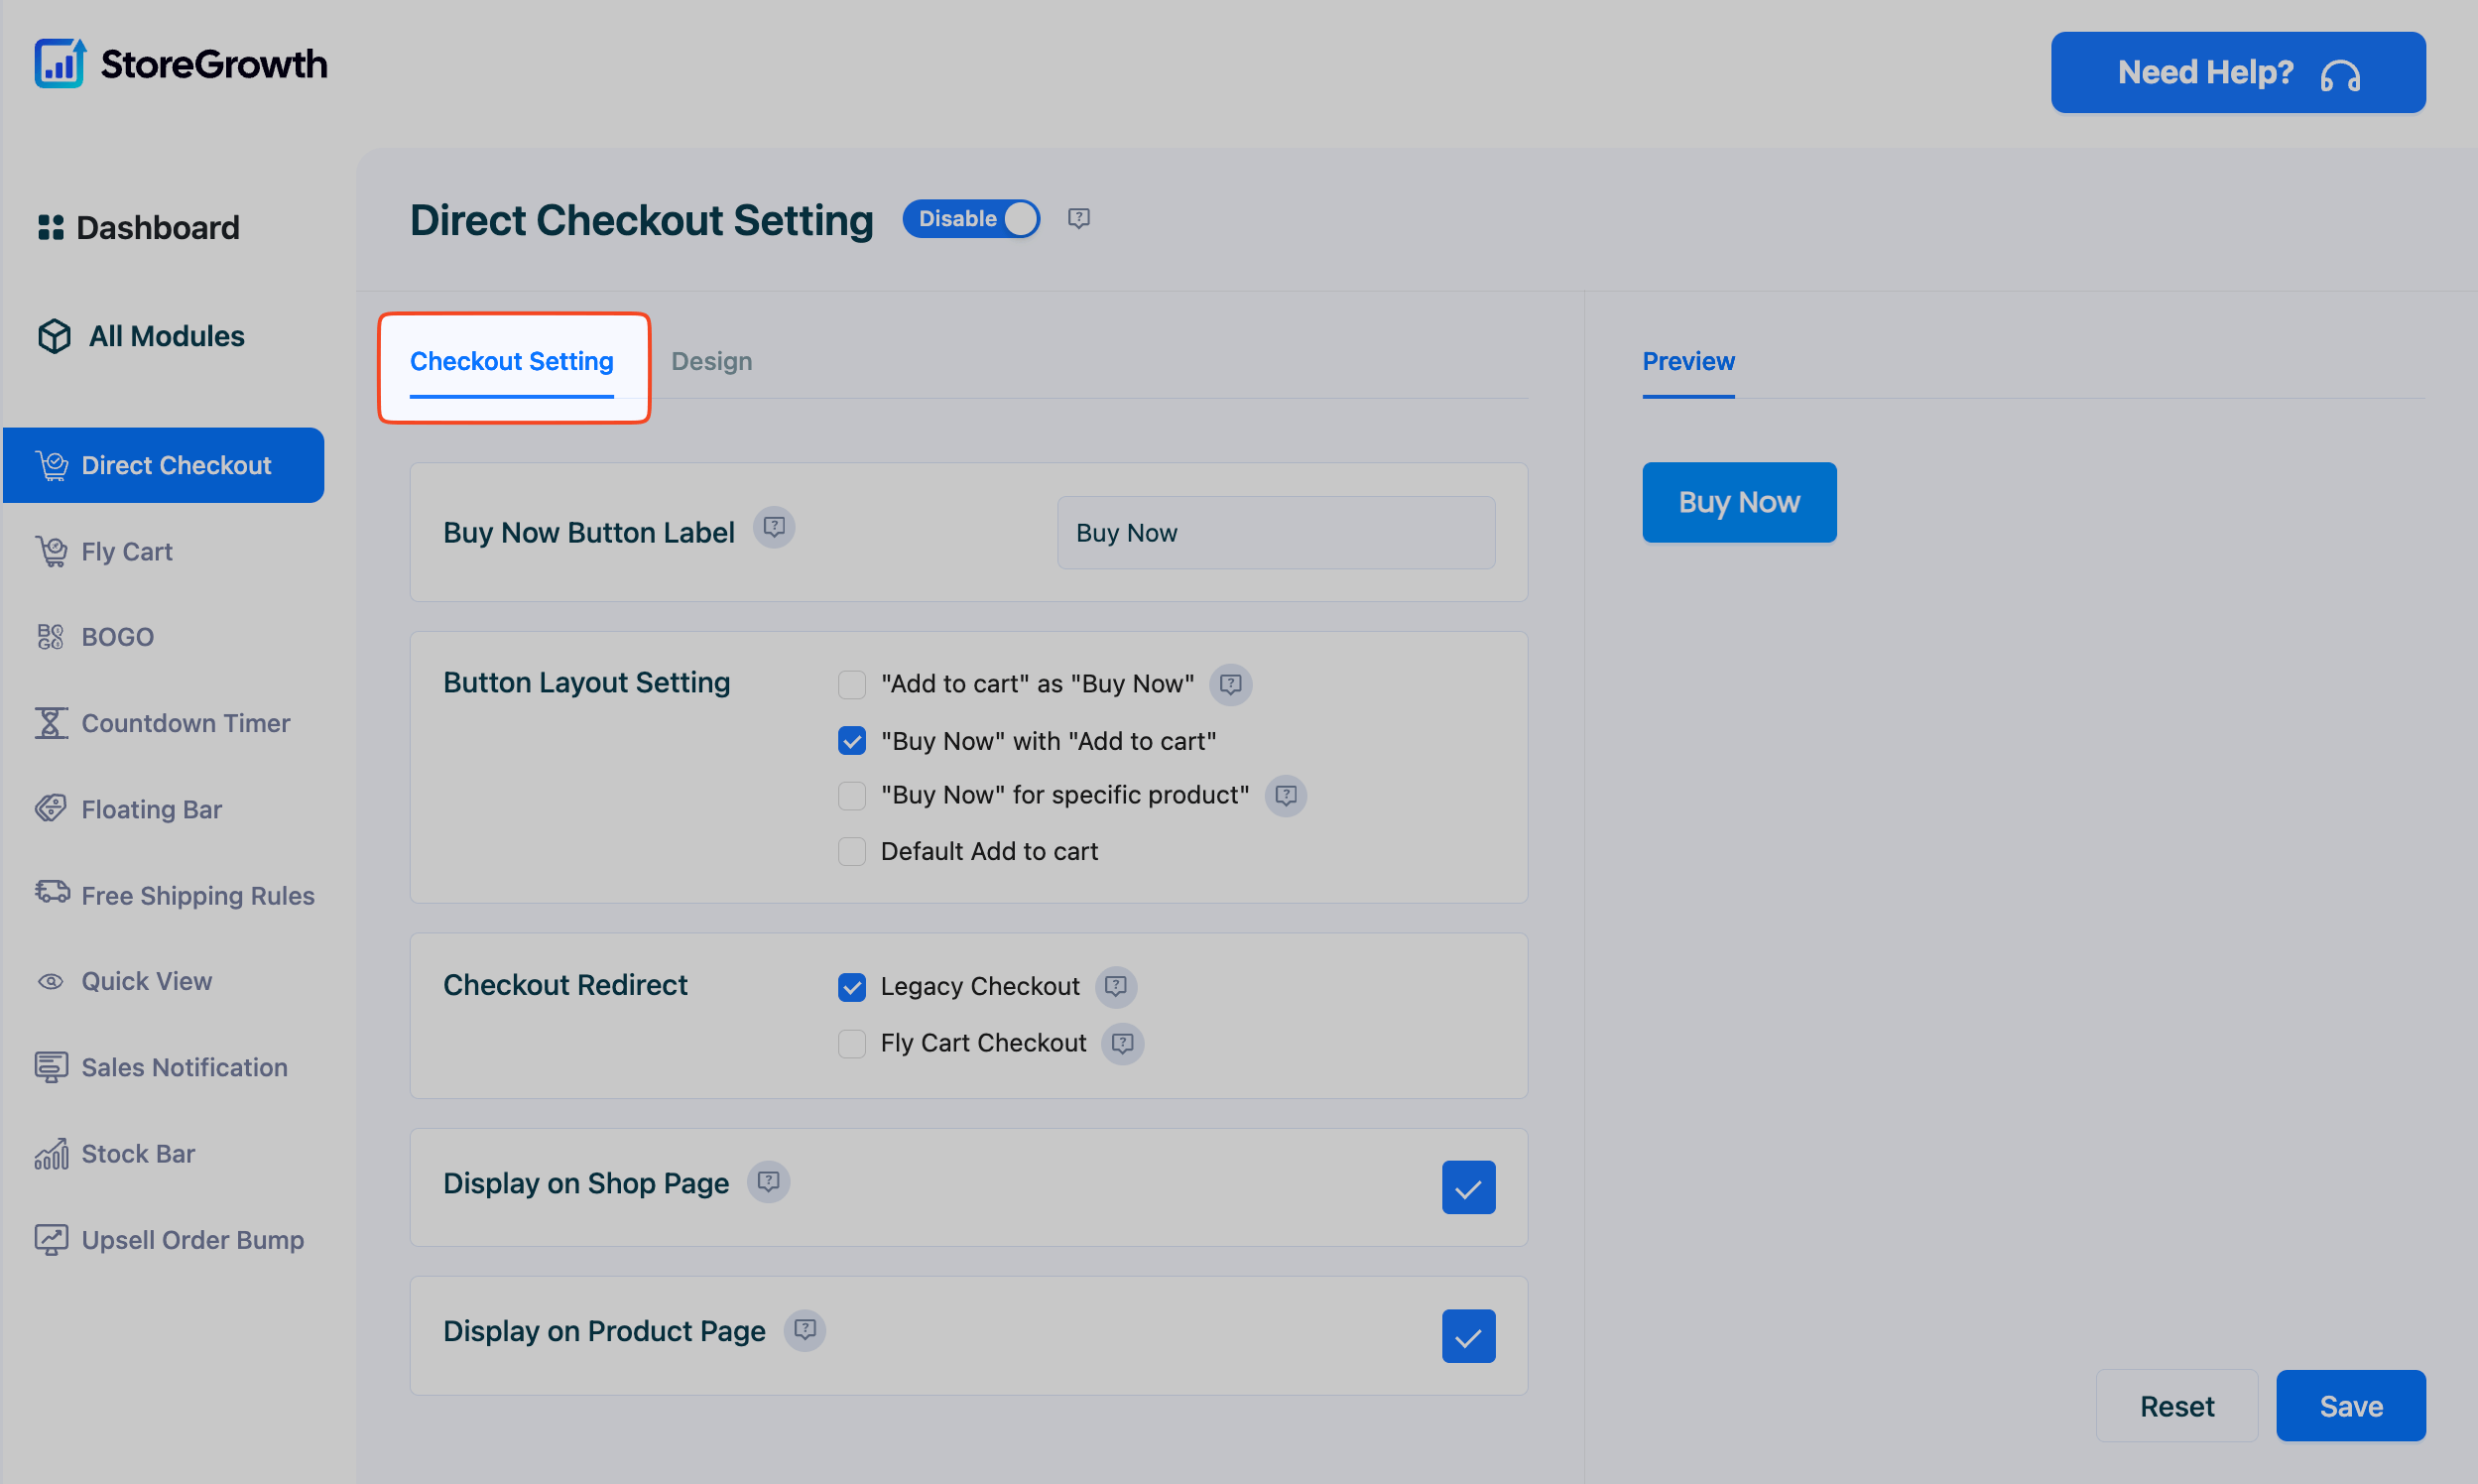
- Buy Now Button Label: Customize the text that appears on the direct checkout button. While it defaults to “Buy Now,” you can change it to other effective calls-to-action like “Purchase Now” or “Get It Now” to match your store’s tone.
- Button Layout Setting: This setting gives you precise control over how the “Buy Now” button is displayed in relation to the standard “Add to cart” button. You can choose to:
- Replace the “Add to cart” button entirely with your “Buy Now” button.
- Show the “Buy Now” button alongside the existing “Add to cart” button.
- Configure the button for specific products.
- Checkout Redirect: Choose where the customer is sent after clicking the “Buy Now” button.
- Legacy Checkout: This is the standard option, which redirects the customer directly to your main WooCommerce checkout page.
- Fly Cart Checkout: For an even faster experience, this option integrates with the Fly Cart module. If you select this, ensure the Fly Cart module is also active.
- Display on Shop Page: Enable this checkbox to show the “Buy Now” button on your main shop and category archive pages.
- Display on Product Page: Enable this checkbox to show the “Buy Now” button on individual product detail pages.
Design Tab
This tab allows you to fully customize the appearance of your “Buy Now” button to ensure it stands out and matches your brand’s aesthetic perfectly.
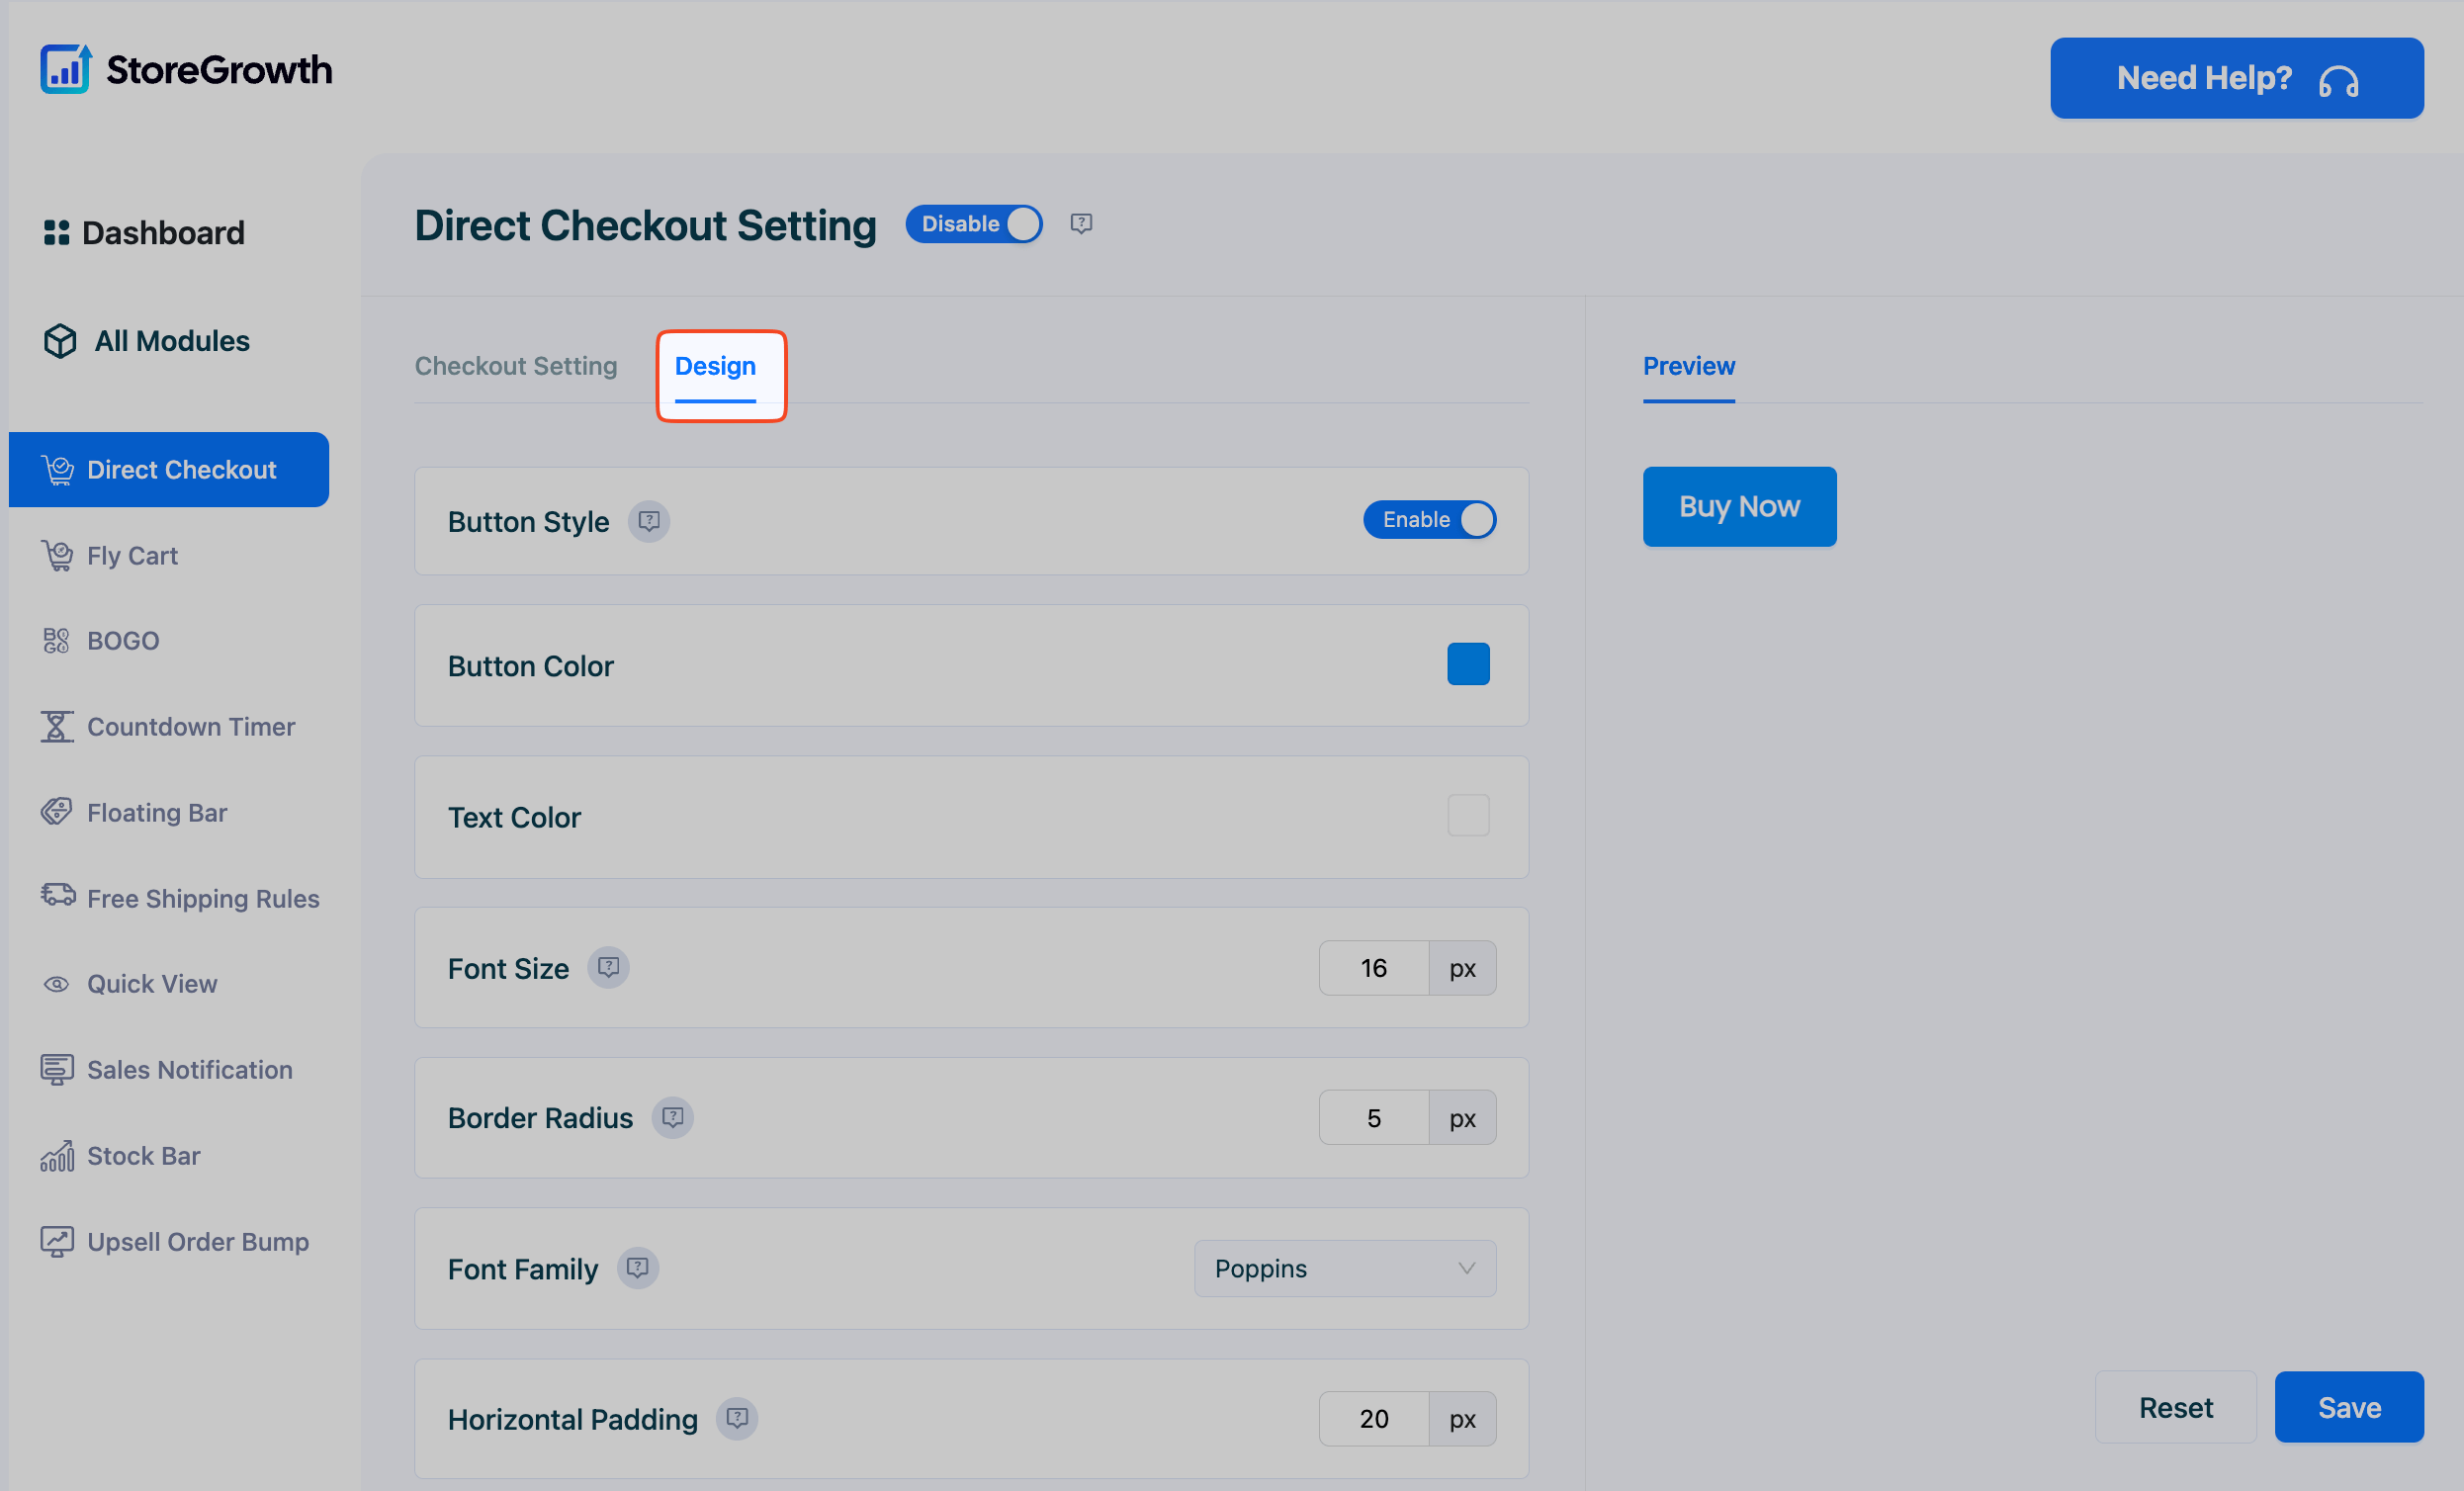
- Button Style: Enable this to apply your custom design settings to the button.
- Button Color: Choose the background color for the button.
- Text Color: Select the color for the button’s text label.
- Font Size: Set the size of the text in pixels.
- Border Radius: Adjust this value to control the roundness of the button’s corners. A higher value creates a more rounded button.
- Font Family: Select the font for the button text from the dropdown menu.
- Horizontal Padding: Set the amount of space (in pixels) to the left and right of the button text.
- Vertical Padding: Set the amount of space (in pixels) above and below the button text.
- Border Width: Define the thickness of the button’s border in pixels.
- Border Color: Choose the color for the button’s border.
- Overview Border: Select the style of the border (e.g., Solid, Dotted, Dashed).
After configuring these settings, be sure to click the Save button to apply your changes.