

The Countdown Timer module is a powerful tool for creating urgency and leveraging the principle of FOMO (Fear of Missing Out) to drive immediate sales.
By displaying a ticking clock for limited-time offers, you can motivate customers to make a purchase before a deal expires.
This guide will walk you through setting up and customizing the countdown timer for your products.
Activating the Countdown Timer Module
To get started, you must first activate the module from the StoreGrowth dashboard.
- Navigate to StoreGrowth » Modules from your WordPress dashboard.
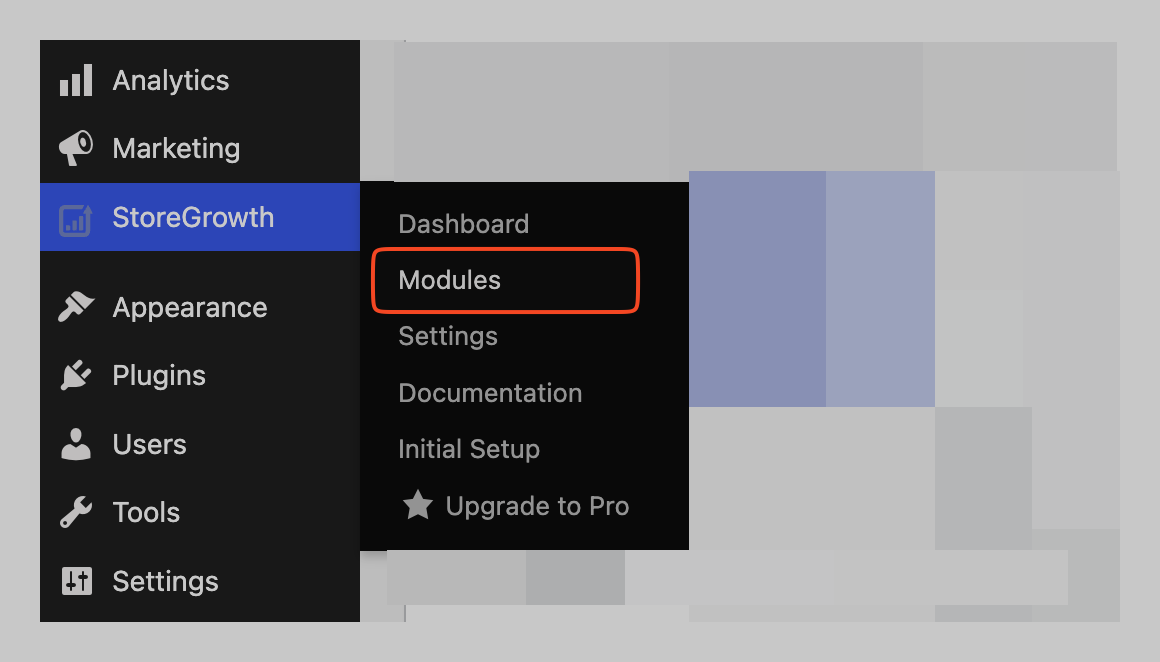
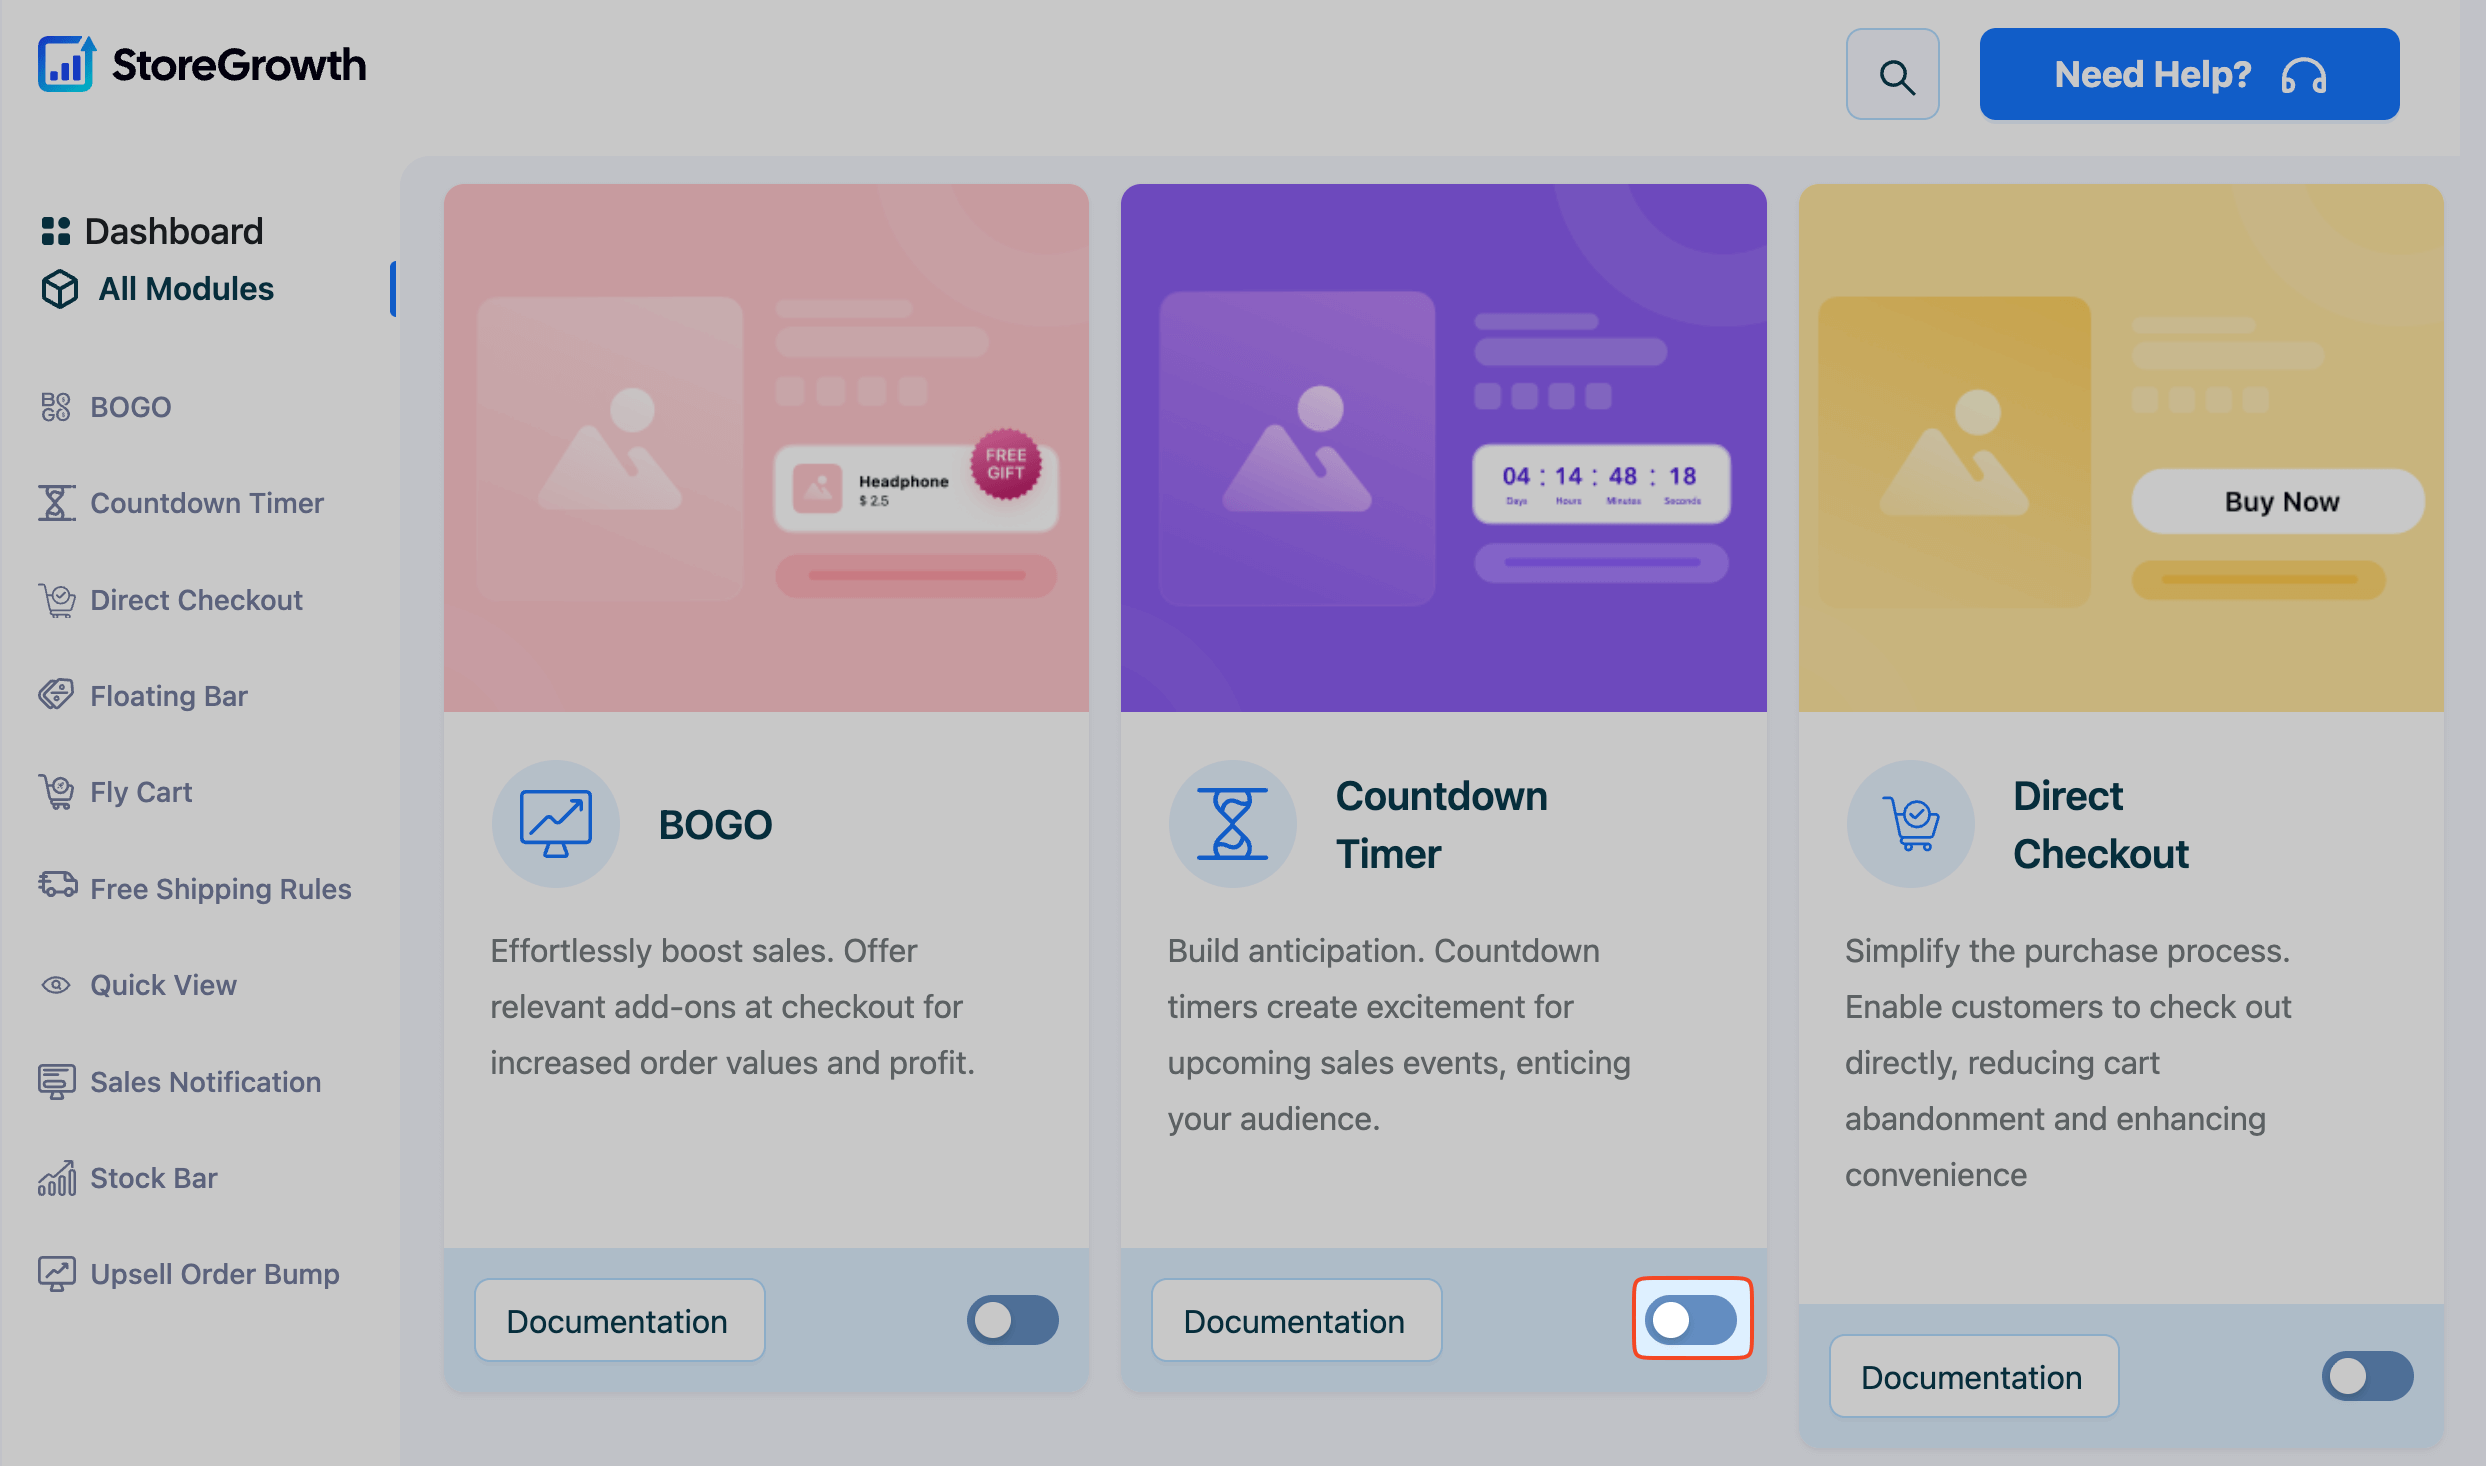
- Find the Countdown Timer module card in the list.
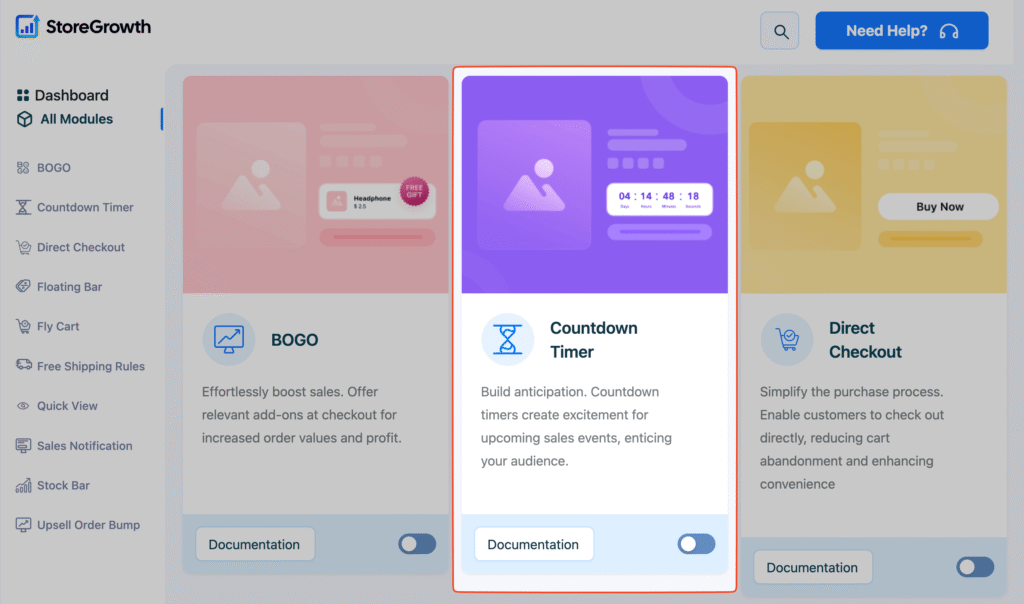
- Click the toggle switch to the “On” position to activate it.
Once activated, a “Countdown Timer” menu item will appear in the main StoreGrowth modules page, giving you access to all its settings.
How the Countdown Timer Works
Setting up the Countdown Timer is a two-part process:
- Global Settings (in StoreGrowth): First, you will configure the overall appearance and display rules for your timers. This includes setting the heading, choosing where the timers appear (shop or product pages), and customizing the design to match your brand.
- Individual Product Settings (in WooCommerce): Next, for each product you want to feature in a sale, you will go to its specific product edit page in WooCommerce to set the discount percentage and the sale’s start and end dates. These dates power the timer and tell it when to display.
Step 1: Configuring Global Timer Settings
Navigate to StoreGrowth » Modules » Countdown Timer to access the main settings panel.
This area is divided into two tabs: Countdown Setting and Design.
Countdown Setting Tab
This tab controls the basic functionality and display location of your timers. A live preview on the right side of the screen will update as you make changes.
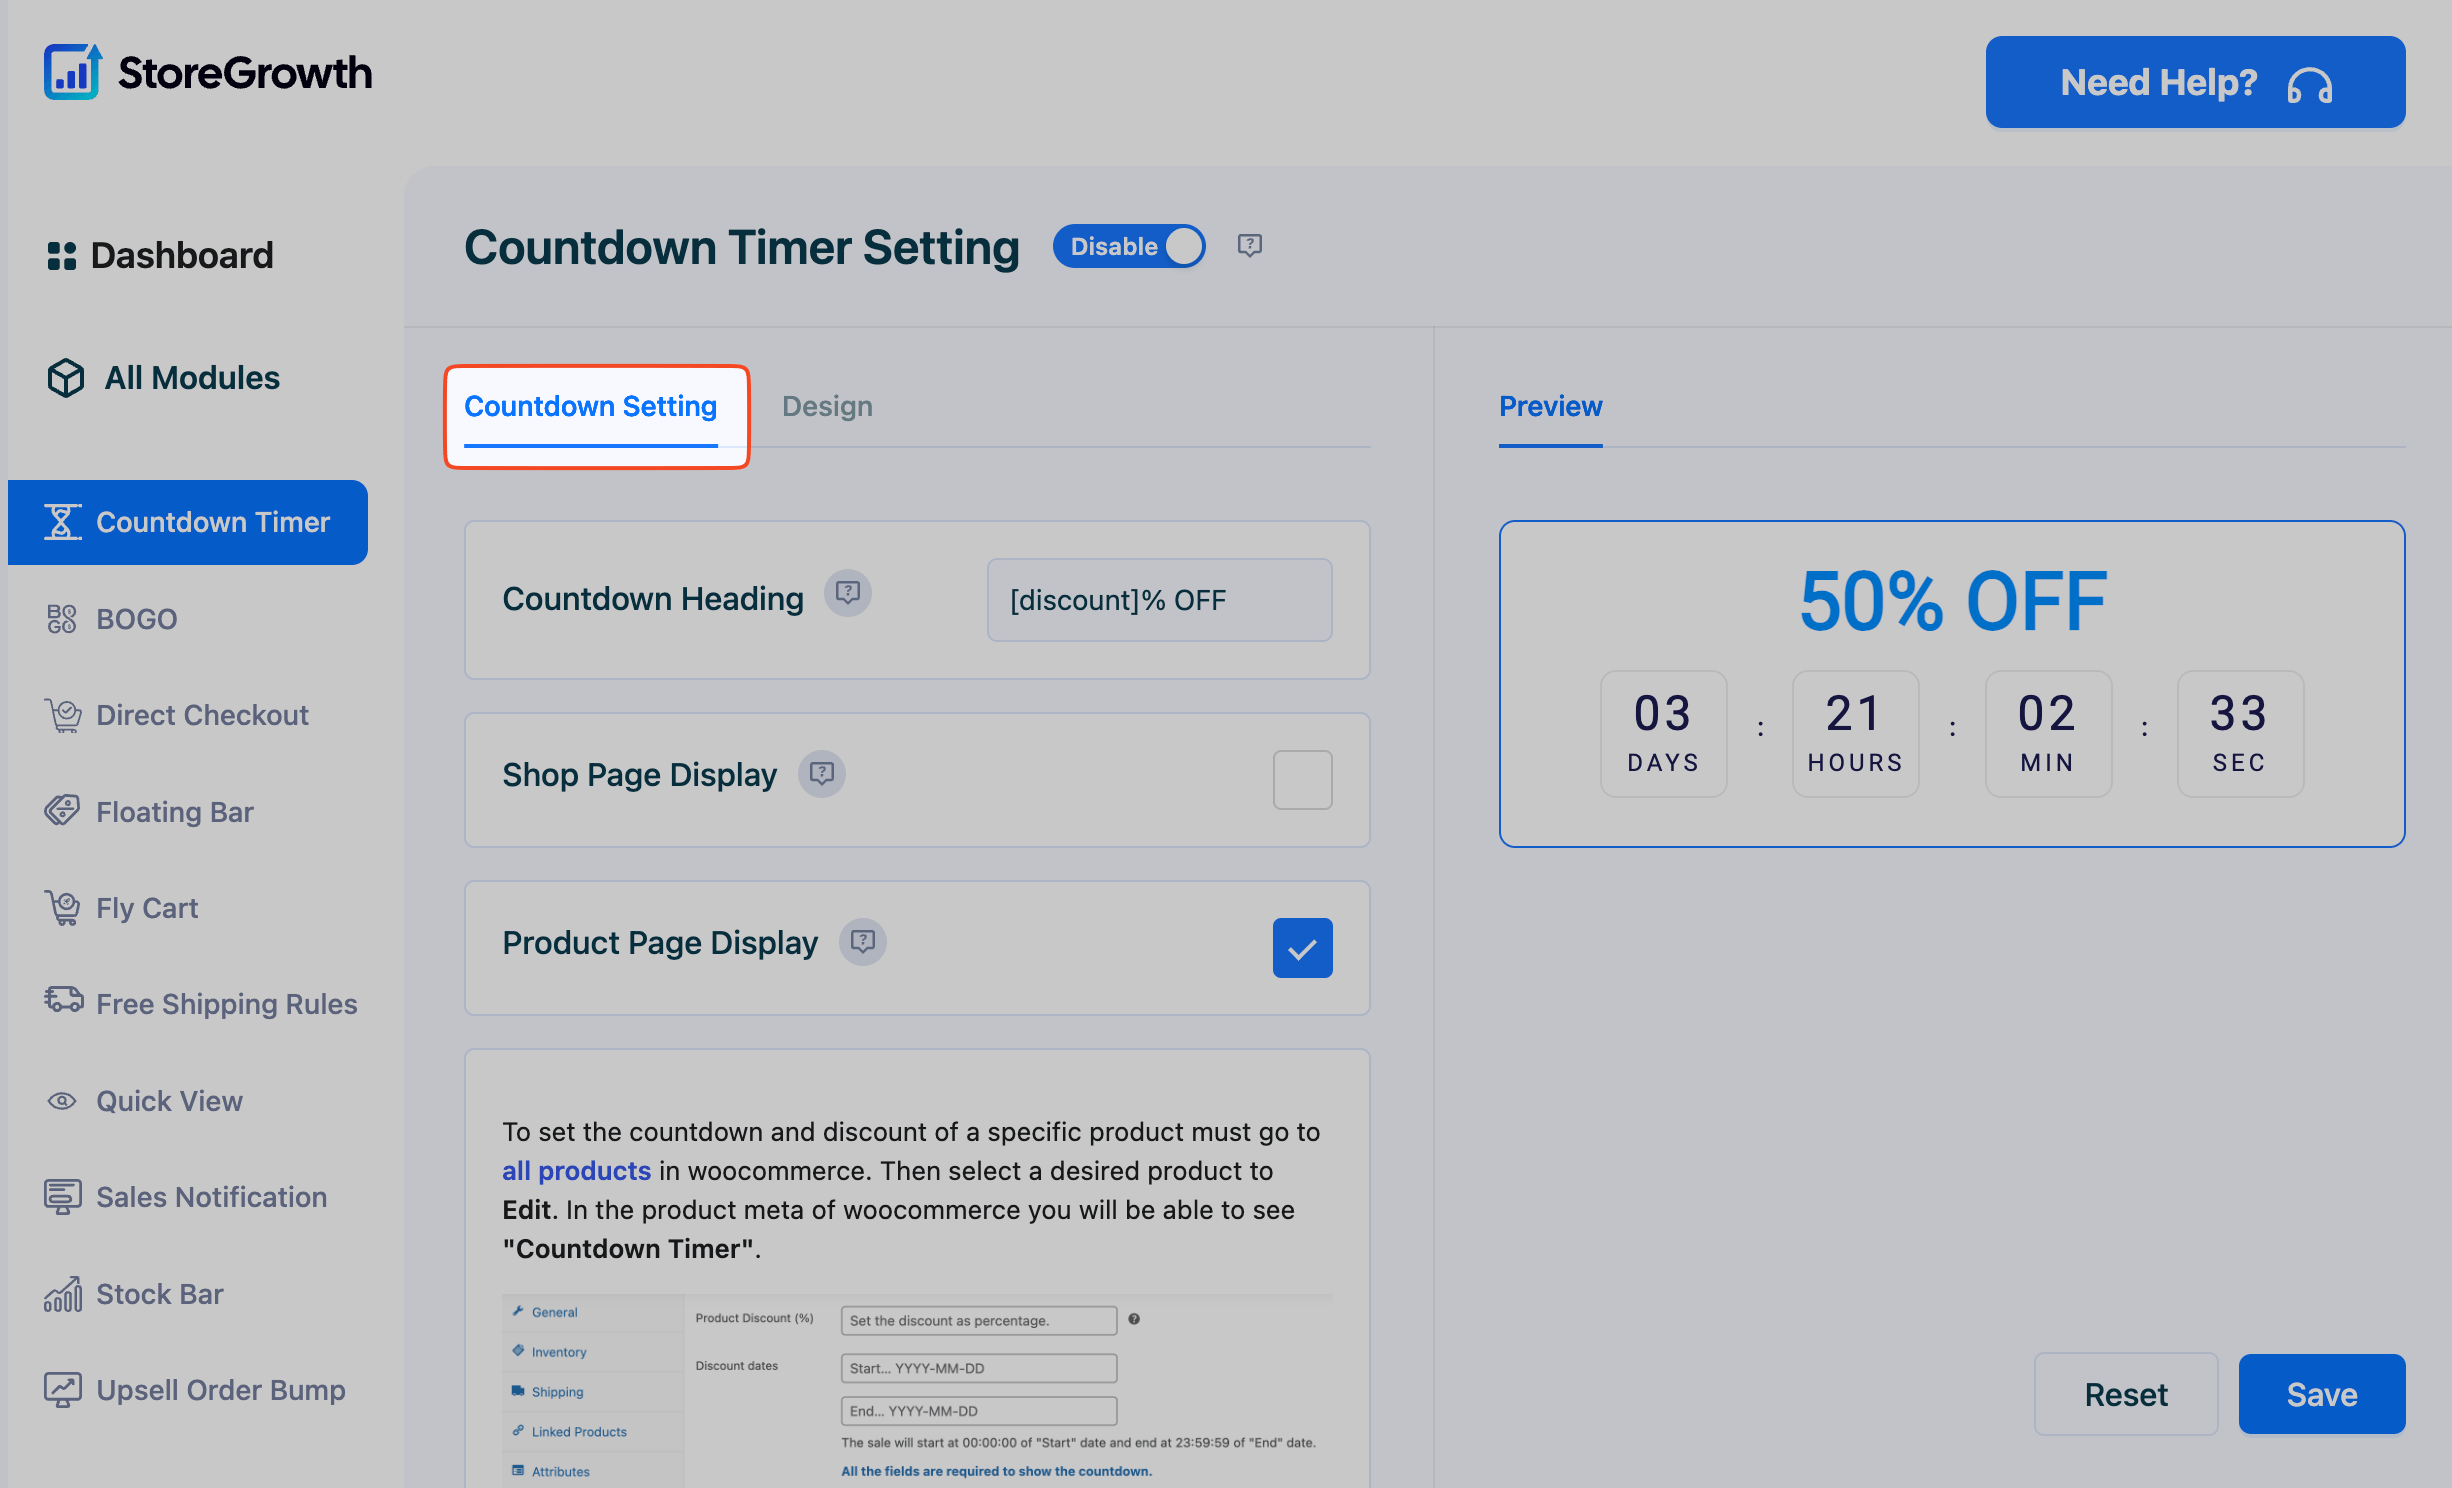
- Countdown Heading: Set the title that appears above the timer. You can use the
[discount]shortcode to dynamically display the discount percentage you set for each product. For example, entering[discount]% OFFwill automatically show “50% OFF” if you’ve set a 50% discount on the product. - Shop Page Display: Enable this checkbox to show the countdown timer on products on your main shop and category pages.
- Product Page Display: Enable this checkbox to show the countdown timer on individual product pages.
Design Tab
This tab gives you full control over the visual style of your countdown timer, ensuring it matches your store’s branding.
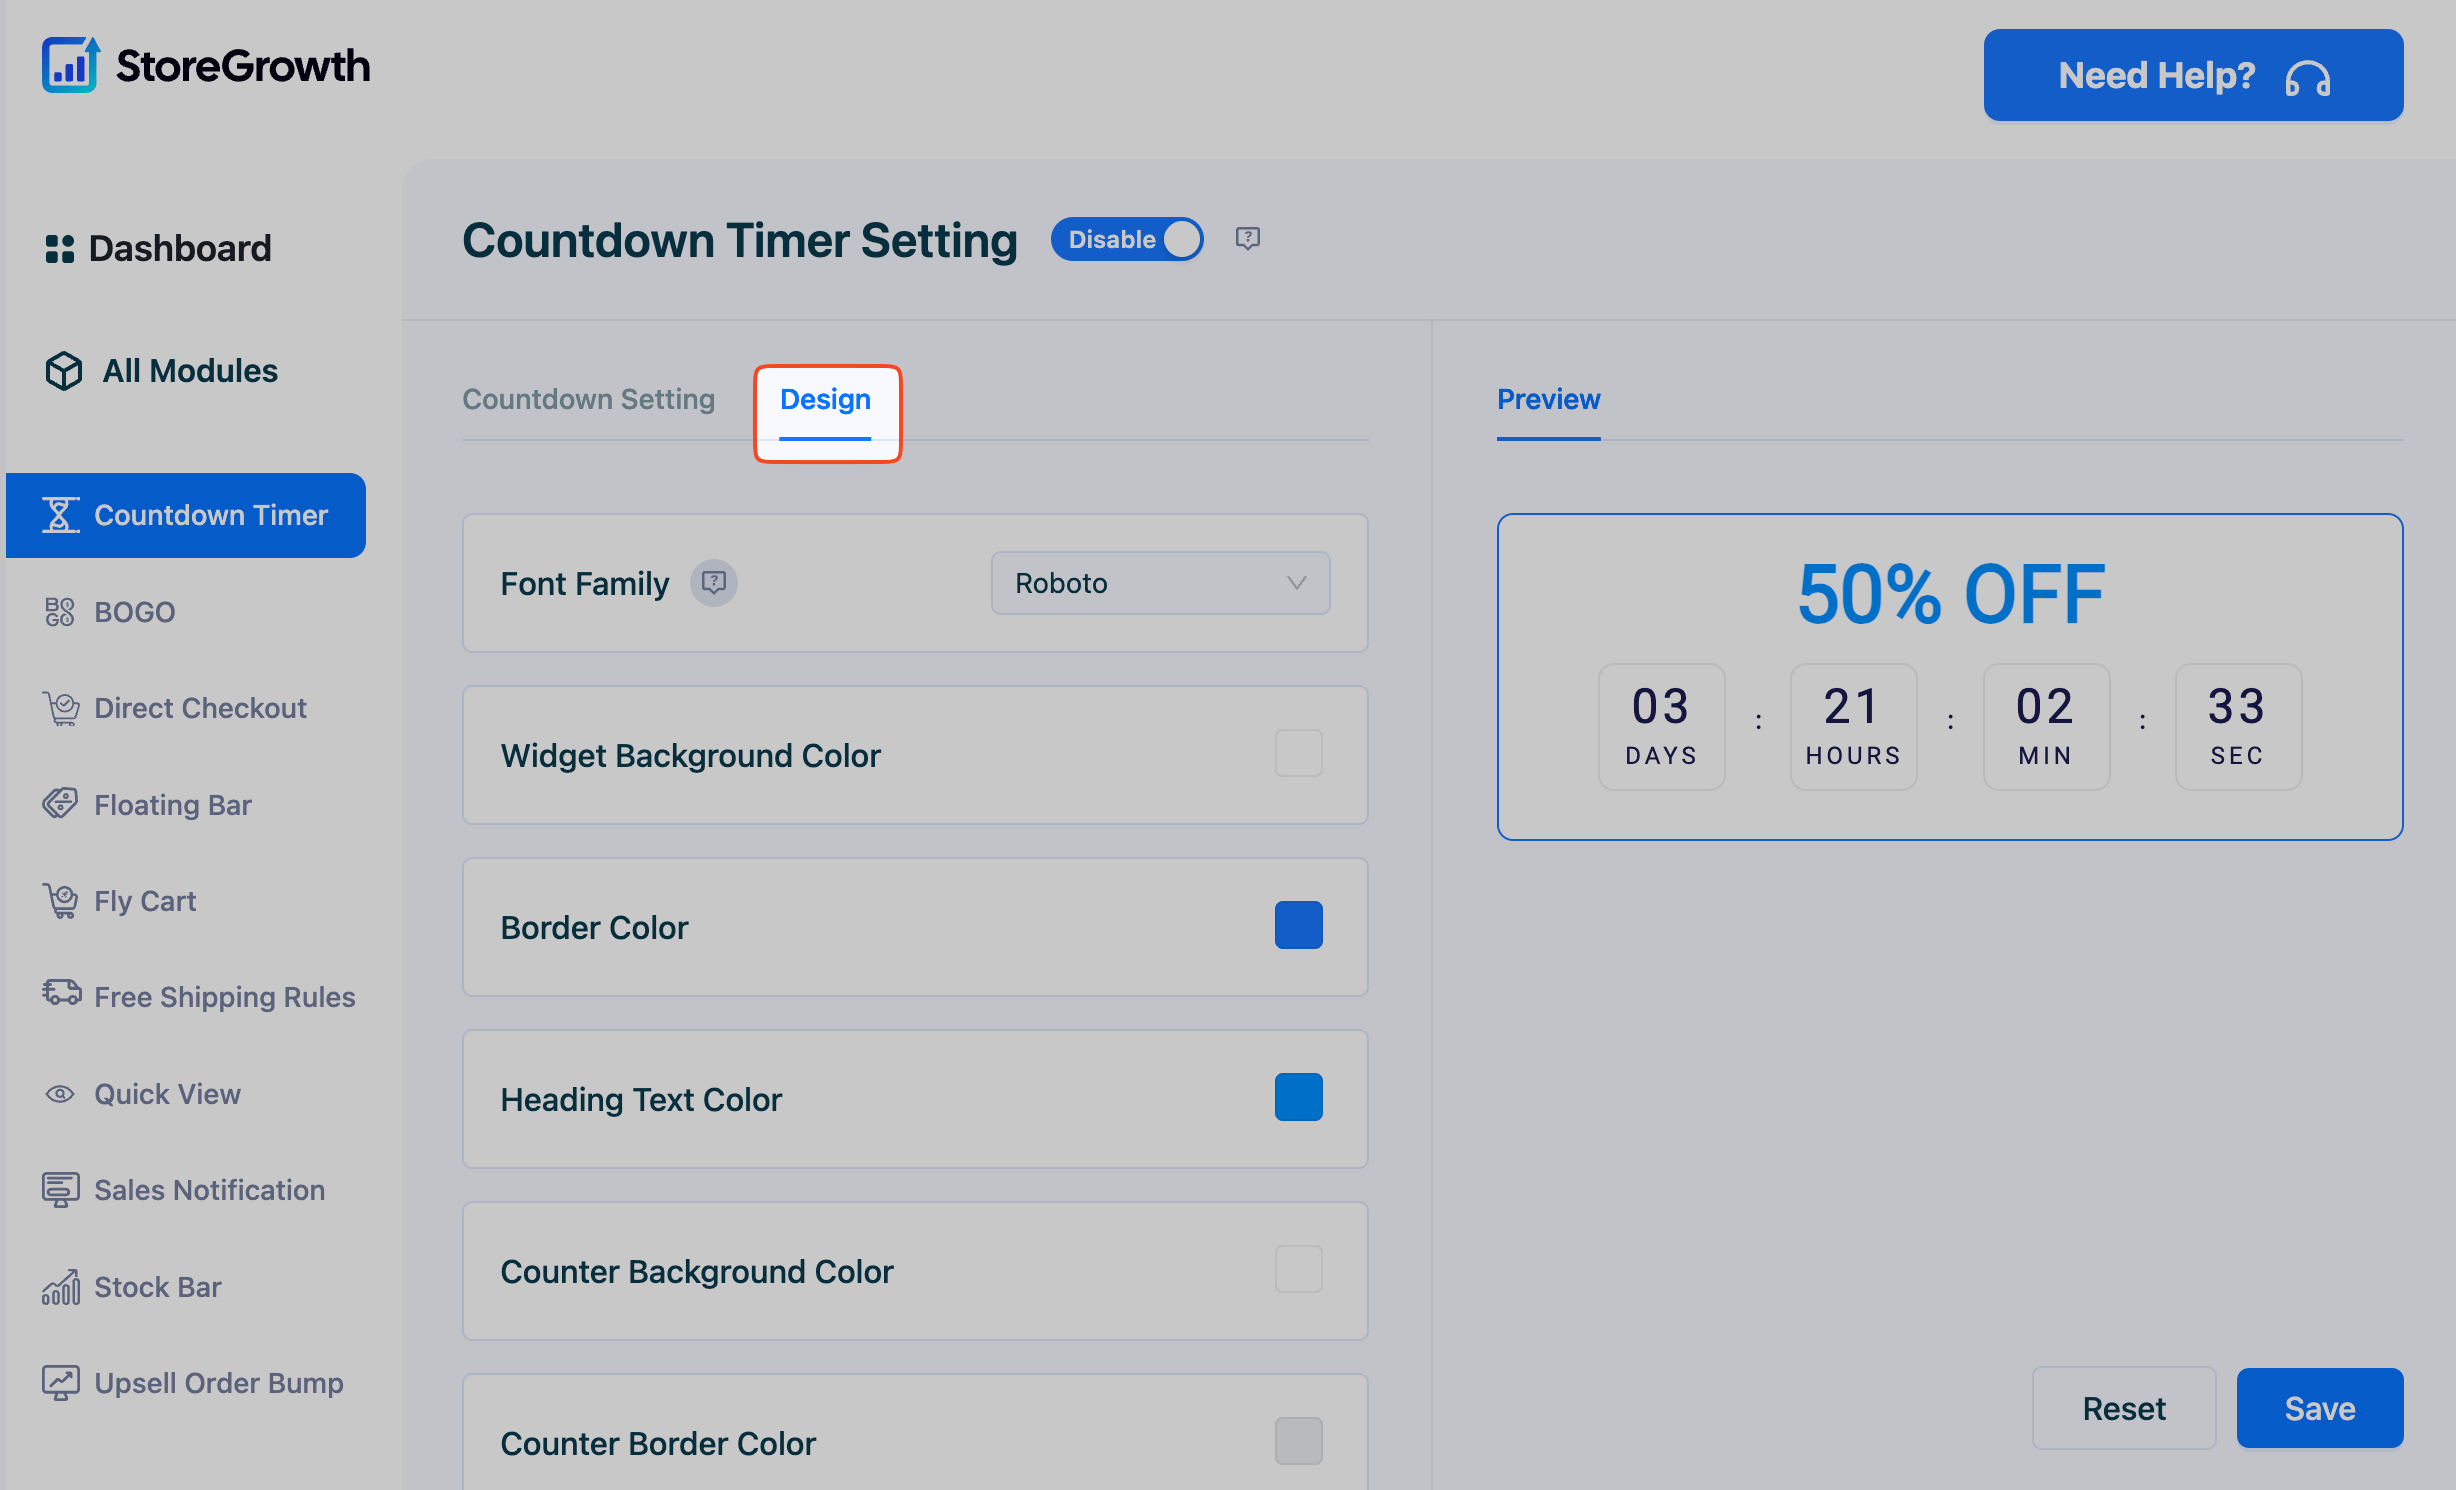
- Font Family: Choose the font for your timer’s text.
- Color Customization: Adjust the color of every element of the timer, including:
- Widget Background Color
- Border Color
- Heading Text Color
- Counter Background Color
- Counter Border Color
- Day, Hour, Minute, and Second Counter Text Color
- Template: Select from pre-designed templates for a quick and professional look.
Step 2: Setting a Sale Schedule for a Product in WooCommerce
After configuring the global settings, you must set a sale schedule for each product you want the timer to appear on. This is done within the standard WooCommerce product editor.
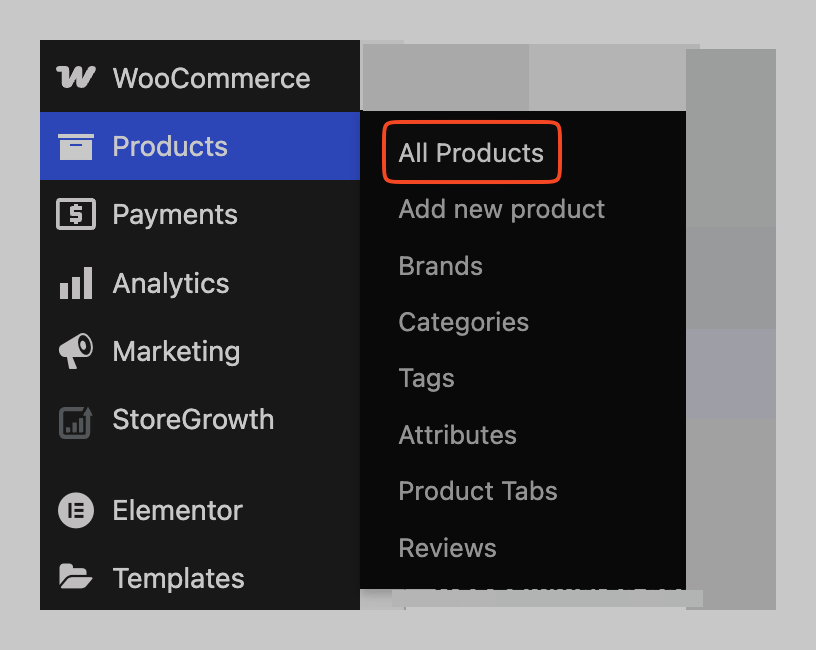
- From your WordPress dashboard, navigate to Products » All Products.
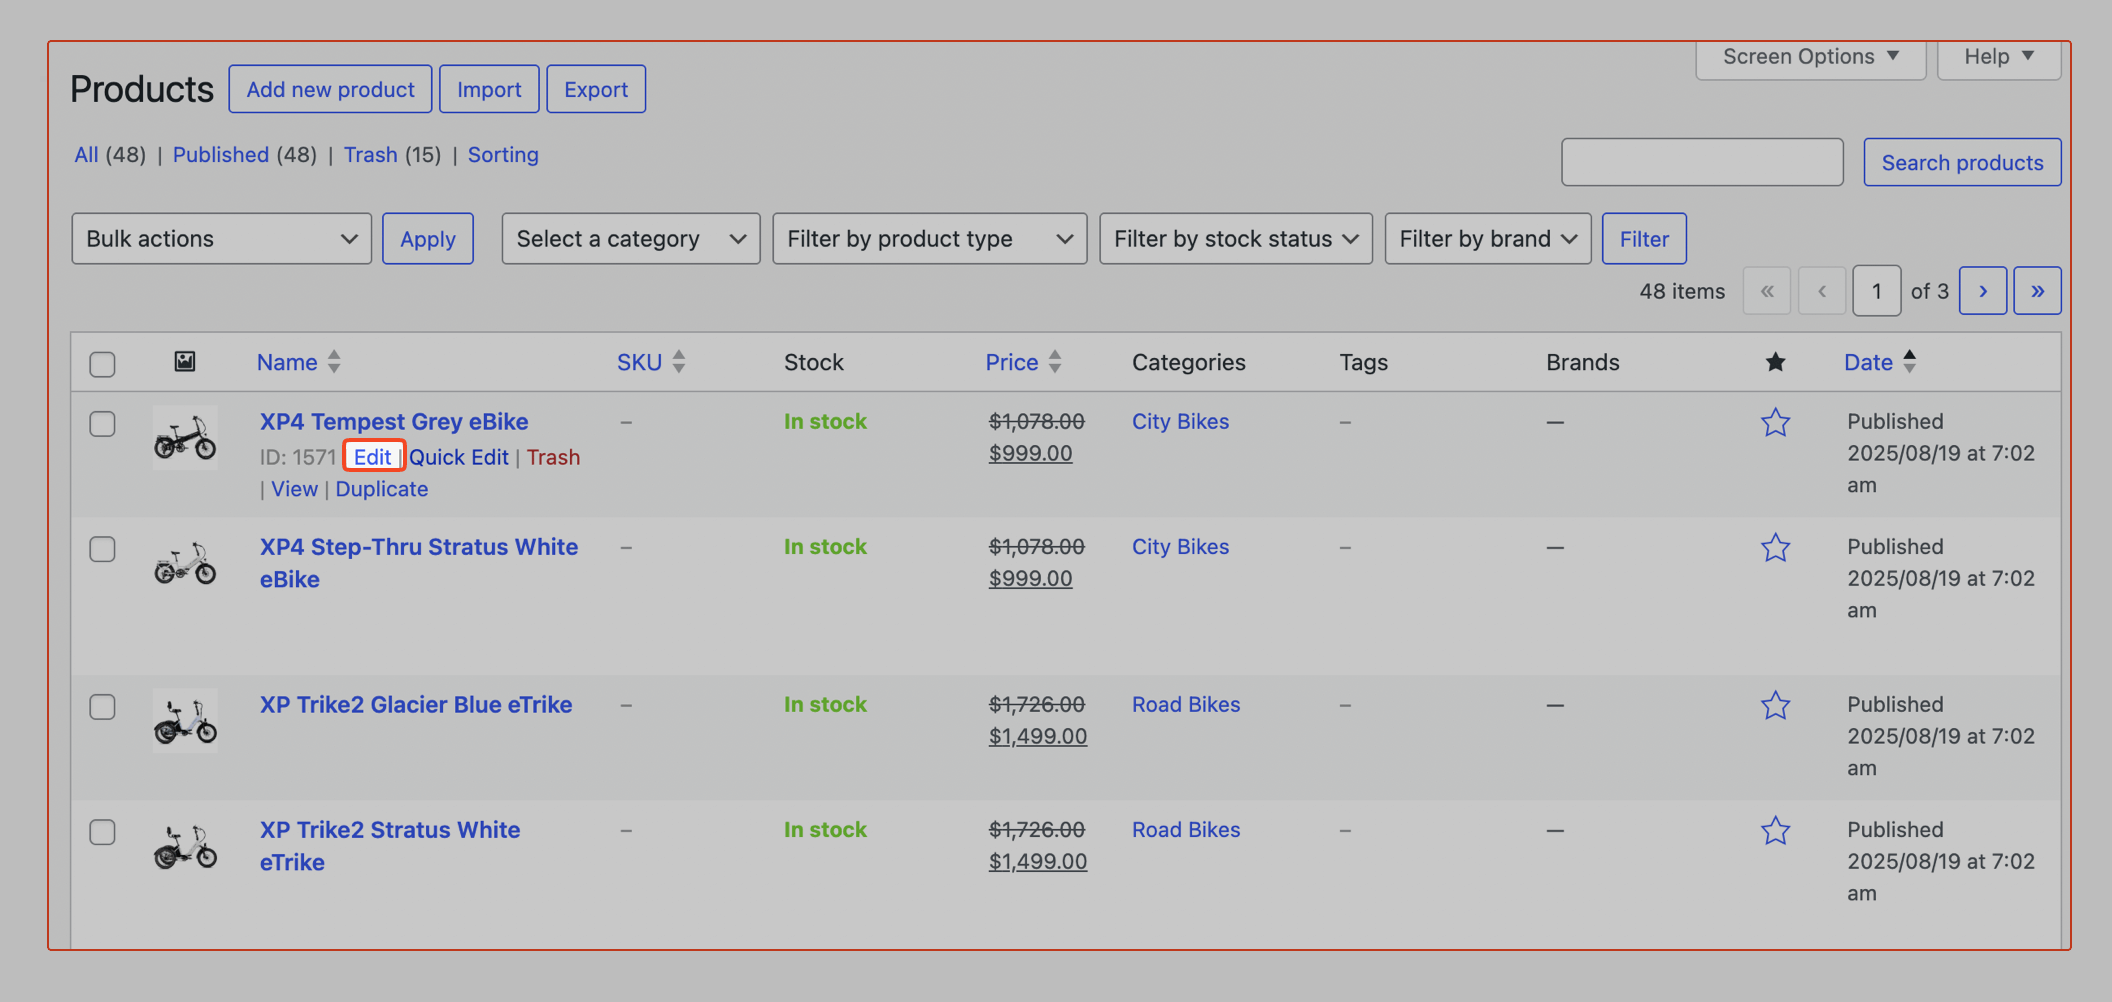
- Find the product you want to put on sale and click Edit.
- Scroll down to the Product data meta box.
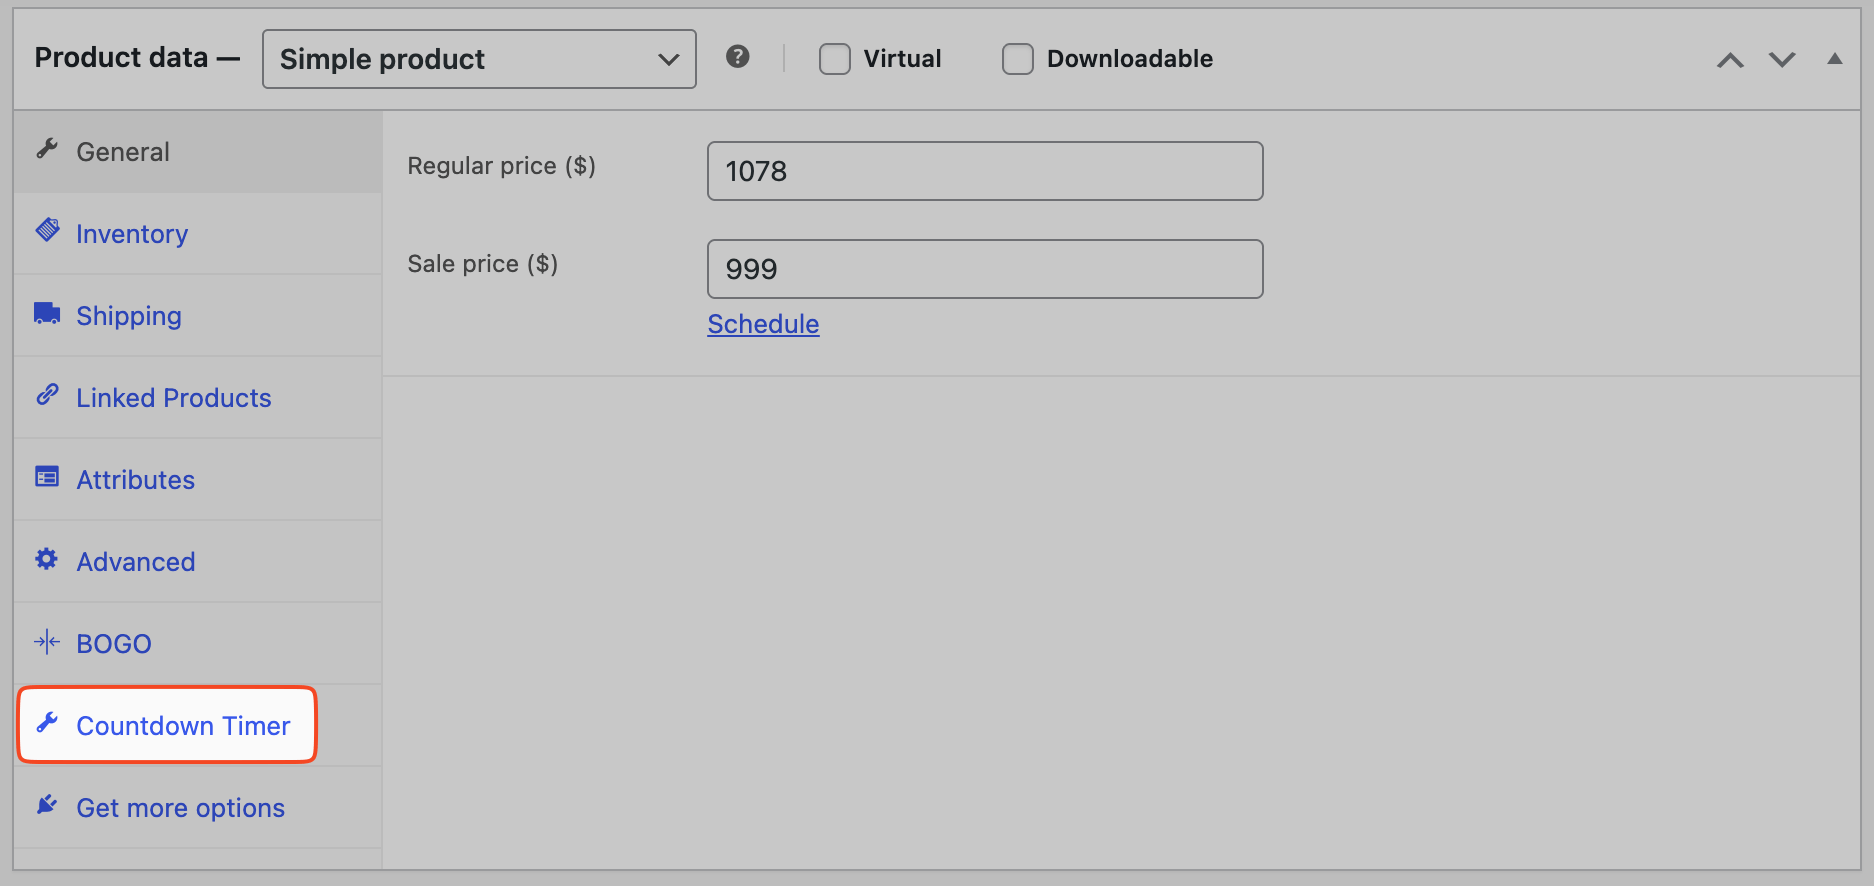
- On the left, click the Sales Countdown tab.
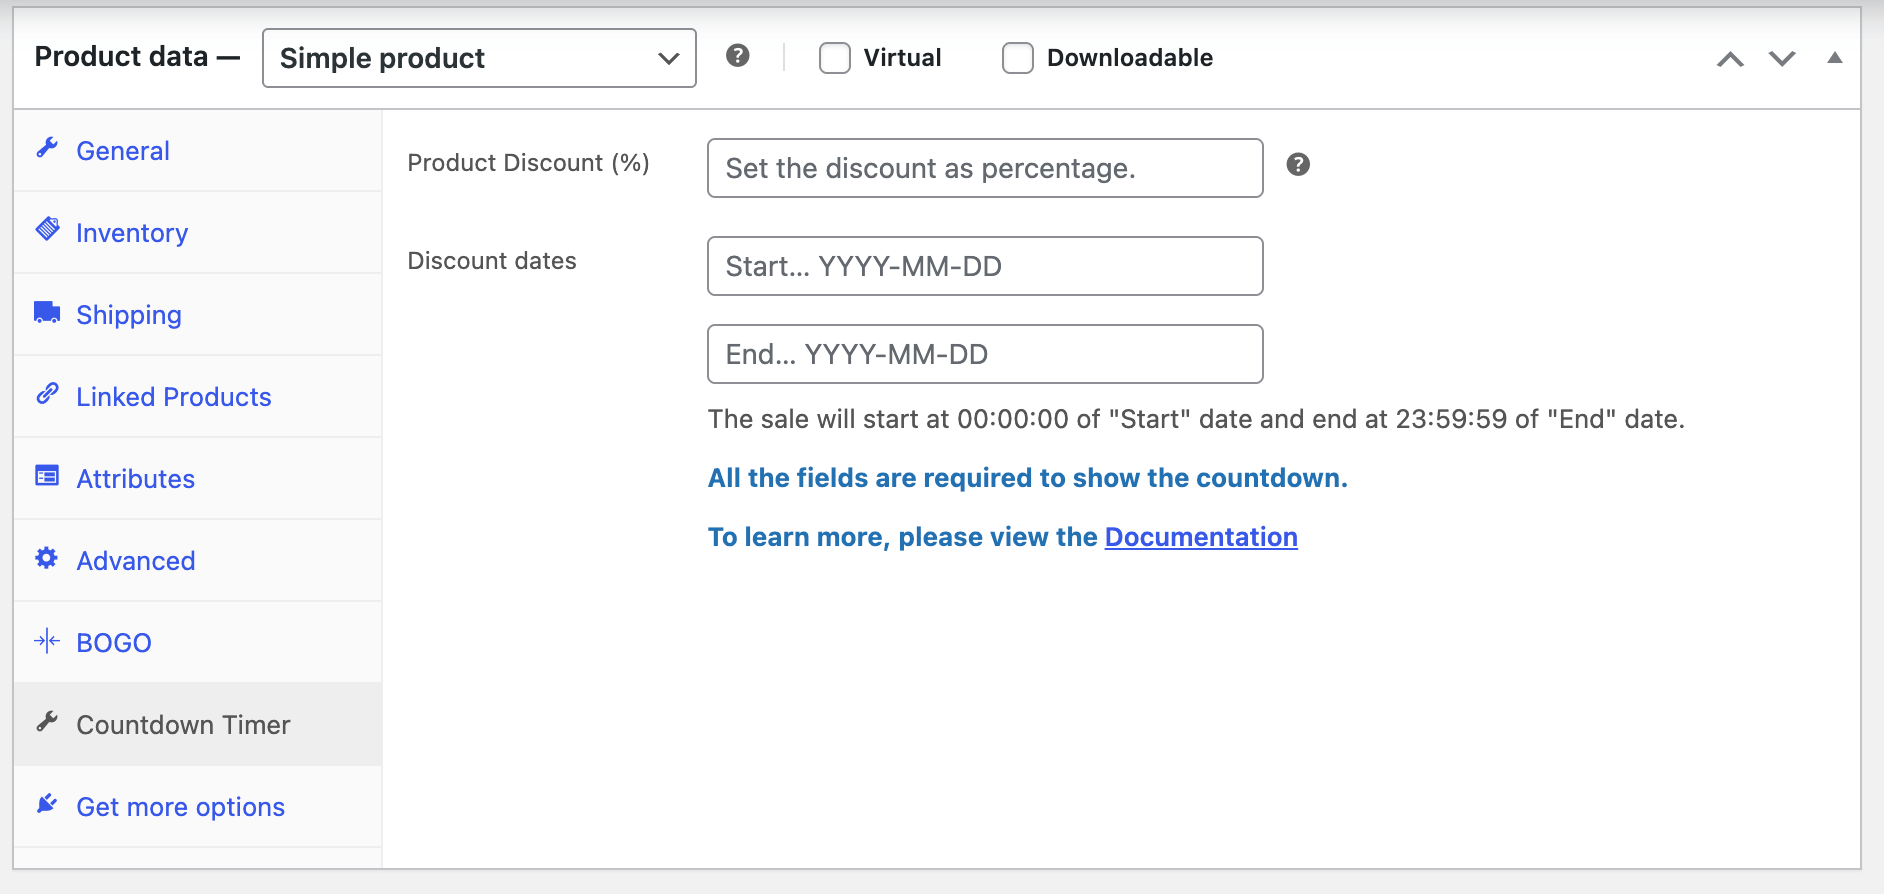
- In this panel, configure the following:
- Product Discount (%): Enter the percentage discount for the sale.
- Discount dates: Click to open a calendar and select the Start and End dates for your promotion.
- Click the Update button to save your changes to the product.
The timer will now automatically appear on this product during the scheduled sale dates, using the design and display settings you configured in the StoreGrowth module.